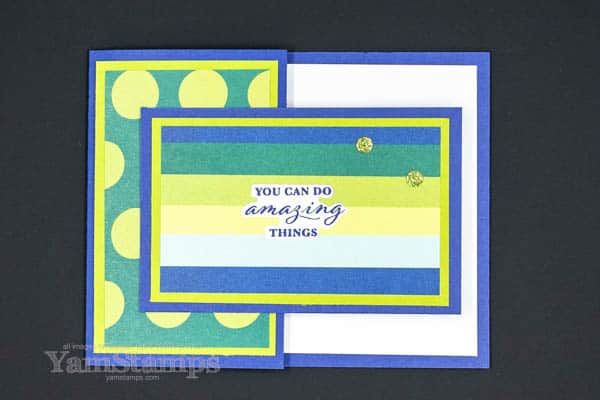
Sharing a Non Christmas Card made with Christmas Themed Designer Series Paper!
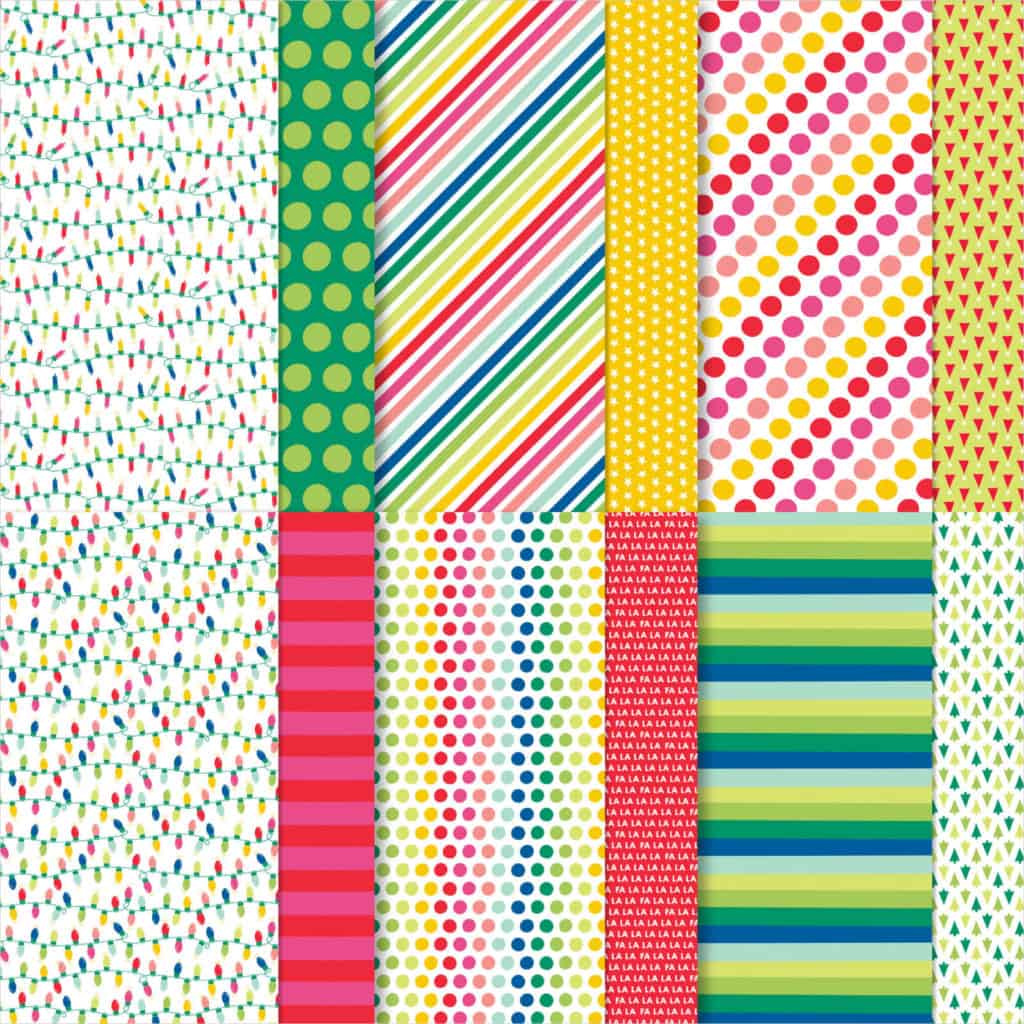
Stampin’ Up!’s Designer Series Papers are typically double sided – with patterns on both sides of the papers. I love this – because there’s such a choice of coordinating patterns at my fingertips – but I also hate having to choose between the patterns sometimes!! Anyway…another thing to love, though, is often there are options if it’s a specifically themed paper – like the Merry Bright & Bold Designer Series Paper – one pattern tends to be more holiday themed than the other. I used the less blatantly holiday patterns to create this non Christmas Card!
This is another one of those easy fun fold cards, too – just cut off the front of the card and turn it! As always, to make my crafting easier, I picked the colours for my card from the colours in the Designer Series Paper – so in this case, I used Blueberry Bushel Cardstock and Lemon Lime Twist Cardstock. I must admit, when I first heard that Lemon Lime Twist was coming back as a colour, my reaction was more on the “meh” side than anything else – but I am using a LOT of it lately, so it must be growing on me.
This non Christmas card was actually one of the cards we made in the last Online Card Club, though instead of the die cut sentiment, I included a die cut circle, so that members could use a stamp from their stash to create whatever kind of card they might need…including a holiday card, I guess! The flip side of the patterns shown on this card are lights and tiny evergreen trees – so the options are endless.
Interested in regular crafting sessions and a way to budget out your crafting spending? If you’re in Canada, consider joining my Online Card Club! Members can budget out their spending, since there is no class fee, but rather a minimum product order ($33CAD) requirement for each month they are part of club. Each member joins for a period of 6 months, and once during that period, gets to spend all the Stampin’ Rewards for the Club orders that month! We meet online in Zoom on the third Monday of the month (generally), but if club members can’t make it live, they have access to the recording in our club site. Our next club date is Monday, 20 November, 1pm eastern. Message me if you’re interested in joining us!
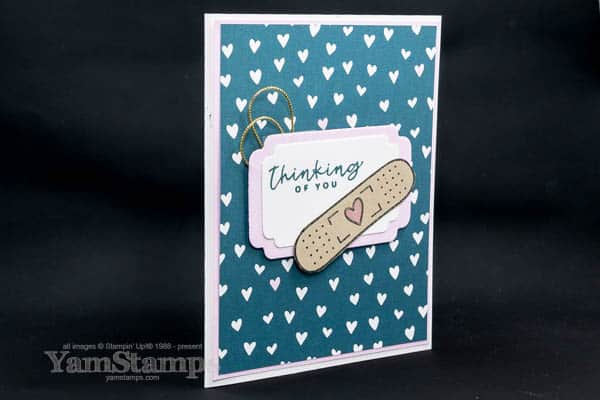
A get well card or thinking of you card is a handy one to have in your card stash. One of the things I love about Stampin’ Up! products is the coordination – for me, the fact that the colours across the products are consistent and a lot of times the images from one set will coordinate with dies or images from other sets – whether intentionally or not!
I have to admit that I don’t often spend an overly long time on a project when I’m crafting, but sometimes it’s nice to slow down a bit and enjoy the process a bit more. I did a simple colouring of the heart on the bandage with my Stampin’ Blends Marker and then fussy cut the bandage image. Easy fussy cutting is key for me! A nice oval. I can handle that. Even though it’s not a huge amount of colouring, I still love how easily the Blends fill in the image and how the colouring is streak free. Still thrills me every time!!
Thankfully, I have not needed to send out this get well card, so it’s sitting in my stash. This is one of those cards I don’t mind not needing!!
I was away for a few days before Thanksgiving, at a business retreat. It’s always great to get together with other like-minded business owners – mostly Stampin’ Up! demonstrators. This group has gotten together in various combinations over the years, so it’s nice to reconnect with familiar friends and make new friends as well. The retreat was in Orlando, so a trip to a park was a must. My friends Darlene and Jo-Ann and I made it to Epcot to enjoy the Food & WIne Festival, but honestly, the highlight was getting to ride the new Guardians of the Galaxy ride! Ok. Actually, the highlight was that we were in Virtual Queue group 8 and basically walked straight onto the ride first thing in the morning. This was my face when I realized we had essentially walked right onto the ride…
This was my face ON the ride…pretty sure this is when the cars were going sideways…I was in the last car and at the beginning of the ride all the cars turned – I had a momentary panic that we were actually going to end up being the first car….note that I am not nearly as relaxed as the fellow beside me (who had ridden the ride the day before so knew what to expect).
(yes this is a screenshot of the photo from the Disney app)
However, the ride photo that made me (and my friends) laugh the most?
this is from the Frozen ride, and doesn’t it look like I’m looking right at the camera and posing??? I swear I had no clue where the camera was, and I actually thought my eyes were closed in the shot because the flash was so bright when the picture was actually taken! Too funny. (Also not sure what I was looking at, maybe the lights on the sides of the tunnel, I can’t remember).
It was a great time, and no photos of me at the Business Mastermind, in part because we were focused on business…and also because the lighting in the hotel conference room was awful LOL. (I look like I need a get well card sent to me…).
If you’ve ever thought about having your own home based business, you might consider the Stampin’ Up! Demonstrator Starter Kit – especially in October, since there’s a special! You have your choice – you can either save 35% on the cost of the kit ($87.75 for $165 worth of product) OR you can get 35% more product for the regular price ($135 for $222.75 worth of product). PLUS you get free admission to the virtual convention – On Stage At Home so you can be inspired from the comfort of your own home! It’s a fantastic way to start your business. You can visithttps://yamstamps.com/joinfor more information or you can message me if you have specific questions. I’d love to have you as part of the “Eh” Team – my group of Stampin’ Up! Canada Demonstrators!
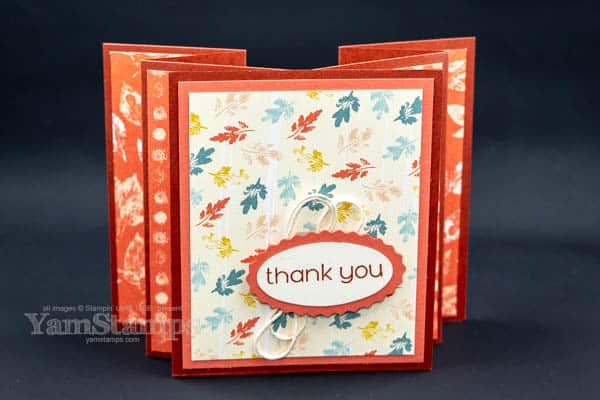
Sharing this fun fold autumn card with you today – thank you for stopping by! If you’re a Canadian visitor, I hope that you had a good Thanksgiving. If you’re an international follower, I hope you had a good weekend!
This is a card that we made in our Online Card Club a little while ago. I like fun folds that don’t require a lot of special tools, and that ultimately fit in a regular, medium Stampin’ Up! envelope. Though I will make some that don’t meet these requirements, they tend to be the exception rather than the rule.
This fun fold autumn card features the Inked Botanicals Designer Series Paper. The backing cardstock is Cajun Craze, and it’s accented with some Calypso Coral. The neutral cardstock is Very Vanilla for a change – I tend to automatically reach for Basic White. It helps that the Designer Series Paper has a vanilla base! The sentiment is from the Timeless Arrangements stamp set, but I decided to use it with the Double Oval Punch rather than the coordinating Timeless Arrangements dies. For club, I tend to use less specific die cuts and punch outs so that club members can use whatever stamps they have on hand when they are constructing their cards.
If you need any of these products, don’t forget that right now, you can get FREE shipping with a product order of $100 or more (before taxes/after any discounts) – but only until Wednesday, 11 October at 1159pm Mountain Time. Shop online at https://yamstamps.com/shop. You can also message me if you would like to pay by etransfer – or if your product order is under $100 and you can pick it up in Burlington ON – I’ll be placing group orders until end of day on Wednesday. Once the cumulative total is $100, I’ll place the order so that everyone gets free shipping!
I’m going to try to edit my club video to show the construction of this card, so I’ll let you know when I can get it uploaded to the YamStamps YouTube channel!
It definitely felt like fall weather the past few days….a bit of a shock to my system, especially since I spent most of last week in Florida! I was there for business purposes…really…but I couldn’t go to Orlando and NOT visit a theme park!
A couple of friends and I spent some time at the Epcot Food & Wine Festival….but I think the highlight was the fact that we got to ride the new Guardians of the Galaxy Ride! We were in the Virtual Queue group 8, which meant that we basically walked right onto the ride first thing in the morning! (Honestly, that was one of the most thrilling parts of the ride LOL). However….that also meant that we didn’t make it to the fireworks in the evening as we were DONE before that. I hadn’t been to Disney in a few years, so it was great to be back in at least one of the parks. Must plan to visit again!! Do you have a favourite Disney Park? I do hope to make it to Disney Sea (the Japanese Disney Park) in the next few years.
In the meantime, I’ll get back to work so that I can plan my next trip!!
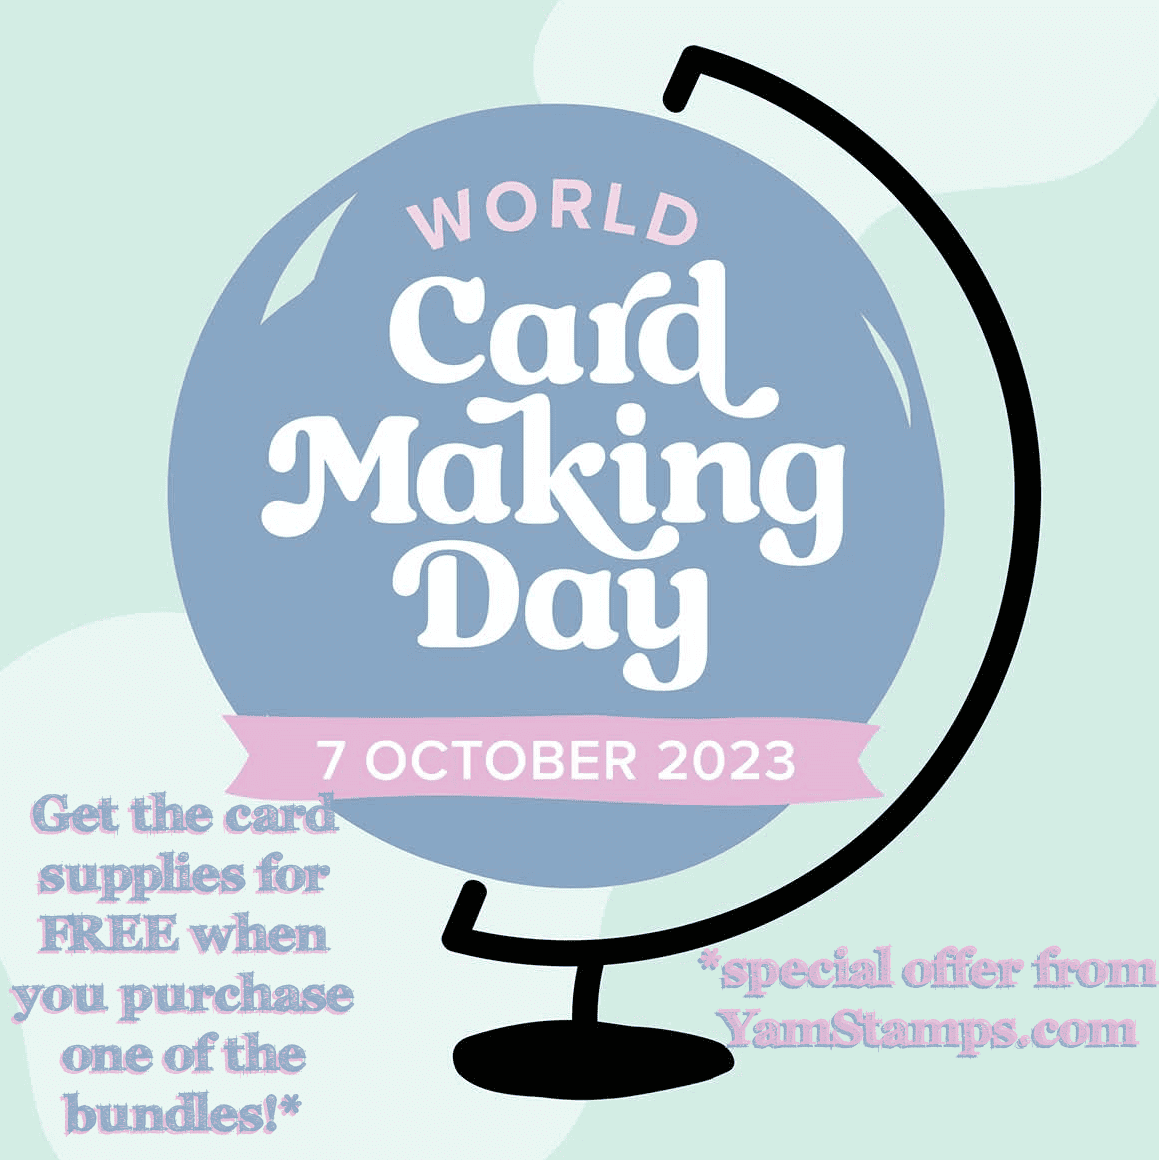
World Card Making Day is Saturday, 7 September – join this Free Virtual Event!
World Card Making Day is this Saturday, 7 October. You know that I love sharing information about National “Days” on the YamStamps Facebook Page….but this is a GREAT one to talk about in advance and EVERYWHERE!
Stampin’ Up! is actually having a free virtual card making event! It’s an online event, and will walk you through cards made with three different bundles. MY OFFER TO YOU: purchase one of these bundles and I will send you the pre-cut paper supplies for the card! Even if you can’t make the event “live” (I can’t, I’m actually travelling that day!), you can watch the recording until the end of the month. I’ll post a link to the event once it’s available – or if you want to be sure not to miss out, you can register here.
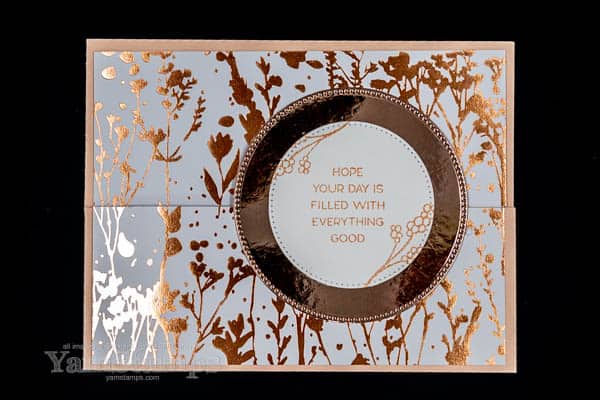
You know that I love crafting that looks impressive but isn’t over the top difficult – that’s this rose gold fun fold card! And it’s shiny, so that’s a plus.
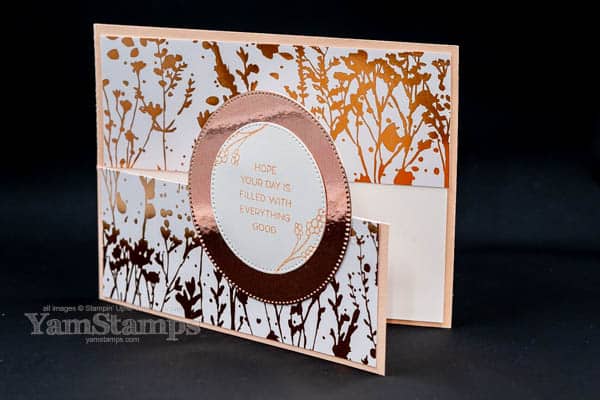
I know that right now, you may be saying “but Linda, where’s the fun fold?”
Here!
OK so maybe “fun fold” isn’t quite as accurate as “fun cut”?? This rose gold fun fold card starts off as a simple side fold card, and then I cut a section off the cardfront. The trick is to use one piece of Designer Series Paper (in this case, the Online Exclusive Naturally Gilded Specialty Designer Series Paper) and cut to size. Then adhere it in place so it looks like one piece of paper, except the top part is on the “inside” of the card and the front is on the “outside” of the card.
The sentiment, from Timeless Arrangements, (along with the floral sprays) was stamped in Petal Pink, then die cut on a circle from the Stylish Shapes dies, before being adhered to a larger die cut circle of Rose Gold Specialty Paper. I made the cardbase from Pretty Pink cardstock to bring out all the pink tones in the papers. For this card, there’s Basic White cardstock on the “inside”, but since the paper is fairly pale, you could get away without that layer if you wanted.
It’s easy to whip up a card like this rose gold fun fold card – this design is a great way to make a “regular” layout more special without having to sweat over the construction.
If you’re looking for more ideas on customizing different card designs, consider subscribing to the YamStamps Sketch System! This monthly subscription introduces you to a card design sketch, and then the following weeks gives you different samples using that sketch. No more staring at your crafting supplies and coming up with a design from scratch! You don’t have to use it for all your cardmaking, but it’s a great tool to have ‘in your back pocket’ for those times when you need a little kickstart. Check out the information page or message me if you have any questions! Remember – paper crafting doesn’t have to be difficult to be impressive!
My next online class is a Window Card Class! Pre-launch Sale on Now!
Window Cards are fun to make and impressive…and you know me, I will find a way to make it as easily as possible AND make sure it fits into a regular medium Stampin’ Up! envelope. After I put effort into making the card, I don’t want to have to make a custom-made envelope as well, so if I can avoid that, I will!
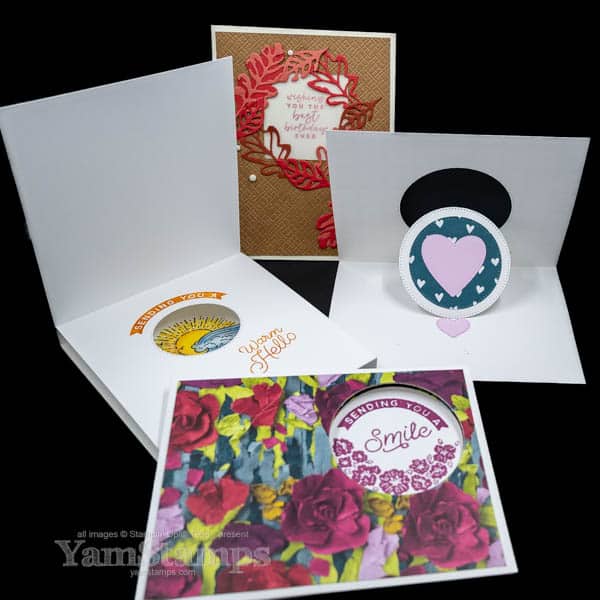
Introducing the Window Card Online Class(super boring name, super interesting class)….and check out these cute prototypes! If you register now during pre-launch, you’ll save $10CAD off regular class pricing, and you’ll be ready to jump in once the class officially launches Thursday 21 September at 7pm Eastern.
I’ve made an effort to show three different methods you could use to create a window in your card….even though I realized (after the fact) that 3 of the cards feature circular windows…. What can I say? I ALWAYS find circles to be the most forgiving shapes – no worrying about alignment!!
I hope that you’ll be able to join in this fun Window Card Class. All the videos are pre-recorded and edited, so you can watch and re-watch as it suits you once the class opens on Thursday. Please feel free to message me if you have any questions. Otherwise, you can visit https://go.yamstampsmore.com/window to get more information and register for class!