This vellum window card has been inspiration for my next online class!
I created this vellum window card for a card swap featuring products from the September-December 2023 Mini Catalogue….and it provided a focus point for my next online class! The upcoming Window Card Class will feature a number of designs with windows or window effects. It’s a fun way to add interest to your cards.
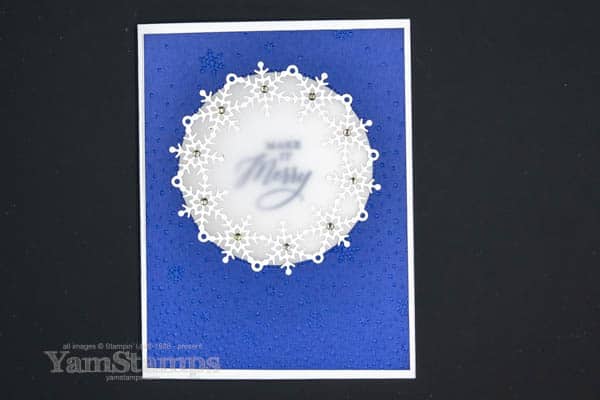
I used the new Snowflake Sky 3D Embossing Folder to add some texture to the Starry Sky Cardstock – I love how it ties in with the whole snowflake theme of the card. To make my life a little easier, I applied an Adhesive Sheet to some Basic White Cardstock before I die cut the circle of snowflakes. That way, I just peeled off the liner and applied it to the cardfront! OK truth be told, for my prototype I didn’t do that, and I used Multipurpose Liquid Glue to adhere the snowflake circle in place. I realized that having to do that repeatedly (I had to make this card in bulk) would probably not end as well as it started…
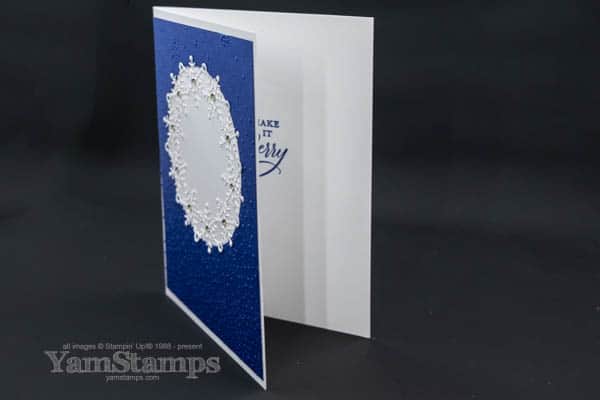
The card open…
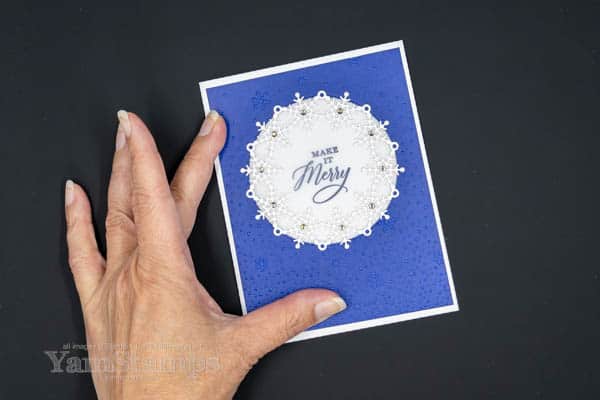
and closed. I had to add the bling to the snowflakes with the Rhinestone Basic Jewels – I think it just makes the card even more special. (They are my go-to when I need to add a little something to my cards).
You can see how well the sentiment shows through the window when the card is closed. In the online class, I’ll walk you through the steps of making a card like this one and my tips for easy construction. I’ll be sharing more details about the Window Card Class tomorrow, so come back to the YamStamps site to learn more and take advantage of Early Bird pricing!
This is a fun Accordion Fold Card to make and share!
In our Online Card Club meetings I like to try to include a fancy fold type card in the mix – this accordion fold card was a recent one we did. It’s fun and easy to make and to share!
The outside…looks like a “regular card”.
The strip of patterned paper down the side is from the Delightfully Eclectic Designer Series Paper – and what I loved about this particular pattern, especially for club, is that the other side is a floral print. That way, club members could choose which print they wanted to showcase!
The inside of this card, though….
FUN, right?! The accordion fold part is actually a second piece of cardstock. If you make it the same colour as the outside cardstock, I feel like it’s masked a bit and so looks more impressive at first glance. The cardstock is cut to 5-1/4″ x 10″, and then scored in 1″ increments from 2″ to 8″ (so 7 score lines). I die cut squares from the Stylish Shapes Dies and stamped with the Good Feelings stamp set. The HIP HIP is on one stamp, so I just carefully inked up only the first “hip” so I could stamp one per square.
You could swap out the words for images if you’d rather, or do a combination of images and words. This accordion fold card is totally customizable!
The only caution about this accordion fold card (other than how you’ll get hooked on making more of them)…is that it is a bit bulkier than your “standard” card, so you may need to watch postage. I’m sure if you sit a heavy object on it for a while it will flatten it down a bit more.
The Online Card Club meets once a month, and members join for a 6 month period. Each member places a minimum order at each meeting, and once during their membership period will receive a minimum of $20 Stampin’ Rewards to spend on product of their choice! If you’re interested in joining us, please contact me. New members are welcome to join up to 1 week before the next club session (typically the third Monday of the month). Next club session is Monday, 18 September, 1pm EDT. Open to Canadian residents only due to Stampin’ Up! regulations.
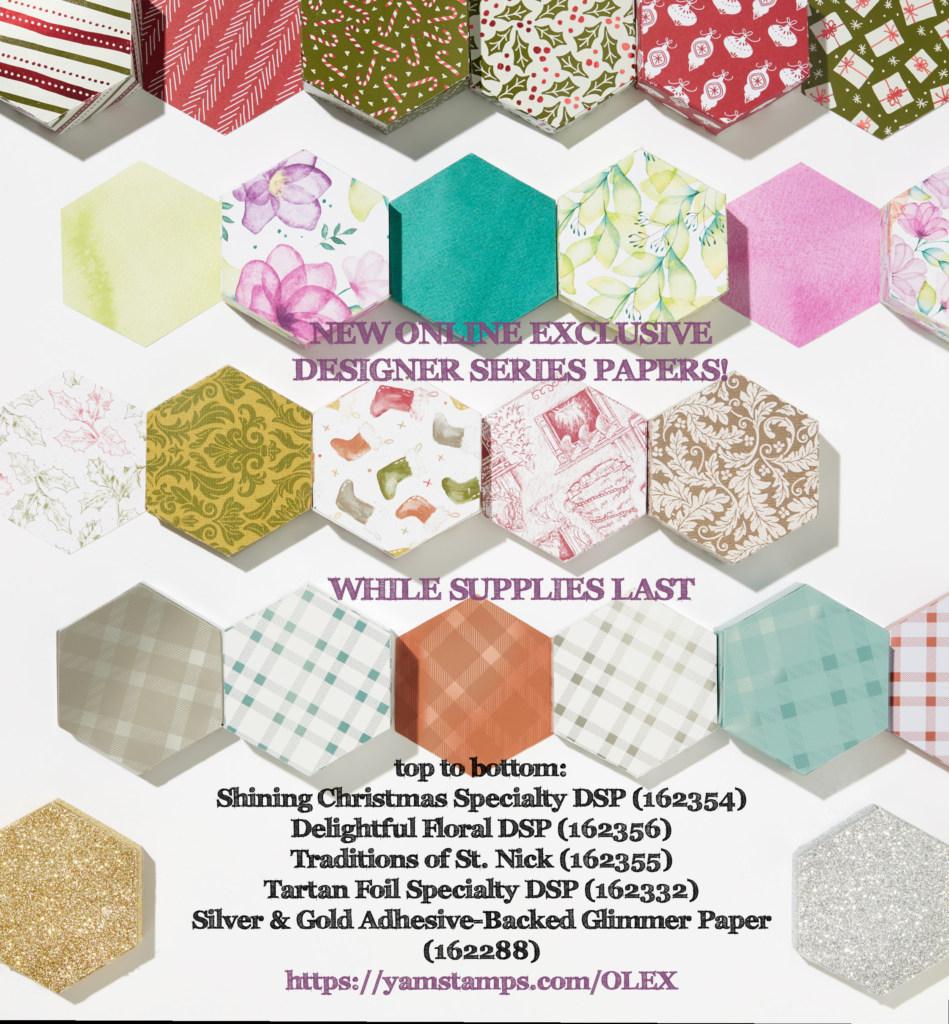
These are amazing seasonal papers available while supplies last. See all the Online Exclusive Products at https://yamstamps.com/OLEX
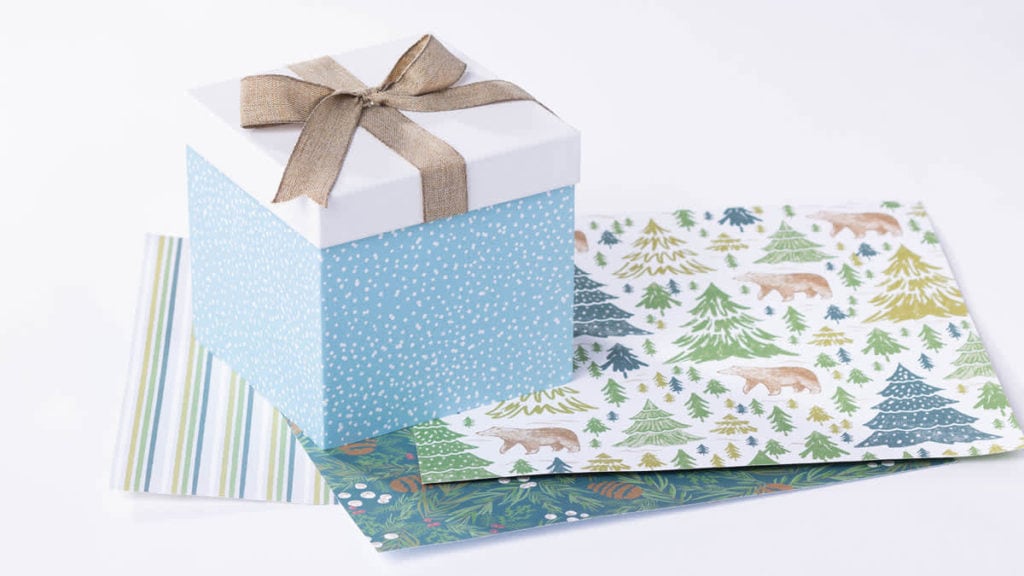
Make a Difference!
When you purchase A Walk in the Forest Designer Series Paper, Stampin’ Up! will be making a donation of $4 to Salvation Army Canada for each package sold. It’s a great way to give and receive, don’t you think?!
(I can hear the sleigh bells jingle….)
So – enough excitement for the day?! Hope that it’s a great one, and for those of you who are in the back to school routine – good luck!!
Here’s a little peek at some of the new product that will be available Wednesday!
The September-December 2023 Mini Catalogue will be in effect as of Wednesday, 6 September – here’s a peek at new product that you’ll find in it!
Stampin’ Up! Demonstrators get advance ordering privileges for new catalogue product – one of the very fun perks of being a Demonstrator. It’s so we can prepare samples and classes ahead of time, theoretically, but really, half the time we are just ooohing and aaahing over the product. (Or maybe that’s just me?! ha!). One of the other things I enjoy about being a Demonstrator is being part of Demonstrator only card swaps – where we make multiples of a single design and share with others who have done the same thing – so we end up with a variety of cards in terms of designs and products used. It’s a great way to kick start my own creativity plus get samples of products that I might not (yet) own!
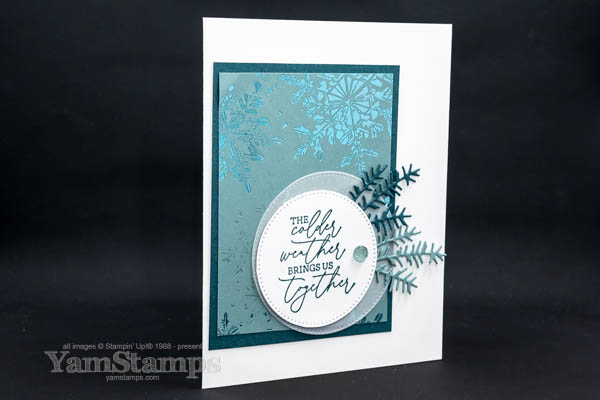
I love the colours used in the Snowflake Magic Specialty Designer Series Paper. I always love things that are shiny or sparkly….and blues/greens are some of my favourite tones, so this paper was part of my first preorder from the catalogue. I combined it with the Magical Meadow stamps and coordinating dies (available in a discounted bundle) and stamped the sentiment in Pretty Peacock, which partners so well with Lost Lagoon. A little bit of bling from the Faceted Gems Trio pack completes the card. All of these links will work properly after 6 September, so you can come back then to follow the trail down the rabbit hole… (plus I’ll post a link to the actual catalogue as well, so there’s that).
Here’s a speedy video of my mass production process (less the part where I cut out the vellum circles because apparently I sometimes get the start/stop process messed up and just record me getting ready to record….not the actual part that I wanted to show!!). It’s from the YamStamps TikTok (speaking of rabbit holes…)
When I mass produce, I tend to do all (or most) of the same task at the same time before moving on to the next. Less switching of tasks means less brain work for me….and when you get into a rhythm it’s easier – plus it’s the only time I can usually craft and watch/listen to something at the same time without getting too distracted!
Did you enjoy this peek at new product?! I’ll be sure to post more – especially after the catalogue is live on Wednesday, so be sure to come back to the YamStamps blog to check it out!
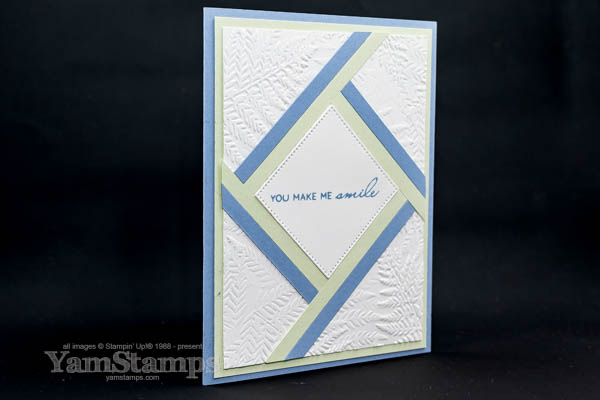
This faux shutter / fractured card design is easy to create!
Right now, the faux shutter / fractured card design seems to be everywhere – or at least variations of it. It’s a super fun and easy way to create an interesting pattern – so here’s another take on it. If you’d like the full written instructions, subscribe to the YamStamps Newsletter (click on the link or use the box at the top of the YamStamps Site) – the tutorial for this design is included in the multiproject September version which is being sent out on Tuesday, 5 September (and a copy goes to all new September subscribers as well!).
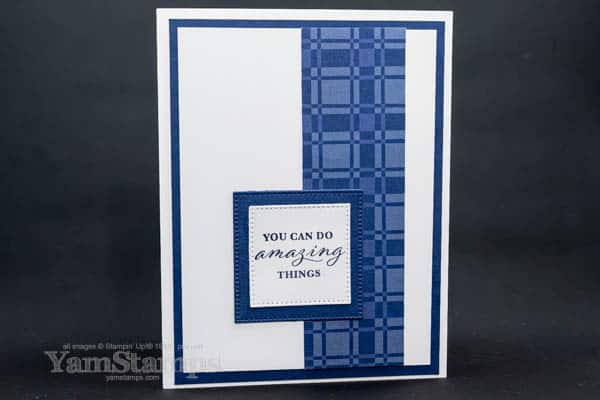
For this version of the card, I embossed the Basic White Cardstock with the Fern 3D Embossing Folder. I think random pattern folders like the Fern EF are great for this card design because each section ends up looking different.
The centre square is cut from the Stylish Shapes Dies, and then the strips are added around the outside of the square, trimming them flush with the edges of the embossed cardstock.
I wanted to share this faux shutter / fractured card before we all get totally distracted by the September-December 2023 Mini Catalogue, which goes live on Wednesday 6 September. So many things coming up this week – a long weekend (YAY) followed for many by Back to Work / Back to School (probably not as big of a yay), and then the Mini Catalogue Launch (YAY), then Thursday (meh) and Friday (YAY).
I hope that your upcoming week is full of more Yays than not! Good luck with all the “back – to’s” coming up. Be sure to check back here at the YamStamps blog on Wednesday for links to the digital version of the Mini Catalogue and more information on specials that are happening – if you like patterned paper, you’ll love the special releases that are available as of Wednesday as well!
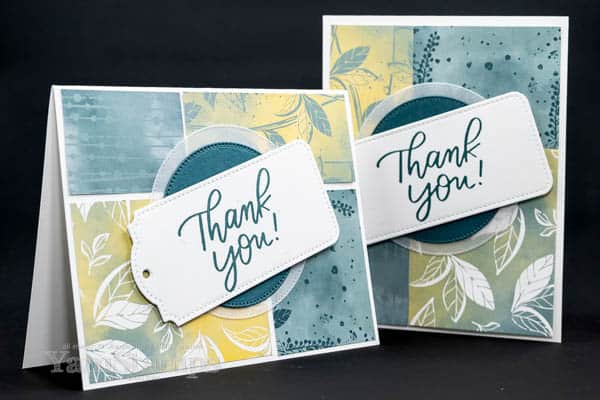
Do you tend to create cards in one orientation? Landscape or Portrait? I find I tend to favour portrait cards – those that are taller than they are wide – so for me, it’s good to create a landscape card every once in a while. There are definitely some images or die cut shapes that force a certain orientation for your finished card based on their size….but that’s not very often, really.
This is a card that we recently created in Club – I created the landscape/top fold card ahead of time as the sample prototype….but during our Club session, I created the portrait/side fold card. Can you spot the other difference?
I left a small gap between the papers for the landscape card, and decided not to leave any space for the portrait one. You could choose either option for either orientation – there’s enough room in any case! (I think I prefer the one without the gaps….)
The other thing that I love about this card is that you can get four similar cards from your cuts. I cut four sheets of the Hello Irresistible Designer Series Paper the same way and then just mixed and matched the pieces…though I think I managed to get two sets that were exactly the same for my sample cards!! I find I typically make the sample card, and then I cut and prep for all the club members plus another set for me to make “live” with them….so it just figures I’d get the same set LOL. That being said, it’s not like I’ll be giving the same card to the same person…so I think it’s safe. Plus – landscape or portrait – think they’d realize it’s the same paper layout? (I actually had to look twice myself).
The sentiment is from the Good Feelings stamp set. This is a fantastic set of large greetings that are perfect for card sending occasions – thanks, encouragement, support, celebration…. It’s a good one to have in your crafting room stash. Stamping onto a tag die cut with the Tailor Made Tags is an easy way to add a sentiment to your cardfront, and I love that the stitching effect is echoed in the Stylish Shapes Die Cut circles behind the tag.
So next time you are sitting down to make a card, consider flipping it on its side! It’s something I share in the YamStamps Sketch System Subscription – showing a variety of ways to change up a single card design to get a bunch of different looks. Every four weeks we start again with a new sketch and different samples! You can start your subscription at any time. It’s a great way to just jump in and get crafting, rather than trying to figure out a design layout every time. Check it out at https://go.yamstampsmore.com/sketchsystem. I think it’s a great way to supplement your crafting – you can still be original with your ideas, but you don’t have to do that every single time! Paper Crafting Doesn’t Have to Be Difficult to Be Impressive!!