Dec 29, 2008 | Business Opportunity, Events
Just a quick note to say that I've updated my calendar to reflect classes and clubs for the next few months – you can see my schedule here (or click at the right – Linda's Class & Event List) or here (the even prettier version on my business website lol). If you are looking to host a class or workshop in your own home in the next few months, please contact me ASAP so I can reserve a date for you!
If you've been thinking about your new year resolutions and one of them is anything to do with money….why not come to my Information evening?! Monday, January 19th at 7pm come on out to find out what owning your own Stampin' Up! business is all about – RSVP to reserve your spot.
Dec 25, 2008 | Christmas, rubber stamping
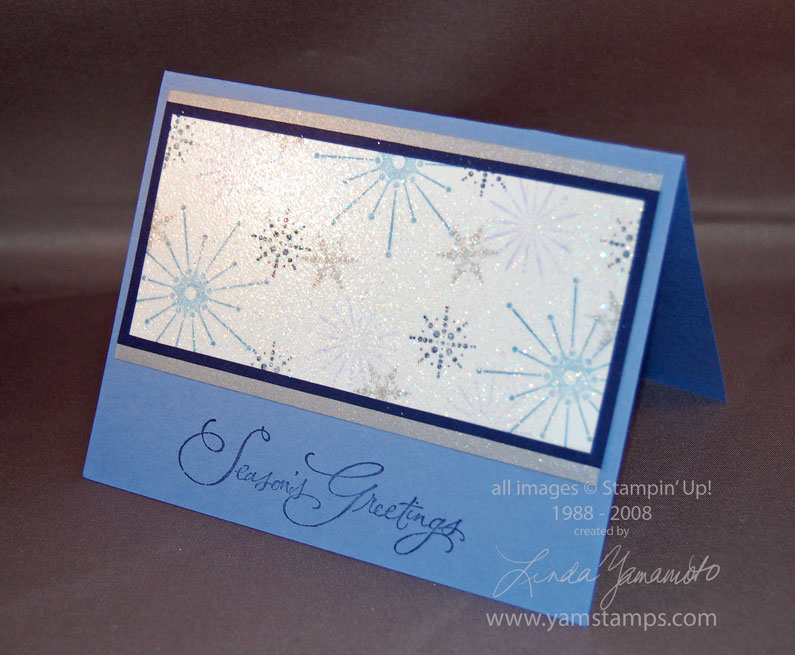
 This was my Christmas card design this year. Oh, and hey, it's another blue holiday card!! (Can you tell what colour I like?!) It may be hard to see in the picture, but the Snow Burst images are stamped onto whisper white cardstock in brocade blue, night of navy, almost amethyst and metallic silver. Once that dried, I pressed my Versamark pad over the strip of cardstock, then heat embossed with iridescent ice embossing powder to give it the all over sparkly look. It's mounted onto night of navy cardstock and brushed silver cardstock. The greeting is from Many Merry Messages (my most used holiday set – all greetings!)
Frugal Friday tip on a non-Friday – I cheated on the silver layer – rather than hiding so much cardstock behind the other layers, I cut thin strips and adhered them to the navy cardstock. Same effect but much more economical! You could also punch out the middle of the night of navy strip with various punches to stretch your dollar further. I however, was a bit time strapped so skipped that frugal step in favour of a bit more speed in my card making!
I want to take the opportunity to thank all of you for your readership and time! Happy Holidays to all and wishing everyone a happy, healthy and creative new year.
Dec 24, 2008 | 3D samples, Christmas
This is from week 11 of my 12 weeks of Christmas emails this year – I thought I'd share it here if you still have some packaging needs for tomorrow!!


I know I can't be the only one that hangs on to the "nice" bags that I sometimes get from stores. This is a heavy duty paper bag with cord handles. I simply covered up the logo with this 3D tree I made, and also covered up the inside logos with a thin strip of designer series paper (hard to see in the picture). The tree is made from 4 squares of the Ski Slope Designer Series Paper, topped with 3 stars punched from metallic gold cardstock. I replaced the cord with the felt ribbon from the Alpine Ribbon Originals.
HOW TO:
1) Cut 4 squares from your designer series paper – 3"x3", 2.5"x2.5", 2"x2", 1.5"x1.5"
2) Each is folded the same way, and then adhered together to form the tree shape; I used a the flip side of the designer series paper for the trunk.
Step by step shots below for the basic fold…the first steps are basically scoring the paper.
start with your square fold in half, then unfold again
fold in half the other way, unfold fold diagonally, unfold, then fold on
the other diagonal & unfold


fold in half with crease at top poke in the side along crease lines
* if you are using patterned paper, (bring the top fold down so it's vertical)
to make design symmetrical, have the
design run horizontally*
previous step finished repeat on other side
bring the front right fold to the repeat with the other side – DONE!
centre line & crease
Dec 23, 2008 | specials

Put some LOVE in your Valentines Day with Stampin’ Up!’s® Love You Much Bundle. The bundle contains the perfect products to create fun and fanciful Valentine’s Day projects that say "I love you" from the heart. And from December 23, 2008, through January 31, 2009, you can purchase the Love You Much Bundle at 20% off the retail value!
Stampin’ Up!’s® Love You Much Bundle (item 115405) includes the following:
| Description |
Retail Value |
|
Love You Much stamp set
|
$30.95 |
|
Candy Lane Designer Series paper (Close to Cocoa, Pink Pirouette, Riding Hood Red, Very Vanilla)
|
$11.95 |
|
Heart to Heart punch
|
$19.95 |
| |
|
|
Bundle Retail Value
|
$62.85 |
| |
|
|
Love You Much Bundle (20% off; item 115405)
|
$50.28 |
Feel free to contact me with any questions or go to www.yamstamps.stampinup.net to place your order directly. Don't forget, if you place an order of $100 or more today you'll receive free shipping as well!! (Free shipping offer on orders of $100 or more ends TODAY)
Dec 22, 2008 | Announcements
 Still need some sets that are RETIRING?
The 10% discount on retiring stamps ends 23 Dec 08 (Tuesday!). The free shipping on all orders over $100 – also ends Tuesday!!
There's also a "love"ly promotion starting on the 23rd – more about that later…
Click here for the retired list in numerical order (by page number)
Click here for the retired list in alphabetical order
Click here for the 10% off price list (in case you don't want to do that much mental math at this point in the day….lol)
Ready to save some money? Click here to go to my business website & shop now! (www.yamstamps.stampinup.net) .