Sep 21, 2018 | Announcements, Christmas, Seasonal Catalogue, Stampin' Up!, Subscribe
Are you looking for some holiday craft inspiration? I have a solution for you! Sign up for the YamStamps Email List today! Being a subscriber means that you’ll get a weekly email full of crafting inspriation – different project ideas with full supply list and instructions, tips and tricks and information on Stampin’ Up! Canada specials. But at this time of year – there’s MORE!
Starting in October, subscribers also receive the Exclusive Twelve Weeks of Christmas emails. This is a special annual “THANK YOU” for being a subscriber. Each week, for twelve weeks, you’ll receive an email with holiday craft inspiration -projects like cards, gifts, wrapping and tags. Like the “regular” YamStamps emails, these will have a photo, supply list and complete instructions to create that week’s project. Also like the “regular” YamStamps emails, these projects will NOT appear elsewhere in the YamStamps world – you won’t see them on the YamStamps Facebook Page, Instagram feed or here on the blog. What are you waiting for? Double the inspiration starting in October! Click on the image to get signed up! Please feel free to contact me if you have any questions.
Sep 19, 2018 | cards, Seasonal Catalogue, Stampin' Up!
Stampin’ Up!’s Holiday Catalogue has some great sets and bundles. The Winter Woods stamp set is a lovely one that could be used for holiday or non-holiday cards. It’s available in red rubber clear mount or red rubber wood mount stamps, and is also available in a discounted bundle with the coordinating In the Woods framelits (red rubber clear mount bundle / red rubber wood mount bundle). This vellum card shows off the elegance of the images. I love using vellum on cards – it instantly makes it seem more artistic! You do have to be sure to allow a bit of time for it to dry, and there are some sneaky tips for adhering it, but it’s worth it!
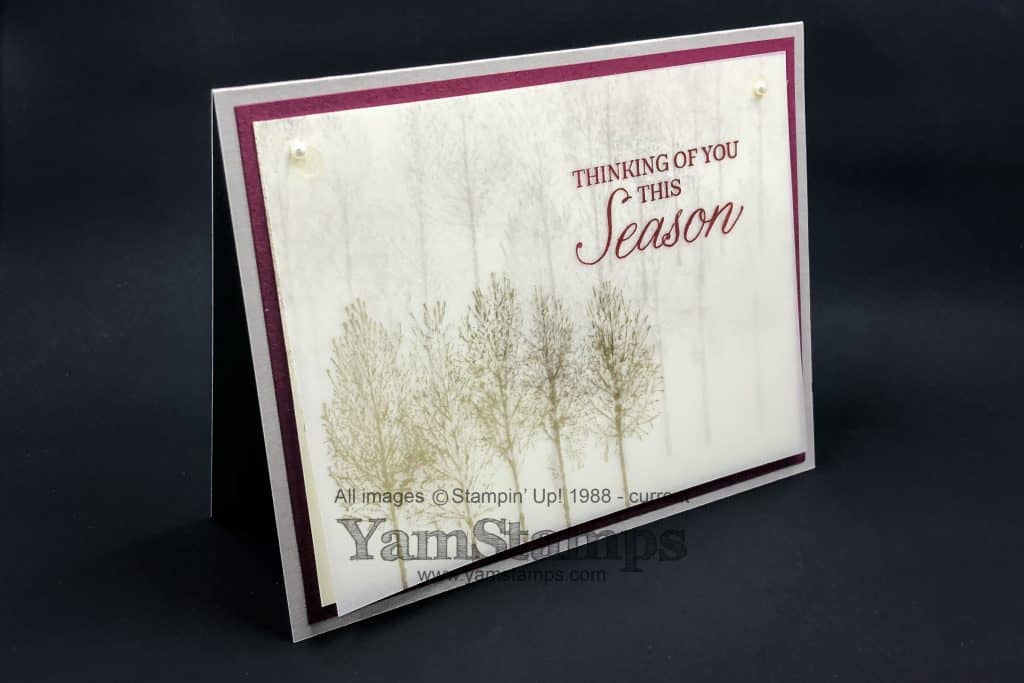
I used some of the new colours on this one – Grey (or Gray if you must LOL) Granite and Merry Merlot. I realize that the picture lighting makes the cardstock look a little ombré-ish…but it’s not. The layer under the vellum is Very Vanilla cardstock. The tree image was stamped a number of times in Grey Granite, and once on the vellum. The sentiment is stamped in Merry Merlot. I love these new colours – and they’re part of the Neutrals Colour Group. Once the vellum was completely dry, I used two Mini Glue dots to adhere the vellum over the Very Vanilla cardstock, then used two Pearl Basic Jewels to mask the adhesive. I made a number of these as my contribution for a demonstrator card swap, and actually let the vellum dry overnight to be absolutely sure there would be no smudging or bleeding. I had vellum spread out all over my craft room!
We had a small get together of my demonstrator group tonight, and I had this as a “make and take” for the local people who were able to attend in person. Next month we will attempt to do a make and take in person and online….wish me luck with the prep for that! (If you want to see it in person and laugh at me yourself, you’ll have to join my demonstrator team first!). In the meantime, holiday cards abound around here – this afternoon was the September Christmas Card Class featuring the fun Santa’s Workshop Enamel Shapes – and tomorrow is the evening version – I had to move the dates and times around slightly to accomodate some travel! Next month, the Christmas Card Class is back on the fourth Wednesday – and you won’t want to miss it! It is going to focus on the GORGEOUS Joyous Noel Designer Series Paper. Check out the YamStamps Events Page for all the upcoming classes! Hope you can join me soon – either in person or online!
Sep 16, 2018 | cards, Seasonal Catalogue, Stampin' Up!
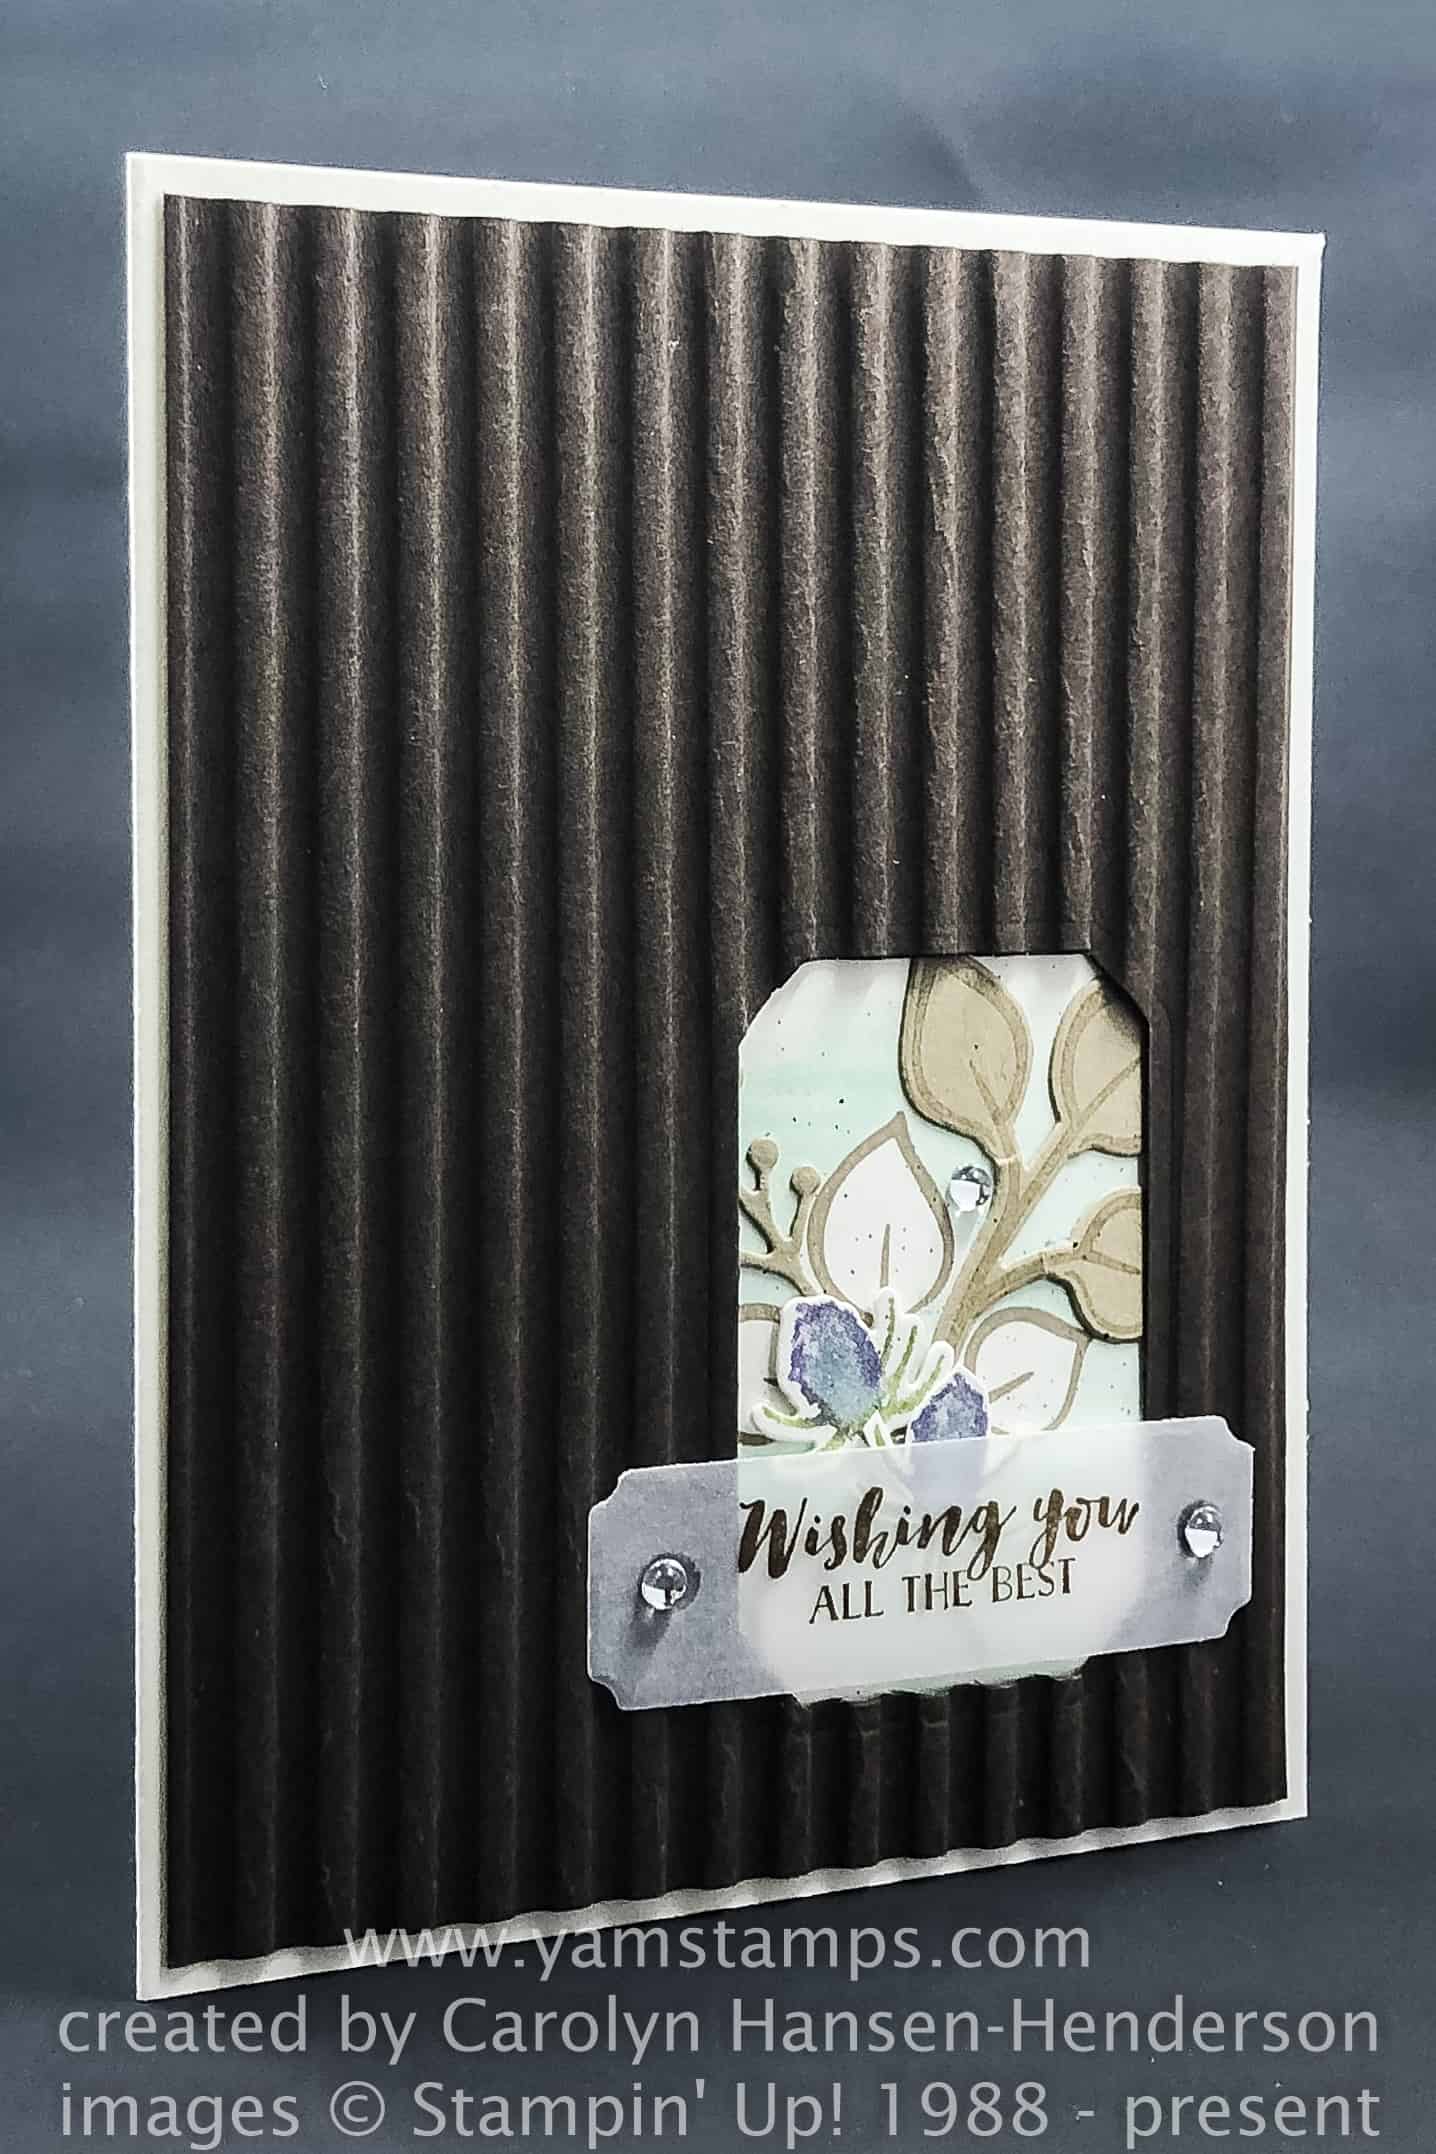
Today’s Sunday Swap Card Share is a best wishes card, created by Helen Hansen-Henderson. Though it’s a simple layout (love those), the details make it even more interesting. The card uses the First Frost stamp set, which is available in red rubber wood mount or red rubber clear mount, or with the Frosted Bouquet Framelits in a discounted wood mount bundle or clear mount bundle. I love the window cut out of the cardstock textured with the Corrugated Embossing Folder that reveals the images from the stamp set, and the layers of die cut images over the stamped image. These items are in the Stampin’ Up! Holiday Catalogue which is now in effect. This set has a few sentiments in it – not just for the Christmas season, and the images could be used year round as well.
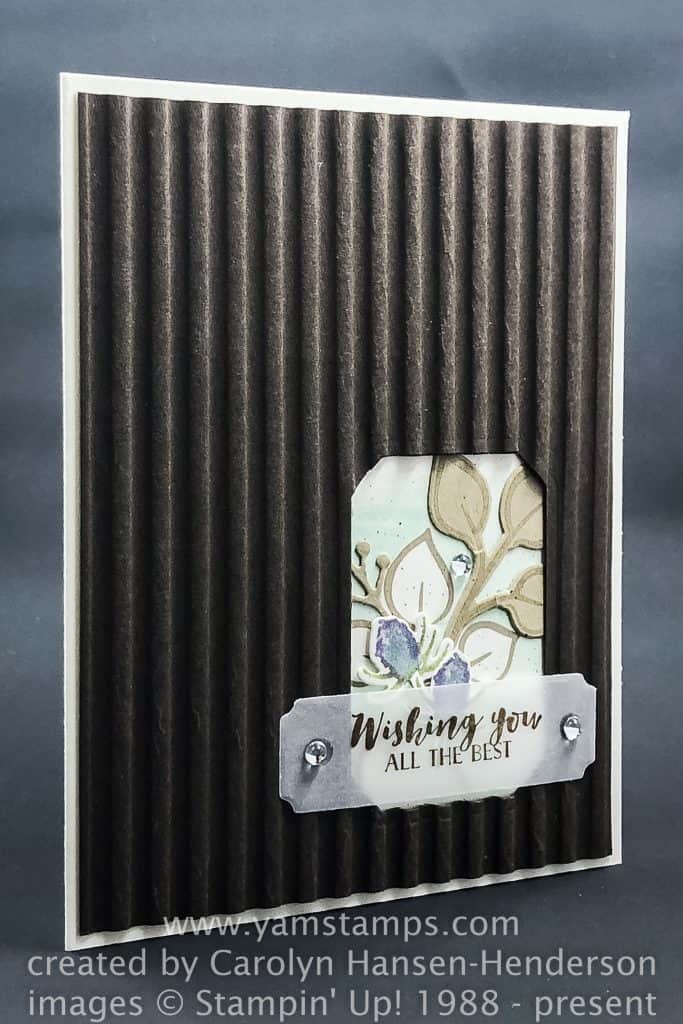
I hope you have a great Sunday, and a great run day if you’re participating in one of the Terry Fox Runs being held around Canada. I know that they were up really early getting things set up for the runners along the waterfront here in Burlington, and it was humid early on, so hopefully everyone takes it easy and stays well hydrated!
I’m finishing up final prep – it’s a busy week here – Stampers Club on Monday, and then Christmas Card Classes on Wednesday afternoon and Thursday evening. I split the times this week because the evening of the third Wednesday of the month is my demonstrator group meeting. This month will be more of a “hybrid” type meeting as some people will be here in Burlington in person, and some will be joining us online. Maybe I should be asking for best wishes for my prep this week?! LOL Upcoming events are listed on the YamStamps Events Page, so you can check out what’s happening locally, but I also have some online class options as well. Please contact me if you have any questions or want to register for an upcoming event.
Sep 11, 2018 | Information, Stampin' Up!, Tutorial
Tuesday Tool Tip (while it’s still – barely – Tuesday LOL). What’s the Difference between Stampin’ Blends and Stampin’ Write Markers?
Colouring is still such a popular past time and stress reliever! Stampin’ Up! products are great for colouring – you can stamp images of your choice and then colour them in – for bonus points you can even use them on a project instead of hoarding them….but one question that has popped up in my classes lately – what’s the difference between Stampin’ Blends and Stampin’ Write Markers? Here’s a quick rundown:
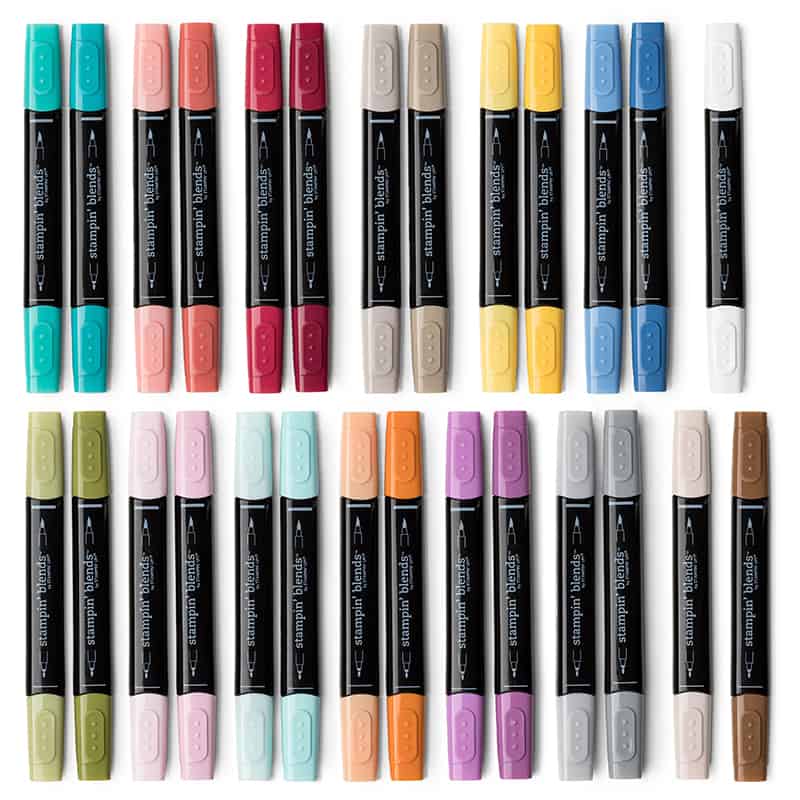
Stampin’ Blends
What’s the Difference: Stampin’ Blends Markers
- Rectangular shape marker
- Double ended – bullet tip and brush tip
- Alcohol Based Colouring Tool – best used with images stamped in Memento Ink
- Currently Available in 27 Stampin’ Up! Colours, Light & Dark Complimentary Shades of Each Colour (see all currently available colours here)
- Ivory, Bronze single shades and Colour Lifter available
- Purchase Individually or in Coordinating Shade Duos
Stampin’ Blends tend not to show “streaks” or colouring lines – as with most alcohol based markers, they blend well to give a more “solid” colour image. The coordinating light and dark shades make it easy to blend and create shadows and highlights for more professional looking results. You can layer the colour to increase the intensity and add more shadows as well. There may be a bit of “bleed” or spreading of colour with these tools, so best to leave a tiny margin by the image line until you know how much your colour will spread. The intense colour will also tend to bleed through the cardstock. The Colour Lifter tends to “push” the colour out of the way, so may help create highlight areas or disguise small areas of spread. These colouring tools are great for colouring, but not suitable for use directly on rubber stamp or photopolymer stamp surfaces. Alcohol based markers are often used by manga / comic book type illustrators.
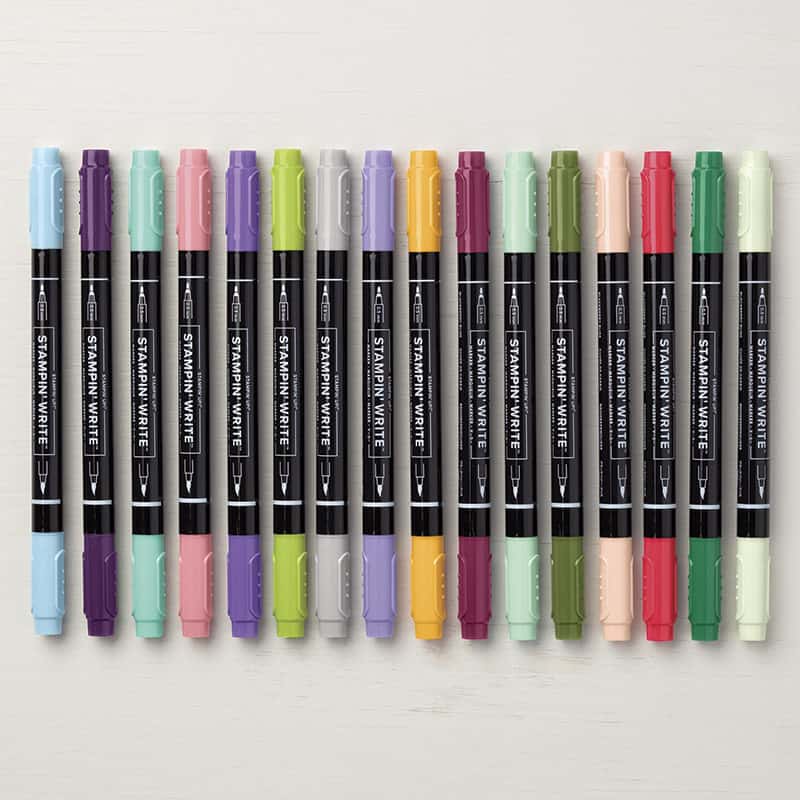
Stampin’ Write Markers
What’s the Difference: Stampin’ Write Markers
Stampin’ Write Markers are a great way to get your hands on all the base Stampin’ Up colours for your crafting needs. They are dye based inks, so can be used to colour images on cardstock, or you can use them to apply colour directly to the surface of your stamps before stamping. Great for quick colouring, or colouring in traditional colouring books – there may be bleed if a lot of colour is laid down, but not to the extent of the Stampin’ Blends. I also love using the brush end of these markers for brush lettering. Don’t overwork the surface when you’re using these to colour as you may end up with the paper “pilling”.
Both types of these colouring tools can have a place in your crafting room! There are advantages to each of them. If you’re just dabbling in adding colour to your stamped images, you may want to start with the Stampin’ Blends, since you can start with just one or two colours and shades – for example, if you like floral images, pick a green and a red or pink to start. If you want to get your hands on many coordinating colours quickly, perhaps start with the Stampin’ Write markers since you can get a colour family (or even better – the new colours assortment) to build your collection quickly. Once you’ve been able to “play” with the tools, you’ll know how they fit into your crafting style and won’t be wondering “What’s the Difference?” any longer!
Hopefully this has helped a bit – but if you have any lingering questions, feel free to contact me! You can also check out the recording of the Facebook Live I did a little while ago on the YamStamps Page, showing how Memento and Staz On inks react with both of these types of markers as well as an Aquapainter. If you “like” the YamStamps Page, you’ll get notifications of whenever I go live with a video in future! See you in cyberspace…
Sep 9, 2018 | Business Opportunity, cards, Stampin' Up!
This week’s Sunday Swap share is a celebration of the fact that it’s technically still summer….even though by this point in the month it feels like we are into the next season. However, well will highlight this Tropical Thank You Card and remind ourselves that it is not yet September 23rd…
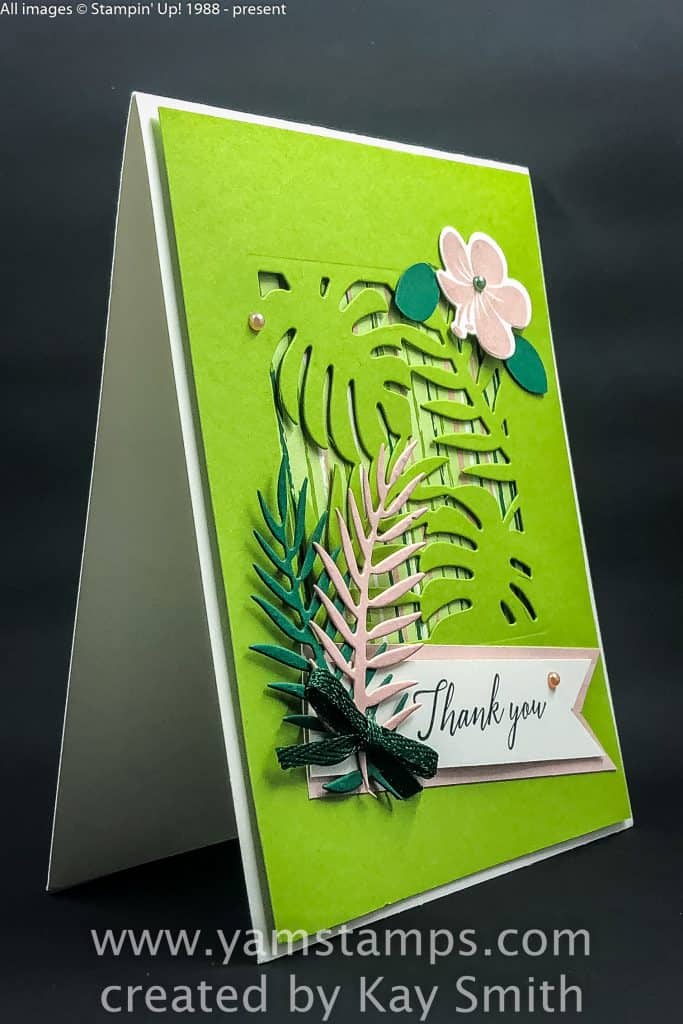
Kay Smith created this lovely, tropical thank you card! It was created with the Tropical Thinlits dies and coordinating stamp set – Tropical Chic. The set is available in red rubber clear mount or red rubber wood mount, and is also available as part of a discounted bundle (wood mount or clear mount) with the thinlits. On this card, you can see some of the Tropical Escape Designer Series Paper peeking out through the die cut window. Love the coordination of the images and colours. Stampin’ Up! really does a great job of presenting coordinating products in suites so that it’s easy for the crafter to pick up on the colour theme or image theme for their projects. Perfect for a lazy crafter like me. I don’t want to work too hard to come up with something that looks great!
As a Stampin’ Up! Demonstrator, I’m often asked where I get my card ideas. I often get inspiration from the products themselves, but I also get inspiration from other demonstrators! I love participating in card swaps with other demonstrators – we each design one card and make multiples of that card – and in return for participating in the swap, we get a variety of cards back (including our own). It’s great to see how others interpret sets and images, and a great way to expand my sample collection – especially when I don’t actually own that particular stamp set or framelit. Shocking, I know, but I don’t actually own everything in the catalogue!! If you enjoy card making or scrapbooking, consider joining my group of Stampin’ Up! Demonstrators – we’re known as the “Eh” Team! You can “support your own crafting habit”, and make a little money as well doing something you love. Please come to my Information Evening on Wednesday, September 12th at 7pm in north Burlington. All that’s required is an RSVP! No cost, no pressure. Come and hear about how being a demonstrator can add a little creativity and income to your life! Maybe you’ll get a tropical thank you card for attending! (or maybe a non-tropical one…since I don’t actually own this set….yet). Hope to see you soon!