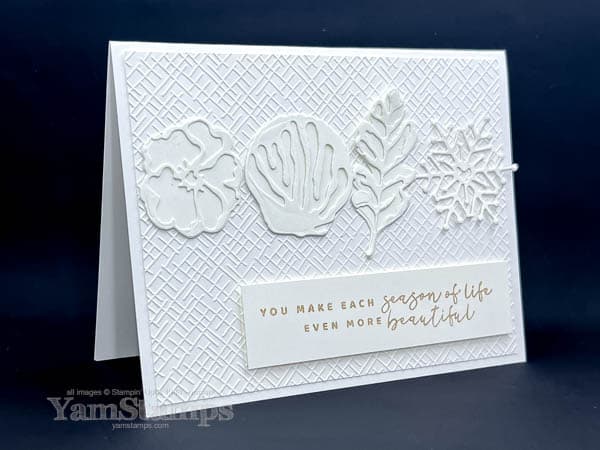
This is a one colour wonder card – I love the monochromatic look!
I love the clean look of single colour cards – I think of them as one colour wonders – like this card! There’s something simple and elegant about the effect, but it’s not so simple that it’s boring.
When I am keeping the colour scheme very simple, I like to make sure that there’s still a lot of eye catching details – so using texture really makes a one colour wonder from being boring. In this case, I used one of the Basics 3D Embossing Folders to create the background – I think this is my favourite out of the three. These Embossing Folders are part of the Online Exclusive Offerings from Stampin’ Up! so you won’t find them in the catalogue – but you will see them in the YamStamps Online Stampin’ Up! Canada Store. You can see the online only offerings by typing “Online Exclusive” in the search box. I just checked the online store, and while you can see the folders, you can’t order them at this moment since they’ve been so popular! Looks like they’re going to be available again in a week or so, though (fingers crossed). Yay! They are available again right now!
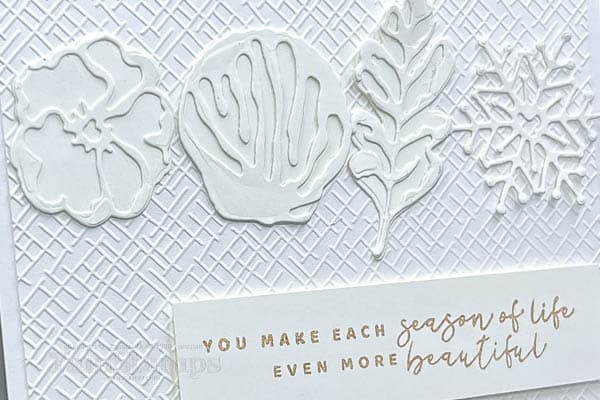
The flower, shell, leaf and snowflake are from the Chic Dies, and the sentiment is from the coordinating Seasons of Chic Stamp Set. These are carried over from the last Annual Catalogue (and I’m very happy that they are still around! So versatile!). As a Demonstrator, I like to be sure to share all the new and exciting products that are released in the catalogues or online, but I also like to make sure that some of my existing favourites get the attention they deserve!!
I die cut the layers from Basic White Cardstock, and layered the coordinating images before adhering them to the card front. I decided to use Crumb Cake ink for the sentiment on this One Colour Wonder Card because I felt it added a touch of colour without being overpowering.
The other thing I love about the one colour wonder approach – it makes my crafting easy because I don’t have to think about what colours to put together! If you like to avoid crafting brain strain, you may also want to consider signing up for a YamStamps Sketch System Subscription. Subscribers have told me that they love how easy it makes their cardmaking! Week One brings the sketch and the first sample to your email inbox, and over the following three weeks you get a different take on that sketch. The sketch and samples are tools to spark your own creativity – so that you can enjoy the process and the results without having to work too hard!! It’s just $9.99CAD every four weeks – get more information and start now by clicking here, or message me if you have any questions! Paper Crafting doesn’t have to be difficult to be impressive!
My weekly newsletter goes out on Tuesdays but only to subscribers – are you on the list? YamStamps Email Subscribers get a weekly dose of inspiration and information – in the form of exclusive project tutorials, special offers and tips and tricks to make paper crafting easier and more rewarding!
You’ll get a link to a video tutorial for a fancy fold card when you first subscribe. (It may take a few moments for the system to process – and you may need to check your spam folder the first time!!). See you in your inbox!
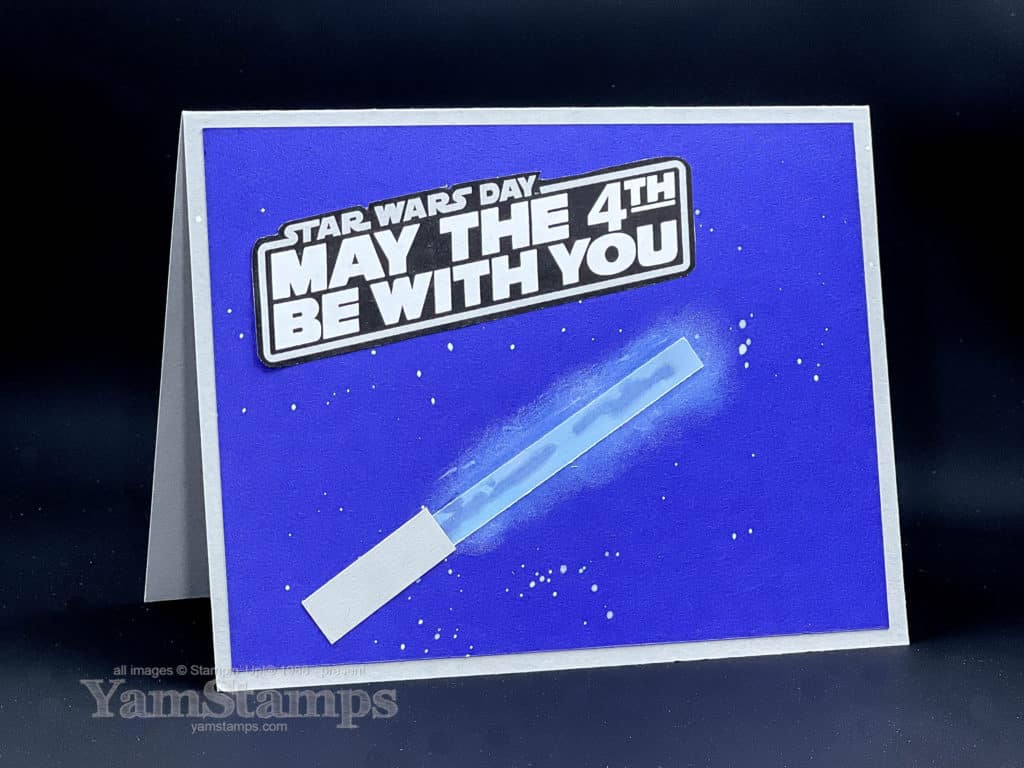
Celebrate Star Wars Day with a fun light saber card
Fun creating this card to celebrate Star Wars Day! Quick and easy….
Found the sentiment online and printed it onto regular paper, then fussy cut it. I used my sponge daubers to add a layer of Whisper White Craft ink onto the Starry Sky Cardstock background and then added a bit of Tahitian Tide ink on top to create a blue hue glow. I also daubed Tahitian Tide ink to a piece of vellum before adhering it in place. I used Multipurpose Liquid Glue to adhere the vellum in place, and I actually don’t mind the bit of “show through” – I think it makes the light saber look more dimensional.
To make it look more sky like, I used my water painter with a bit of White Craft Ink and splattered it onto the cardstock. I did share another fun galaxy sky technique in my Just Add Ink Online Class, so you can check that out if you want to learn more! Good for your Star Wars Day card or any other day!
I really wanted this to be a fast card, so I didn’t fuss too much with it….I don’t think that every card we make needs to be over the top – sometimes it’s more important to get it done and shared!!
Sharing the TikTok video I made – because it’s faster than the version on Instagram (I couldn’t figure out how to speed up the video on Instagram….).
Happy Star Wars Day! Still time to make a quick card to share with your family and friends who love Star Wars! (Or just love a good pun).
Have you checked out the new Stampin’ Up! Canada Annual Catalogue? You can see the online version here, or fill out this form if you would like a hard copy! Online shopping is 24/7 at YamStamps.com/shop or you can message me if you would like assistance placing an order, or want to pay by etransfer.
It’s time to shop from the new catalogue! You can shop 24/7 in the YamStamps Stampin’ Up! Canada store at yamstamps.com/shop or message me if you need assistance placing an order or would like to pay by etransfer.
Stampin’ Up! had a fantastic April – between the Last Chance Sale, Free Shipping Day and Demonstrator Pre-Orders for selected new catalogue products….so they are still playing a bit of catch up in the shipping department!! You may find that your order takes a little longer to be shipped to you, so try to exercise some patience – I promise it will be worth it! (I am also talking to myself, here, in case you were wondering).
I will leave you now to check out all the products…
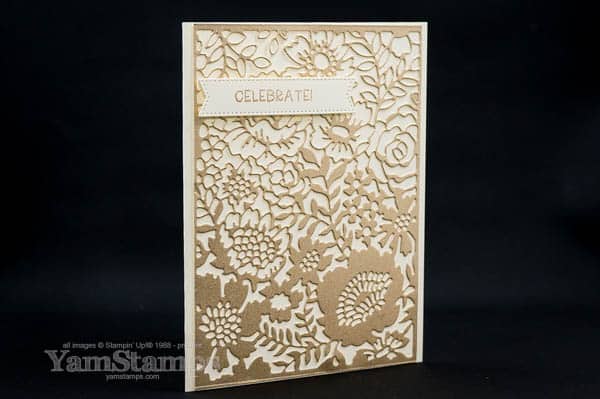
Stampin’ Up! has a number of larger dies that can be used to create backgrounds or main elements for your paper crafting projects. I used the large die from the Two Tone Flora Dies to create this shimmery die cut card. The dies include the large die, as well as smaller dies that coordinate with the large die and with the Two Tone Flora stamp set. Right now, they’re available in a discounted bundle, but that option will disappear after 1 May 2023. The individual products will still be available for purchase, though!
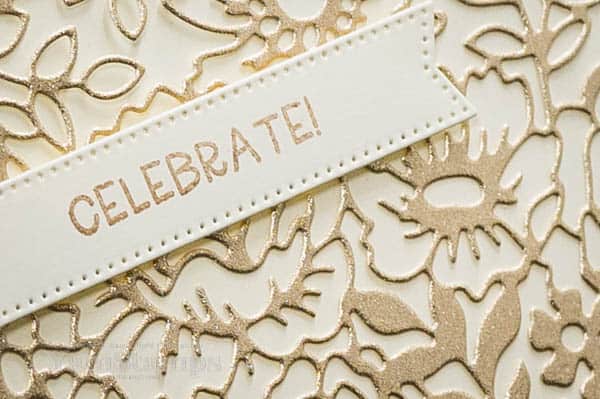
For this quick and elegant shimmery die cut card, I used the large die with the Fine Shimmer Paper Pack (also retiring – available until 1 May 2023/while supplies last). I love the shimmer paper for adding some bling but not being over the top (and also not leaving glitter/shimmer everywhere). To make this even easier, I applied strips of the adhesive sheet to the back of the Fine Shimmer Paper before die cutting.
Tips for die cutting thicker layers/detailed dies: I make the “sandwich” according to the instructions on the cutting plate, and run it through the Stampin’ Cut & Emboss Machine a couple of times. I also have found that if I have the die/paper on a slight angle (rather than lining it up straight on the cutting plates), it tends to cut more efficiently (plus it’s easier to feed through the machine). I definitely use both of these approaches if I have adhesive sheet on the back. I usually find that it may not cut all the way through the liner, but when I pull the adhesive liner off my die cuts, the little bits also tend to pull away at the same time.
I added a Stylish Shape die cut label and stamped “Celebrate” in Crumb Cake ink, which I thought complemented the tone of the Shimmer Paper. The sentiment is from the retiring Framed Florets stamp set (see previous disclaimer about retiring product…).
You could make a whole bunch of these shimmery die cut cards ahead of time, but just add whatever label was appropriate for the occasion!!
If you’re looking for more card making inspiration, information and tutorials, be sure to be signed up for the YamStamps Newsletter! New subscribers get a free video tutorial as well. Sign up using the box at the top of the website, or click here.