Jul 24, 2012 | 3D samples, Announcements, Business Opportunity, Events, specials
So, internet connection was a bit spotty at times and my posts were postponed LOL. Here’s a few shots from around & about Stampin’ Up!’s Convention.
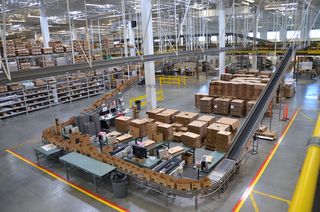
This is the distribution area of Stampin’ Up! (they were finishing lunch break when we were in this area). Cool to see how automated this system is – boxes are tagged and move in & out of the picking area on a conveyor belt, waiting to be filled with items and then sent on to us!
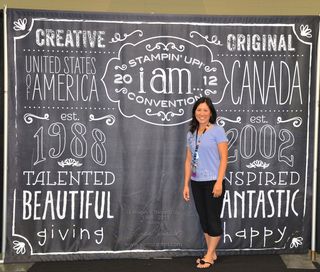
The theme for convention this year was “I Am” – loved the theme and the song. I posted the video on my facebook page here. The end of the video is the live performance portion at the opening session of convention.
2012 marks 10 years of Stampin’ Up! Canada and this was celebrated by having all the Canadian demonstrators march across the stage. Nice to be recognized that way by the company and other demonstrators 🙂 There was a special march for those of us who were demonstrators in the first year as well.
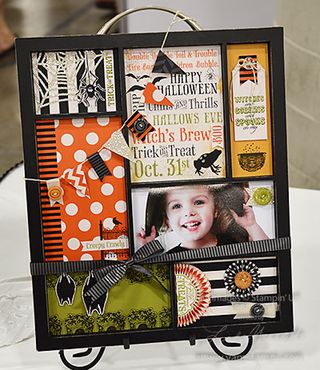
Here’s the upcoming special which is so fun! If you sign up as a demonstrator in August, you and your upline will both get this cute printer’s tray project – just add ink! I think I might have a special team get together in September to assemble these! More information on being a demonstrator in my group can be found here. Our “Eh” Team group has demonstrators across Canada and we’d love to have you join us – I hope to have demonstrators from each province and territory as part of our group.

I am enjoying being home again, and busy preparing for my upcoming weekend of events – “Eh” Team get together on Saturday, first Christmas Stamp a Stack on Sunday! I hope to see you soon at one of my events. If the dates don’t work for you – let me know and we can get a private class together for you and your friends. Keep your eyes on www.yamstamps.com for more news and events.
Jul 18, 2012 | 3D samples, Events
and technically, it hasn't officially even started! My friend Sue & I arrived yesterday and went for dinner with other demonstrator friends that we haven't seen since January (at Stampin' Up!'s Leadership conference). Great fun catching up with them!!
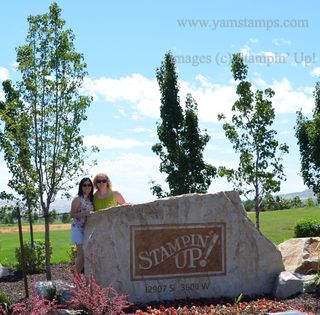
Sue & I with the sign at the entrance to Stampin' Up!'s home office.
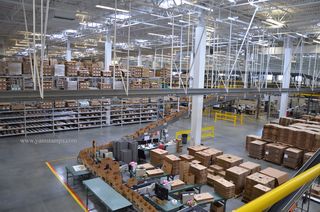
We took a bus ride to tour Stampin' Up! headquarters – viewed different areas of the home office including the large distribution centre. It was fascinating to see how automated the line is – boxes will roll along the conveyor belt and stop off at the correct spot for the items to be picked off the shelf and placed inside. Once the order is fully completed, the box is weighed to make sure everything is inside! Neat to see.
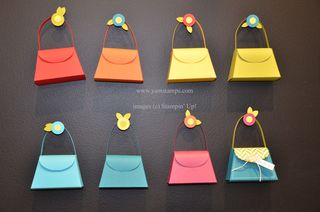
Here's a cute set of the purses from the Petite Purse Bigz die. Love how they made the little flowers out of circle punches – how cute and easy is that??!! Don't be surprised if you see them show up on a project at one of my future classes LOL!!
I'll be posting more ideas and inspiration from Convention over the next while. I will be sharing them in person with my demonstrator team members at our get together on July 28th – if you'd like to join us, please contact me for more information!
Jul 16, 2012 | cards, rubber stamping
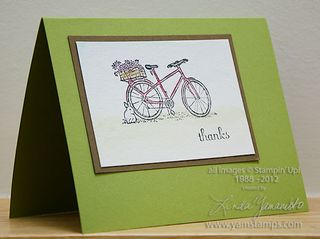 I love to watercolour…even though I'm not that good at it! I have to confess that drawing, painting etc are definitely not strong skills of mine – which is why I love rubber stamping! Stampin' Up! has made it easy for me to look artistic without me having to do the "heavy lifting" as they say :) For this card, I stamped the bicycle image from the hostess only set "Summer Afternoon" (check the back of the Stampin' Up! Catalogue to see the stamp set). I used Stazon Jet Black ink on watercolour paper to be sure that my image would stay clear once I soaked the paper. I then used my aquapainter and my Watercolour Wonder crayons to colour in the image. This is my favourite way to add watercolour to my images – I can control the amount of water used and can direct the colour where I want it. Takes me back to my watercolour painting class days without the anxiety of hearing "Oh, just sketch out what you want to paint". (See back to initial comment about not being able to draw).
I created these cards to send to everyone who sponsored me (and my son) in our recent bike ride efforts. We participated in "The Healing Cycle" which is a varying distance bike ride to raise funds for hospice care. We had a lot of fun and were thrilled to raise over $18,000 with our teammates for the Carpenter Hospice here in Burlington. The Carpenter Hospice not only provides end of life care but also runs wellness programs for those living in the community with terminal illnesses. I know a number of people who have benefitted from the valuable services that the staff and volunteers provide, so spending some of my time to raise funds for them was not an issue at all, nor was spending a bit of time on creating special thank you cards for my friends and family who gave generous donations to sponsor our efforts.
Jul 12, 2012 | cards, rubber stamping
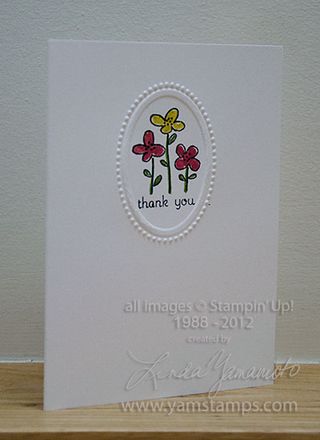 One type of card that is always a pleasant surprise to receive is a "Thank You" card. In this day of technology, it's sadly becoming a bit of a rare occasion to receive a "nice" piece of mail (as opposed to bills and flyers!) – so it's great to receive a card for a change. A handmade card is even better! Thank you cards can be sent to anyone to whom you want to express your gratitude.
These cards were quickies that I made to send to attendees at my Open House in July. I personally think that the embossing around the image dresses up this simple card. Stampin' Up!'s Easy Events set is another versatile multi-occasion set that will cover many of your card sending needs. The Designer Frames Textured Embossing Folder set (for use with the Big Shot) was one of the items you could select for free during Sale-a-Bration but is also available in the main Stampin' Up! catalogue. I added a bit of colour with my Stampin' Write markers – I used the In Colour '12 – '14 set and was able to produce a number of these fairly quickly. With me, I've learned I need to get the cards done and out, otherwise they get bogged down in the system somewhere. (By system I mean my stamping room chaos or somewhere en route to the actual mail box…LOL). I've also started using custom post it notes inside the cards to my customers so that they can be re-used by the recipient 🙂 or kept for a sample, whatever suits that person's needs at the time!
(By the way, if you attended my Open House and haven't received one of these – please let me know!!).
By the way – thank you for taking time out of your day to check out www.yamstamps.com – I appreciate it!
Jul 10, 2012 | cards, rubber stamping
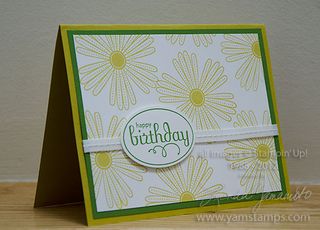 This card uses some of Stampin' Up!'s new In Colours. So glad that the In Colours hang around for two years now – gives me more chance to play with them! Summer Starfruit and Gumball Green are the featured colours here…and I have to admit that when I first saw Summer Starfruit I wasn't really sure about it….but I love it on this card! Mixed Bunch is one of my favourite sets right now and I love the versatility of the set Perfect Punches.
This card is not complicated to make but I think has great impact, which is how I like to work! I often find that I need a card for an occasion moments before I need to send it or give it…so cards like this fit into my life perfectly!
Don't forget that my monthly card classes continue in the summer, and my Christmas Stamp a Stacks start at the end of July!! Please see my events page for more information or contact me if you have any questions.