Dec 19, 2008 | 3D samples, Christmas
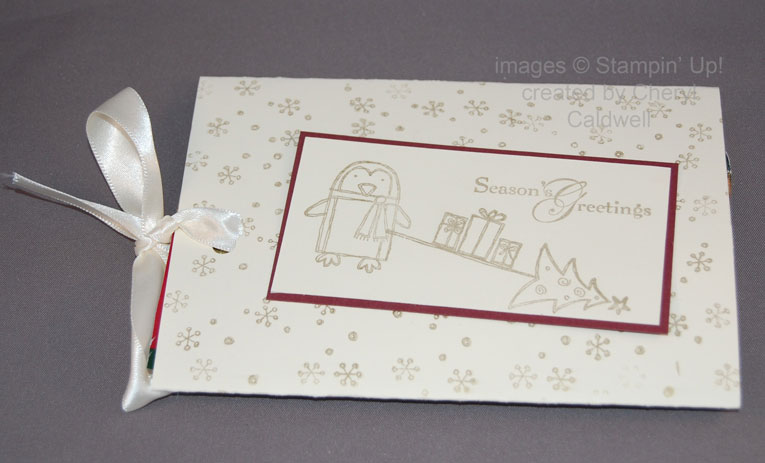
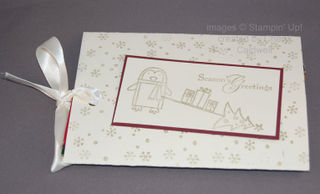 Cheryl gifted my son & I recently – I got to have this portion of the treat! She created a packet holder using the Punch Pals set, with the packages on the tree like a sled – so cute.
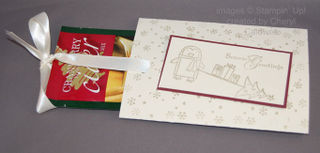 This is the slider portion open – with the treat! Essentially you create a flat tube, then punch a hole through both layers at the top; thread a length of ribbon through. You place the treat into the centre of the tube, on top of the ribbon. Slide it into place, then tie the ribbon. The recipient simply pulls up on the tied ribbon to slide out the treat (no untying necessary – so a great gift packaging idea for little ones to open!).
Thanks Cheryl, for the treat! I had the cider immediately after taking these pics!
Nov 18, 2008 | 3D samples, Tutorial
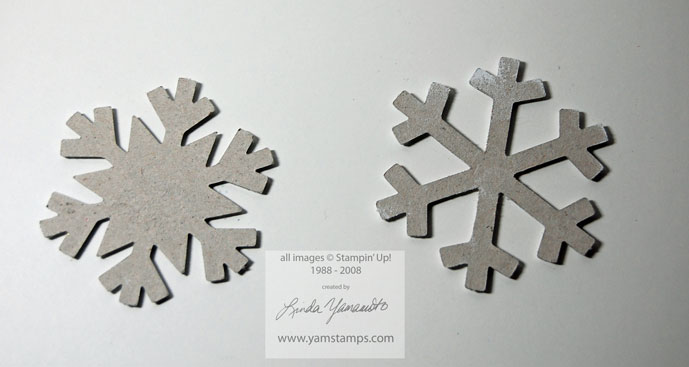
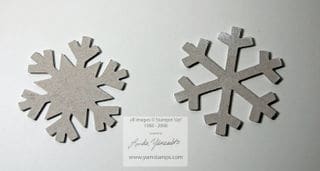 These are two of the snowflakes from Stampin' Up!'s die cut chipboard set On Board Something Seasonal. They're made of high quality acid-free chipboard and are very easy to pop out of the board. I was trying to decide which method to use to decorate the chipboard for the next Scrappers Club. So here's the "naked" chipboard.
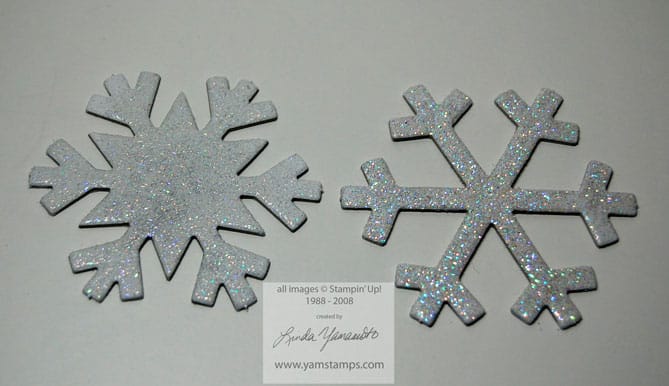
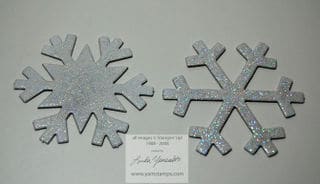 Here are the decorated snowflakes. I used white craft ink on both of them. I placed the snowflakes face down into the craft ink pad to coat them to get good coverage. Then, I used iridescent ice embossing powder (EP) on the left snowflake – coated with the powder & heated until it melted. The snowflake on the right was coated with heat & stick powder, melted with the heat gun, then coated with dazzling diamonds glitter & re-heated to "set". The EP snowflake is a little more subtle and glossy, the heat & stick/glitter snowflake a bit more sparkly and showy. You can click on the photo for a slightly larger view.
Thought I'd share this side by side comparison in case you were wondering which treatment to use on your chipboard. The Country Living Holiday Collection Chipboard shapes can also be treated in this manner. I used the heat & stick powder because I'm not great with glue…I'm a bit of a messy gluer (it ends up everywhere) so I personally find the heat & stick a bit more "neat".
Nov 7, 2008 | 3D samples, Events, rubber stamping
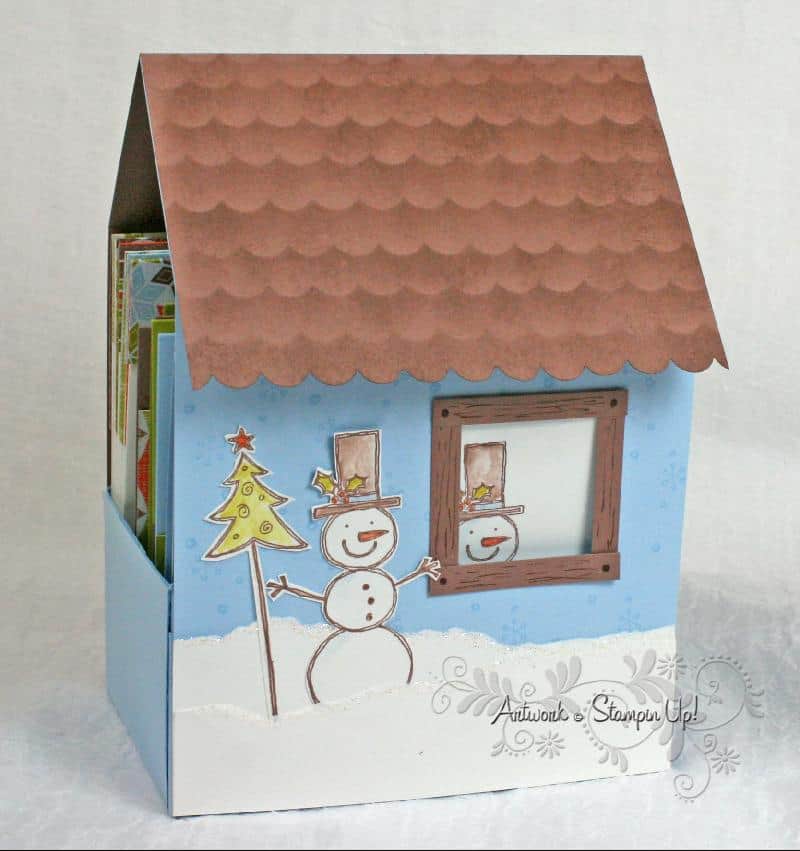
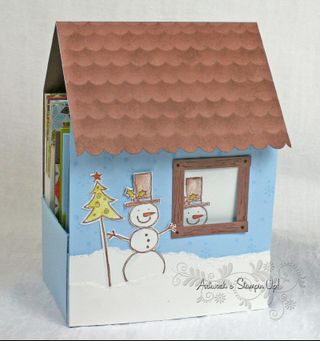 Newsletter subscribers had the heads up on this one – is this not the CUTEST card holder?!
My next themed class will be Punch Pals – Wednesday November 26 at 7 pm here in Burlington. We'll make this card holder plus six coordinating cards. I can see this being a great gift….or sending out the cards and keeping the card holder to hold the holiday cards & photos that will come in the mail to me! Class fee is $25 and includes all supplies.
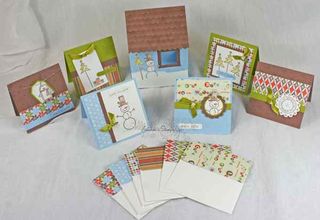 Can't make it the evening of the class? Class to go kit is also $25 (plus postage if applicable), includes precut cardstocks & embellishments plus full instructions. You will need to supply the stamp set, inks & adhesive; in addition, this class uses a number of punches. If you're interested in the class to go option, please email me and we can work out what additional supplies you might need.
In the meantime, I'm cleaning up from the first Christmas Card Clinic and getting ready for the next one! Perhaps I'll get all the glittery bits out of the dining room by next year…..lol…..in the meantime, I think it adds to the festive look!!
Nov 4, 2008 | 3D samples, specials
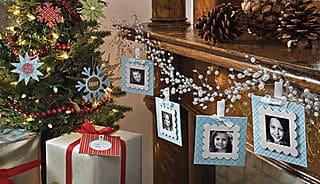 Stampin' Up! has teamed with Country Living Magazine to present the Country Living Holiday Collection Stampin' kit!
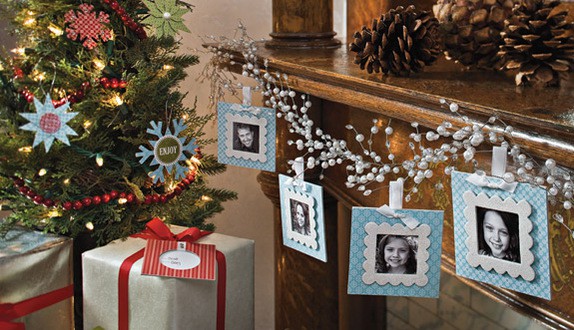
The kit comes with EVERYTHING you need to create fantastic ornaments and tags like the ones shown in this picture. When I say EVERYTHING – this includes the chipboard, designer series paper, cardstock, adhesive, stamps, ink and accessories (including glitter, jewelled brads, ribbon & silver elastic cord) – oh, and instructions! To purchase your set, click on the shop now link at the right, or go to www.yamstamps.stampinup.net, click on shop now & then click on specials. Alternatively, you can always email me to place your order.
Oct 4, 2008 | 3D samples, Announcements
 The new phase of Stampin' Up!'s Decor Elements product line has been released. There are some great holiday themed rub ons as well as new colour options!

There are also some great new designs for children's rooms. Available in different colours and shapes. CLICK HERE to view the online brochure featuring our ENTIRE Decor Elements product line. Ready to order? Click on the box at the top right of the blog!
For the month of October – I will include a free applicator tool with your Decor Elements order! (If you place your order online through www.yamstamps.stampinup.net, your tool will ship separately)
Contact me for more information or samples.
Aug 17, 2008 | 3D samples
Just a post to say thank you to all who managed to make it to my new catalogue open house and retired rubber sale. It was fun! I'm now gearing up for the first stampers and scrappers club of the year – this Wednesday evening. I'm excited to offer the scrapbooking club option as up until now, it's just been cards. If you're interested in joining a future club, please contact me for more information or to get on the list!
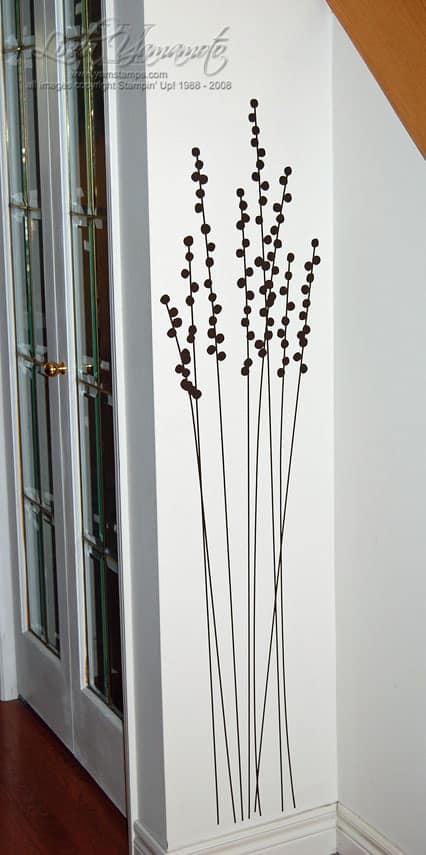
I recently (as in just before the open house on Saturday….) put up my decor elements on my main level – a little something to add to an otherwise plain area between my staircase & basement entrace!
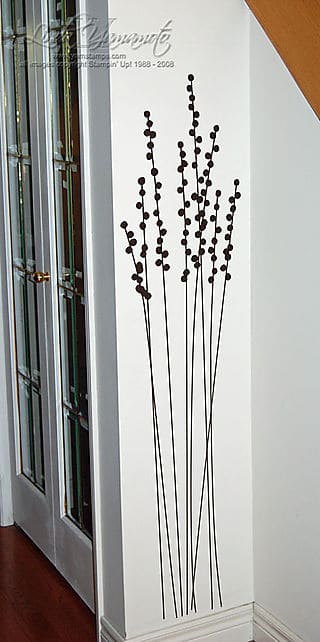 I was really pleased with how it turned out, and how easily and quickly it went up. We were able to practice applying these while at convention and I managed to pick up a few tips and tricks as well.
You'll be able to examine my handiwork close up if you attend a future class or club at my home! (hint hint – lol)

 Cheryl gifted my son & I recently – I got to have this portion of the treat! She created a packet holder using the Punch Pals set, with the packages on the tree like a sled – so cute.
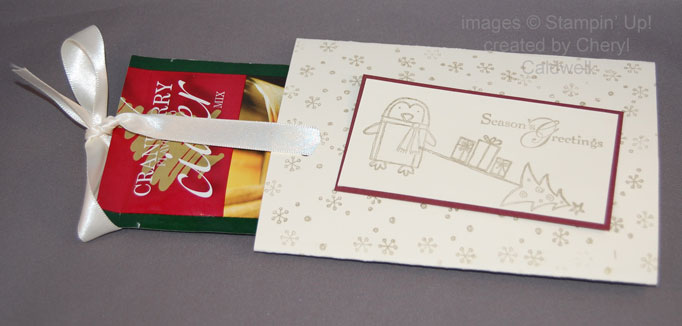 This is the slider portion open – with the treat! Essentially you create a flat tube, then punch a hole through both layers at the top; thread a length of ribbon through. You place the treat into the centre of the tube, on top of the ribbon. Slide it into place, then tie the ribbon. The recipient simply pulls up on the tied ribbon to slide out the treat (no untying necessary – so a great gift packaging idea for little ones to open!).