Feb 11, 2009 | 3D samples
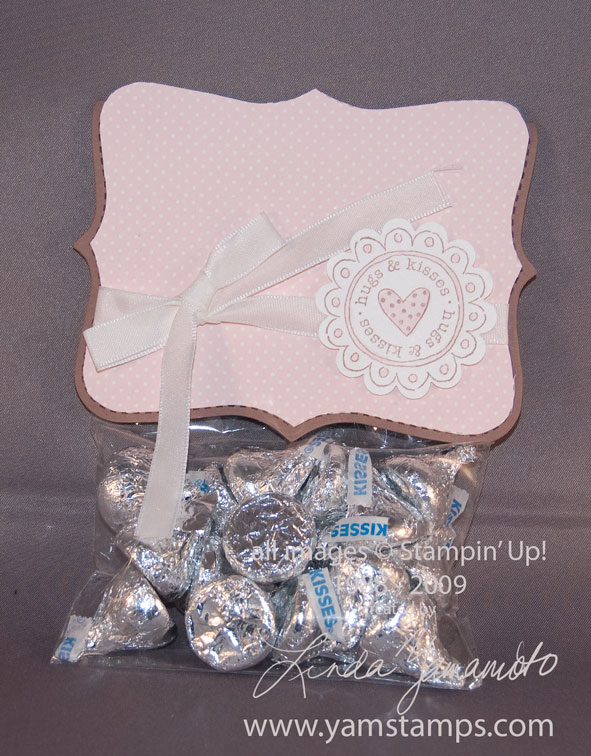
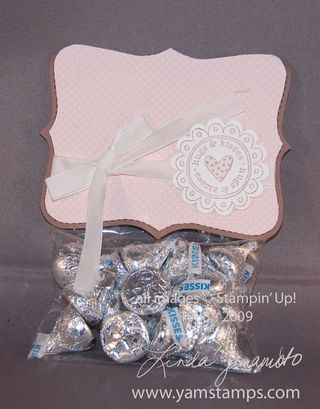 This is a super quick & easy way to present chocolates to a special someone! Put the chocolates into a cello bag, seal it closed with sticky strip and add a bag topper! This topper was created with the Big Shot Top Notes Die. The Close to Cocoa layer was created using a folded piece of cardstock – the folded edge is placed on the die so it's not cut. For the Candy Lane Designer Series Paper layer, I used the die with single layer, then trimmed around the score lines to make it a little smaller. A quick stamp job – using the hugs and kisses stamp from the Love You Much set, coloured in quickly with a blender pen & pink pirouette ink, then punched with the coordinating scallop circle punch…finished off with a little white taffeta ribbon. Room still to write a personal note, too! Makes a handful of chocolates into a more impressive gift!
Feb 10, 2009 | 3D samples, Announcements, Sale-A-Bration
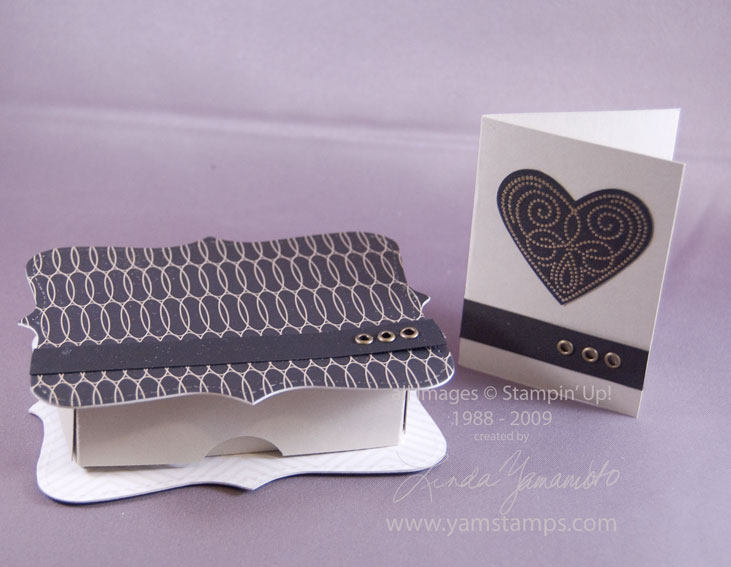
 Here's another look at the Top Note box and Love Note I quickly displayed on CH Morning Live… I used the Big Shot with the Top Note Die to create the top and bottom of the box, then assembled a quick box to go in the middle. Yes, I'm working on a video tutorial for this…
The little love note is made of sahara sand, and the black strip with antique brads matches the box. The heart is from the Sale-a-Bration set, Polka Dot Punches – all of the stamps in the set coordinate with a punch… By embossing the image with gold it makes it almost like stud work… I know black may not be the most romantic colour, but wanted to show that all Valentine's Day items do not need to be red or pink, especially if designed for a male!!
OK so covered the gift box, love note, and now for the BONUS! All new e-newsletter subscribers will receive a special tutorial in their inbox! So what are you waiting for? Enter your email in the box at the top left! Please note that I do welcome subscribers other than Canadians, but I cannot sell product to those outside Canada, and any specials will pertain to Canadians only…(sorry, Stampin' Up! rules).
Feb 6, 2009 | 3D samples
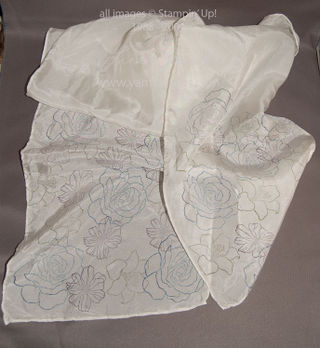
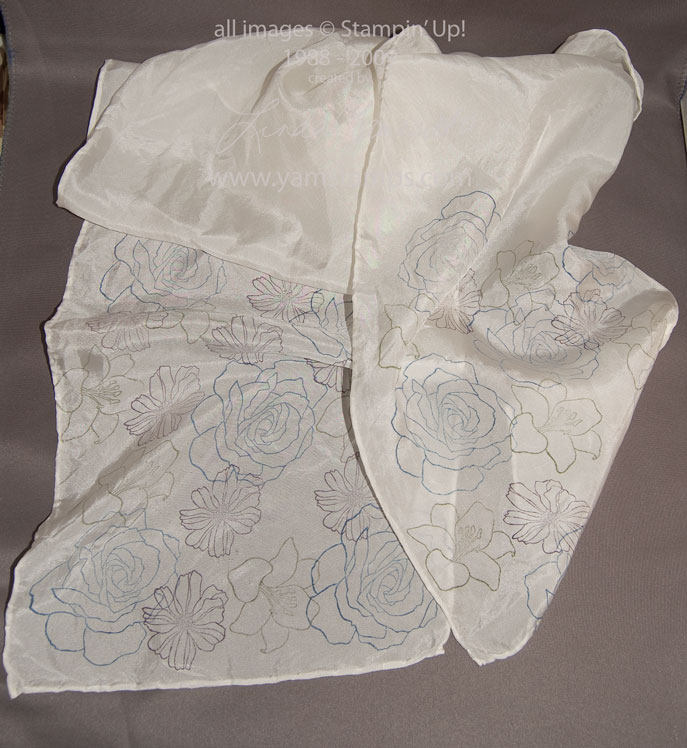
This is the handmade scarf I showed on CH Morning Live earlier today. It's a silk scarf, and we stamped on it with Stampin' Up! craft inks. The stamp set is Fifth Avenue Floral – I think it's one of my favourite new sets in the Spring-Summer Catalogue!
I am hoping to get more photos posted in the next little while, in the meantime, you can check out this page where I have a few photos of projects already up. I will be working on getting more photos and instructions up in the next while (to give you time to work on your own Valentine's gifts!!). In the meantime, you might consider attending my "Love"ly Little Gifts class next Thursday – contact me to register!
Feb 4, 2009 | 3D samples, Big Shot, Events
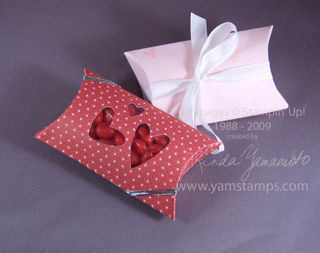
These are some examples of the handmade gifts I'll be showing on Friday morning, when I appear on CH Morning Live (around 8:10 am).
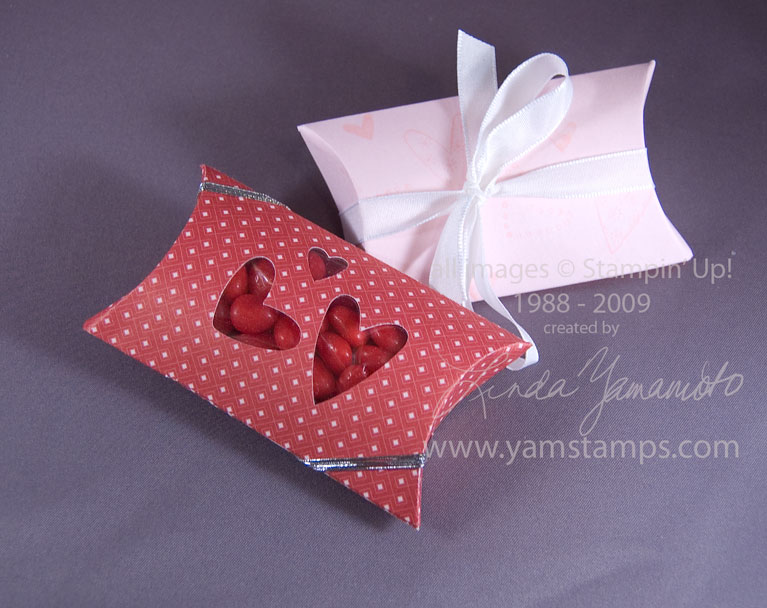
These were made with the Pillow Box die for the Big Shot. I stamped the hearts from the Stampin' Up stamp set Love You Much on Pink Pirouette cardstock for the one in the rear, and used some of the Candy Lane Designer Series Paper for the one in the front. I used the Heart to Heart punch to make a "window" so you could see the treats inside!
We'll also be doing a pillow box (complete with candy – got to get it out of my house so I don't eat it all!!) at the "Love"ly Little Gifts class on Thursday February 12th at 7 pm in Burlington. Contact me to reserve your spot!
Jan 4, 2009 | 3D samples, Events, rubber stamping
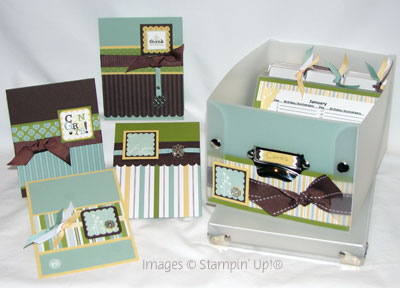
 This is a pic of the Card Organizer Class Projects. If you're like me, January brings a time to start fresh and arm yourself with a list of resolutions. A perpetual place on my list has been granted to "Be More Organized"… hmm I guess that's not a good thing if the same item keeps showing up year after year?! lol. Anyway – after this class we'll all have a place to keep cards plus a list for all those dates to remember and a few cards ready to send out. Getting them into the mailbox may be another thing entirely….says she who is still sending out holiday greetings. ahem.
Don't procrastinate any longer! (another thing on my list) – register NOW for this class – deadline is Jan 7th, cost is $40, class date is Wednesday Jan 21st, 7pm. January 7th is also the first stamping class – featuring all occasion cards (which of course, will fit into your card organizer…).
Oh – and what do you think of the blog's new look? I decided to spiffy it up a bit. The photo is in my front yard, where one of the local bunnies took a shortcut! Feel free to leave comments below or send me feedback directly.
Dec 24, 2008 | 3D samples, Christmas
This is from week 11 of my 12 weeks of Christmas emails this year – I thought I'd share it here if you still have some packaging needs for tomorrow!!


I know I can't be the only one that hangs on to the "nice" bags that I sometimes get from stores. This is a heavy duty paper bag with cord handles. I simply covered up the logo with this 3D tree I made, and also covered up the inside logos with a thin strip of designer series paper (hard to see in the picture). The tree is made from 4 squares of the Ski Slope Designer Series Paper, topped with 3 stars punched from metallic gold cardstock. I replaced the cord with the felt ribbon from the Alpine Ribbon Originals.
HOW TO:
1) Cut 4 squares from your designer series paper – 3"x3", 2.5"x2.5", 2"x2", 1.5"x1.5"
2) Each is folded the same way, and then adhered together to form the tree shape; I used a the flip side of the designer series paper for the trunk.
Step by step shots below for the basic fold…the first steps are basically scoring the paper.
start with your square fold in half, then unfold again
fold in half the other way, unfold fold diagonally, unfold, then fold on
the other diagonal & unfold


fold in half with crease at top poke in the side along crease lines
* if you are using patterned paper, (bring the top fold down so it's vertical)
to make design symmetrical, have the
design run horizontally*
previous step finished repeat on other side
bring the front right fold to the repeat with the other side – DONE!
centre line & crease

 This is a super quick & easy way to present chocolates to a special someone! Put the chocolates into a cello bag, seal it closed with sticky strip and add a bag topper! This topper was created with the Big Shot Top Notes Die. The Close to Cocoa layer was created using a folded piece of cardstock – the folded edge is placed on the die so it's not cut. For the Candy Lane Designer Series Paper layer, I used the die with single layer, then trimmed around the score lines to make it a little smaller. A quick stamp job – using the hugs and kisses stamp from the Love You Much set, coloured in quickly with a blender pen & pink pirouette ink, then punched with the coordinating scallop circle punch…finished off with a little white taffeta ribbon. Room still to write a personal note, too! Makes a handful of chocolates into a more impressive gift!