Jun 18, 2018 | Big Shot, cards, rubber stamping, Stampin' Up!
One of my past online classes was a Monochromatic Class – where you used one colour in your project. Sounds a little boring, but I promise, it isn’t! Plus it makes crafting a little easier, so what’s wrong with that?! So along those lines, I present a single colour leaf card.
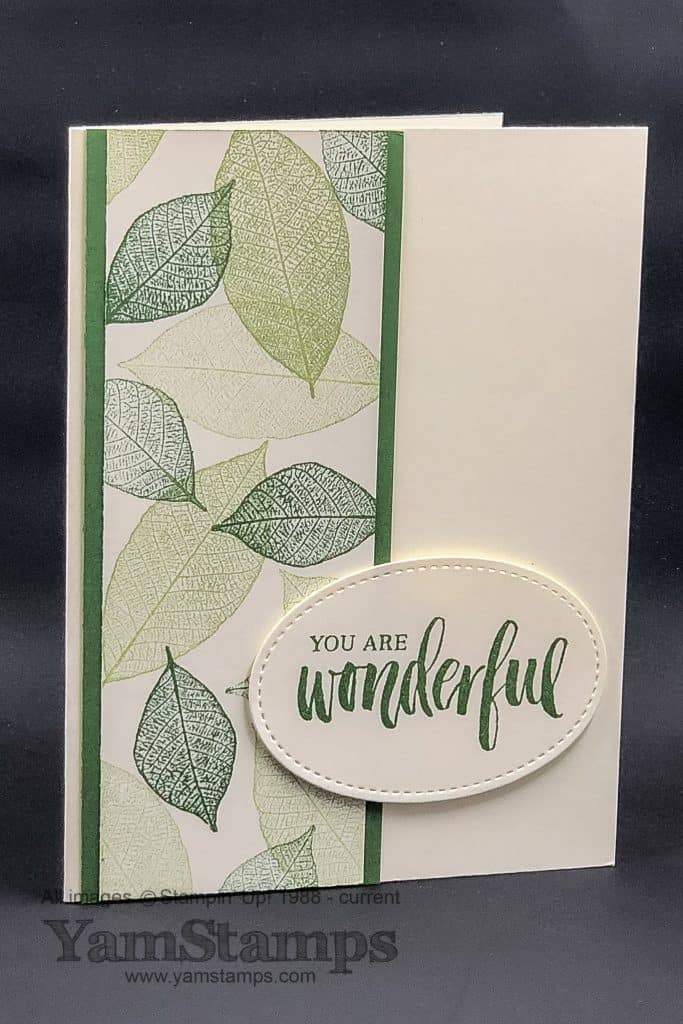
Notice that single colour doesn’t mean you can’t play around with shades of a particular colour! For this single colour leaf card, the base colour is green. In the Stampin’ Up! world, the colours are Garden Green and Pear Pizzazz. You can get further shades by using first, second or third generation images. First generation images mean ink the stamp, then stamp onto the paper. Second generation is inking the stamp, stamping off / stamping onto scrap paper, THEN onto the paper. So guess what third generation is…. Yes, 10 points for you if you said inking the stamp, stamping off twice on scrap paper THEN onto the project paper. Now, I do find that this technique works better with red rubber stamps (in the Stampin’ Up! world those would be the wood mount or clear mount stamps), rather than the photopolymer stamps, which don’t seem to hold onto the ink quite as well, at least when I’ve tried. You can still do this technique, but you want to stamp off with a light hand so there’s still enough ink left on the stamp surface.
The Rooted in Nature stamp set is available in Wood Mount or Clear Mount versions, and also can be bundled with the coordinating Nature’s Roots Framelits Dies.(Wood Mount Bundle / Clear Mount Bundle) For this card, though, I chose to use the Stitched Shapes Framelits to cut out my sentiment. I love this sentiment – perfect for special occasions or just because. In my case, it may end up being a graduation card…(I know I said that about my last card, but I need options…LOL).
If you are interested in trying out an online class, right now I have two current offerings – there’s the Clever Cards class – interactive card designs, and the new Scrapbook in a Box class which has an option to purchase the Class By Mail as well – so pre-cut cardstock/Designer Series Paper is sent to you! Check them out at YamStampsMore – or message me/leave a question below for more information. There’s always the in person options for classes as well – check out the YamStamps Events Page for details. Hope to see you in class soon – whether in person or online!
Jun 20, 2017 | Big Shot, cards, Stampin' Up!
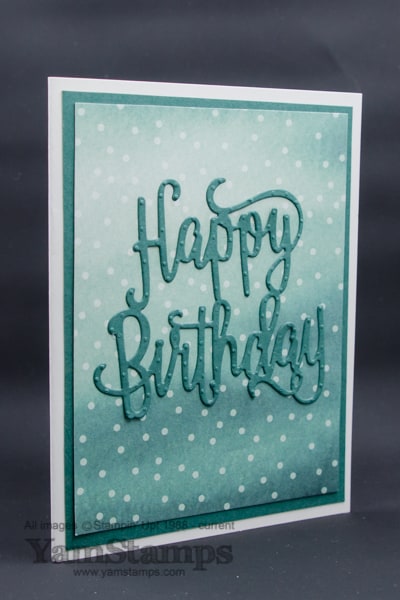
If you’ve attended a card making class with me, you’ll know that one of of my favourite thrifty techniques is to die cut or punch from the mat layer of a card. This thrifty die cut birthday card is an example of that technique! The words are cut with the Happy Birthday Thinlits die – and they come out as a single piece which makes it easy to adhere in place. I used the Multipurpose Adhesive Sheet to make it even easier! I cut my Tranquil Tide cardstock to 4.25″ x 11″, and placed it onto the adhesive sheet. I replaced the top liner sheet and then trimmed the adhesive sheet/liner so it lined up with the edges of my cardstock. I then cut the cardstock (with the adhesive and back liner in place) to 5.25″ x 4″ (reserving the left over for other projects or smaller die cut pieces). The words were die cut from the centre of this piece of cardstock. Since the Designer Series Paper goes on top of the cardstock, noone knows about the gaping hole!
The Designer Series Paper showcased on this card is Delightful Daisy. I love the watercolour / wash type effect on this paper – it gives more interest when you’re using it as a backdrop for projects. It’s adhered onto the (front side of the) Tranquil Tide cardstock with SNAIL, but then I just peeled off the backing from the adhesive on the backside of the cardstock and adhered it onto my Whisper White card. I peeled the backing from the back of the die cut words and adhered them in place on the cardfront. No fuss, no muss, and no waiting for liquid adhesives to dry (I’m usually an impatient crafter).
I was really happy to see the return of adhesive sheets in the latest Stampin’ Up! Annual Catalogue. They make this thrifty die cut birthday card easy peasy! Another way to use the adhesive sheets is to take a die cut piece and place it onto the adhesive to transfer the adhesive to the back of the die cut shape. (I’m getting ready to re-shoot my Subscriber bonus video and use that technique in the project I share).
Stampers Club members got to make this card as part of the club class this month. I like this card so much, it may appear in a future Monthly Card Class as well! If you are local to Burlington, please consider joining me for a class! No experience is needed, and your class fee covers all supplies required for the projects. This Saturday, June 25th (which by no coincidence is 6 months until Christmas), I’ll be having a Christmas Card Class! We’ll make 4 different holiday cards. I’ll be having holiday card classes each month leading up to December, so the more classes you attend, the more cards you’ll have ready to mail out before the postage deadline! Please contact me to register and make arrangements to pay the $20 class fee for the Christmas Card Class by this Thursday. Check out the YamStamps Events page for upcoming dates. See you soon!
Apr 26, 2017 | Big Shot, cards, Stampin' Up!
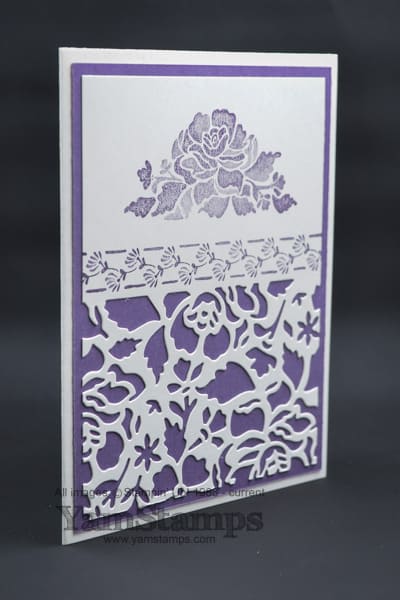
I love beautiful cards that are easy to make…and believe it or not, this card actually falls into that category!! Promise! This lovely detailed floral die cut card uses the Floral Phrases stamps set (available in wood mount or clear mount) and the coordinating Detailed Floral Thinlit Dies – the stamps and dies are available together in a discounted bundle (wood mount bundle or clear mount bundle) BUT ONLY UNTIL THE END OF MAY. Sorry for shouting, just don’t want you to miss out! The individual items WILL be in the new catalogue, but the bundles WILL NOT.
Anyway. The main image gives a kind of watercolour-y feel with the variations in degrees of intensity of colour. I love that I don’t have to do the work to get that effect! On this card, it’s stamped in Perfect Plum. The detailed floral die cut at the bottom of the cardstock is made by placing the flat edge of the larger thinlit along the border stamp image. Then it’s adhered onto Perfect Plum cardstock and onto the cardfront.
The new catalogue will be bringing back one of my favourite adhesives – adhesive in the form of a sheet – which will make adhering detailed die cuts even easier! If you need to make a detailed floral die cut card in the meantime….use the pointy end of the Multipurpose Liquid Adhesive, or the Fine-Tip Glue pen. We’ll be making this card in May’s Monthly Clard Class. Have you registered yet? Space is limited….so please don’t delay. Class will be Wednesday, May 3rd at 1pm or 7pm. See other upcoming events on the YamStamps Events Page.
Oh – and before I forget – if you’re in the Burlington ON area – mark Saturday, June 3 on your calendar! It will be the annual YamStamps New Catalogue Open House and Retired Rubber Garage Sale! More details to follow – look for info here on the YamStamps blog and in the May Paper Crafting Projects Newsletter – going to subscribers May 2!
Jan 2, 2017 | Big Shot, cards, Stampin' Up!
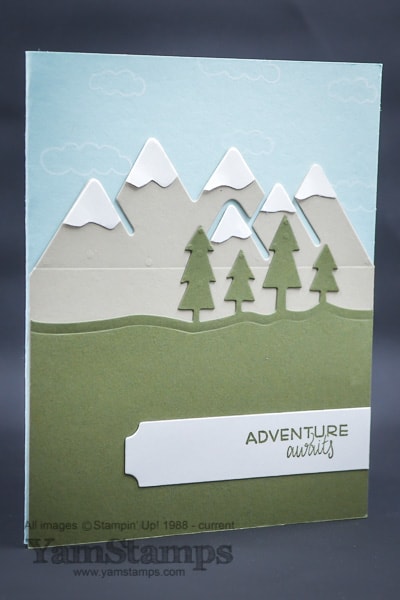
Sharing a card from a month or two ago as I think it suits a new year! I always like fresh starts – January is definitely one of those times.
If you’ve been to a class with me, you know I tend to avoid fussy cutting. Not that I don’t like it, I actually don’t mind it at times, but if there’s a faster, easier way of getting there, I’ll take it!! Die cutting is right up my alley! This card features the Stampin’ Up! Outdoor Adventures framelits, that I cut with my Big Shot. The framelits also come in a discounted bundle with the set Always an Adventure, available in clear mount or wood mount, which I used to stamp the clouds in the sky (which you can just barely see….) The tag with the sentiment is from the Project Life Cards & Labels framelits dies, and the sentiment itself (because I couldn’t resist it) is from the Places You’ll Go stamp set. I love the fonts in that set, and I do love this sentiment.
If you’re looking for adventure or new challenges in 2017 (see what I did there), why not look at building a hobby? Come to one of my classes and make some cards to send to friends and keep in touch with them in ways other than online! Or purchase the Stampin’ Up! starter kit – on Wednesday (when Sale-a-Bration starts), you’ll be able to get an additional 2 stamp sets of your choice, in addition to the $165 worth of product you can select! The YamStamps newsletter is going out tomorrow and will have some more information, and I’ll also post here as well. If you can’t wait, you can always contact me to get the scoop! I’ve also updated the YamStamps Events Page for the next few months.
Now that I’ve recovered from watching the first episode of season four of Sherlock (!!!! no spoilers here, though!!) I am looking forward to a relaxing day of watching the Tournament of Roses Parade on TV (can’t wait for the Burlington Teen Tour Band to appear in it next year!) and doing some Christmas clean up. OK so maybe not looking forward to the clean up bit….LOL. I’m also spending some time planning out my year ahead. I have a few goals that I will work to achieve in 2017, and a few that will be longer term. I have travel goals, business goals, and personal goals – including my eternal goal of organization and decluttering….(please tell me I am not the only one?!). Close on the horizon is the launch of my latest online class “Clever Cards”, and even closer is the start of Sale-a-Bration! So definitely, after I finish watching the parade, I’ll get back to work…. Happy New Year everyone!
Nov 1, 2016 | Announcements, Big Shot, specials, Stampin' Up!
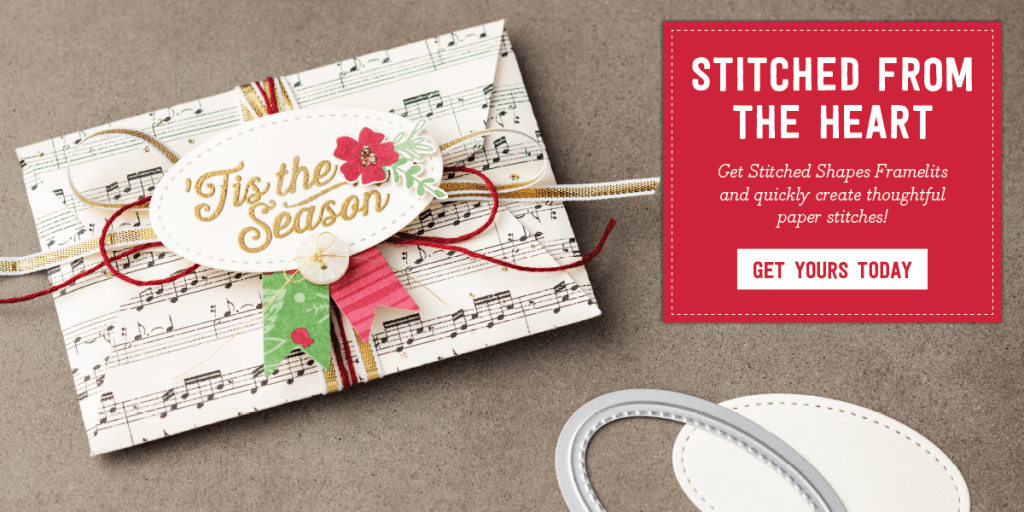
Starting today, Stampin’ Up! is offering the chance to pick up the new Stitched Shapes Framelits! These will be in the 2017-2018 Annual Catalogue, but you don’t have to wait until June to get them – they’re available for this month ONLY. As well, there are selected stamp sets on sale for 25% off that coordinate with the sizes of the shapes, but because these framelits feature ovals, circles and squares, they’re really quite suitable for a number of existing Stampin’ Up! sets.
List of Available Items in this Promotion:
I have included links to the items in the above table so that you can see them in the YamStamps Online Stampin’ Up! Canada store. You can take advantage of these deals by placing your order online before November 30, or by contacting me if you need assistance placing your order, or have any questions. Happy Shopping!
Oct 24, 2016 | Big Shot, cards, rubber stamping, Stampin' Up!
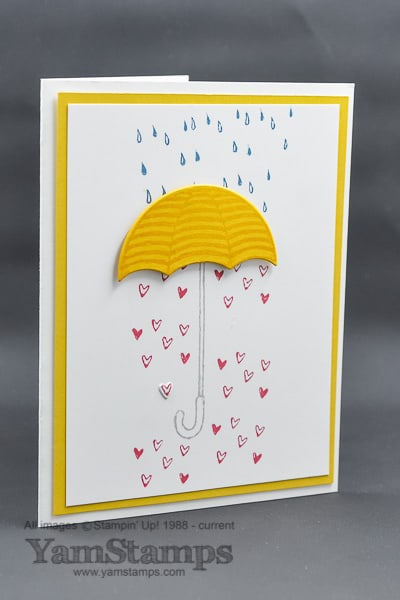
I’m sure you can relate (perhaps especially on a Monday?). One of those days where nothing seems to work in your favour and you’re constantly swimming up stream. Like Dory, my mantra is often “Just keep swimming”. Here’s a great card to send to someone who’s going through a bit of a rough patch, and it’s perfect for a Manic Monday, I think! This card is easy to reproduce and a perfect way to brighten someone’s day. It uses the Stampin’ Up! Canada Weather Together Bundle which includes the Umbrella Weather Framelits and Weather Together photopolymer stamp set.
Colours used are Crushed Curry for the background and umbrella top; Island Indigo for the raindrops, Real Red for the hearts and Smoky Slate for the umbrella handle. I did the usual thrifty trick of stamping the umbrella top in the centre of the Crushed Curry cardstock, and die cutting it before using the remainder of the cardstock as the backing for the main image piece. Noone sees the umbrella shaped hole behind the other layers! Since this set has coordinating images and framelits, I was able to cut out a few hearts easily, and add one or two to the front of the card with the Fine-Tip Glue Pen. I combined Thick Whisper White cardstock for the cardbase and regular Whisper White for the top layer. This way, the whole card feels substantial, but it’s not too bulky or heavy, especially since the umbrella top is raised with Stampin’ Dimensionals.
I’m off to continue on my Manic Monday….prepping for the Christmas Card Class on Wednesday – going to be a fun one with lots of bling! The registration deadlines for the November Christmas Card Class and the Tin of Tags Class are coming up soon – visit the YamStamps Events page for more details and registration information. Hope to see you in class soon.


