Jan 10, 2019 | Big Shot, cards, Occasions, Seasonal Catalogue, Stampin' Up!
One of my issues with Valentine’s Day Cards is that they tend to be all flowery, frilly and over the top, and that’s not really my style. Most of my class attendees are females, and most of them are giving these cards to males, so I thought I’d come up with a more Masculine Valentine’s Day Card design to use in my January classes. More gender neutral or suitable for someone who appreciates more streamlined designs without too much fuss. Sorry. Likely a bad description for a good card, so perhaps I should just go ahead and share it?!
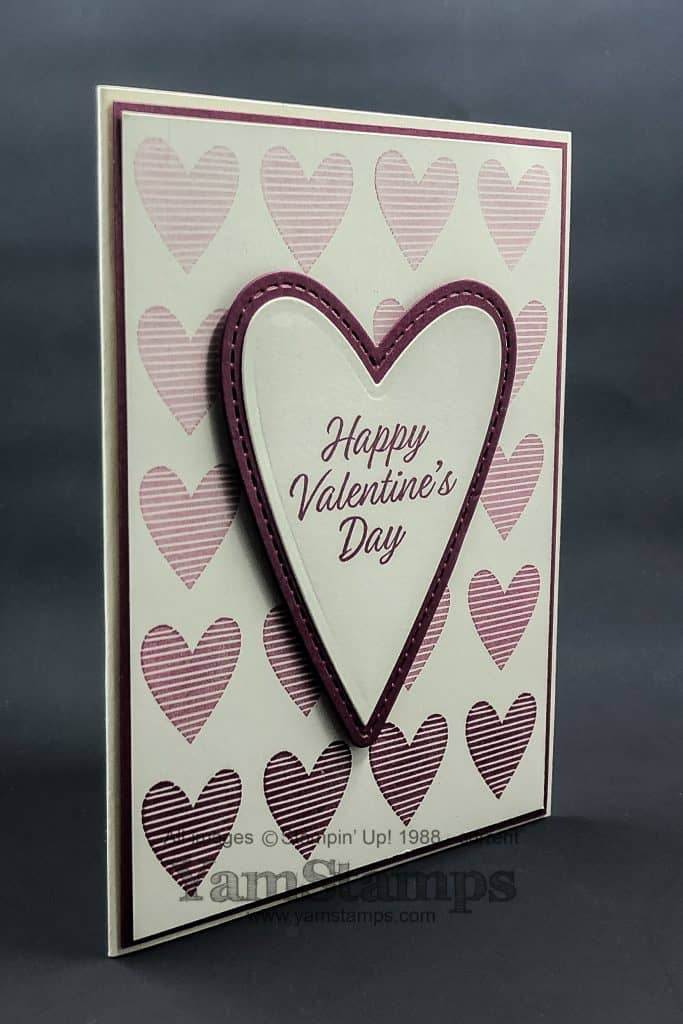
So this masculine Valentine’s Day Card uses the Stamparatus – which makes the ombré pattern sooooooo easy. I wanted the darkest heart at the bottom of the card, so I actually stamped the cardfront upside down – that is, I positioned the heart upside down so that when I did the hinge technique, the hearts faded out so the palest heart was at the top. The hinge technique is where you stamp the image, and then move the Stamparatus plate down one (or more) hinge spots, and restamp the image. You can see how this works in this YamStamps Facebook Live I did in November.
I used the Occasions Catalogue Meant to Be Bundle for this card. The bundle includes the Be Mine Stitched Framelits Dies, and the Meant to Be stamp set, which is one of the new CLING stamp sets from Stampin’ Up! These red rubber stamps have a new and improved sticker system which means your stamps will really cling to your clear blocks or Stamparatus. Some of the images and framelits are the traditional more flowery type of images, and scallop border edges, but for a Masculine Valentine’s Day Card, I stuck to the more linear look image, the stitched edge heart, and the deeper colour of Merry Merlot.
We made this card at the Monthly Card Class, and I’ll bring it out again for Stamper’s Club, because I like it so much! If you’d like to make this masculine Valentine’s Day card, you can join the Stamper’s Club, or host a card making party with friends before Valentine’s Day (we could do all valentines, or a mix of occasions)! This is a GREAT time to host a card class – because it’s Sale-a-Bration! If you place a $60 product order, you can select a Sale-a-Bration item for free – and hosts can earn more free product with qualifying total party sales. Contact me to book a date! You can host your friends and family class at your place or mine – whichever is easier. Please contact me as soon as possible so you have the best choice of available dates. Looking forward to hearing from you!!
Jan 6, 2019 | Big Shot, cards, Occasions, Stampin' Up!
The new Occasions Catalogue has some great new items! Today’s Sunday Swap Share is this die cut butterfly card that I created for a recent demonstrator card swap. I apparently have a thing for butterflies…so check out the YamStamps Instagram feed to see another Butterfly Card that I did for a different demonstrator card swap, using Occasions Catalogue product plus Sale-a-Bration product that you can select as your freebie with a $60 product order.
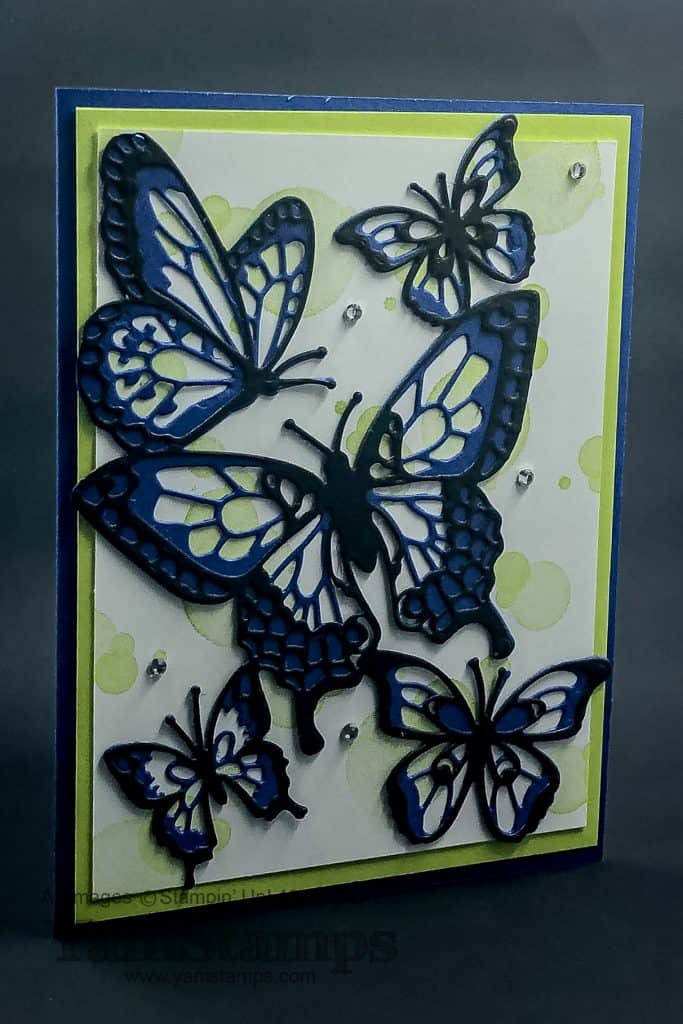
The butterflies are made up of two layers of die cuts, and they’re each one piece (all the butterflies are attached to each other). They really are the centre showpiece for this die cut butterfly card. I used the Beauty Abounds Bundle from the Occasions Catalogue. The Beauty Abounds Stamp Set is one of the new “Cling” stamp sets. It’s red rubber, with a new, improved super sticky label that will really cling to your clear block or Stamparatus. It’s available in a discounted bundle with the Butterfly Beauty Thinlits Dies. For this card, I used one of my favourite colours, Blueberry Bushel, for the back layer of butterflies, and used Basic Black for the top layer. The background uses Lemon Lime Twist to give it a bit of “pop”, and some Rhinestone Basic Jewels for a bit of bling.
One of the perks of being a Stampin’ Up! demonstrator is getting first looks and first access to upcoming catalogues and products! If you’re interested in having your own Stampin’ Up! business, now is a GREAT time to join. During Sale-a-Bration (that is…now until March 31st), you can get an additional $60 in free product! For $175, you can get $225 worth of product of your choice, PLUS the exclusive Craft & Carry Tote. This is the ONLY way to get this craft tote bag at this time. If, by some crazy chance, you don’t feel you need another bag….(I’m not sure how that feels…LOL), you can get the Starter Kit without the Tote for just $135. You get all that Stampin’ Up! product and all the basic business supplies to get your business off the ground running. Plus you’ll get my support when you sign up as part of my “Eh” Team of stampers. If you’d like more information or need help selecting your Starter Kit products, you can contact me, and RSVP to attend the no charge Information Evening, this Thursday, January 10th at 7pm. If you prefer to read about it… you can check out this FAQ page…or if you prefer to just take action, you can join my team here.
A reminder that January’s Monthly Card Class is THIS Wednesday, January 9th at 1pm or 7pm. If you want to get your year off to a creative start, please contact me to reserve your spot! Spaces are limited. Cost is $20 and includes all supplies required. Hope to see you soon!
Nov 28, 2018 | Big Shot, cards, Christmas, Limited Time, specials, Stampin' Up!
I have a thing for snowflakes, if you couldn’t tell. Mostly the paper ones, not so much the ones that have to be shovelled…so this Silver Snowflake Card is right up my alley. It was made during my November Christmas Card Class – which also used the Festive Farmhouse Elements. Thankfully, I’d purchased the class supplies before they became unorderable – but you can recreate this card using a stamped sentiment or die cutting words/letters.
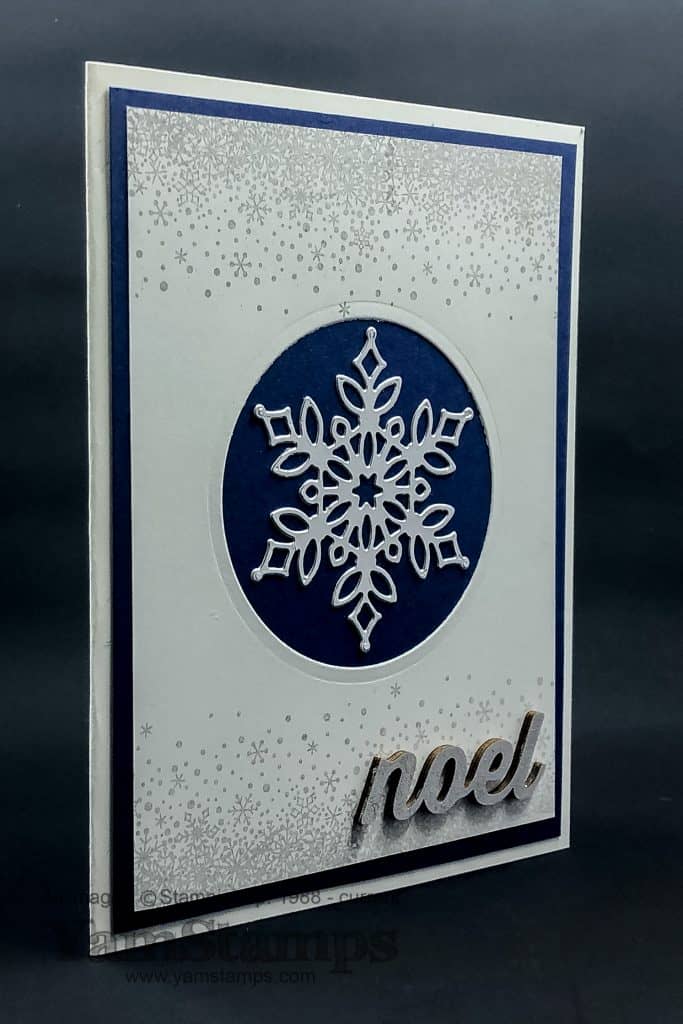
The wooden elements had a grey/silver colour on one side, and we added some Clear Wink of Stella Glitter to it (though I think it’s a little hard to see in this photo) to give it extra bling. The central snowflake is cut from a Silver Foil Sheet using one of the snowflakes from the Snowfall Thinlits Dies. The border is from the Snow Is Glistening set stamped in Smoky Slate and the Stamparatus using the “hinge technique”. We stamped the image once, then moved the Stamparatus plate a couple of hinges over and restamped to create a continuous line of snowflakes along the edge of the cardstock. So easy!
A reminder that we are in the last few hours of the last online sale from Stampin’ Up! – selected tools and ink pads are 10% off until 1150pm Mountain Time today. We are also in the last few days of the Snowflake Showcase items (some of which are featured on today’s Silver Snowflake card). Those products will not be available after November 30th…so please don’t hesitate and miss out!! You can shop online in the YamStamps Online Stampin’ Up! Canada store, or you can contact me if you need assistance placing an order or have any questions. Stampin’ Up! will ship to Quebec though the online shopping portal will NOT work – but you can contact me and I can enter the order for you and have it shipped directly to you. Happy shopping!
Oct 29, 2018 | Big Shot, cards, Manic Monday, Stampin' Up!
Sharing a simple handmade sympathy card idea with you. Sympathy cards are often ones we need to have on hand but not ones that we are often inspired to create. This card could be used for any number of purposes by just changing the featured sentiment and/or colour scheme, perfect for a “Manic Monday” project – a project you can create even if you don’t have a lot of time.
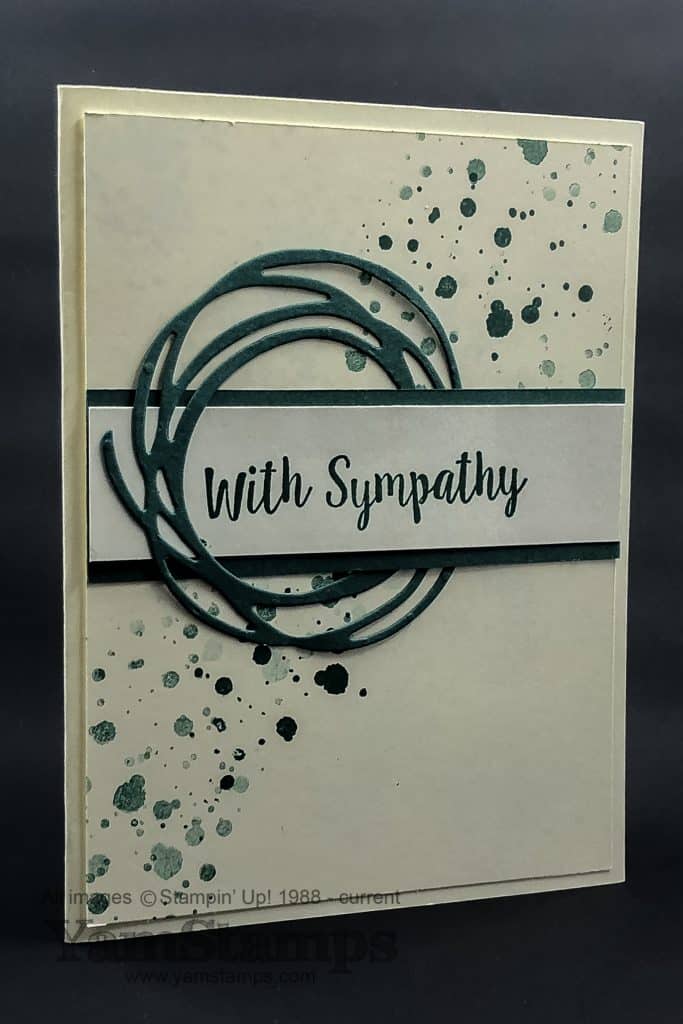
I always think that a single colour scheme is very elegant (and very easy). This card features Tranquil Tide (a 2017-2019 In Colour) and Very Vanilla. The splatters are from the Swirly Bird Set, and the die cut is from the coordinating Swirly Scribbles Thinlits Dies. The splatters are stamped in first, second and third generation images to give a variation and depth. A first generation image is where the stamp is inked and then stamped onto the cardstock. Second generation = the next image stamped by the stamp WITHOUT reinking in between. It’s often best to ink the stamp and then stamp onto scrap paper and THEN onto your project if you want a second generation image. I’ve often found that when I am stamping images off the edge of the cardstock and re-stamp right away that my second generation image can be uneven because the ink didn’t get used up evenly on the rubber surface. For this simple sympathy card, the swirl was die cut from Tranquil Tide cardstock and then fed over the sentiment strip. Bonus points if you can figure out what motivated this design choice….
If you guessed (or inspected closely) that it was because I got an ink smudge on my sentiment strip, you are correct!! Somehow, I managed to smudge a spot on the sentiment, and I found that the die cut swirl could be positioned to distract/cover up that little error. In the end, I think it’s much more interesting than if I had used it behind the sentiment strip (which is where I originally thought I would place it…). Simple Fix for a Mistake on a Simple Handmade Sympathy Card! The sentiment is from the Better Together set, which is available in wood mount or red rubber clear mount. That set has a number of different sentiments so you could change out the sentiment and colours on this card design for an easy variation.
Are you a YamStamps Mailing List subscriber? A special exclusive for subscribers is the Annual Twelve Weeks of Christmas. This week brings Week FIVE (can you believe it?!), and the last week of card ideas. We move on next week to gift ideas. Like the “regular” YamStamps emails, each project has a picture, supply list (with links for easy reference), and complete instructions. You can jump in and get the remainder of the project ideas by subscribing now! You can subscribe in the sign up box on the YamStamps site itself, or click here to be on the list. You’ll also get access to a subscribers only free video tutorial. See you in your inbox soon!
Oct 5, 2018 | Big Shot, birthday, cards, Stampin' Up!
Stampin’ Up! has so many great Designer Series Paper packages. These coordinating patterned papers make paper crafting a snap – and here’s an easy birthday card to share! The main feature is the die cut sentiment, and then you can change up the background paper to suit your need.
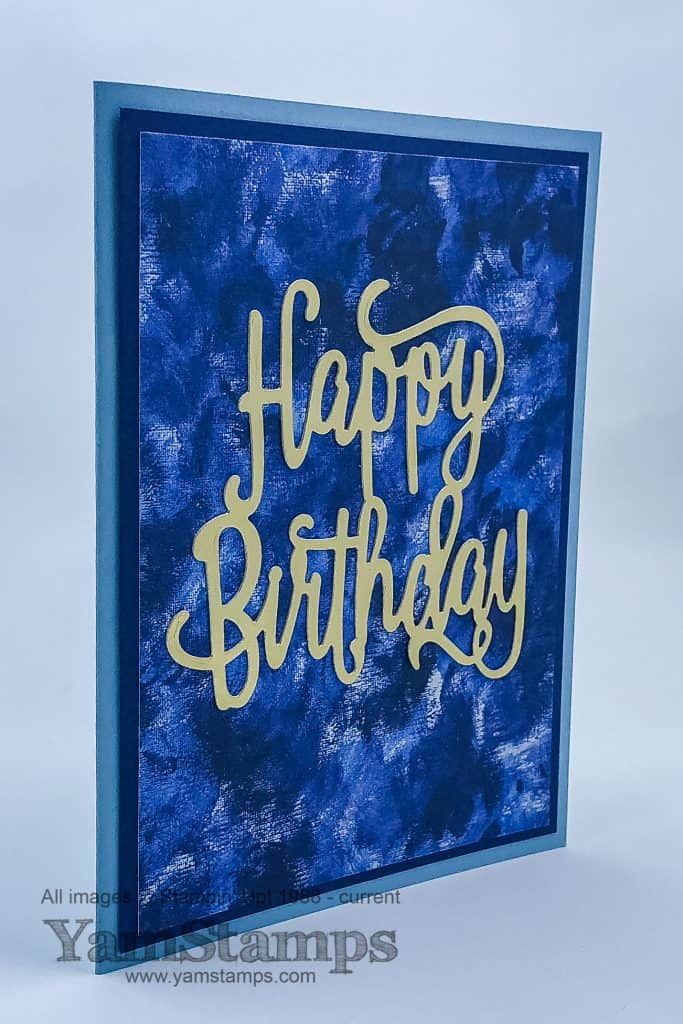
The sentiment on this card is created with the Happy Birthday Thinlits Die and Gold Foil Sheets. There’s a couple of tips to share with you with this thinlit and the gold foil to be sure this easy birthday card is…easy. First – when you die cut the Gold Foil sheet and remove it from the die, you may notice some “bumps” on the foil from the thinlit die. You can remove these or smooth them out by running the die cut shape through your Big Shot a second time on its own – just be sure that the Plastic Cutting Plate next to the Foil side/good side is fairly blemish free. I tend to try to use one Plate as the bottom one all the time, and the other Plate as the top one all the time, so that only one gets really scuffed up. A non-scarred Plate will not transfer any marks to the foil sheet. To adhere the die cut shape to your card, there’s two methods I prefer. One is to use the Multipurpose LIquid Glue – use the pointy tip end and just apply dots to the thicker areas on the back of the die cut. The other way I like is to use a Multipurpose Adhesive Sheet. If you want to use an adhesive sheet, adhere the non-cut cardstock or foil sheet to the adhesive sheet BEFORE die cutting. Then after it’s cut, you just peel off the remaining liner paper and adhere it in place.
I like the abstract pattern of this Designer Series Paper – it’s from the Garden Impressions package. If you want a more floral look, you could simply change out the paper – or in this case, flip the paper over! The flipside of this pattern is a random floral design. See? It really is an easy birthday card! You could make a whole bunch of these in advance using different papers and then have them on hand when you need a birthday card. If you are looking to build your stash of cards and want a regular outing, consider joining the Stampers Club! Each month, on the third Monday, the Stampers Club members get together for their class – at 1pm or 7pm (you can see dates on the YamStamps Events Page). Each member commits to 6 months of membership, during which time they place a minimum order at each class. Then, once during their 6 month membership, they’ll also receive a minimum of $20 free product of their choice (or $20 towards a Demonstrator Starter Kit, their choice). It’s a great way to get to know other people who are interested in crafting, and a fun afternoon or evening out! Contact me for more information or to sign up. New members are welcome to start at any time. See you in club soon?!
Sep 30, 2018 | Big Shot, birthday, cards, Seasonal Catalogue, Stampin' Up!
Happy Sunday to you! Can you believe it’s the end of September already?! Today’s Sunday Swap Share is a gorgeous fall birthday card – but you could easily switch out the sentiment to suit your purposes for any card you’d like to send out this autumn. Today was a bit of a rude awakening for me – I spent the last few days in New Orleans at a business retreat/mastermind. It was great to see my fellow stamping business owners, mahy who have become such good friends. The weather was very humid and warm, and the food was great….and now I’m back to reality in Ontario where it’s autumn weather and I have to cook for myself LOL!!!


A couple of touristy shots from the trip including the NOLA equivalent of stopping at the doughnut shop?! You can see some other photos from my trip on the YamStamps Instagram account and Facebook page.
So back to that Sunday Swap Share…being at the retreat/mastermind these past few days have reinforced to me that stampers really are some great people! Lots of ideas, inspiration and sharing occurred as we focused on running and growing our businesses. Another aspect of this line of work is of course the creative side. I often will participate in smaller, organized card swaps to get creative inspiration for myself (and thus for my cusomters!) – and I love seeing samples with sets that I might not own myself (yet?!).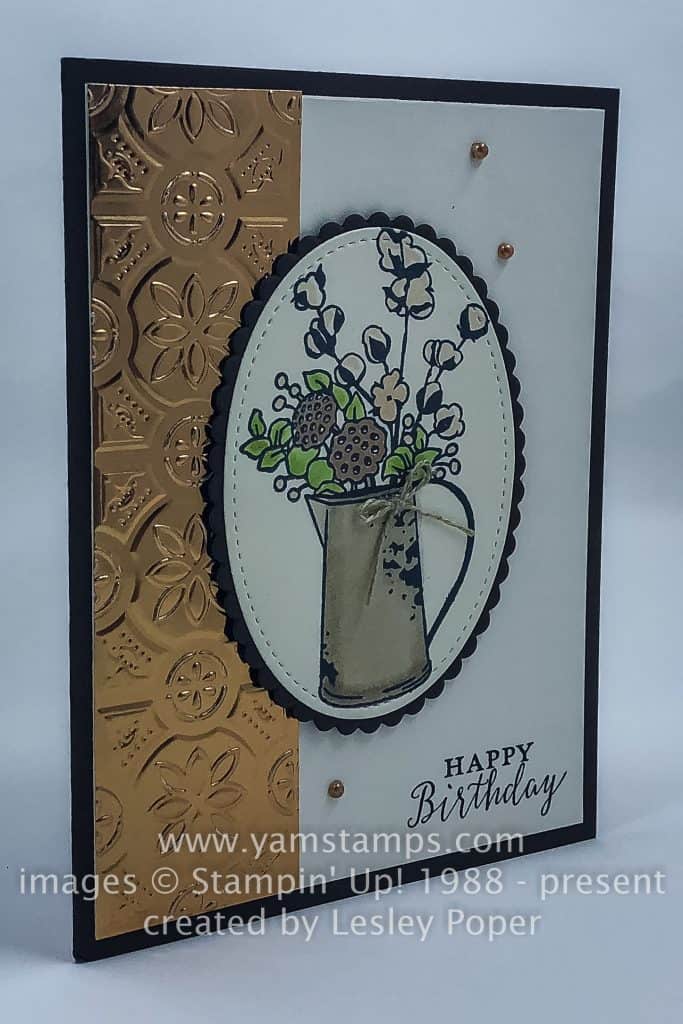
This card was created by Lesley Poper. I love the effect of the Tin Tile Dynamic Textured Impressions Embossing Folder on the Copper Foil Sheet.The depth from the dynamic folders really is quite stunning! The main image on this card is from the Country Home stamp set. I believe that she used Stampin’ Blends to add colour to the image. The sentiment is from the set Detailed With Love, which is available in red rubber clear mount or red rubber wood mount. The colours and sentiment make this a fall birthday card, but as I mentioned, you could change out the sentiment and even the bouquet )the stamp set has options) and/or colours to suit whatever card giving occasion you have!
If you are looking for seasonal cards, the October Christmas Class is scheduled for Wednesday, October 24. The 1pm class is already full! There are still some spots in the 7pm class though! Please contact me to register by October 9th – there are some options for this class – $20 version for card supplies only – $30 includes 1/2 package of Joyous Noel Designer Series Paper and $40 includes a full package of Joyous Noel Designer Series Paper. For the paper included options I will cut your card supplies from your portion of the paper, and you will have the remainder to take with you, which will be more than enough to recreate those designs or use them for other projects. If you register after October 9th please note there will be an additional fee to ensure that your class supplies will arrive in time for your class. Again – please contact me to register or if you have any questions. Upcoming events can be seen on the YamStamps Events Page. Hope to see you at a class or event soon!


