Oct 10, 2013 | Big Shot, cards, Christmas
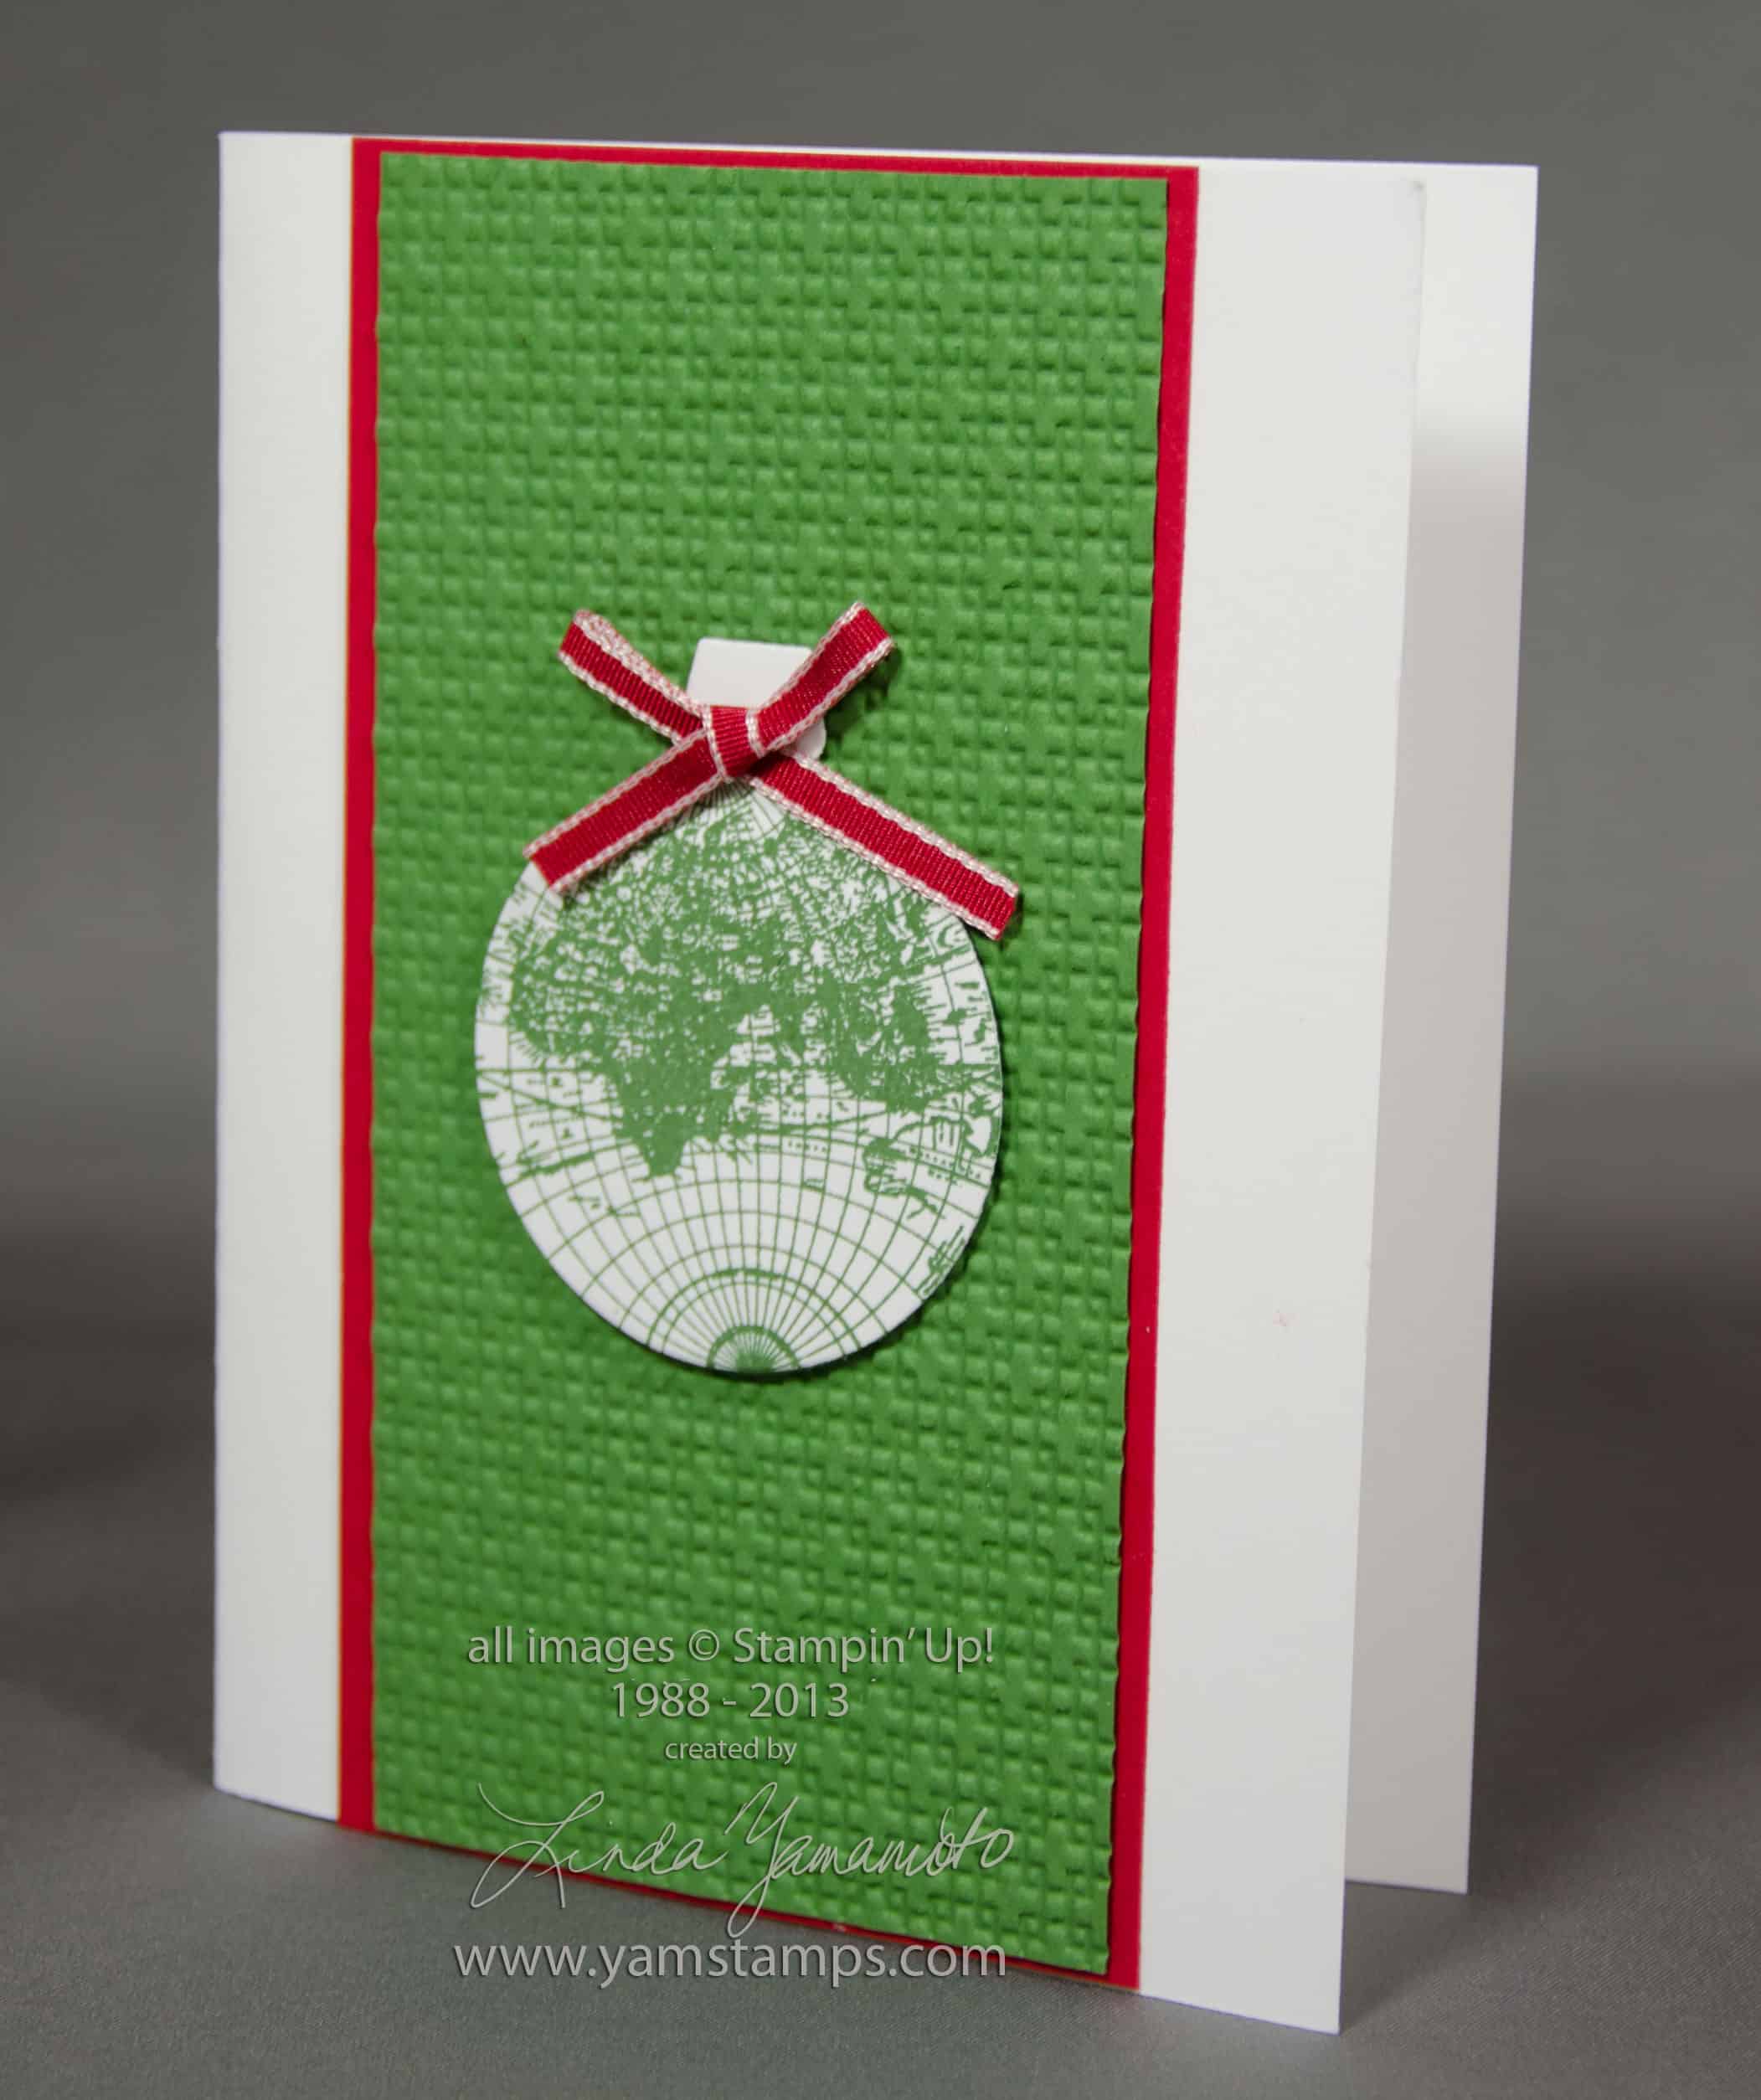
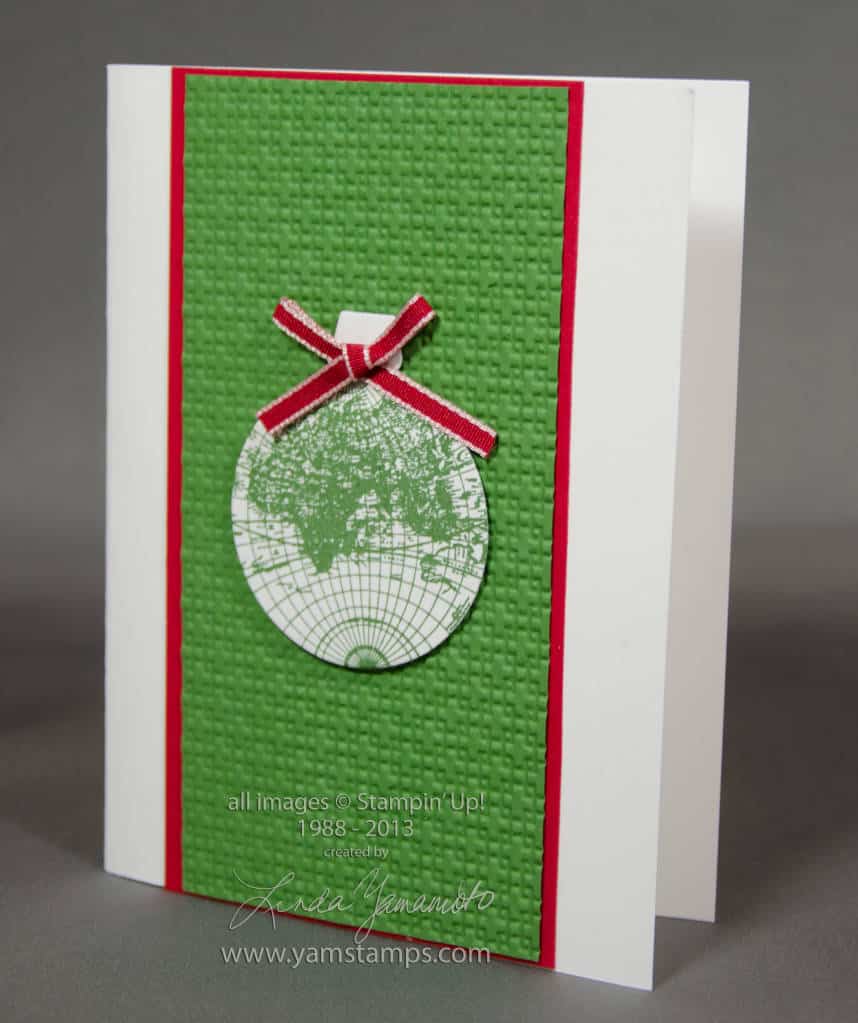 I’d tweeted about a great idea I’d visualized for a card…but you know how it goes with those ideas, sometimes…looks fantastic in your imagination, but in real life, doesn’t work out. Well this one worked! OK so I may rework the background again at some point, but it was the “ornament” that I was visualizing. I used the globe stamp from The Open Sea (a non-Christmas set), and paired it with the ornament framelit from the Holiday Ornaments framelits set that is still available (though not featured in the current catalogue and kind of hard to find on the online store site!). Anyway, it fit well enough for me to be happy with the result. Add a ribbon and there you go! The inside sentiment is “Joy to the World” but “Peace on Earth” would also be appropriate, don’t you think??
I designed this card for the October Christmas Card Class. If you are just getting into holiday card mode (or vaguely realizing that there’s a holiday coming up at some point in the next while…) there’s the November & December Christmas Card Classes still to come. Each month features 4 different cards (and different from the month before as well). You’ll have plenty of ideas if you want to recreate some of them for mass mailing. OR….consider attending my November 30th Stamp a Stack or Christmas Card Clinic. You’ll have your choice – 10 cards of 5 different designs, or 10 (or more) cards of the same design. Watch for the sign up in the next couple of weeks. Of course, there’s also the 12 Weeks of Christmas mailings – 2 weeks down, 10 to go…if you’re on my mailing list, you’ll automatically receive these special mailings.
In the meantime, I’m off to start thinking about my Thanksgiving menu! (Order turkey – check; everything else for the meal: ummmmm)
Sep 22, 2013 | Big Shot, cards, Christmas, Stampin' Up!, Tutorial
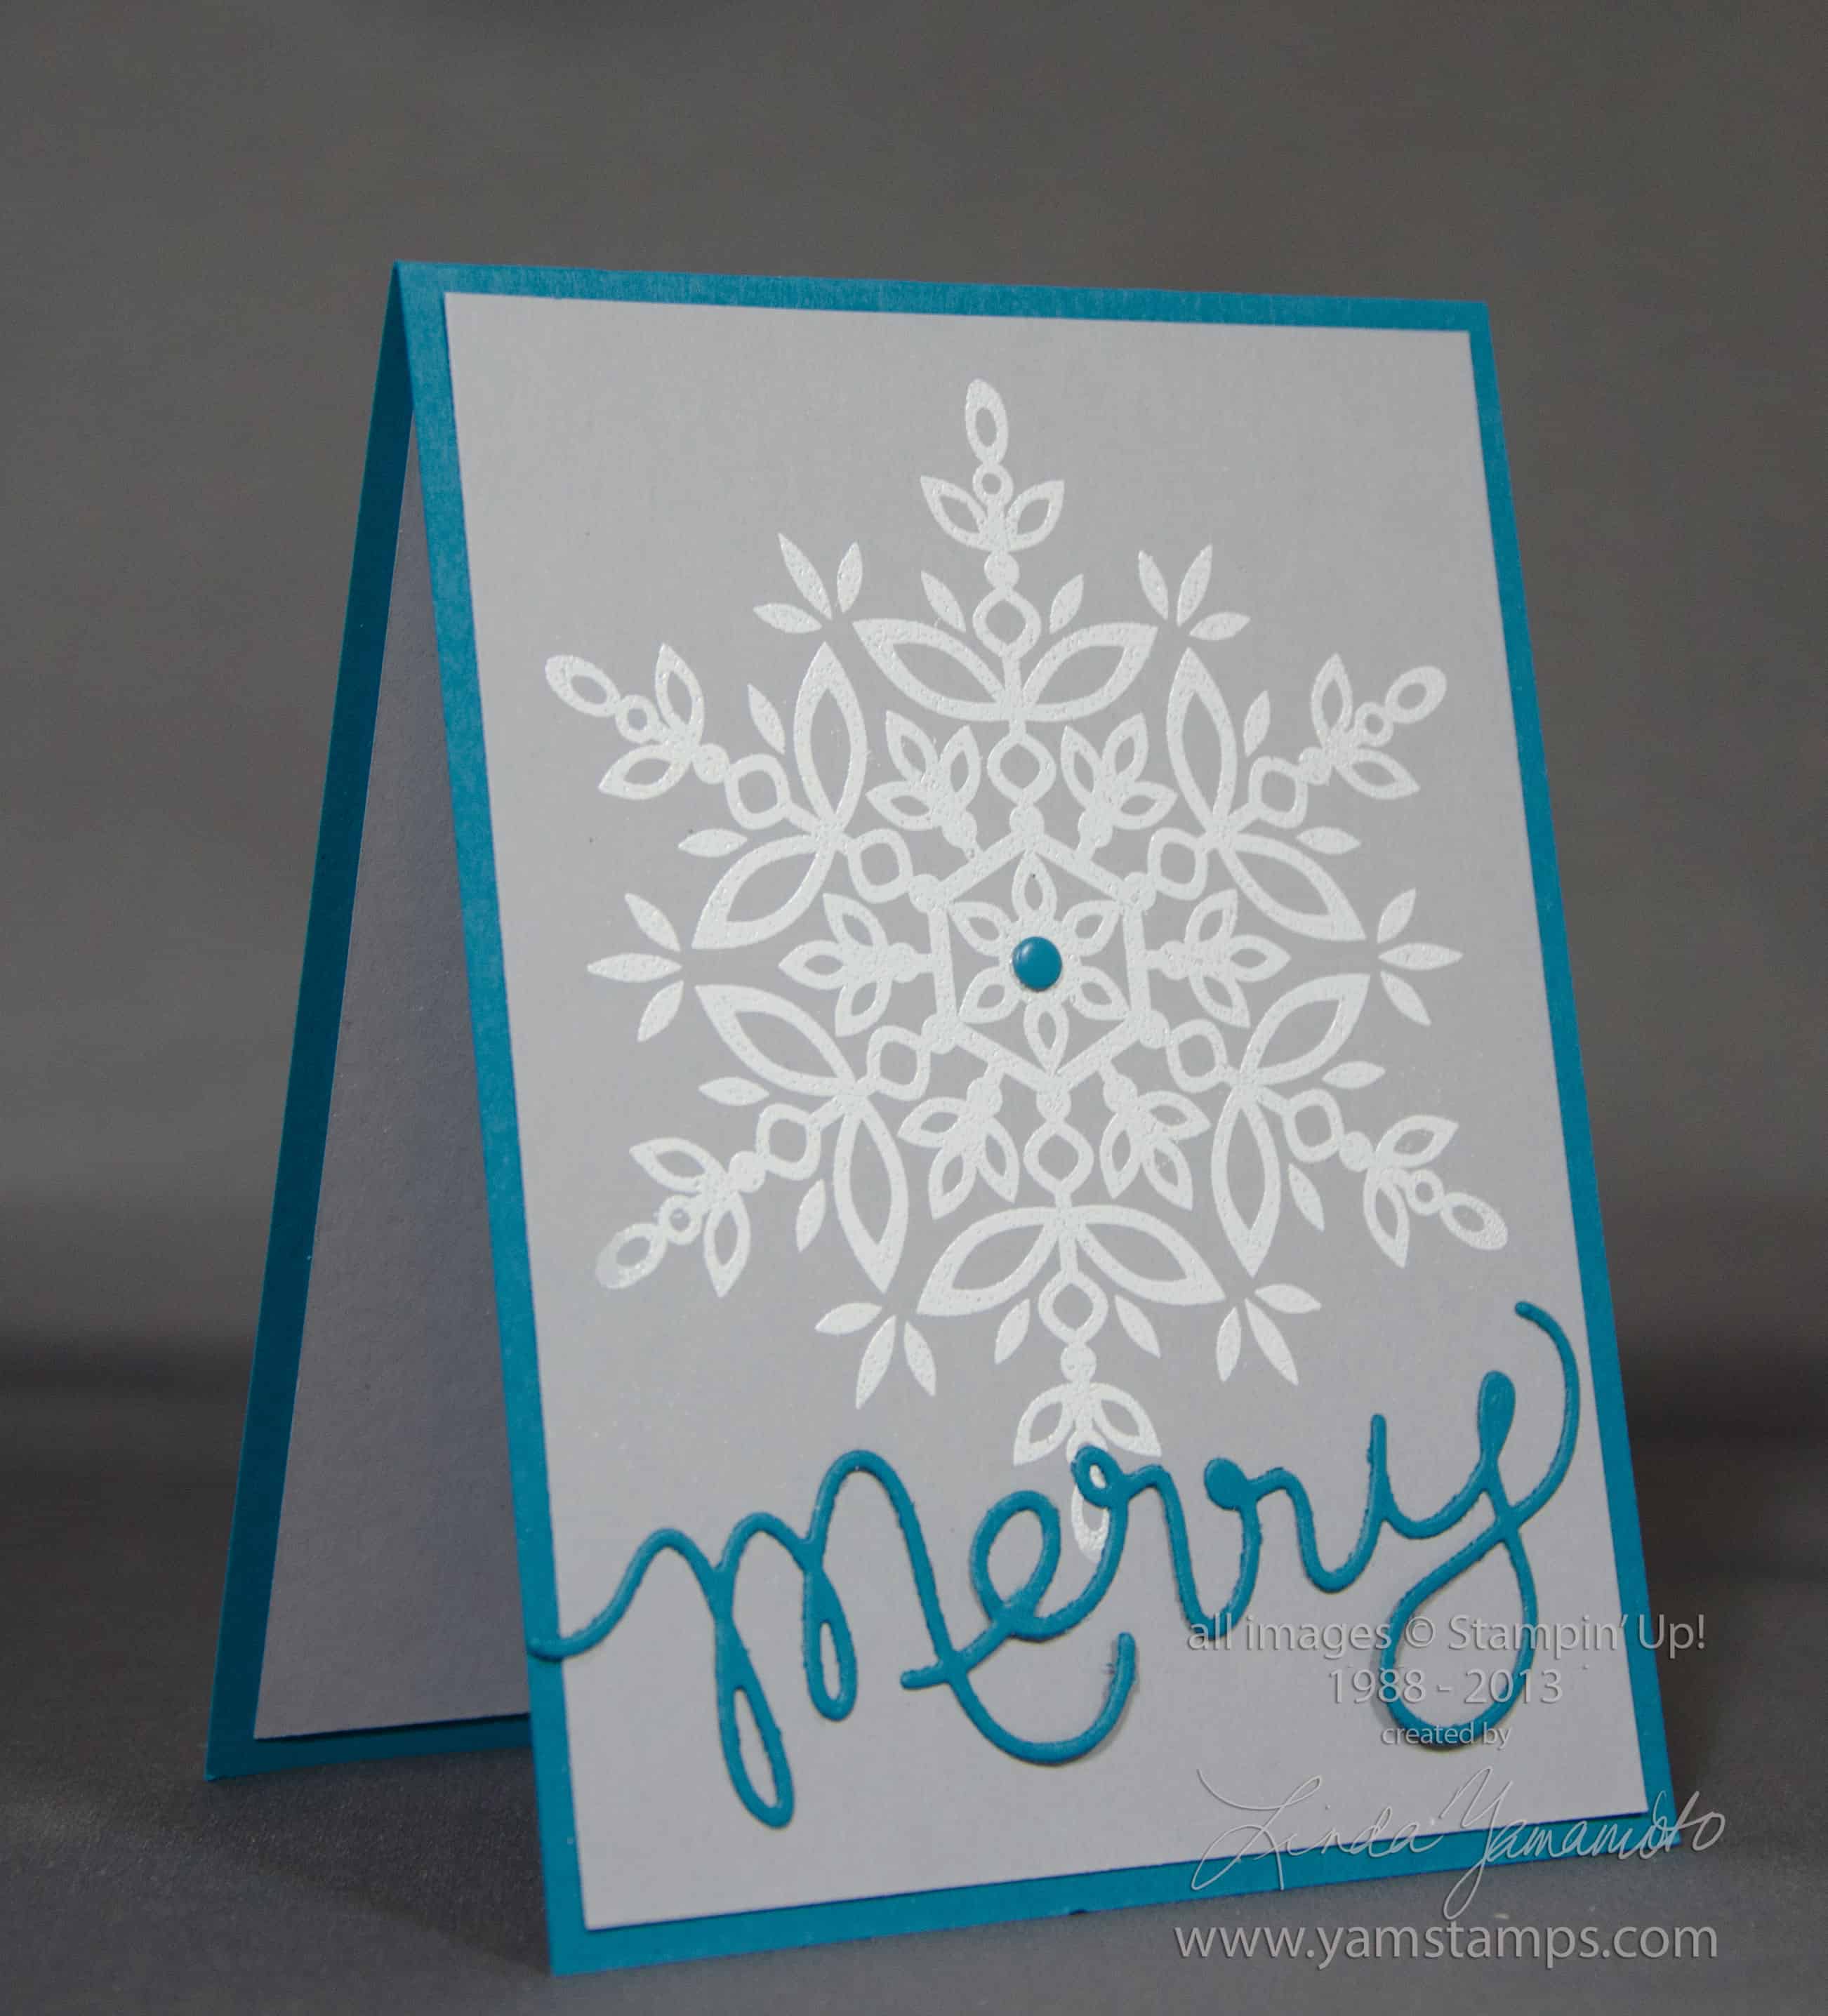
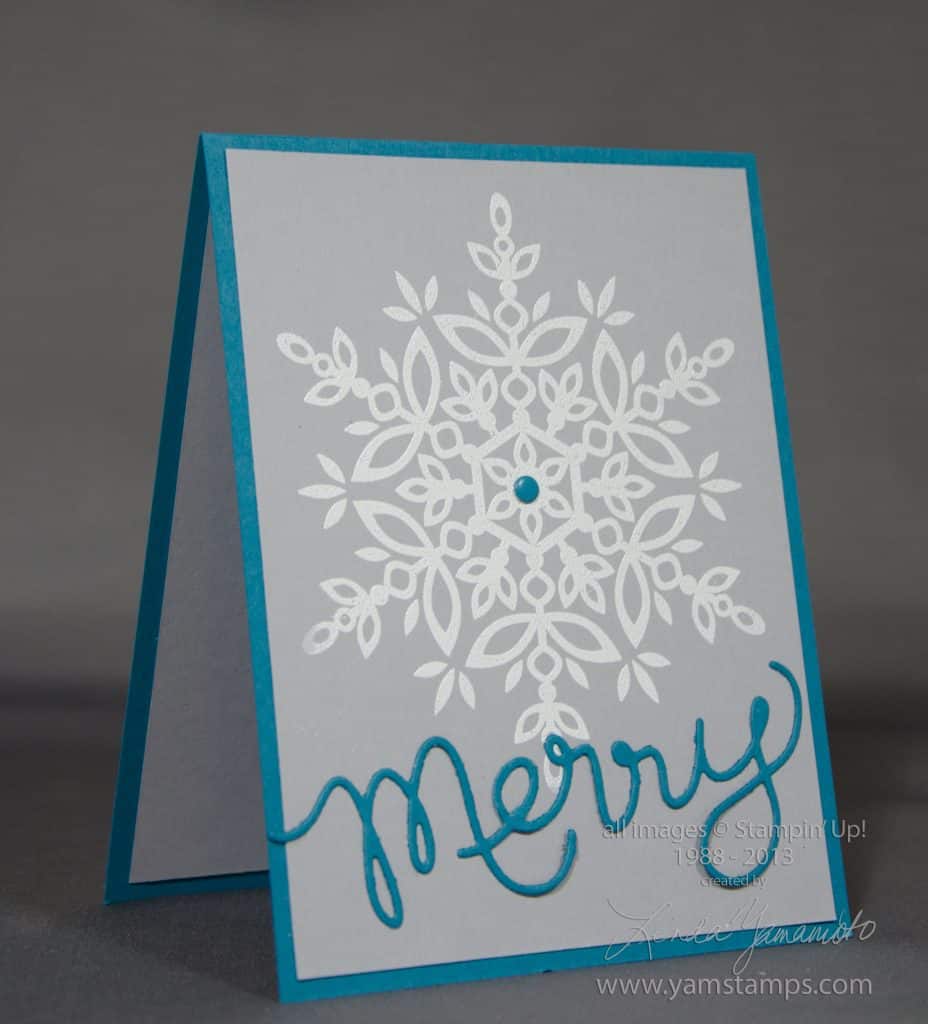 Never too early to start prepping those holiday cards. We created this card during Stampers Club this month. The large snowflake from Stampin’ Up!’s Festive Flurry set is heat embossed in white on Smoky Slate cardstock (love this new colour), and the Expressions Thinlit “Merry” adds the sentiment. An Island Indigo Candy Dot ties it together. I really like this card, but I have to admit that initially during Club it was driving me crazy…until I figured out a hint – and I’ll share it here.
Expressions Thinlits Hints
1) Use the Magnetic Platform. I looooooove this tool. You don’t need to have brand new, pristine cutting plates, but you do need to have ones that are fairly straight – not warped, in order for the magnet to be able to hold the metal framelit or thinlit in place.
2) Use a layer (or two) of waxed paper between your cardstock and thinlit if you’re having trouble getting the cardstock to “release”.
3) Use your paper piercer tool to poke gently through the little holes in the thinlit to push your diecut out if you’re having trouble getting the cardstock to “release”
4) Use an extra piece of cardstock on top of the cutting plate as a “shim” to add extra pressure along the thinlit
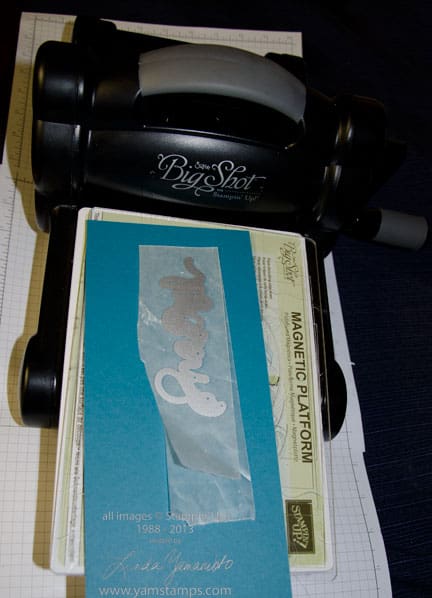
5) Run the thinlit through lengthwise rather than widthwise!!! This is the hint we discovered at Club night. If you run the word through horizontally, you may have uneven pressure across the thinlit. In my case, the centre of the thinlit wasn’t cutting as cleanly as the edges. It may be that my cutting plates were slightly warped or perhaps because my Big Shot has been used and abused since I got it…LOL. Anyway, check out the photo below for the visual as to the set up (the top cutting plate is missing in the photo just so you can see it better). Obviously with some of the longer words (i.e. “thankful”) it’s a given, but with the word “merry” or “love”…not so much!
If you have any tips or tricks you’d like to share about using the thinlits or Big Shot, please leave a comment below, or on my facebook page so we can all learn!
Aug 2, 2013 | Announcements, Big Shot
 We had the chance to see these at the recent Stampin’ Up! Convention and there were definitely squeals of excitement from the audience!! Framelits dies made these type of “flip flop” cards a little easier to make, but now there’s dies that do it all – cut and score so that there’s little fuss for you!! There’s a circle and a label version, and both come with additional pieces to make your card even more WOW. You can be sure that we’ll be using these in upcoming classes. If you can’t make it to the monthly card class or Stampers Club, consider hosting your own private class – get a group of friends together and I’ll come to you! Contact me for more information.
Click on the image or here to download the flyer with more information about the thinlits dies, or check them in my online store HERE. These dies are sure to make your cards a huge hit and impress your friends and family!
Feb 19, 2013 | Big Shot, cards
 Tomorrow is the next installment of the Celebrate Sale-a-Bration emails – we are at week 5 – halfway through! This email program is going out to all my subscribers as a thanks and to help with creative ideas for all your papercrafting! Tomorrow's project features one of the images I just knew I had to pick as my free item…
In Ontario we had a long weekend – "Family Day" was yesterday. In our family, we celebrated by sleeping in!! We had a nice day just hanging around the house. I did do some crafting for upcoming projects, but you'll see those later on… in the meantime, I'm not sure that I've yet shared this card. Another from the Bootiful Occasions set. I always try to ensure that we do one masculine type card at each card class – so this was the masculine card a little while back. Love the Natural Trim Ribbon and Argyle Folder to add accents to the card that aren't overly feminine.
The next monthly card class will be Wednesday, March 6th at 7pm here in Burlington – registration required, and space is limited. Can't make it to class? Host a class with your friends (and earn free Sale-a-Bration items!) or try my online class! Happy crafting 🙂
Feb 13, 2013 | Big Shot, cards, Occasions
 This is the Valentine's Day spinner card that I shared on CH Morning Live last week – the heart spins along the slot in the card. These spinner cards are fun to create and once you've made one, it's easy to make more! I've always used pennies as the weights to create the spinning effect – so if you're in Canada, grab those pennies before they disappear!!
This card features the scallop heart die from the Hearts a Flutter framelits behind the full heart punch and the Parker's Patterns Designer Series Paper. Accent is Itty Bitty Banners cut out with Bitty Banners Framelits.

Here's another version of a spinner card, using the set A Fitting Occasion and a Soda Pop Top (no cleaning required!) that was squashed using the Big Shot. Love that effect! Twitterpated Designer Series Paper on this one and accented with one of the stamps from Ciao Baby and the Petite Curly Label punch you can get for FREE during Sale-a-Bration!
Don't forget that today is Week Four (one month!!) of my Celebrate Sale-a-Bration emails. Today's project idea could be used for Valentine's Day! Email goes out at 1pm Eastern Time, so be signed up for my mailing list (if you aren't already!) before then so you don't miss out.
Feb 3, 2013 | Big Shot, scrapbooking, Seasonal Catalogue, TV/Video/Web/Tech
 First of all, a big thanks to all the crew and cast of CHCH TV's Morning Live Show. I have been so fortunate to have been asked to appear on this show many times, and it's always so much fun. On Friday, I was on to share some ideas for Valentine's cards and gifts. This is one of the projects that you may not have been able to catch a glimpse of on the day.
I think scrapbook pages can make great gifts – you can include them in a larger scrapbook that can be added to over time, or do as I've done here and put it into a frame to display. Since I don't do a huge volume of scrapbooking, I like the frame option. When I create a new one, it can go into the frame, and the previous page can go into my scrapbook. As with my cards, I prefer designs that aren't overly fussy, and quite honestly, for me, I need to get it done, or I'll dither away over it for hours (and probably end up stripping it back to what I started with…).
I created this layout to commemorate our family time at the DisneyWorld Marathon Weekend in January of this year. My son & I ran in the Family Fun Run 5km around Epcot, and later that weekend, I ran my third (!) marathon – the 20th Anniversary Disney Marathon. I wanted to create this page to remember the fun time we had. I love how the Real Red and Whisper White of the Polka Dot Parade Designer Series Paper reminds me of Minnie Mouse's dress. Oh, and of course, my Team Sparkle running skirt that I got for the occasion. I added the scallop edge using the Tasteful Trim Die in my Big Shot and added pennants with words that reflected the theme from the set Loving Thoughts. I used the new Oval Collection Framelits to create a journaling spot as well.
If you are looking to get some creative time in, please consider attending one of my monthly card making classes – or if you're looking to commit to some "me" time, consider joining the Stampers Club for 6 months of classes and a turn at spending some hostess dollars! Contact me for more information, or see the YamStamps Event Page.

 I’d tweeted about a great idea I’d visualized for a card…but you know how it goes with those ideas, sometimes…looks fantastic in your imagination, but in real life, doesn’t work out. Well this one worked! OK so I may rework the background again at some point, but it was the “ornament” that I was visualizing. I used the globe stamp from The Open Sea (a non-Christmas set), and paired it with the ornament framelit from the Holiday Ornaments framelits set that is still available (though not featured in the current catalogue and kind of hard to find on the online store site!). Anyway, it fit well enough for me to be happy with the result. Add a ribbon and there you go! The inside sentiment is “Joy to the World” but “Peace on Earth” would also be appropriate, don’t you think??