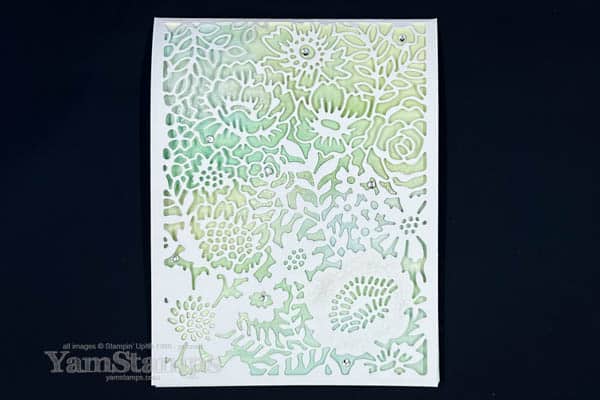
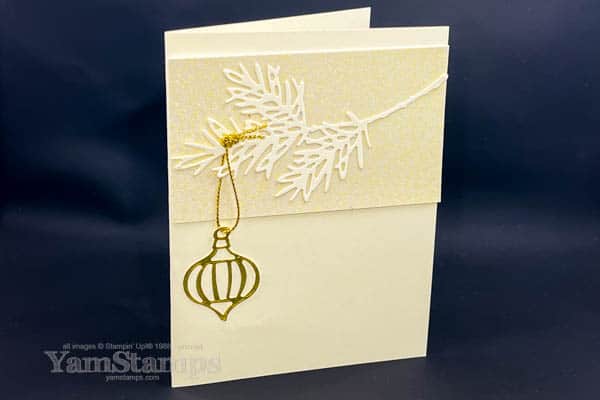
Add some colour to this easy and elegant die cut card!
Stampin’ Up! Canada has some beautiful larger dies in the catalogues. The Two Tone Flora dies include dies that coordinate with the Two Tone Flora stamp set plus a larger detailed die that leaves a border around the cut section which I featured on this easy and elegant die cut card.
easy and elegant die cut card
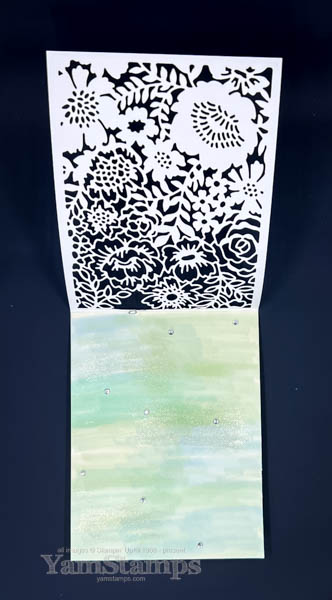
The die is used to cut the detail in the cardfront, and then there’s a pop of colour in behind! Plus some Rhinestone Basic Jewels because who doesn’t like a little extra bling on their card?! I also added some Wink of Stella for some extra sparkle on the diecut (but it doesn’t photograph very well).
easy and elegant die cut card – insert
So as you can tell….you don’t need a lot of skill to create the coloured panel for this card….haha – that’s what helps make it an easy and elegant die cut card! If you can scribble, you can do this. I just did linear colouring, but you could do more organic blobby shapes (technical term…) or circles, or whatever. If you would like the details on how I created this card, click here to download the free tutorial pdf.
If you like crafting tips, tricks and tutorials, be sure to sign up for my newsletters! At the beginning of each month is the multi-project newsletter, then each week after that it’s smaller updates, with tutorials, tips or information, released each Tuesday. I’ll be releasing the February multi-project newsletter early, since the 31st of January falls on a Tuesday – and I don’t want you to have to wait until a week into February to get all the goodies! You can sign up the top right of the YamStamps blog page, in the box near the top of the YamStamps home page, or just click here.
In the meantime, if you’re in Ontario, hope that you are staying safe and not having to shovel TOO much snow right now!
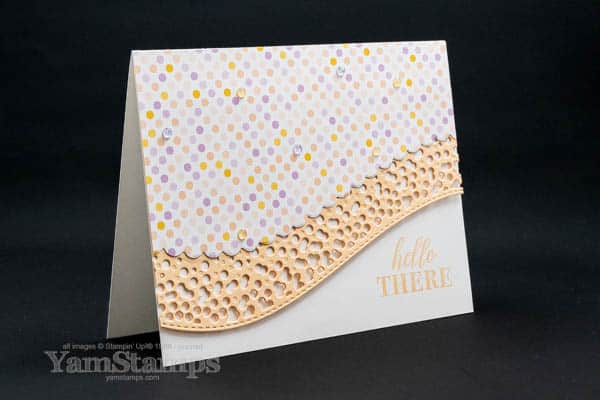
Curved layers make this hello there card more interesting!
This hello there curved layer card uses Stampin’ Up! Canada’s Around the Bend stamp set and coordinating dies – and I think that this makes the usual “layer the patterned paper on cardstock and then onto the cardfront” look a little more interesting. Of course, I’m all about making an interesting card without spending 6 hours on it, so I’m happy about that!
Hello There Curved Layer Card
The Around the Bend stamp set is available in your choice of red rubber cling mount or clear photopolymer material – so when you place your order be mindful that they will have different item numbers (or just contact me and let me know which one you want and I will be mindful when I place the order for you!). The Around the Bend dies have coordinating shapes and angles, and there’s a discounted cling mount bundle or a discounted photopolymer bundle available. Have I mentioned how much I love the fact that the coordinating dies and stamp sets now have the same name so I don’t have to remember which ones go together?!
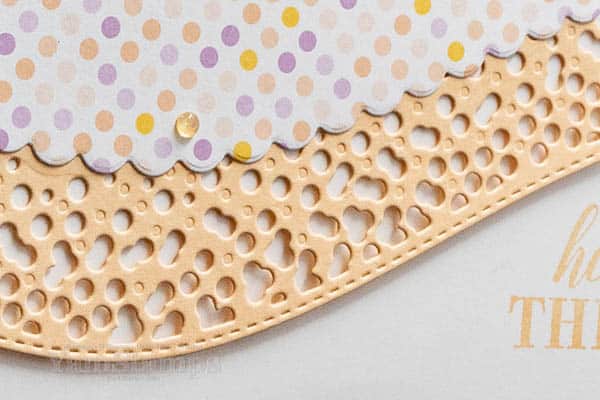
The scalloped layer on the Hello There Curved Layer Card is cut from the Dandy Designs Designer Series Paper which is a Sale-a-Bration item – you can select this patterned paper for free with a $120CAD product order. I picked the Pale Papaya cardstock for the curved layer and I also used Pale Papaya ink for the sentiment. After I finished the card, I decided I wanted to add a bit more bling to it – so I used some 2021-2023 In Color Opal Rounds to add shine and just a touch of colour.
Hello There Layered Card – close up detail
The Take Your Pick Tool with the Die Brush Tip make removing all the little bits easier – just place the die cut piece on the foam that comes with the Brush tip, then run the brush over the die cut piece. I put my foam mat into a shallow box to try to contain some of the little bits that tend to go flying (especially because I am usually doing it in a hurry….).
This is one of the cards we made during Stampers Club this month, though I didn’t think of adding the bling until after club! My Stampers Club is a great way for members to budget out their crafting spending. Each month, we meet (via Zoom/recording) and create the card projects from the packet of supplies each member receives. After club, we place a group order, and each club member gets a turn receiving the Stampin’ Rewards from the orders placed that month. Each member signs up for 6 months and has the option to continue for another 6 months. Some members take a break every now and then, and some just carry on! New members can start at any month, so we often have a rotation of new faces coming and going. Right now, since we continue to meet by Zoom, the bonus is that if you can’t make the club date, you can catch the recording, and still benefit from being in club. The other bonus is that you can be anywhere in Canada, you don’t have to be local to Burlington! If you’re interested in joining us, or have any questions about Stampers Club, feel free to contact me!
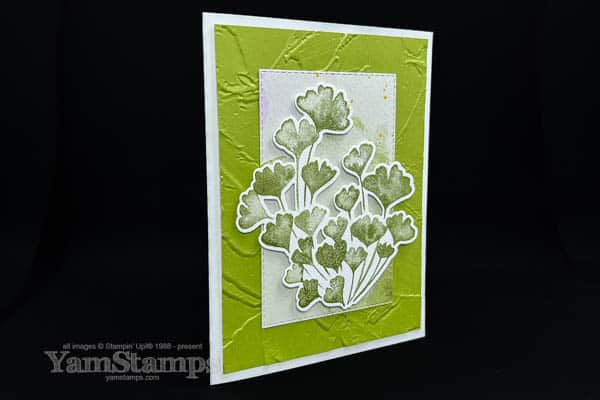
Coordinating stamps and dies means this gingko branch card is quick and easy to create!
I love coordinating products because they make my crafting so much easier – this gingko branch card is a perfect example of that. I’m even happier because Stampin’ Up! now calls the stamp sets and coordinating dies by the same name so it’s easy for me to remember which ones go together!
Gingko Branch Card
The Gingko Branch stamp set is one of Stampin’ Up!’s Distinktive stamp sets – meaning that the stamps have a texture that automatically provides depth and texture without any extra effort on my part – so you know it’s going to be a favourite for me! I simply inked this stamp with Old Olive ink, then when I applied the stamp to the paper, the shading and texture automatically occurred because of the way the stamp surface is constructed. (BONUS – if you don’t stamp it perfectly, no one will know because it’s not meant to be a uniform image!). There is the coordinating Gingko Branch Dies, and you can get the stamps and dies together in a discounted Gingko Branch Bundle during the January-April Mini Catalogue sales period (until 30 April 2023/while supplies last).
If you checked out the Sunday Swaps Page on New Years Day, you’ll have seen the swap card that I created for the Demonstrator Only Sale-a-Bration swap with the Beautifully Happy stamp set. Since it had multiple layers, I was thrifty and cut out the centre of the Dainty Flowers Designer Series Paper with a Stitched Rectangle Die. The DSP layer was covered up by my main stamped image. I then took all those smaller Stitched Rectangle die cuts and used them to create multiples of this card!! It made a perfect backdrop to the die cut gingko leaves. I added an Old Olive Cardstock layer that I dry embossed with the Painted Texture 3D Embossing Folder (still one of my favourites and a go-to in my craft room). Honestly, the thing that took the longest was taking off all the liner bits from the Stampin’ Dimensionals that I used on the back of the die cut!
If you’re in Canada, if you purchase the Gingko Branch bundle, you’ll be able to select a Sale-a-Bration item for free from the “free with $60CAD purchase” level! You could select the Dainty Flowers DSP that I used on this card as well – then you’ve got almost everything to just copy this design – now that’s quick and easy crafting! Sale-a-Bration runs until 28 February, but a reminder that Sale-a-Bration freebie products are also only available while supplies last – while there’s a good supply of all the products, you never know what’s going to be the runaway hit and sell out before the end of the official sales period!
You can shop in the YamStamps Online Stampin’ Up! Canada store 24/7 and have your items delivered directly to you in Canada, or you can contact me if you need assistance placing an order, want to pay by etransfer or have any questions. Let’s Sale-a-Brate!
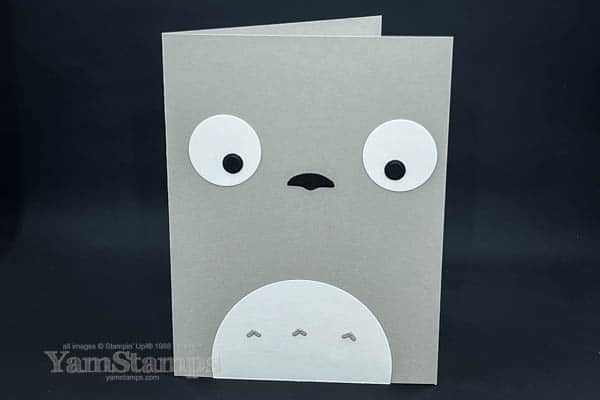
So I was “procraftinating” the other day…you know, when you’re supposed to be doing something and craft instead…and came up with this super fun Totoro punch art card! OK technically it’s not punch art, it’s die cut art…but you get the idea. Basically use die cuts to piece together a totally different look!
Totoro Punch Art Card
Technically, I think I should have the belly circle lower on the card front, but it’s stuck in place now LOL!
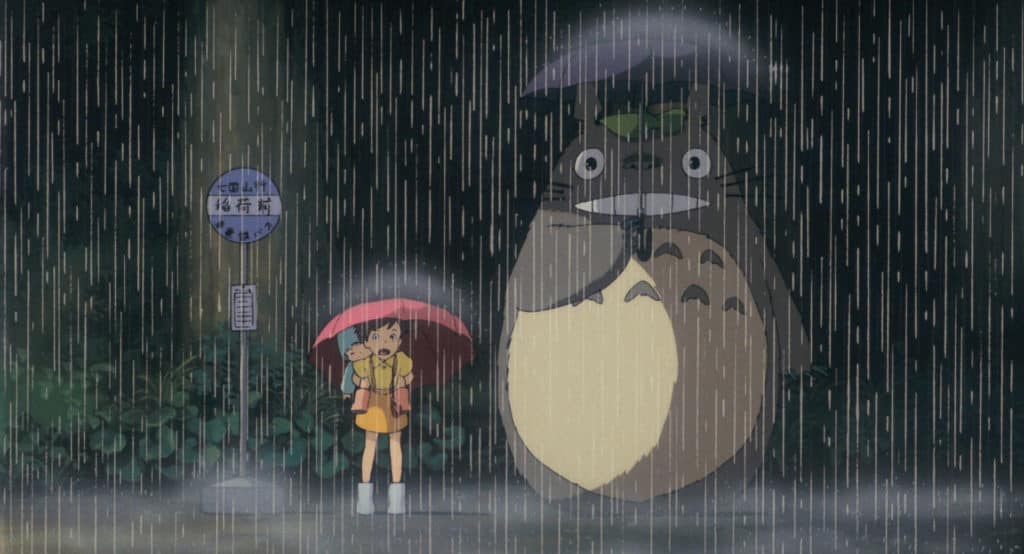
image from Studio Ghibli site (with permission as per site settings)
So the above is a photo for reference…obviously my version is simplified! I used circle die cuts (from Layering Circles Dies and Warm Welcome Dies)for the eyes, and the nose is the end cast off piece from the label in the Waves Dies; the marks on the belly are created using the accent from the Alphabet A La Mode Dies!
This Totoro punch art card was a lot of fun to create – and I made a short video of the process which I uploaded to pretty much all my social media platforms – TikTok, YouTube, Instagram and Facebook….because everyone has their “go to” platforms where they watch their content! I’ve embedded the YouTube version below.
Eventually I did get some other work done….but I am really good at procraftinating…..how about you? If you want to keep in the loop about other tools to help you procraftinate, or craft on purpose, even, be sure to be signed up for the YamStamps Newsletters (click on the link or use the box on the YamStamps site) – they are sent out each Tuesday at 1pm Eastern – so no more procraftinating for me – I’m off to write a newsletter!
Wishing you all the best for 2023 – let’s Celebrate You this year!
Happy New Year! I hope that it brings good things for all of us. I also hope that you had time to enjoy the holiday season! I was fortunate enough to have some time off from my “other” job after Christmas so I was able to relax a bit, and also was able to see extended family – some of whom I hadn’t seen in person for a few years!!!
As I write this though, I’m trying to gear myself up to get going again – but it’s hard since every day has felt like a Sunday for the past week!! It’s not a bad thing, but it’s definitely disorienting, and I have trouble knowing the day/date on a regular basis anyway…
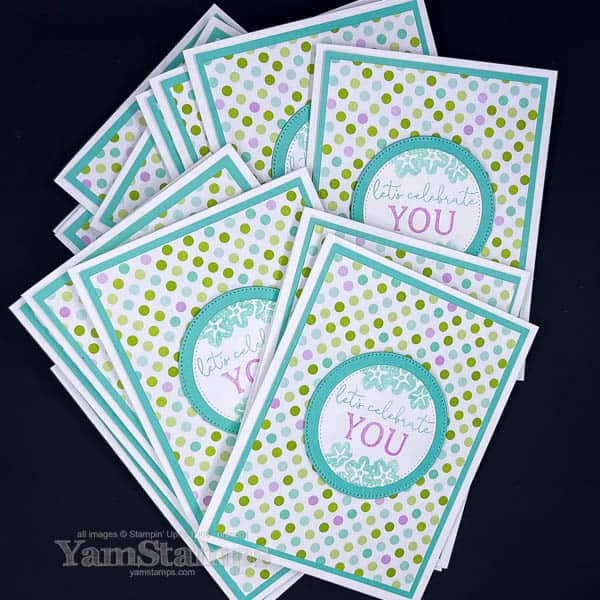
I had the luxury of time to be able to do things like…clean up my office (long overdue, and how many pens do I actually have??!!!) though it’s already starting to get a little messy again. I did also do a bit of craft room clean up, but honestly, it’s a bit overwhelming sometimes so I do a bit, and then make some cards and make a mess again….LOL. However I did get some things done there – like these “Celebrate You” Cards!
These are some cards that I bulk produced over the break – for members of my Stampin’ Up! Demonstrator group known as the “Eh” Team! I did a bit of “catch up” over my break and sent out my “Eh” Team Rewards inside these cards. (If you want to find out more about joining my group of demonstrators, you can check out the information at yamstamps.com/join or message me). I definitely wanted to send a “celebrate you” message to them at the start of the year!
Celebrate You!
This celebrate you sentiment is great – and it’s made by combining partial sentiments in the stamp set Sentimental Park that’s in the January-April Mini Catalogue. I used Coastal Cabana and Fresh Freesia ink (pulled from the Designer Series Paper colours). This card’s colour scheme just makes me happy – I’m a blues/greens kind of girl, so this is my colour palette! The patterned paper is the Dandy Designs Designer Series Paper that is available as a Sale-a-Bration freebie – you can select it for free with a $120 CAD product order. Both the Mini Catalogue and Sale-a-Bration are in effect as of THURSDAY, 5 JANUARY 2023. I put it in caps because I want to highlight that it’s not yet available. Just a few more days! (I’ll come back and update this post with links once the catalogues are live).
I love clean and simple designs, and this is definitely in that category, but I think because of the busy paper and details on the stamped sentiment, it distracts you from the fact that the design is quite straightforward. Not that there’s anything wrong with straightforward designs! They are my go-to! I like having a pattern that I know works, and then I can just change it up with whatever I have on hand for whatever occasion! I like my crafting to be easy and effective.
Something’s Coming…
If having a blueprint for your crafting is something that sounds helpful for you, you’ll want to check back on Wednesday – or better yet, be on my mailing list, because I’ll be sharing details for a new program I’m offering – designed to make your crafting easier and more fun. No More Crafting Brain Strain!!
In the meantime, I’m off to see if I can find a clear tabletop area in my craft room to come up with a few more cards that I will need in the next little while…
I hope that you are staying safe and warm with this crazy winter weather!
Hoping that you are able to spend some time with family and friends – whether in person or virtually. We’ll be video calling with my brother on the west coast later today….and perhaps we’ll venture out to see if we can clear the driveway (my excuse is that it’s been too windy so far – what’s the point of clearing it when it will all get covered again by blowing snow?!).
Hope you’re able to get in a bit of crafting, too! Thank you for being part of the YamStamps community!