Cheery patterns and a fun card design mean this playful tent card is sure to bring a smile to someone’s face!
There are some projects that just make me smile – and this is one of them…so I figure this playful tent card will also bring a smile to the recipient’s face as well!
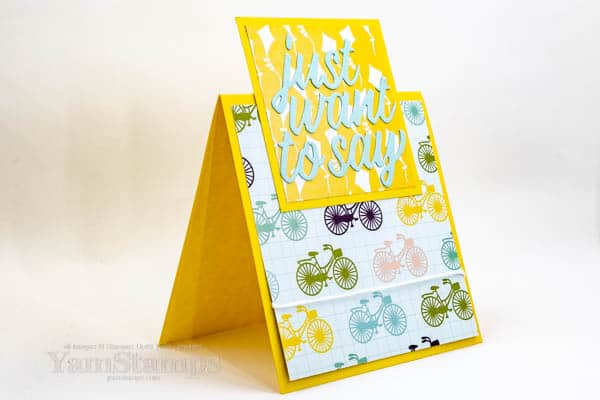
playful tent card
This card features patterned paper from the Design a Daydream Designer Series Paper (“DSP”) I thought that the kites and bikes went together well. Since they’re from the same package of paper, they have coordinating colours and go together well on a card.
This playful tent card also features a bit of a fun fold. The tent fold portion is a little shorter than usual, which means you can add the extra piece on top and still have a standard sized card. (I like my cards to fit into regular medium Stampin’ Up! envelopes!). The words are die cut with the Floral Gallery Dies from Pool Party cardstock, one of the colours in the DSP. *crafting hack alert* I used a kitchen product to make applying the die cuts a little more easy…. I put the die cut words face down on some Press ‘n Seal wrap, then applied dots of Multipurpose Glue to the back of them. I picked up the wrap and then placed it onto the card where I wanted the words, rubbed over top and then carefully peeled back the wrap.
We made this card during Stampers Club this month, and the Press ‘n Seal was great for transporting the die cuts (and making sure that the little dot on top of the “J” didn’t get lost!), as well as applying them to the card. It made making the playful tent card much easier! We are meeting virtually for club, which means everyone gets their card kits ahead of club night, and then we gather via Zoom (or via recording for those who can’t make it “live”) to assemble the cards. Club is also great for those who like to be able to purchase items that are only available with Stampin’ Rewards, like this DSP! Each member joins for a 6 month period, and once during that 6 month period, each member gets to use the Stampin’ Rewards for the club orders that month. It’s a great way to budget out craft spending since there’s a minimum order required ($33CAD product at this time), and also know that you’ll be able to earn guaranteed Stampin’ Rewards! If you’re in Canada and are interested in joining us, contact me. New members can start their 6 month membership at any club meeting.
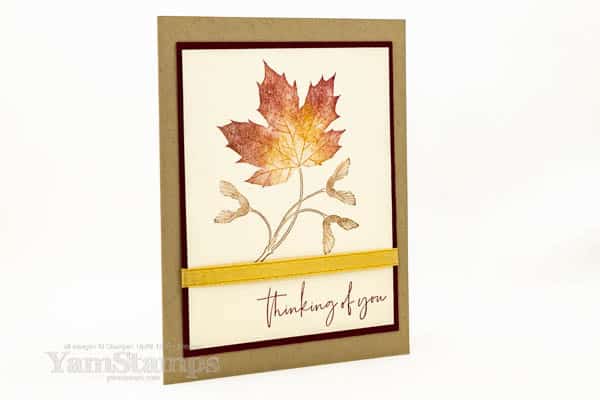
I know it’s technically still summer, but I couldn’t wait any longer to share this Autumn Leaf Card!
This was my contribution to a Stampin’ Up! Demonstrator Card Swap featuring products from the July-December 2022 Mini Catalogue. Since it seems like temperatures have dropped as soon as September hit, I thought I could share this card now….especially since I -did- see some leaves changing colour on a recent road trip over Labour Day Weekend. (Only a few, but they were definitely NOT green leaves).
I love the font on the sentiment – and was sure to use my Stamparatus to stamp it, since I was making 21 of the same card! If I was doing only one card, I might just stamp it “free hand” using a block, but I know that making multiples means not every one will be straight if I do it that way. (Or it will take me 10 times as long to create each card….and “nobody got time for that!”). I always think it’s good to have a “Thinking of You” card in your stash – because it covers a lot of reasons to send someone a card. A little bit of Gold 1/4″ Shimmer Ribbon adds a finishing touch and dresses up this card a little more.
I call this a cheater fancy fold card because one step makes it so much easier than it’s complicated cousin…
There are “step” cards that you can make that involve cutting the cardbase and scoring it to get different levels of height on a card. This cheater fancy fold card gets those same variations of levels, but achieves it in a much easier way! (at least in my opinion…)
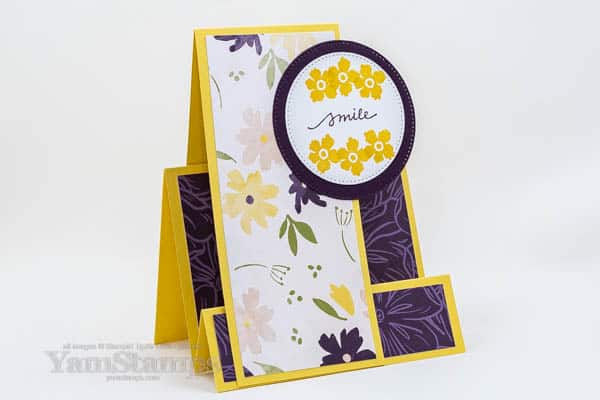
Cheater Fancy Fold Card
I suppose technically, this is still a fancy fold card, so it’s not a total cheat…the base is scored and folded so that there’s two peaks, and the third taller peak is created by adding a separate piece of cardstock to the original base. You can’t see it in this picture, but the point where the extra piece is attached to the back of the card is masked by an additional piece of cardstock for the message to the recipient.
We made this cheater fancy fold card in Stampers Club – using the Design a Daydream Designer Series Paper. Yes, I know that I use this paper a lot….but I can’t help it!! It’s got a variety of patterns and styles, and there’s FOUR of each of the double sided papers. It’s a big package! Definitely getting my Stampin’ Rewards’ worth out of this particular paper. You earn Stampin’ Rewards once your single order/workshop sales are $200CAD – and you can use your rewards towards a more expensive item (e.g. if you earn $20 Stampin’ Rewards, you could use it towards a $50 bundle…or a $135 Demonstrator Starter kit!), or host exclusive items, like the Design a Daydream Paper. The sentiment and flowers are from the Lovely You stamp set and I thought they fit the motif.
I’m putting the finishing touches on my next online class, focusing on interactive cards – cards that have movement of some sort – and of course, because it’s me, you can trust that they will be impressive but not overly complicated to make. (Mainly because my brain can’t manage overly complicated things when paper crafting. It’s supposed to be fun!! LOL). Early bird pricing starts tomorrow! I’ll post more when the link is live. You can see all the available online classes at YamStampsMore.com
Don’t forget that tomorrow is the last day to Sale-a-Brate! Grab your freebies with your qualifying product order before the end of day 31 August – you can shop online at yamstamps.com/shop or message me if you need assistance placing an order or would like to pay by etransfer.
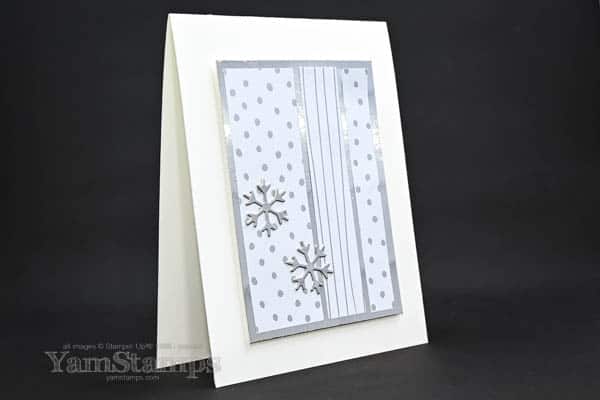
I know, it’s still summer, but I have good reason to share this silver snowflake card right now!
Really! This Silver Snowflake Card features some Sale-a-Bration paper that is only available until the end of August (or while supplies last) – so I need to share this with you sooner rather than later….
Silver Snowflake Card
This is another quick and easy card. I think silver is perfect for a snow card, though you could choose to go with gold, because that’s the other tone in the Silver & Gold 6″ x 6″ Designer Series Paper. You can select this for free with a $60CAD product order. I teamed it up with some of the Silver Foil Specialty Pack – which is ALSO now part of the Sale-a-Bration product line! You can select it with a $60CAD product order (purchase $120CAD worth and you can get both of these paper packs!). Please remember that if you are choosing the Silver Foil as your Sale-a-Bration freebie – that you select the correct item code – because it’s different than the regular catalogue code. If you’re shopping in the YamStamps Online Stampin’ Up! Canada store (shortcut https://yamstamps.com/shop), the SAB option has a pink banner on it. (see the image below)
what the Silver Foil Sale-a-Bration option looks like in the YamStamps online Stampin’ Up! Canada store
Once Sale-a-Bration is over at the end of August, you’ll still be able to get the Silver Foil by purchasing it on a regular order, though it’s not quite as fun as saying “I got this for free!” LOL.
The snowflakes on the silver snowflake card were die cut with the Frosted Flurry Dies. These dies coordinate with the Joyful Flurry stamp set. Some of these dies do partial die cuts – like the Pretty Pop Ups Card that I shared with you here. These small snowflakes are a full die cut, though, so made some cute accents for the cardfront.
This silver snowflake card is part of my quest to bring a seasonal holiday card to each Stampers Club session until we hit December! Nothing like having a small stash of special cards that you can give to special people. If you’re interested in joining us in Stampers Club, it’s a great way to budget out your craft spending, make some fun projects and learn some new techniques – and get free product! You can read more about Stampers Club on the YamStamps Events Page. We are currently continuing to meet virtually, so while it’s not quite the same as crafting together in person (which we will resume at SOME point in time), there are some advantages. One is that you can join from wherever you are in Canada! The other is that if Club Members can’t make the “live” Zoom class, they can access the recording on our members only site at their convenience. Please feel free to contact me if you have any questions or would like to join us!
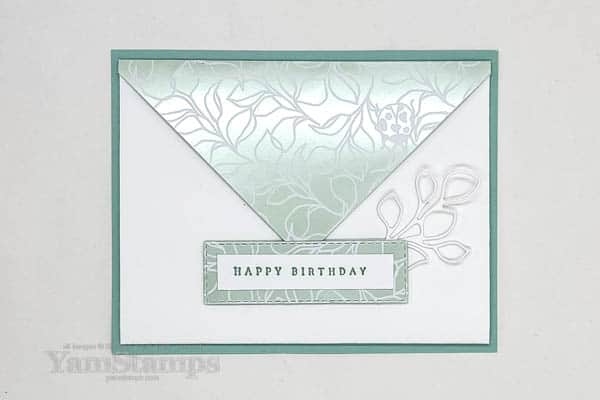
Show off a patterned paper you love with this fun Envelope Fold Card!
The Envelope Fold Card design is a great one to show off one of my current favourite Designer Series Paper [aka DSP]- the Splendid Day Specialty DSP. If you’ve been reading my posts (thank you) you may recognize that I like shiny things LOL!! So this Specialty Designer Series Paper ticks all the boxes.
Envelope Fold Card – closed
This envelope fold card is an easy fun fold – you basically cut a square of patterned paper, score and fold it on the diagonal, and adhere the one side to the back of the card. The Basic White card is actually folded so that the crease is on the bottom, so it opens down. Thrifty Thursday / Frugal FridayTip (depending on where you live and when you’re reading this…) – I cut the backing Stitched Rectangle Die from the back of the DSP square (well, diamond I guess, technically) where it wouldn’t be seen. The sentiment is from the Waves of Inspiration stamp set, stamped in Pool Party ink. I used Stampin’ Dimensionals to add it to the front of the card so that the tip of the DSP could slide underneath and hold it closed. I added a diecut leaf outline from the Splendid Stems Dies as an accent piece, but kept it in Basic White so that it didn’t distract from the other design elements. I love how it coordinates with the pattern on the paper.
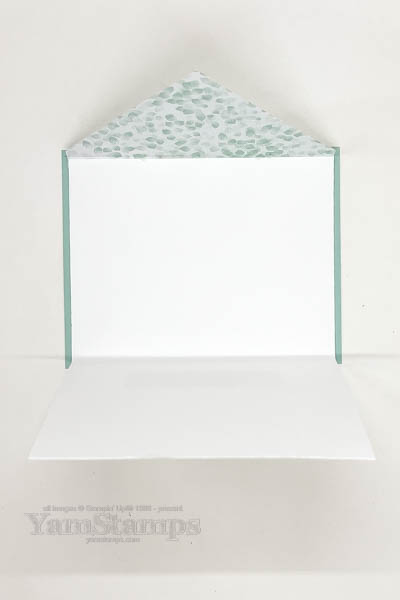
Envelope Fold Card – open
I also love that you can see the other side of the DSP when the card is open! The card ensemble is adhere to a 5-1/2″ x 4-1/4″ piece of coordinating cardstock (in this case, Pool Party). Pool Party is one of my tried and true cardstock colours. I love it!
Fancy Folds are always a great way to add interest to your cards. My latest online class just launched – Fantastic Fancy Folds! This time around, I also added pdfs that accompany the tutorial videos and highlight the important measurements and steps. Are you registered for this class? Let me know what you think of the pdfs – are they helpful accompaniments? Should I do this for future classes that feature folding or cutting techniques, or do you tend to just work off the video?
I always love the techniques that look impressive but don’t take a huge investment of time – and this is one of them! Hope you enjoyed it. If you’re looking for more paper crafting ideas, be sure to be signed up for the YamStamps Newsletter! Weekly ideas, information and inspiration for your crafting!
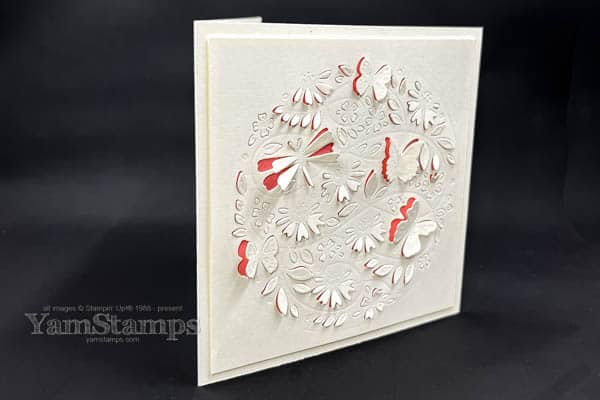
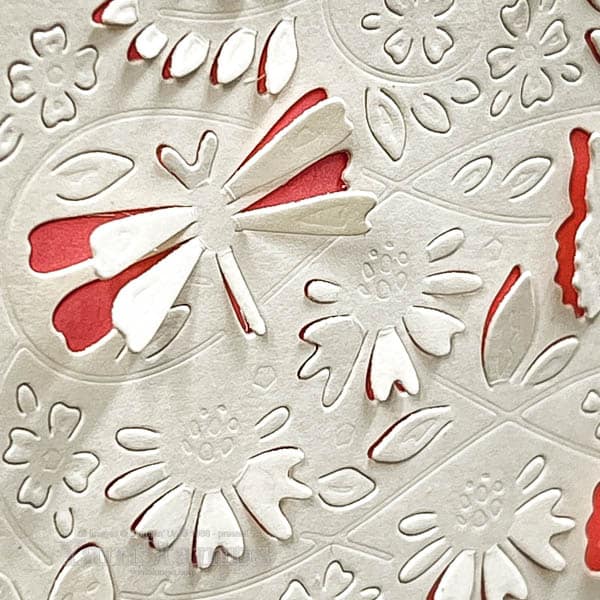
Create a Pretty Pop Ups Card using the Stampin’ Up! Pretty Pop Ups Dies!
This pretty pop ups card is much more easy to create than you might think – all it takes is one pass through the Stampin’ Cut & Emboss Machine to make this intricate looking card!
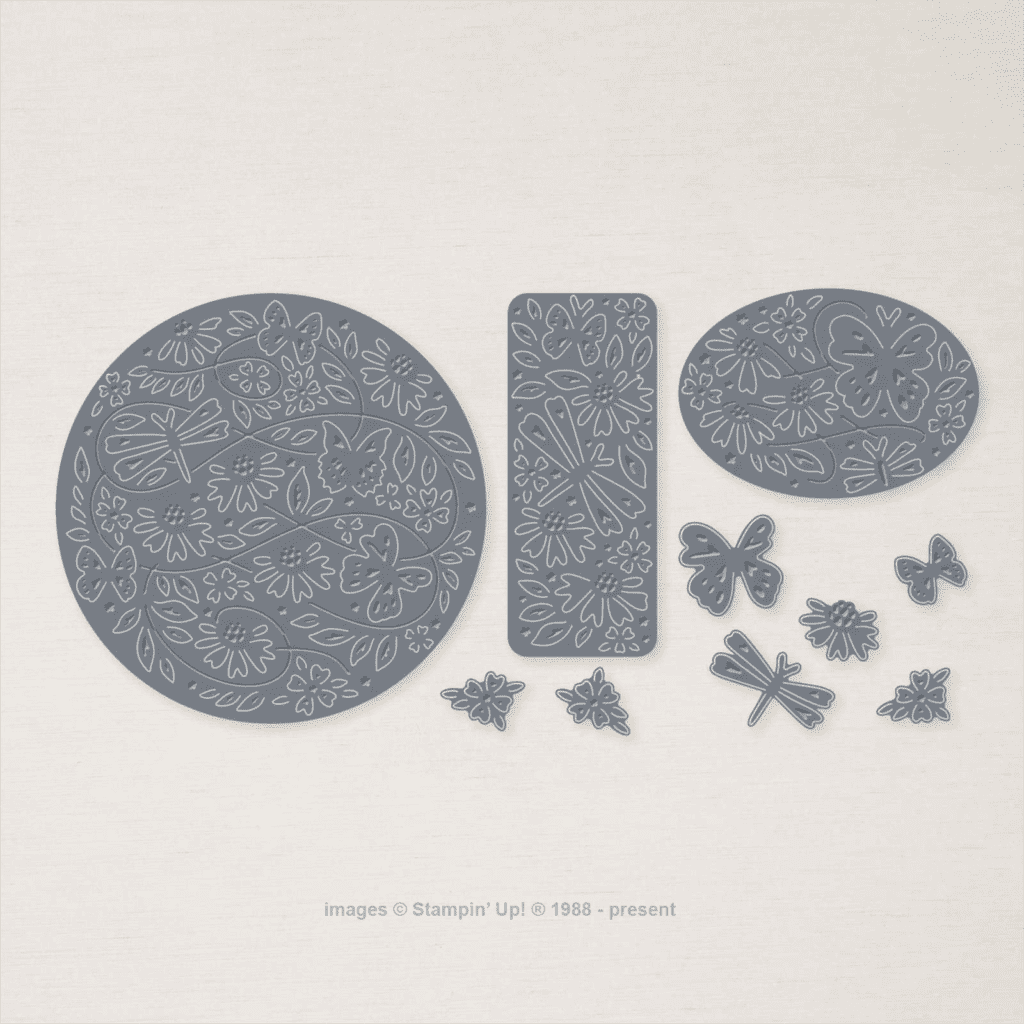
The Pretty Pop Ups Dies are a set of dies that create partial die cuts, and they emboss too! There’s additional individual pieces that can be used to accent the main dies.
Honestly, the thing that takes the most time on this relatively quick card is “fluffing up” the cut sections! I started by running my die brush tip attachment for my Take Your Pick Tool on the backside of the die cut, then used my fingers or bone folder to make a more firm crease.
Stampin’ Up! Canada Pretty Pop Ups Dies
I wanted a more monochromatic look for this pretty pop ups card, but I wanted that colour accent to catch your eye – a pop of colour for the pop up!
I used Very Vanilla as the main cardstock, then the pop of colour comes from Polished Pink Cardstock – though obviously you could choose whatever colour you prefer! I cut the Accent cardstock slightly smaller than the die cut piece to keep the focus on the hint of colour through the die cut areas, rather than having a coloured border around the edge (which I often use as a design element).
I always like easy and effective projects – so this ticks the boxes for me! If you want a project that takes a little more time and effort, though, may I suggest that you sign up for my Fantastic Fancy Folds Online Class? It’s currently in Pre-Launch pricing – so you save $10 off the regular $30 (Canadian) price if you register by the end of Wednesday 10 August. The class page will be available on Thursday 11 August. It features four different fun folds that look impressive but aren’t as difficult to make as you might think…though they will take a bit longer to create than this Pretty Pop Ups Card! (but since I’m the one offering the class, it’s still not going to be overly complicated!) Click on the link to get more information about the class and to register, and as always, please contact me if you have any questions!