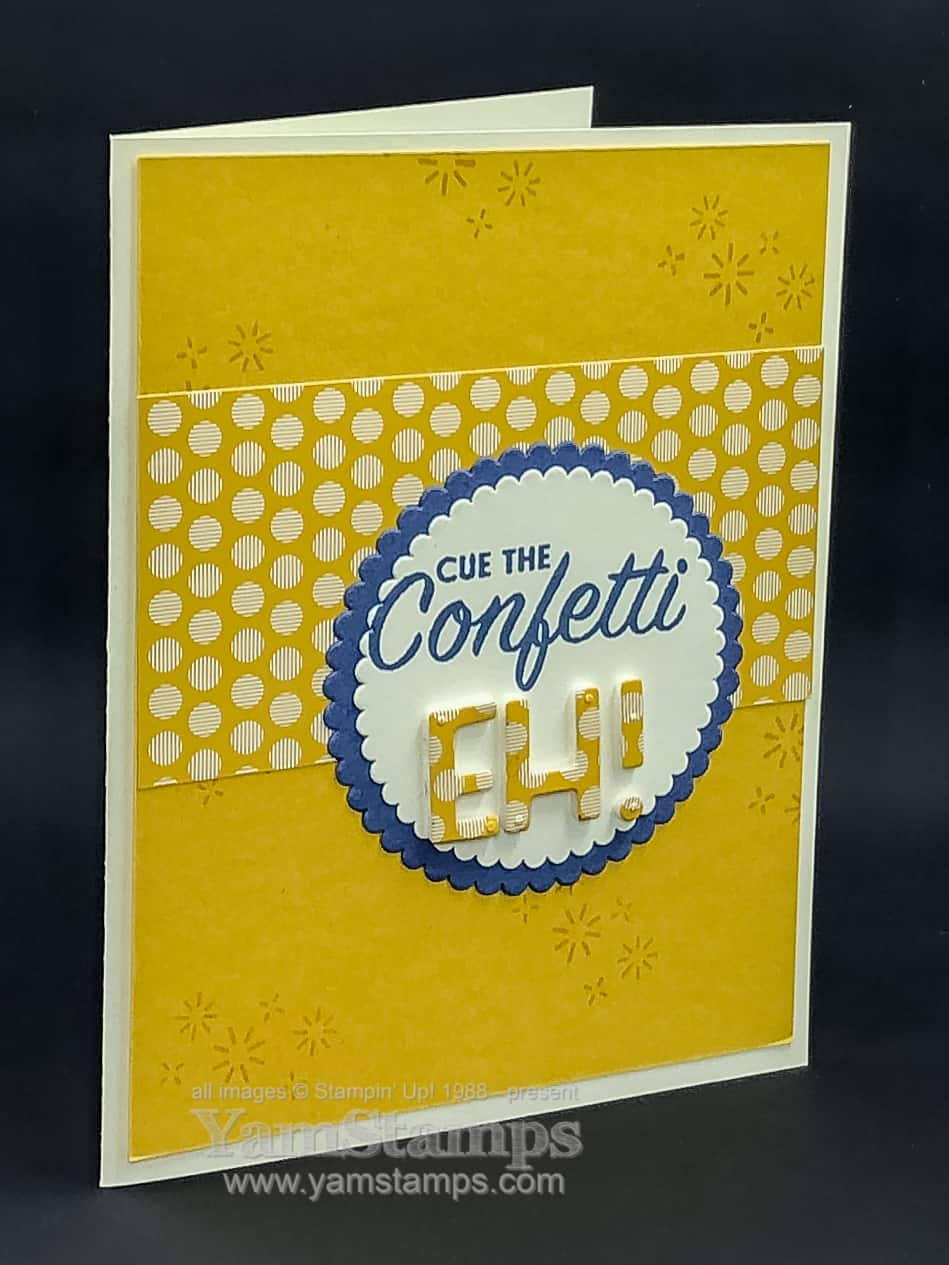
Sometimes you need a celebration card, but it’s something outside of the more common occasions to celebrate, like birthdays or weddings. This sentiment is great for any reason to celebrate! It’s from the Pattern Play stamp set. I used the discounted Pattern Play Bundle that includes the stamp set and the Playful Alphabet Dies to further customize my card.
I made this card to send to some members of my demonstrator group, known as the “Eh” Team, so I used the dies and the Foam Adhesive Sheets to customize the card by adding the EH! I cut the 2020-2022 In Colour Designer Series Paper [DSP] to fit my card front, and then stuck the remaining scraps of the DSP onto a Foam Adhesive Sheet. I was able to cut through the DSP and sheet using the dies, and then positioned them onto the front of the card.
Part of the joy of making handmade cards is the fact that you can make a card that suits your specific occasion and can customize it for the recipient. These cards are to celebrate my team members’ achievements – like making their quarterly sales quotas, adding members to their own demonstrator teams or having a certain level of sales in a month. By using coordinating products and colours it makes it even easier – and that’s my kind of crafting!! I stamped the “sparkle” stamp in Bumblebee ink onto the Bumblebee cardstock, and die cut some scalloped circles from the Layering Circles Dies in VeryVanilla and Misty Moonlight. I could have used the Stamparatus to stamp the sentiment, but because the Pattern Play stamp is photopolymer, I just used a clear block because I can actually see through the stamp (and block) to where I am stamping.
My healthcare job has been increasingly busy over the past couple of weeks, and I’ve been able to take a few days off this week. During my staycation I’ve been able to relax a bit with family, and catch up on some crafting and mail sending! I’m getting the August-December Mini Catalogue ready for mailing as well – if you’re in Canada and don’t have a demonstrator that you already deal with, please fill in this form to request a copy! In the meantime, stay healthy and keep crafting 🙂 I’m back to finishing my celebration cards and mailing them out!
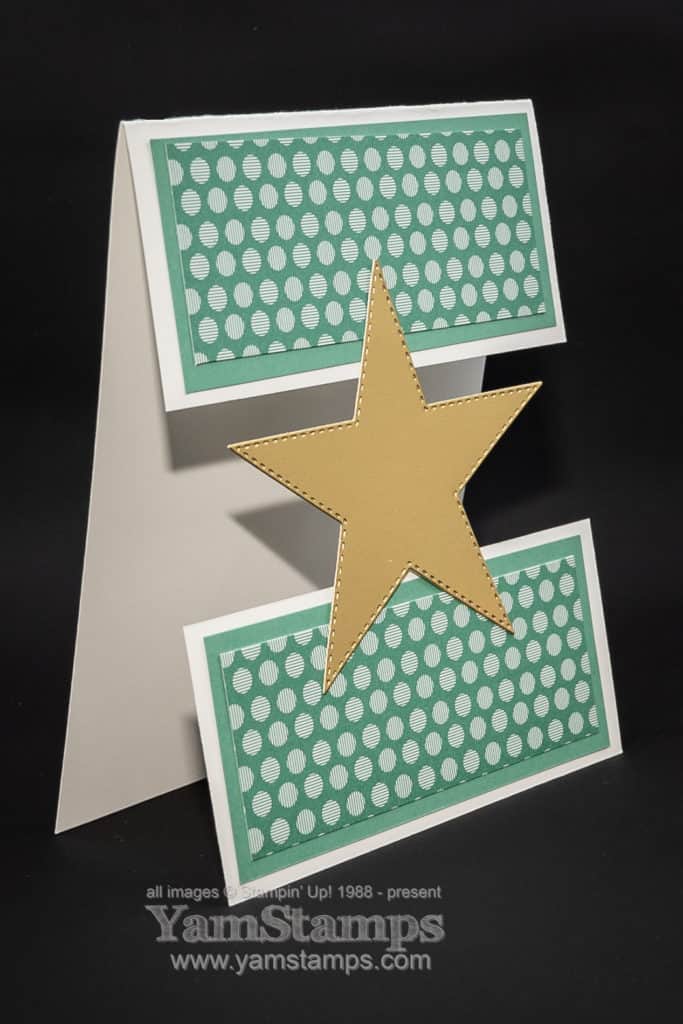
Sharing this starry fun fold card….though I’m never truly sure what is a fun fold and what is just a neat design?? Technically this card doesn’t have extra folds, though it does have extra cuts?! I shared a quick red white and blue (and gold) version on the YamStampsInstagram and Facebook accounts yesterday in honour of the Fourth of July, but here’s a more neutral toned version for other special events.
By cutting out a portion of the front of the card, and then using the die cut star to reattach it and hold it in place, it makes an otherwise straightforward layout a little more interesting! I cut the Whisper White Cardstock to 4.25″ x 11″, then cut the front flap at 2″ and cut another 2″ strip from the portion I cut off. Add a bit of decorative paper – in this case the 2020-2022 In Colour Designer Series Paper in Just Jade, and then added a Stitched Star die cut in Gold Foil.
If you’d like to make a version of this card, I’m offering a Card Class to Go – and this is one of the designs. Due to COVID19 precautions, I’m still not scheduling any in person Monthly Card Classes – so this is what I’m trying. For the regular class fee of $20, you’ll get precut supplies to create 4 different cards. You supply the adhesive (if you need some, you can purchase from me when you register for class and I’ll send it with your supplies). As well, if it’s in the design of the card, I’ll include punch outs or die cuts that you can add a sentiment or image to with your own stamps and inks (or handwriting). This is due to Stampin’ Up! regulations – I can’t include pre-stamped images or sentiments in a class kit. You can pick up your kit if you’re local to Burlington Ontario, or I can mail it anywhere within Canada. You’ll get the supplies plus a sheet with photos of the completed projects and step by step instructions.
CARD CLASS TO GO
WHAT’S INCLUDED IN YOUR CLASS FEE: – precut supplies to create four different cards including card bases, all design elements and envelopes – Instruction sheet with colour photo and step by step instructions for each project – regular postage within Canada/porch pickup in Burlington ON – customer service – I’m available to answer your questions or provide extra guidance if needed!
YOU SUPPLY: – adhesive(s) of your choice (some options available for purchase at time of class registration) – any stamps/inks of your choice to customize your cards as you wish
Interested? I have a limited number of kits available – you can email me to purchase one! Payment by etransfer preferred, but CC options available.
Contact me if you have any questions – or if you’re ready to get the supplies to make your own starry fun fold card!
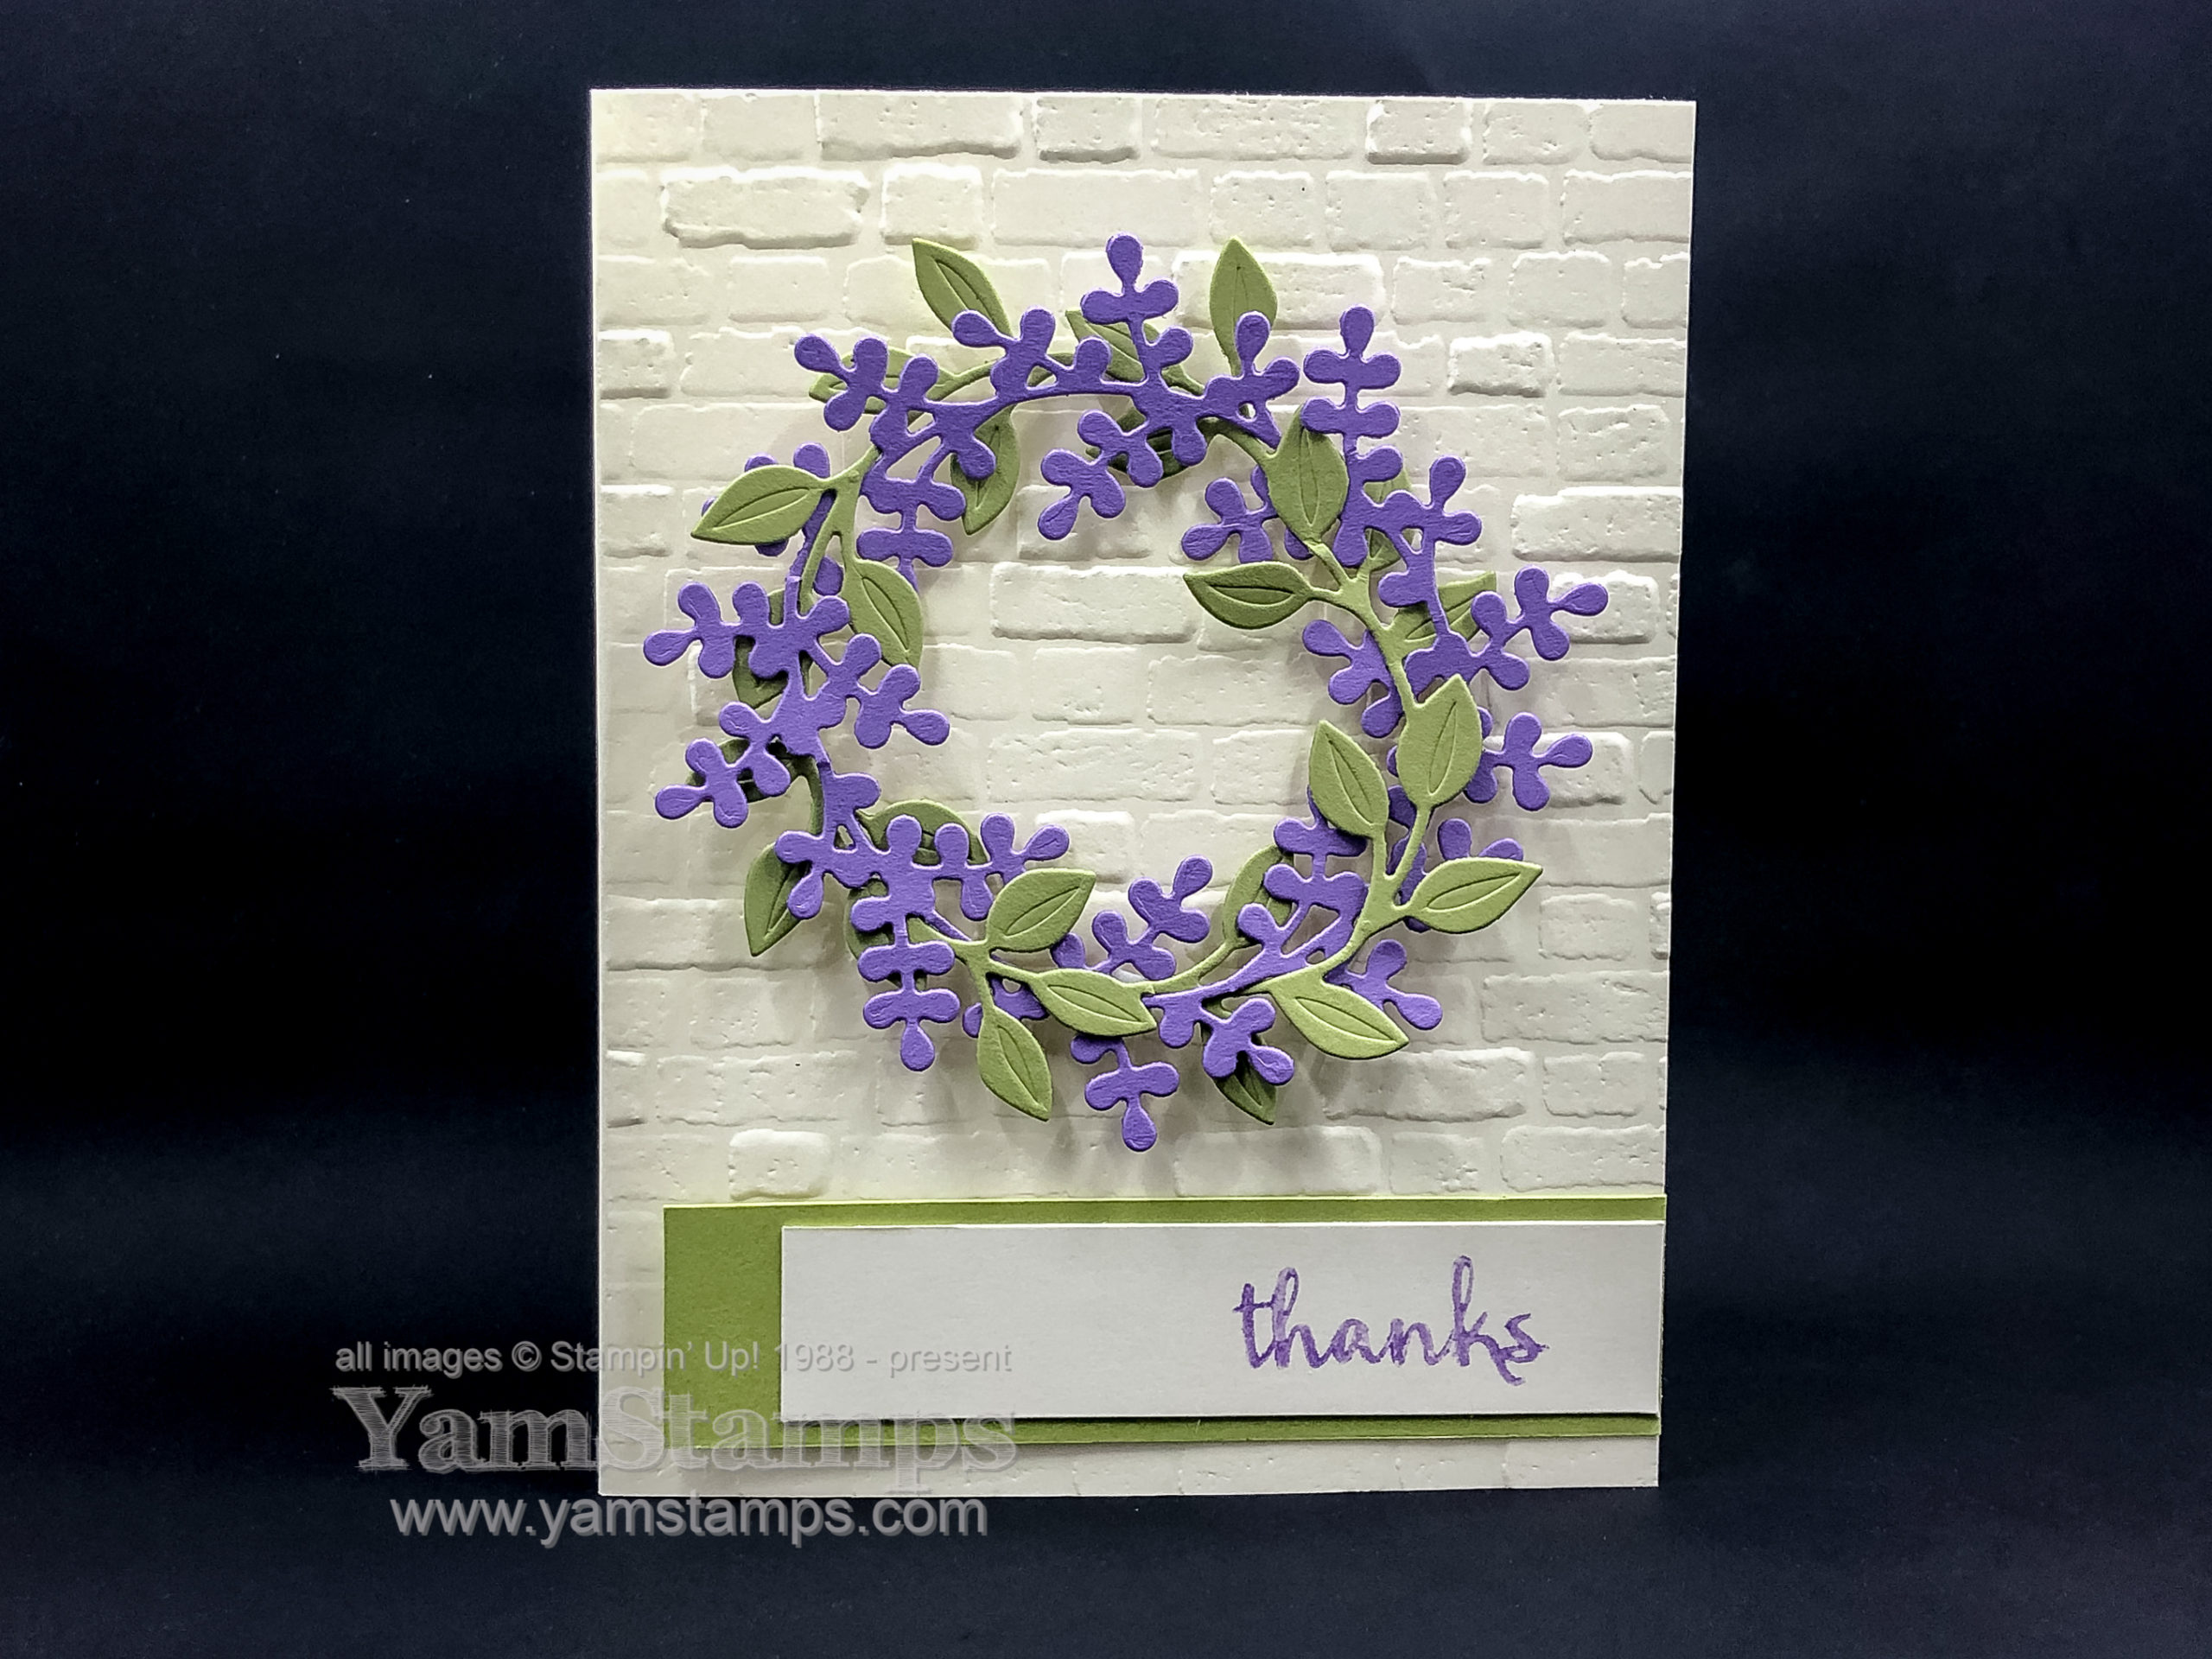
The Arrange a Wreath Bundle was high on my wish list and was part of my first order from the new Stampin’ Up! Catalogue when it went live. I’ve created this wreath card with it and there’s a trick that I did with these die cuts that made me clap my hands when it worked. (Seriously. Am I the only one who does that?!)
I really wanted to get started with this bundle because I loved the concept of it and how it could be used over the year. The Wreath Builder Dies coordinate with the images in the Arrange A Wreath stamp set, and the stamp set features sentiments that cover a variety of occasions. I wanted to show that this bundle can be used outside of some of those occasions, and I think I managed that with this card.
I die cut the two different wreaths – the leaves in Pear Pizzazz and the sprays in Highland Heather. If you’ve visited the YamStamps blog before, you’ll know that I like this colour combination! To make a more unified wreath element, I snipped the spray wreath in one spot, and then wove it around the green leafy wreath. I secured the ends in behind with a bit of Multipurpose Liquid Glue. After I finished patting myself on the back…LOL, I embossed the front of a Very Vanilla card with the Brick & Mortar 3D Embossing Folder, and then used Mini Stampin’ Dimensionals to adhere the wreath in place on the cardfront. I then used the brush end of a Highland Heather Stampin’ Write Marker to ink the “thanks” from the “give thanks” stamp and stamped it onto a strip of Very Vanilla, converting it from a Thanksgiving sentiment to something more suited for thiswreath card.
This cardfront reminds me of something I’d see in a modern design magazine of a big open concept kitchen or loft space. Pretty sure that this is as close as I will get to that set up!!!
While you can purchase the stamp set and dies separately, I’d recommend buying them together in the bundle – for one, it’s discounted 10%! As well – there’s nothing like the coordination of a stamp set and tool to make your crafting more quick and easy. If you’d like this bundle for a discount of 100%….you should consider purchasing a demonstrator starter kit and becoming part of my “Eh” Team! Until the end of June, when you purchase a starter kit, you’ll get a stamp/tool bundle of your choice for free! The starter kit contains all the business supplies you will need, plus $165 worth of product of your choice – so it’s completely customized to your crafting needs/wants! You can find out more about joining my group of demonstrators here or you can contact me. Oh – and another bonus? Demonstrators get early access to the new Stampin’ Cut & Emboss Machine that you can use with your Wreath bundle!! This machine will be available in September for customers, but demonstrators will be able to order it a month early.
I’m off to see what else I can create that is non-specific holiday-ish with this bundle! Happy Monday and thanks for stopping by.
Well, imagine my surprise when I realized I hadn’t posted here in a while – oops! So I’m back, with a bonus. One set, two looks. I have been busy behind the scenes, updating my new subscriber video, hanging out in the new catalogue launch event group, and like you, continuing to negotiate our changing situation day to day. Sometimes it’s all I can do to make it through the day and then zone out watching Netflix (currently finishing the Great Canadian Baking Show, which I’ve enjoyed, though admittedly not quite as much as its big brother, the Great British Bake Off, and not as much without Dan Levy).
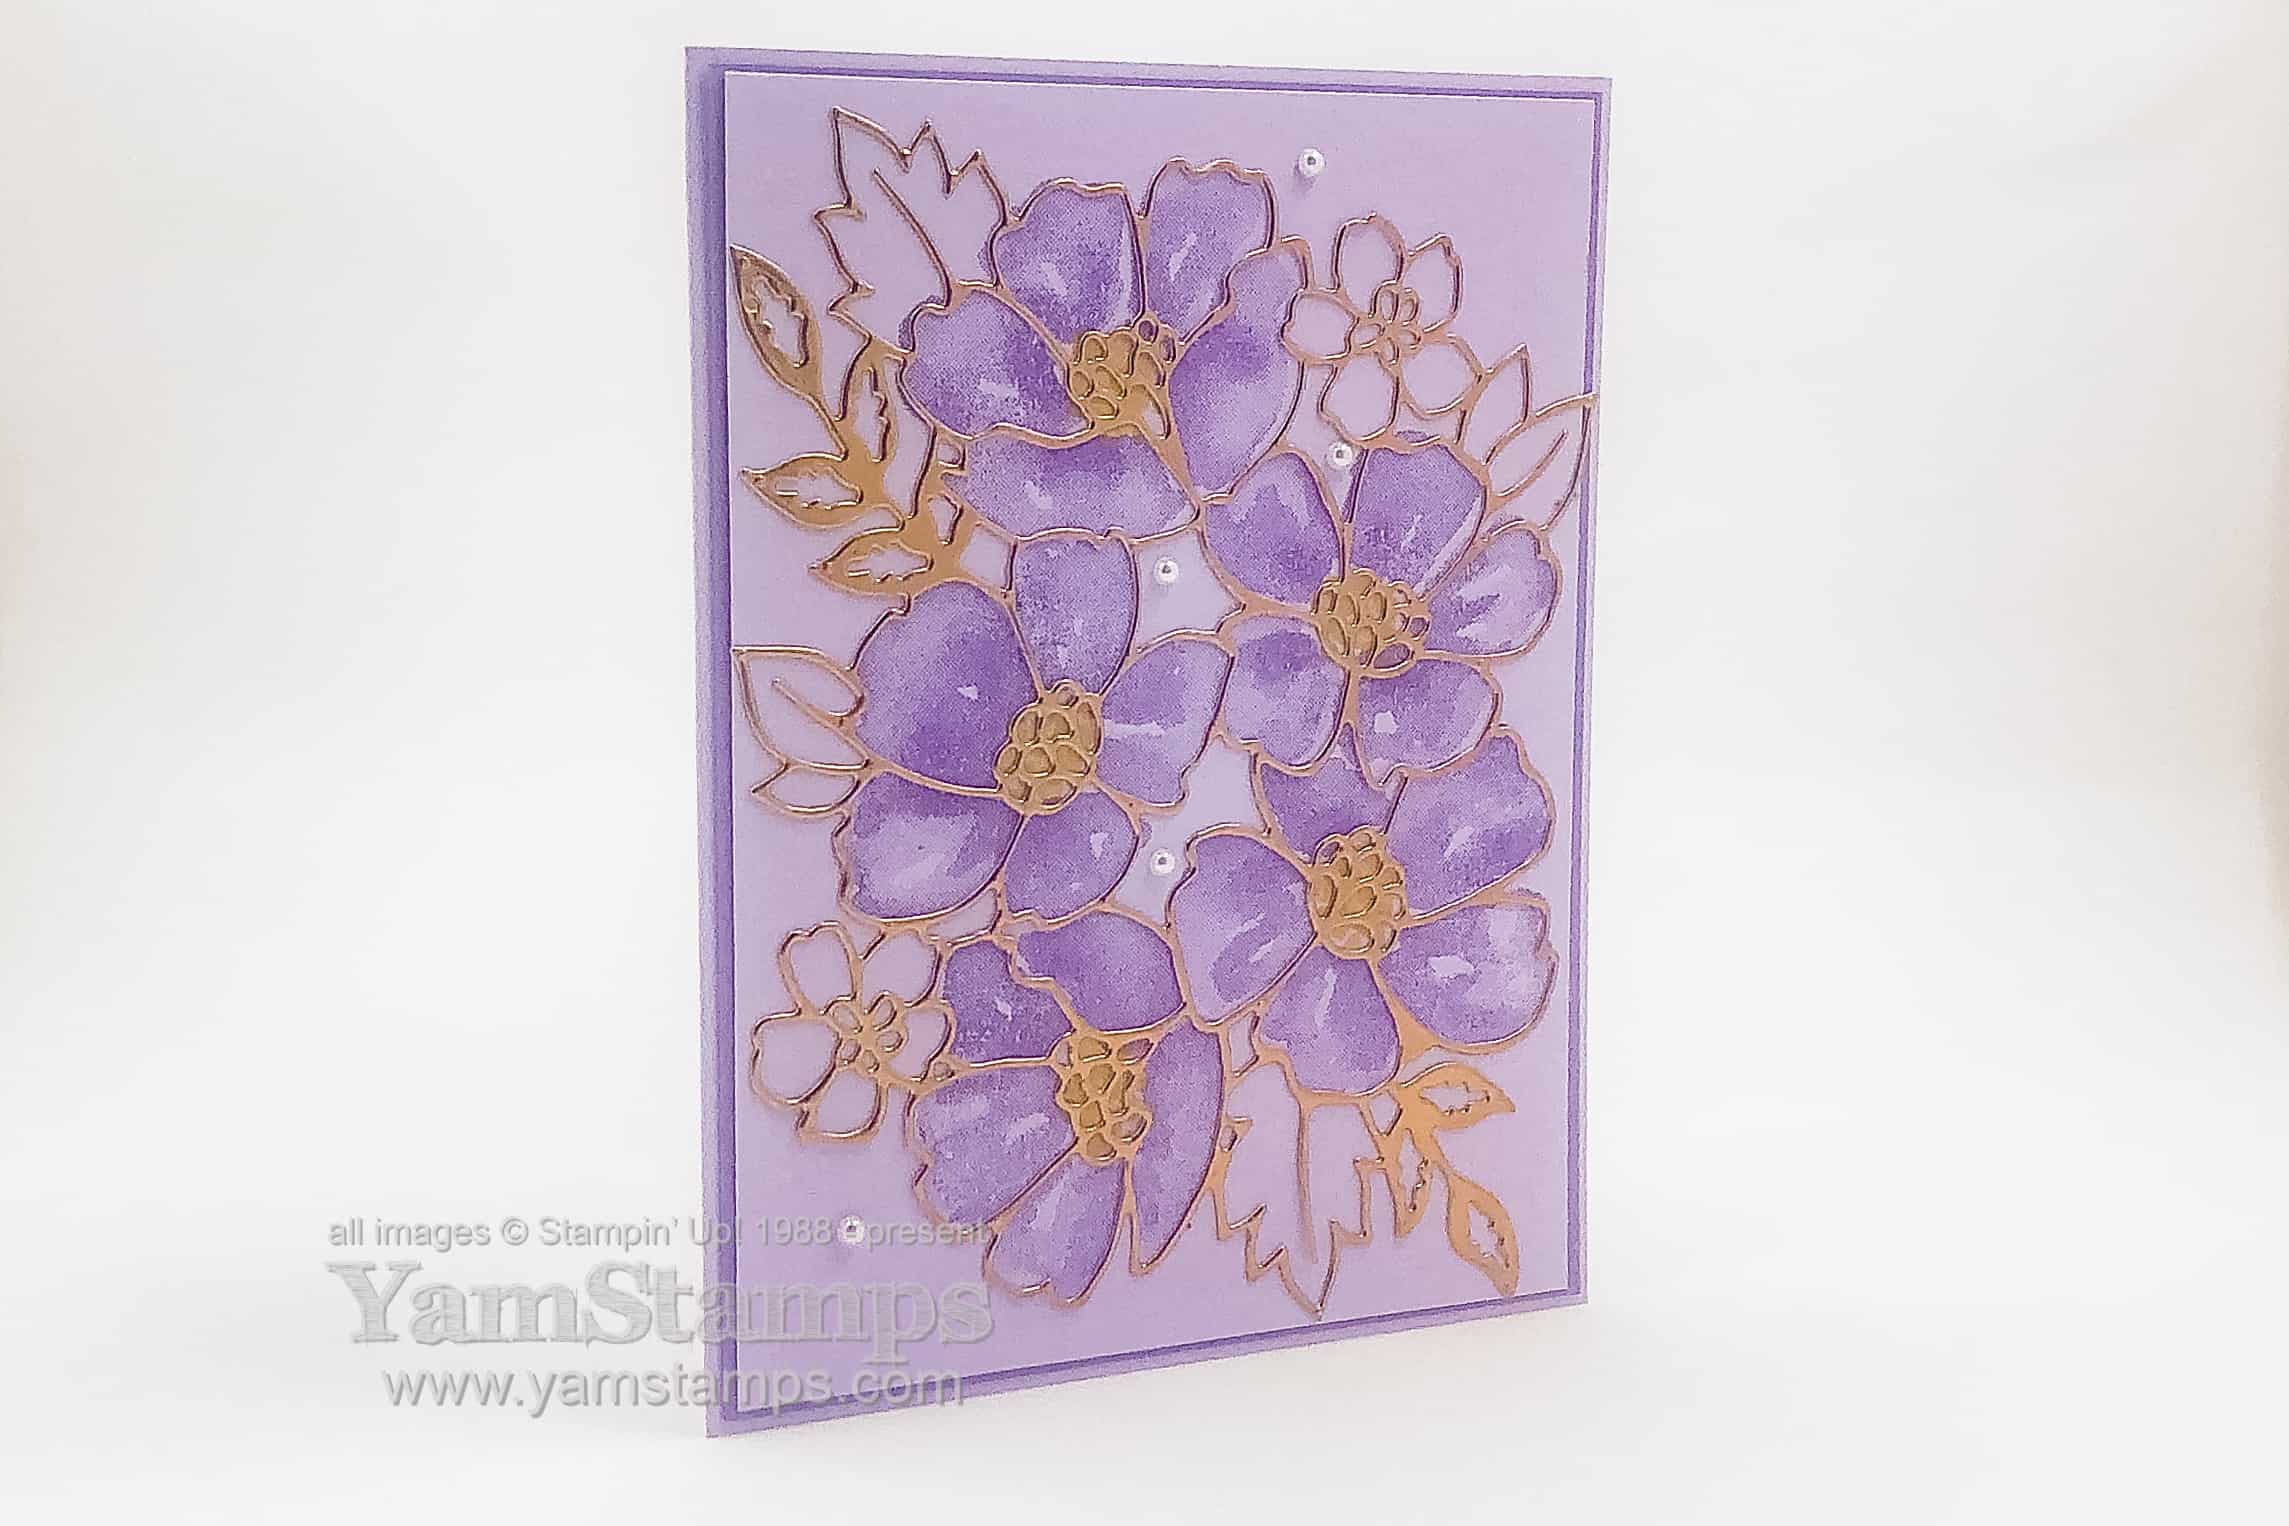
Anyway – refocus! OK, so the set/bundle I used was Blossoms in Bloom. I love the coordinating Blossoms in Bloom stamp set and Many Layered Blossoms dies, and love that the dies can actually be used on their own as well. The first card was one that I used for a demonstrator swap where Stampin’ Up! demonstrators each create multiples of a card, then we get back one of each participants’ cards. It’s a great way to see other ideas and stamp sets that you may not (yet) own. I try to share a different swap card I’ve received each Sunday on the YamStamps Facebook PageSunday Swap Share.
For this card, I focused on the thin, detailed die cut and kept the colours monochromatic otherwise. The image of the blossoms is stamped in Highland Heather onto Purple Posy Cardstock. The detailed die was cut out of a Copper Foil Sheet. When you place an Adhesive Sheet on the back of your cardstock/foil before die cutting, all you have to do after running it through your die cutting machine is peel off the liner for the adhesive and place your die cut wherever you want!
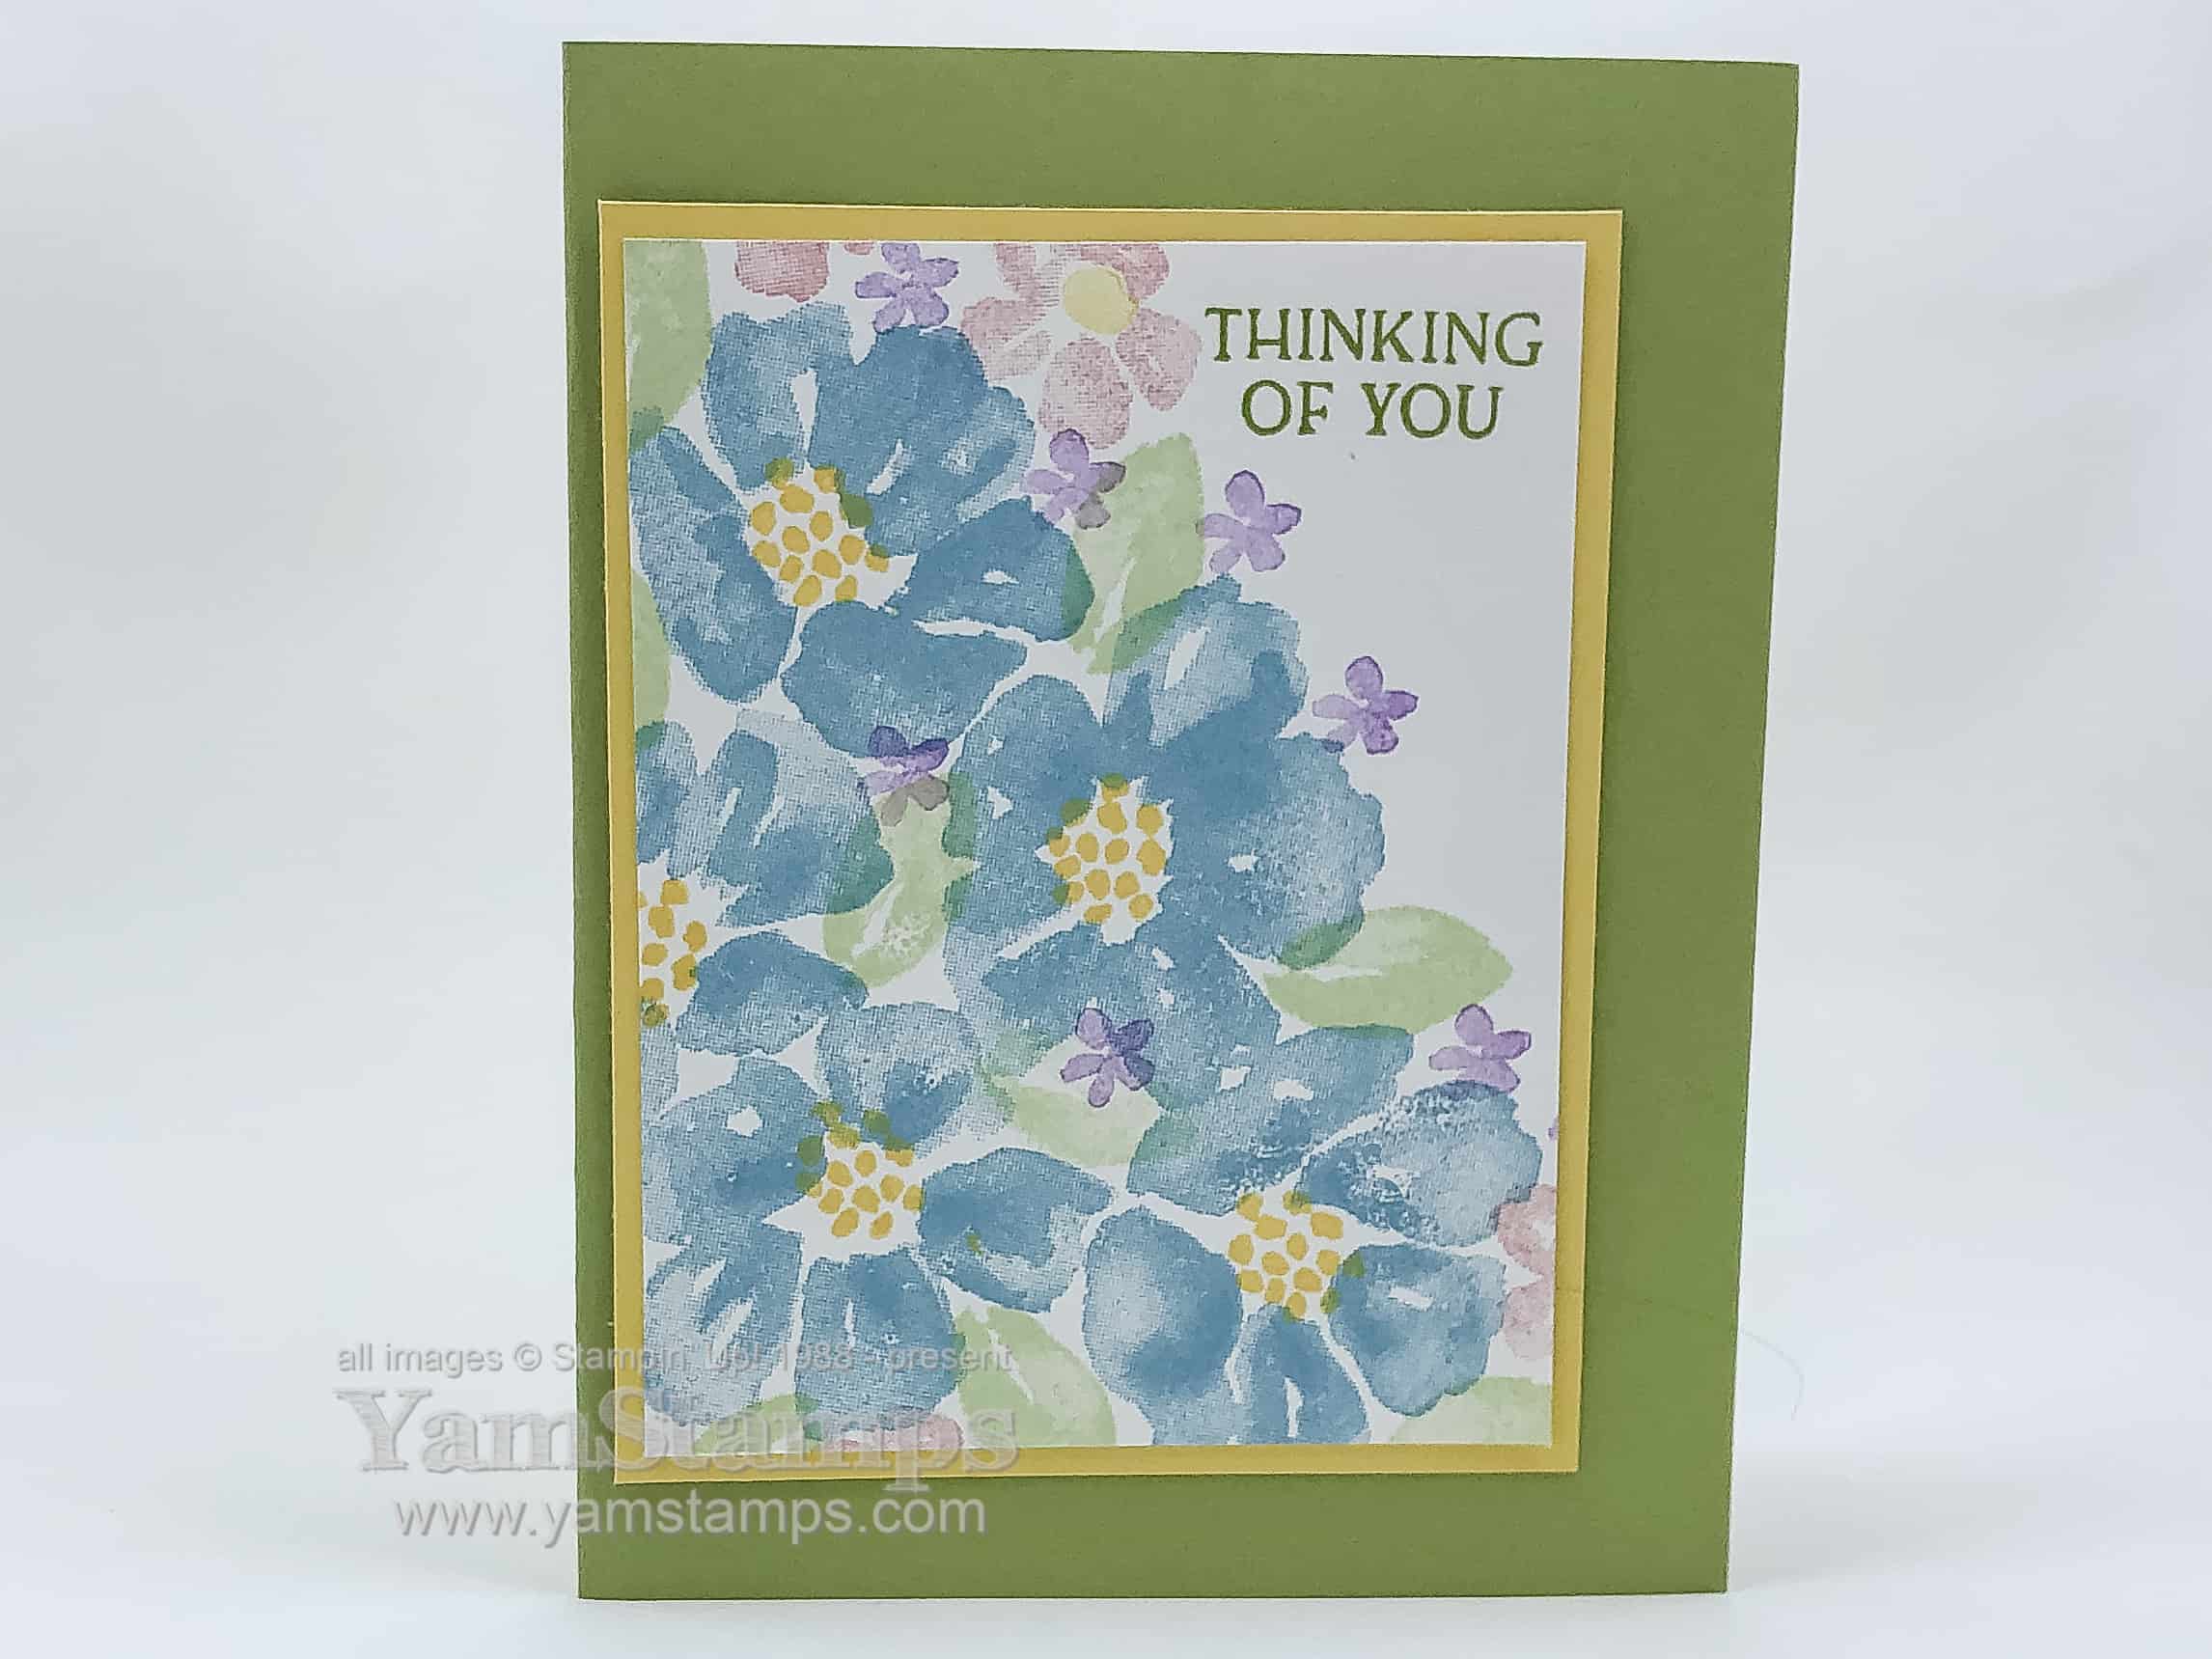
For the second version of the card, I focused on the stamped images in the set and a more colourful approach.
For the large flowers, I used Balmy Blue ink, then used Highland Heather for the very small flowers and Petal Pink for the medium sized flowers. I essentially just stamped the large flowers first, then filled in any gaps. The sentiment and leaves were stamped in Pear Pizzazz, but I used second generation images for the leaves so they were a softer colour that didn’t distract from the flowers. (Second generation image = ink up the stamp, stamp off once on scrap paper, then stamp onto your cardstock). Some of my favourite card making hacks are on this card – second generation images, stamping off the edge of cardstock, leaving one corner blank for the sentiment, and mounting the image off centre on the cardfront. I use these tricks for myself otherwise I can end up with the same design all the time! It’s fine if you’re sending off the cards to different people, but it becomes obvious when you’re posting them in one place LOL. My other lazy crafting card hack? All the colours used came from the same Stampin’ Up! colour family – Subtles.
Hope you enjoyed this One Set, Two Looks approach! I’m off to finish up prep for Stampers Club tomorrow. We continue to meet virtually, and it’s great to see everyone during our Zoom crafting sessions. We likely will not be meeting in person for a while longer, and will keep an on local mandates to help guide our decisions. In the meantime, you can always check out the YamStamps blog here, plus the YamStamps accounts on Facebook, Instagram, YouTube and Pinterest. Oh – and subscribe to my newsletter to get access to the new subscriber tutorial video. See you online!
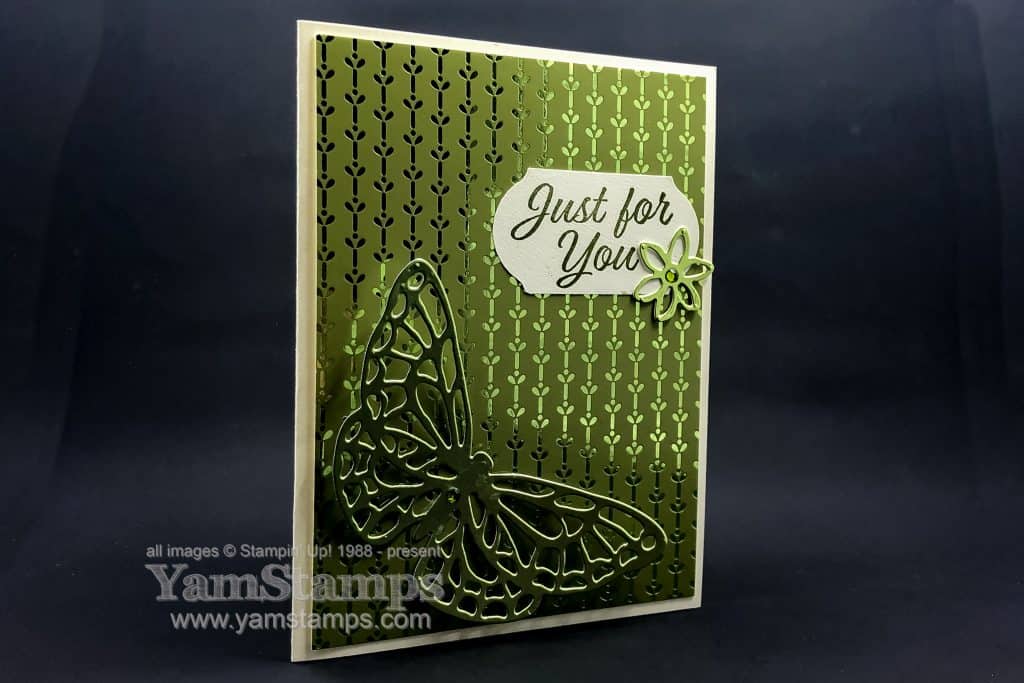
A Just For You card using some retiring product. Just a few days left to grab these items before we fully turn our attention to the new Stampin’ Up! Canada catalogue!
We made this card as part of Stampers Club this month. Currently we are continuing to meet online, so I sent out the class packets and then we assembled the projects together during a Zoom session. It was nice to be able to see each other, even if we couldn’t be in the same room! Under Stampin’ Up! regulations, we can’t send out stamped images, so club members got a blank label and could add whatever sentiment suited their needs.
My next online event is the New Catalogue Kick Off which I’m hosting in a limited time Facebook Group. I’ll be sharing some projects using new product, and I’ll go live in the group on Wednesday evening (June 3 – the day the new catalogue is active). Click here to request membership. I’ll keep the group open until the end of the week, and then will revert to using the YamStamps Facebook Page and Paper Crafting with YamStamps Facebook Group. Of course, I’ll also continue to post here on the YamStamps blog. In the meantime, hope you liked theJust For You Card– and I’ll be getting prepped to share all the new product coming your way on Wednesday!
I know, I’ve already whined about this set retiring, but I am revisiting Paris yet again with this card. I’m also revisiting a technique that I haven’t used in a while – forgot how fun and easy it is!!
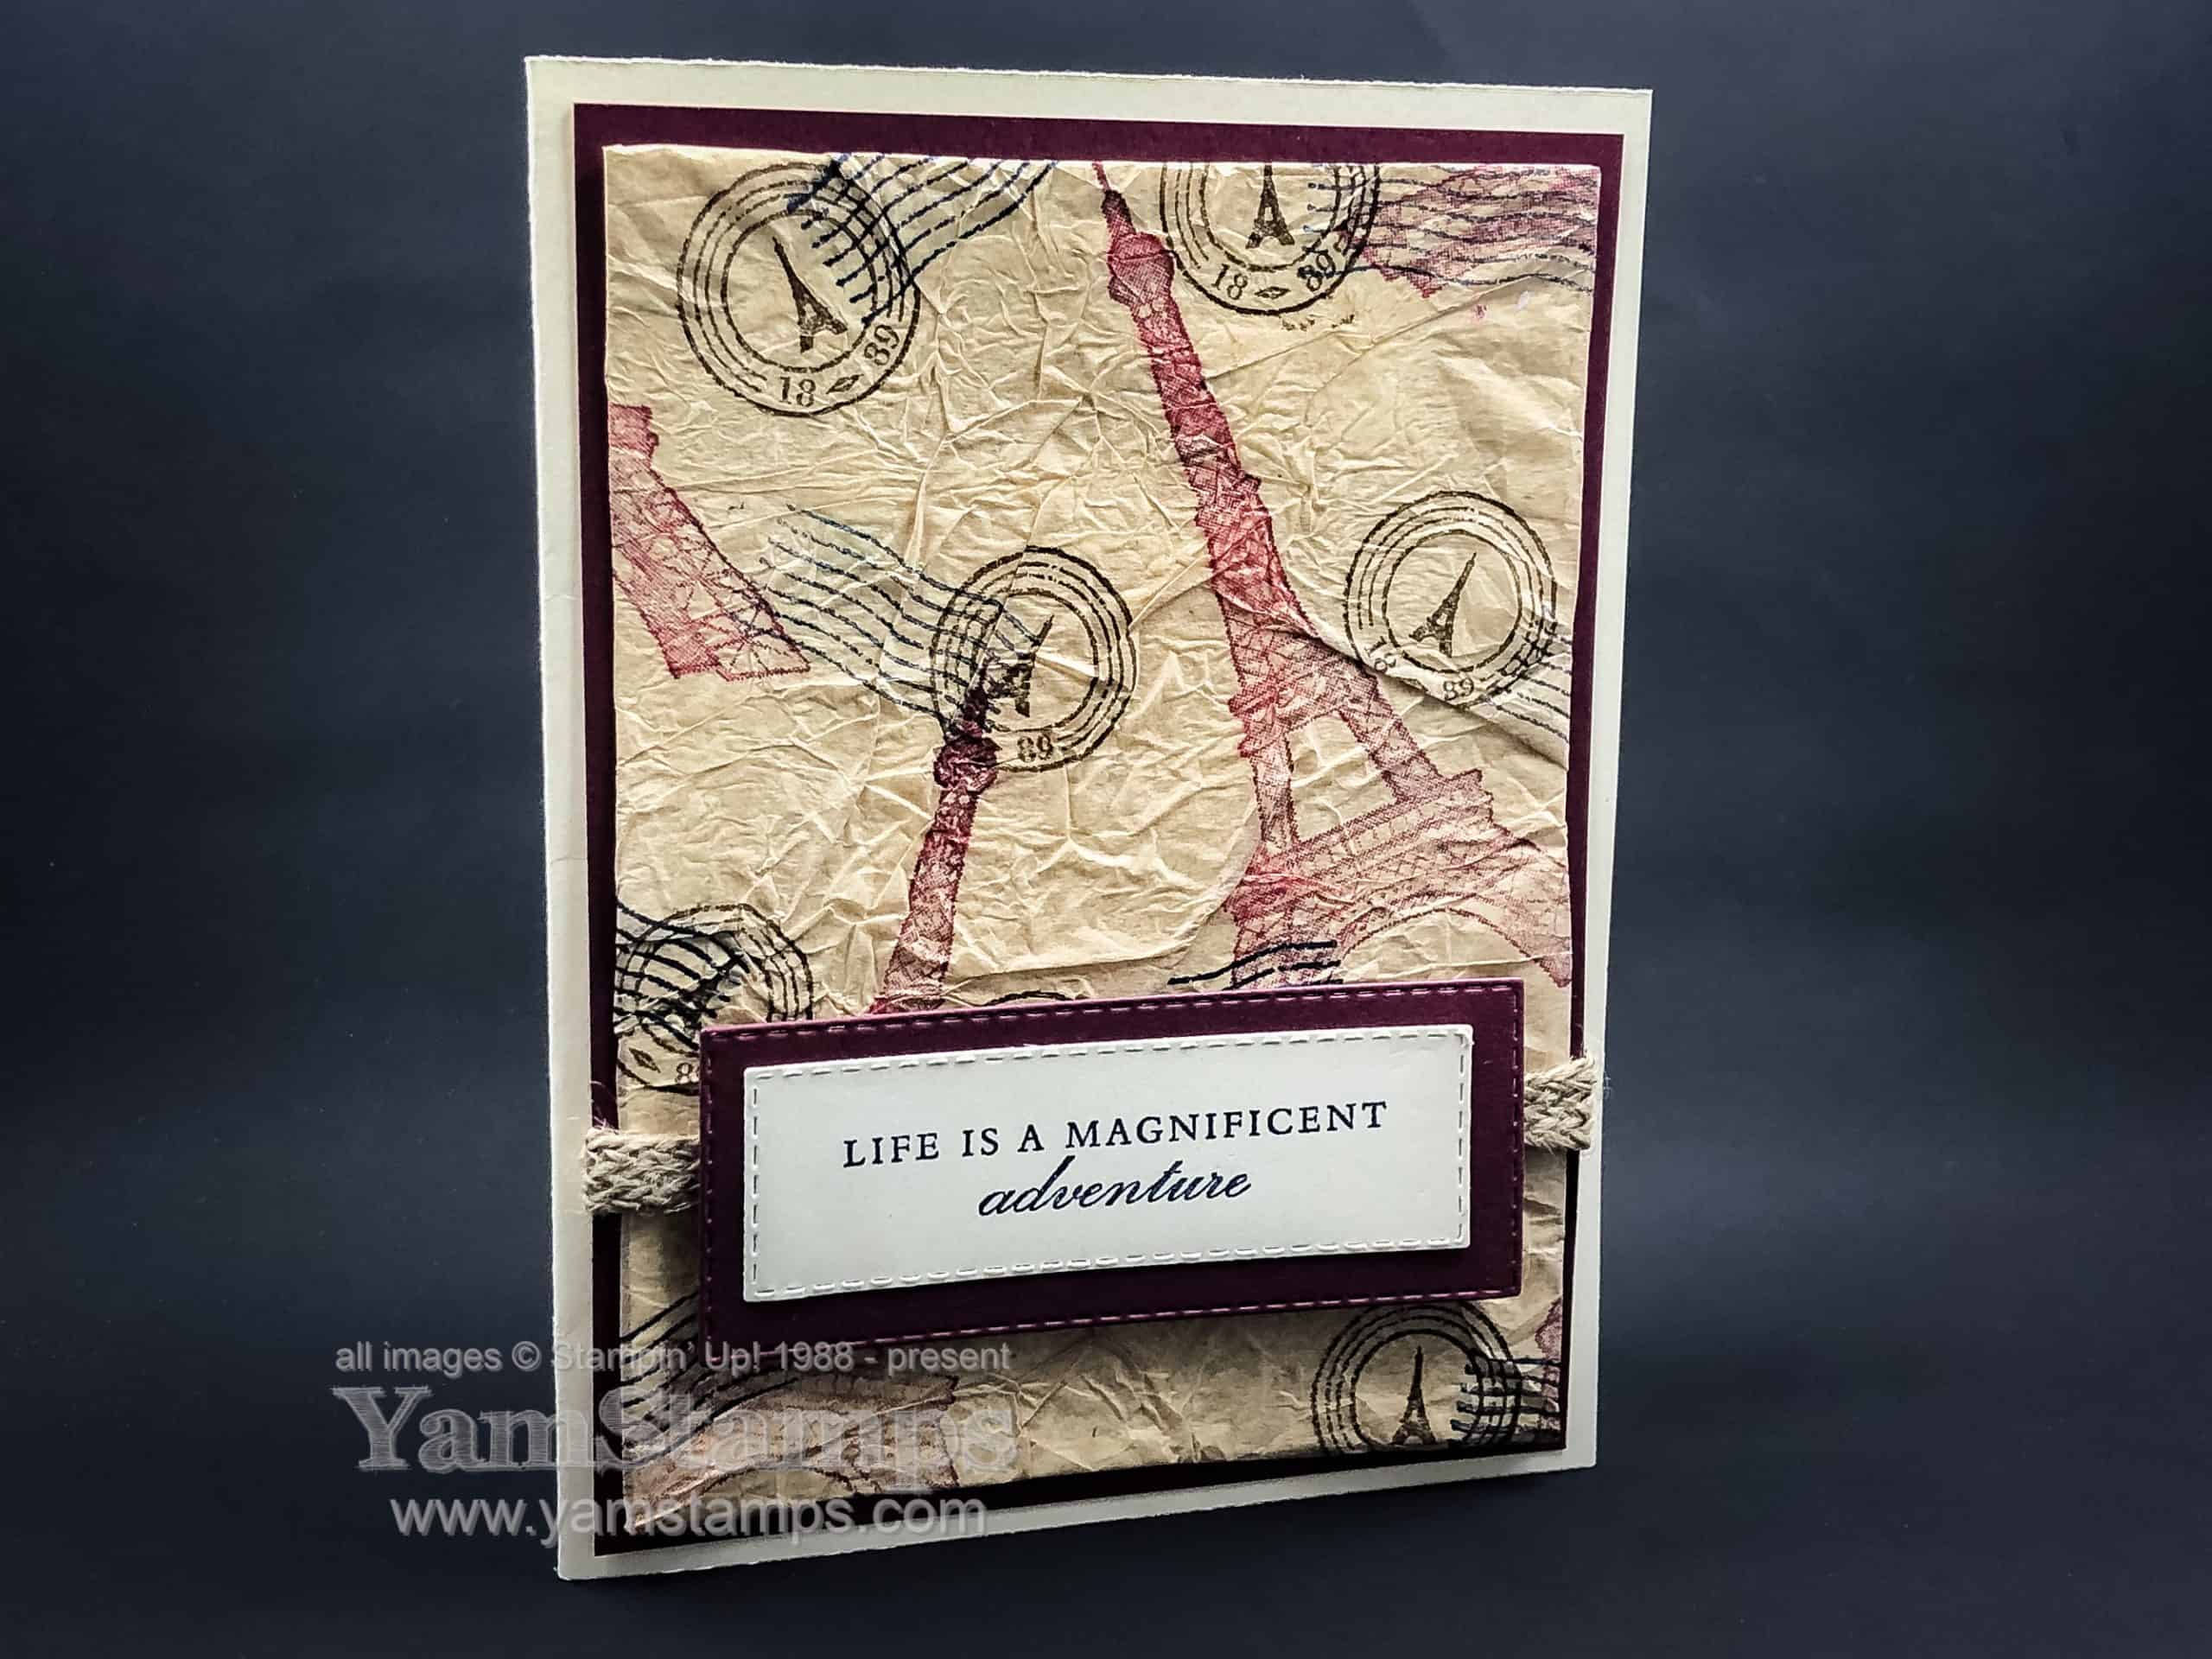
So, yes, once again I used the Parisian Beauty stamp set, while I still can. I have until June 2nd to create and share projects with you with this retiring set LOL. I used the faux silk technique, which I haven’t done in a while! A group of my crafty friends had a “virtual retreat” over the weekend and one of the challenges was to create a happy mail card. Something that featured either the saying “Happy Mail” or featured something postal themed. Et voila! the Parisian Beauty set has a cancellation/post mark stamp so I was able to bring it out.
I am not the greatest at collage-type stamping, but faux silk is quite forgiving. I love the vintage feel to this card! I used some off white tissue paper, and stamped the images randomly on it. Crumple up the tissue paper, uncrumple and then adhere onto cardstock with Multipurpose Liquid Glue. I wrapped the tissue around the back of the cardstock and stuck the ends down to keep the front neat, then adhered that whole piece onto some Merry Merlot Cardstock. I used some of the Braided Burlap Trim and cut out the sentiment with the Stitched Rectangle Dies. Had to use Stampin’ Dimensionals to adhere the sentiment/backing to the card because the Burlap Trim is thick.
So there you go – revisiting Paris and revisiting a technique! As much as I love the Parisian Beauty set, there are lots of great things coming in the new catalogue! I’m in the process of getting the catalogues out to those who requested them or purchased from me in the past year….and I’ll be in touch to check that they arrive! In the meantime, join me for a Launch Party for the new catalogue on Facebook! You can request membership to the New Catalogue Kick Off group here. I’ll share some different projects and products, and will go live for a short while on Wednesday June 3 at 7pm, but you can join before that date! See you there for the fun.