Sharing this Leafy Die Cut Card using one of my favourite die sets.
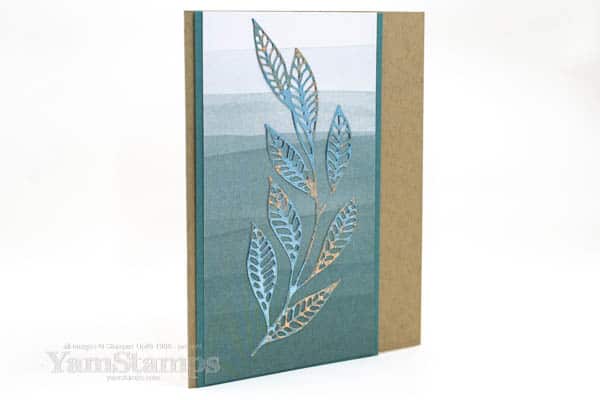
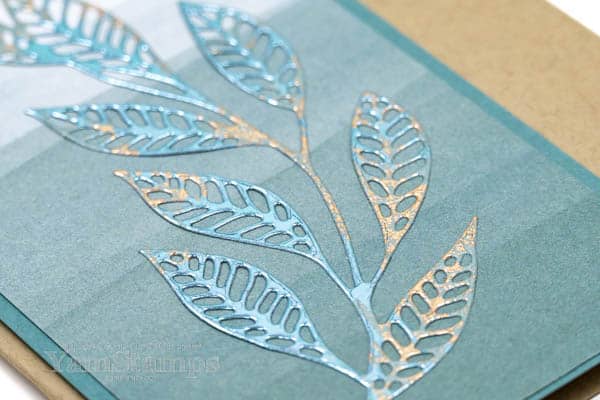
Similar but different….here’s another leafy die cut card for you today! The Artistic Dies are still one of my favourite sets of dies – and this leaf spray is a big reason. I love how this spray is big enough to be the main feature if you’d like it to be…and can be used for cards for anyone and any occasion.
For this card, I die cut the leaf spray from a sheet of the Dry Brushed Metallic Specialty Designer Series Paper. Before I die cut it though, I did add some Adhesive Sheet to the back – so it was super easy to add to the cardfront. I used the sheet that had Soft Succulent shades in it, so I stuck to blue-green tones for the background. The ombre patterned Lost Lagoon paper is from the Bright & Beautiful Designer Series Paper. I placed it onto a piece of Lost Lagoon Cardstock before adhering to the front of a Crumb Cake card, which I think echoes to gold tones in the Specialty DSP. So matchy matchy, but not perfectly so for this Leafy Die Cut Card.
I have confessed how I tend to automatically reach for Basic White as my go-to neutral background for a card, but this was a good reminder of how nice Crumb Cake can be! Light enough that you don’t have to add any extra cardstock inside to be able to write a message but a deeper, more calming shade than a bright white. It also feels a little more “artsy” to me. Or maybe “kraftsy” – because it’s the shade we used to call “kraft” cardstock… (Sorry, I’m a little punchy as I’m writing this post…)
So – the crafty challenge for the next week or so (for all of us who are willing to take it on…) – create a card and use a different neutral shade than you usually use for your cardbase! If you post it on social media – tag me – @yamstamps across all platforms – including Threads which I have joined and am still trying to figure it out!
Don’t forget that if you are stocking up on Stampin’ Up! supplies – you’ll want to do so in multiples of $60! Each $60CAD product order (before shipping/taxes, after any discounts) for the rest of July will earn you a $6CAD coupon code that you can redeem in August! You can shop online at https://yamstamps.com/shop or message me if you’d like to pay by etransfer or need assistance placing your order.
This Layered Leaves Background Card is easier than you might think…
Really! This layered leaves background card uses die cut labels that make it easy to add a lot of delicate details to this card.
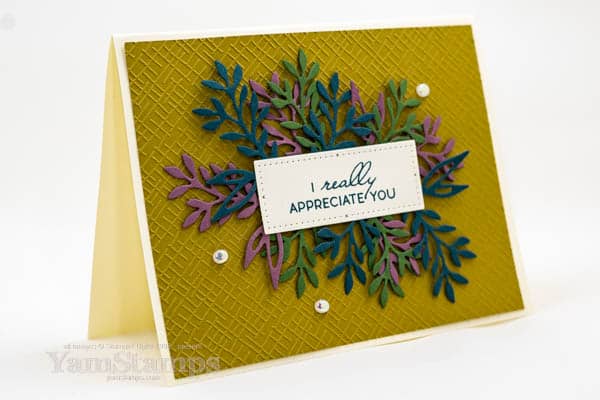
I used a number of the newer/returning Stampin’ Up! colours for this layered leaves background card – and I think it might almost look a little autumnal…but I couldn’t wait until then to share it! Using Wild Wheat as the backdrop, with foliage die cut from Pretty Peacock, Moody Mauve and Mossy Meadow. I also used Very Vanilla for the sentiment label and card, as I felt it went better with the tones of the colours I ended up choosing. I tend to automatically reach for Basic White – so every once in a while I have to remind myself that there are other options!! [What about you – are you a Very Vanilla or Basic White kind of crafter??]
The background layer is textured with one of the Basics 3D Embossing Folders. I love these folders that are part of the Online Exclusives. Stampin’ Up! Online Exclusive Products are items that are available for purchase, either through the YamStamps Online Stampin’ Up! Canada store, or by contacting me and having me place the order for you. You just won’t find them in a catalogue. Stampin’ Up! is able to offer different items and will replenish stock as able, and add new offerings every few months – in fact, there’s a new set of products added to the selection as of 6 July!
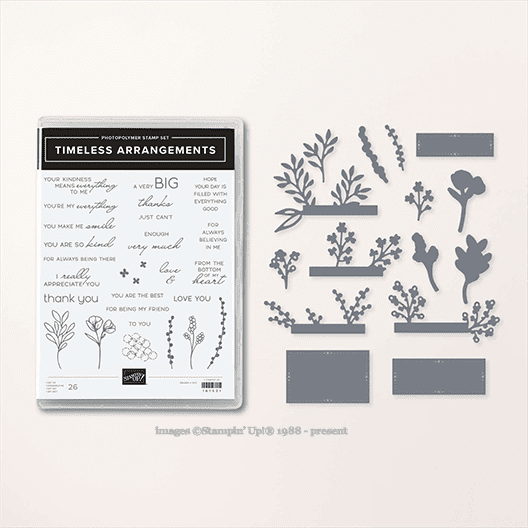
To add these layers, I basically cut one of the leafy frames from the Timeless Arrangements dies twice from each of the cardstocks. I added adhesive to the back of the die cut sentiment, and then arranged the different leaf die cuts – one showing out the top, and one showing out the bottom. I trimmed the rectangular base of the die cut as needed so it didn’t overhang the sentiment. The sentiment is from the Timeless Arrangements stamp set, and I stamped it in Pretty Peacock ink (the rectangular die is also from the Timeless Arrangements dies). You can get the Timeless Arrangements stamp set and dies together in a discounted bundle during the 2023-2024 Annual Catalogue sales period. (They may be available after that if they are not retired, but as individual items only. Stampin’ Up! tends to offer the discounted bundles only for one catalogue sales period).
The small sentiments actually can fit on the little rectangular bar too! To make it simpler for me, I stuck to using just the one die cut with the leafy sprays on it. The finishing touch for this layered leaves background card was a few Flat Adhesive-Backed Pearls because everything is more fun when there’s bling.
You can shop for any of these products 24/7 in Canada at https://yamstamps.com/shop or contact me for assistance placing your order or if you’d like to pay by etransfer.
A slight change in a card fold – and what a difference!
My cards are not usually over complicated, and I do always like a nice, clean layout. For Stampers Club in May, I designed a card that showcased some of the new Stampin’ Up! Colours, and used some Rose Gold Foil for a die cut because shiny is always good in my books!! I liked the first version I came up with, but a little tweak and what a difference!
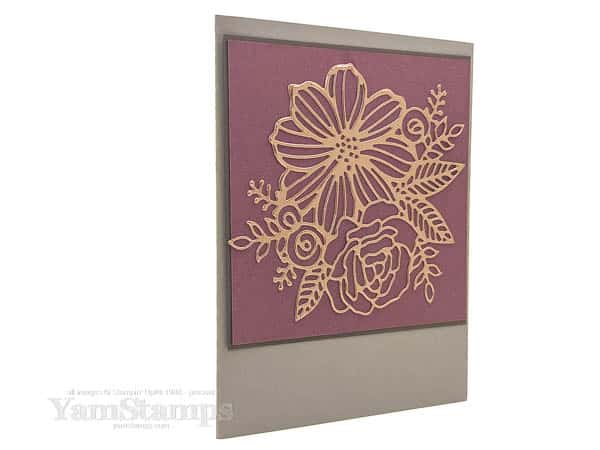
So this was the first version…
Showing off the Artistic Dies and Rose Gold Specialty Paper, on a background of Moody Mauve and Pebbled Path, on a Crumb Cake cardbase. I do love the effect, and putting an Adhesive Sheet on the back of the Rose Gold Specialty Paper before diecutting makes adding the intricate die cut to the cardfront so much easier. I didn’t add a sentiment to this, but was thinking I could add something in Pebbled Path ink at the right corner below the focal piece.
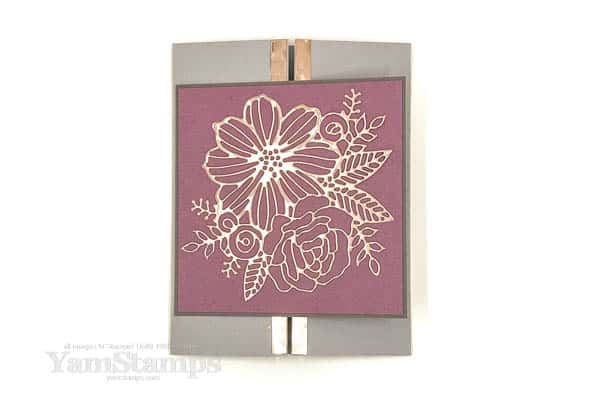
I did think it was a bit “ordinary” though, so using the exact same cardstock pieces, I just created a gatefold card rather than a side fold card, and added two strips of Rose Gold Specialty Paper to the edge of the cardstock and LOOK – what a difference! I think it makes it look so much more special and interesting!
Also an unfair advantage perhaps – what a difference lighting makes! The angle that I had to photograph the card really emphasized the shininess of the foil which you can’t see as much in the other card photo. HOWEVER, I do think that the gatefold card for this kind of a layout makes a much more striking impression, don’t you?
So there’s an idea for you for if you think your card design is “okay” but you want to give it a bit of a lift – try changing up the fold! Instead of scoring your 8.5″ x 5.5″ cardstock at 4.25″ for a side or top fold card, score 2.125″ (2-1/8″) in from each edge of the card, and make a gatefold card instead! (Just make sure you only adhere the focal piece only on one side of the card….otherwise you stick your card shut).
My Stampers Club is meeting online via Zoom, and members have access to the recording so they can make their cards at their own leisure. The advantage of “virtual” club is that club members don’t have to be local to Burlington! Club members join for a 6 month period. Club requirements are a minimum product order each month using either the club host code or by emailing me with their order. We meet online once a month to assemble that month’s club cards (project kits are either picked up or mailed via Canada Post); once during each membership period, club members will earn the host benefits from that month’s club orders (aka FREE product! Guaranteed minimum $20). Check out the YamStamps Events Page for dates and more information, and message me if you’re interested in joining us or want more information!
This is a one colour wonder card – I love the monochromatic look!
I love the clean look of single colour cards – I think of them as one colour wonders – like this card! There’s something simple and elegant about the effect, but it’s not so simple that it’s boring.
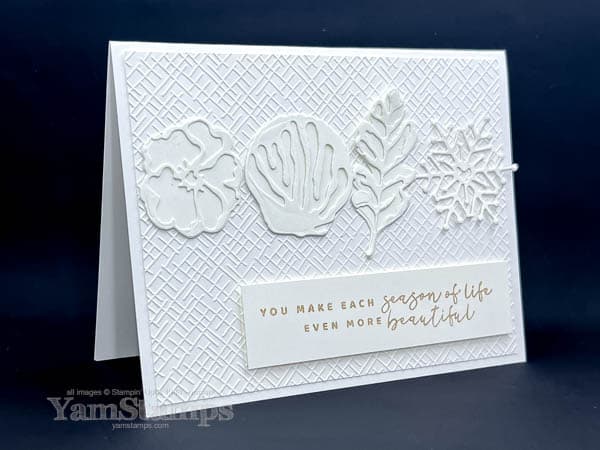
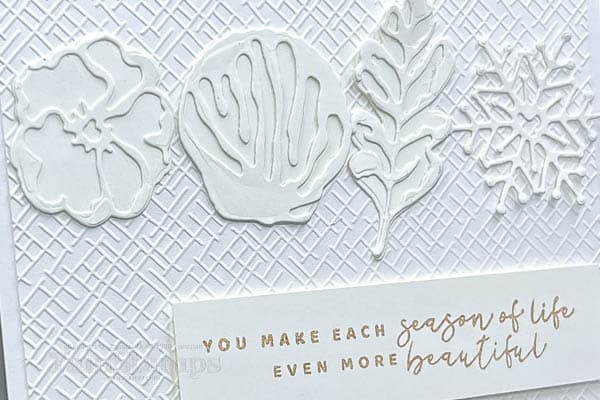
When I am keeping the colour scheme very simple, I like to make sure that there’s still a lot of eye catching details – so using texture really makes a one colour wonder from being boring. In this case, I used one of the Basics 3D Embossing Folders to create the background – I think this is my favourite out of the three. These Embossing Folders are part of the Online Exclusive Offerings from Stampin’ Up! so you won’t find them in the catalogue – but you will see them in the YamStamps Online Stampin’ Up! Canada Store. You can see the online only offerings by typing “Online Exclusive” in the search box. I just checked the online store, and while you can see the folders, you can’t order them at this moment since they’ve been so popular! Looks like they’re going to be available again in a week or so, though (fingers crossed). Yay! They are available again right now!
The flower, shell, leaf and snowflake are from the Chic Dies, and the sentiment is from the coordinating Seasons of Chic Stamp Set. These are carried over from the last Annual Catalogue (and I’m very happy that they are still around! So versatile!). As a Demonstrator, I like to be sure to share all the new and exciting products that are released in the catalogues or online, but I also like to make sure that some of my existing favourites get the attention they deserve!!
I die cut the layers from Basic White Cardstock, and layered the coordinating images before adhering them to the card front. I decided to use Crumb Cake ink for the sentiment on this One Colour Wonder Card because I felt it added a touch of colour without being overpowering.
The other thing I love about the one colour wonder approach – it makes my crafting easy because I don’t have to think about what colours to put together! If you like to avoid crafting brain strain, you may also want to consider signing up for a YamStamps Sketch System Subscription. Subscribers have told me that they love how easy it makes their cardmaking! Week One brings the sketch and the first sample to your email inbox, and over the following three weeks you get a different take on that sketch. The sketch and samples are tools to spark your own creativity – so that you can enjoy the process and the results without having to work too hard!! It’s just $9.99CAD every four weeks – get more information and start now by clicking here, or message me if you have any questions! Paper Crafting doesn’t have to be difficult to be impressive!
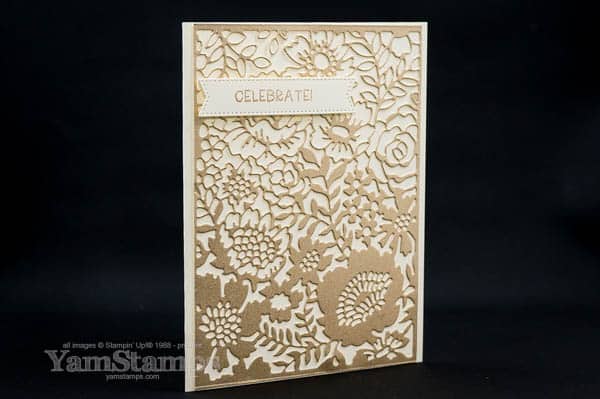
Stampin’ Up! has a number of larger dies that can be used to create backgrounds or main elements for your paper crafting projects. I used the large die from the Two Tone Flora Dies to create this shimmery die cut card. The dies include the large die, as well as smaller dies that coordinate with the large die and with the Two Tone Flora stamp set. Right now, they’re available in a discounted bundle, but that option will disappear after 1 May 2023. The individual products will still be available for purchase, though!
For this quick and elegant shimmery die cut card, I used the large die with the Fine Shimmer Paper Pack (also retiring – available until 1 May 2023/while supplies last). I love the shimmer paper for adding some bling but not being over the top (and also not leaving glitter/shimmer everywhere). To make this even easier, I applied strips of the adhesive sheet to the back of the Fine Shimmer Paper before die cutting.
Tips for die cutting thicker layers/detailed dies: I make the “sandwich” according to the instructions on the cutting plate, and run it through the Stampin’ Cut & Emboss Machine a couple of times. I also have found that if I have the die/paper on a slight angle (rather than lining it up straight on the cutting plates), it tends to cut more efficiently (plus it’s easier to feed through the machine). I definitely use both of these approaches if I have adhesive sheet on the back. I usually find that it may not cut all the way through the liner, but when I pull the adhesive liner off my die cuts, the little bits also tend to pull away at the same time.
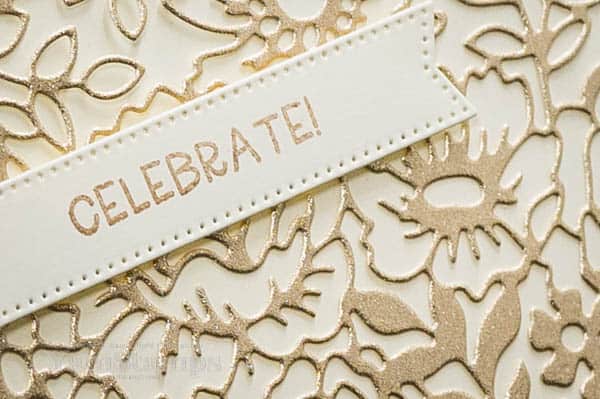
I added a Stylish Shape die cut label and stamped “Celebrate” in Crumb Cake ink, which I thought complemented the tone of the Shimmer Paper. The sentiment is from the retiring Framed Florets stamp set (see previous disclaimer about retiring product…).
You could make a whole bunch of these shimmery die cut cards ahead of time, but just add whatever label was appropriate for the occasion!!
If you’re looking for more card making inspiration, information and tutorials, be sure to be signed up for the YamStamps Newsletter! New subscribers get a free video tutorial as well. Sign up using the box at the top of the website, or click here.
A bit of ink gives these die cuts a cool effect for this floral card!
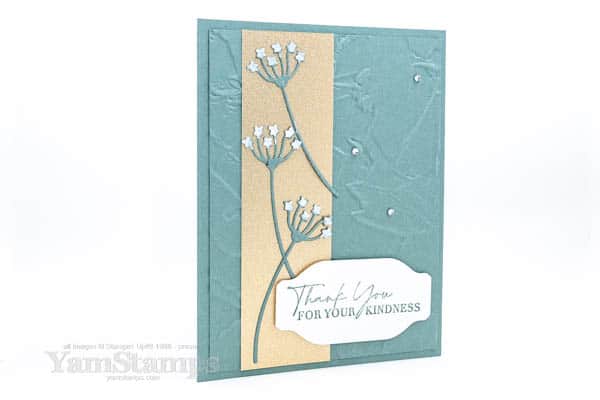
I’m all about flowers right now….because I’m ready to stop shovelling snow! This is a floral card that I made for a recent Demonstrator only card swap. We used products from the January-April Mini Catalogue, so I chose to use the Dainty Delight stamp set and dies – which you can purchase separately or purchase together in a discounted bundle. A quick reminder that discounted bundles are often available only for the sales period of initial catalogue in which they appear – something to keep in mind, especially as we draw closer to the end of the Mini Catalogue sales period!
I may have mentioned it before, but I am not a gardener. Inside plants, outside plants – doesn’t matter – they are lucky to survive a few months at my home. That’s why I really like paper flowers and plants!! I decided that these die cuts reminded me of Queen Anne’s Lace, though they may actually be based on a different flower, but the beauty of paper flowers is that you can customize them however you’d like.
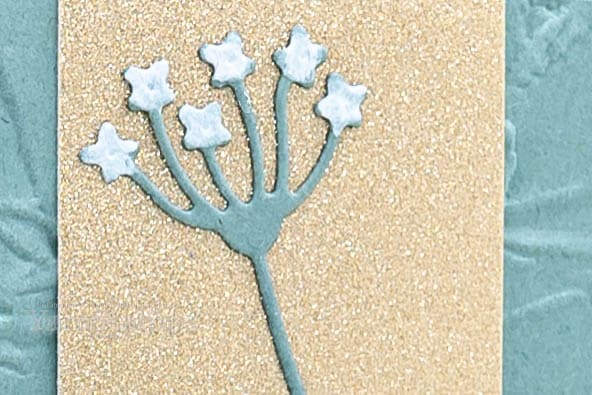
To make them more like the flowers (okay, I believe they’re actually considered weeds around here, but they’re pretty weeds), I made the blossom portion white. This was actually the most time consuming part of this floral card, and even at that, it didn’t take long. I placed the die cut onto a silicone sheet, and then squeezed some White Craft Ink refill onto a spare Clear Block. I used a dry Water Brush to apply the reinker onto the blossoms, did a couple of coats to be sure it was opaque enough for my liking, and then left them to dry. Once they were dry, I added them to the card. Easy peasy! I have to try it, but I think you could probably add some coloured reinker on top of the white blossom to make coloured blossoms if you want!
floral card closeup (you don’t have to be an expert painter!)