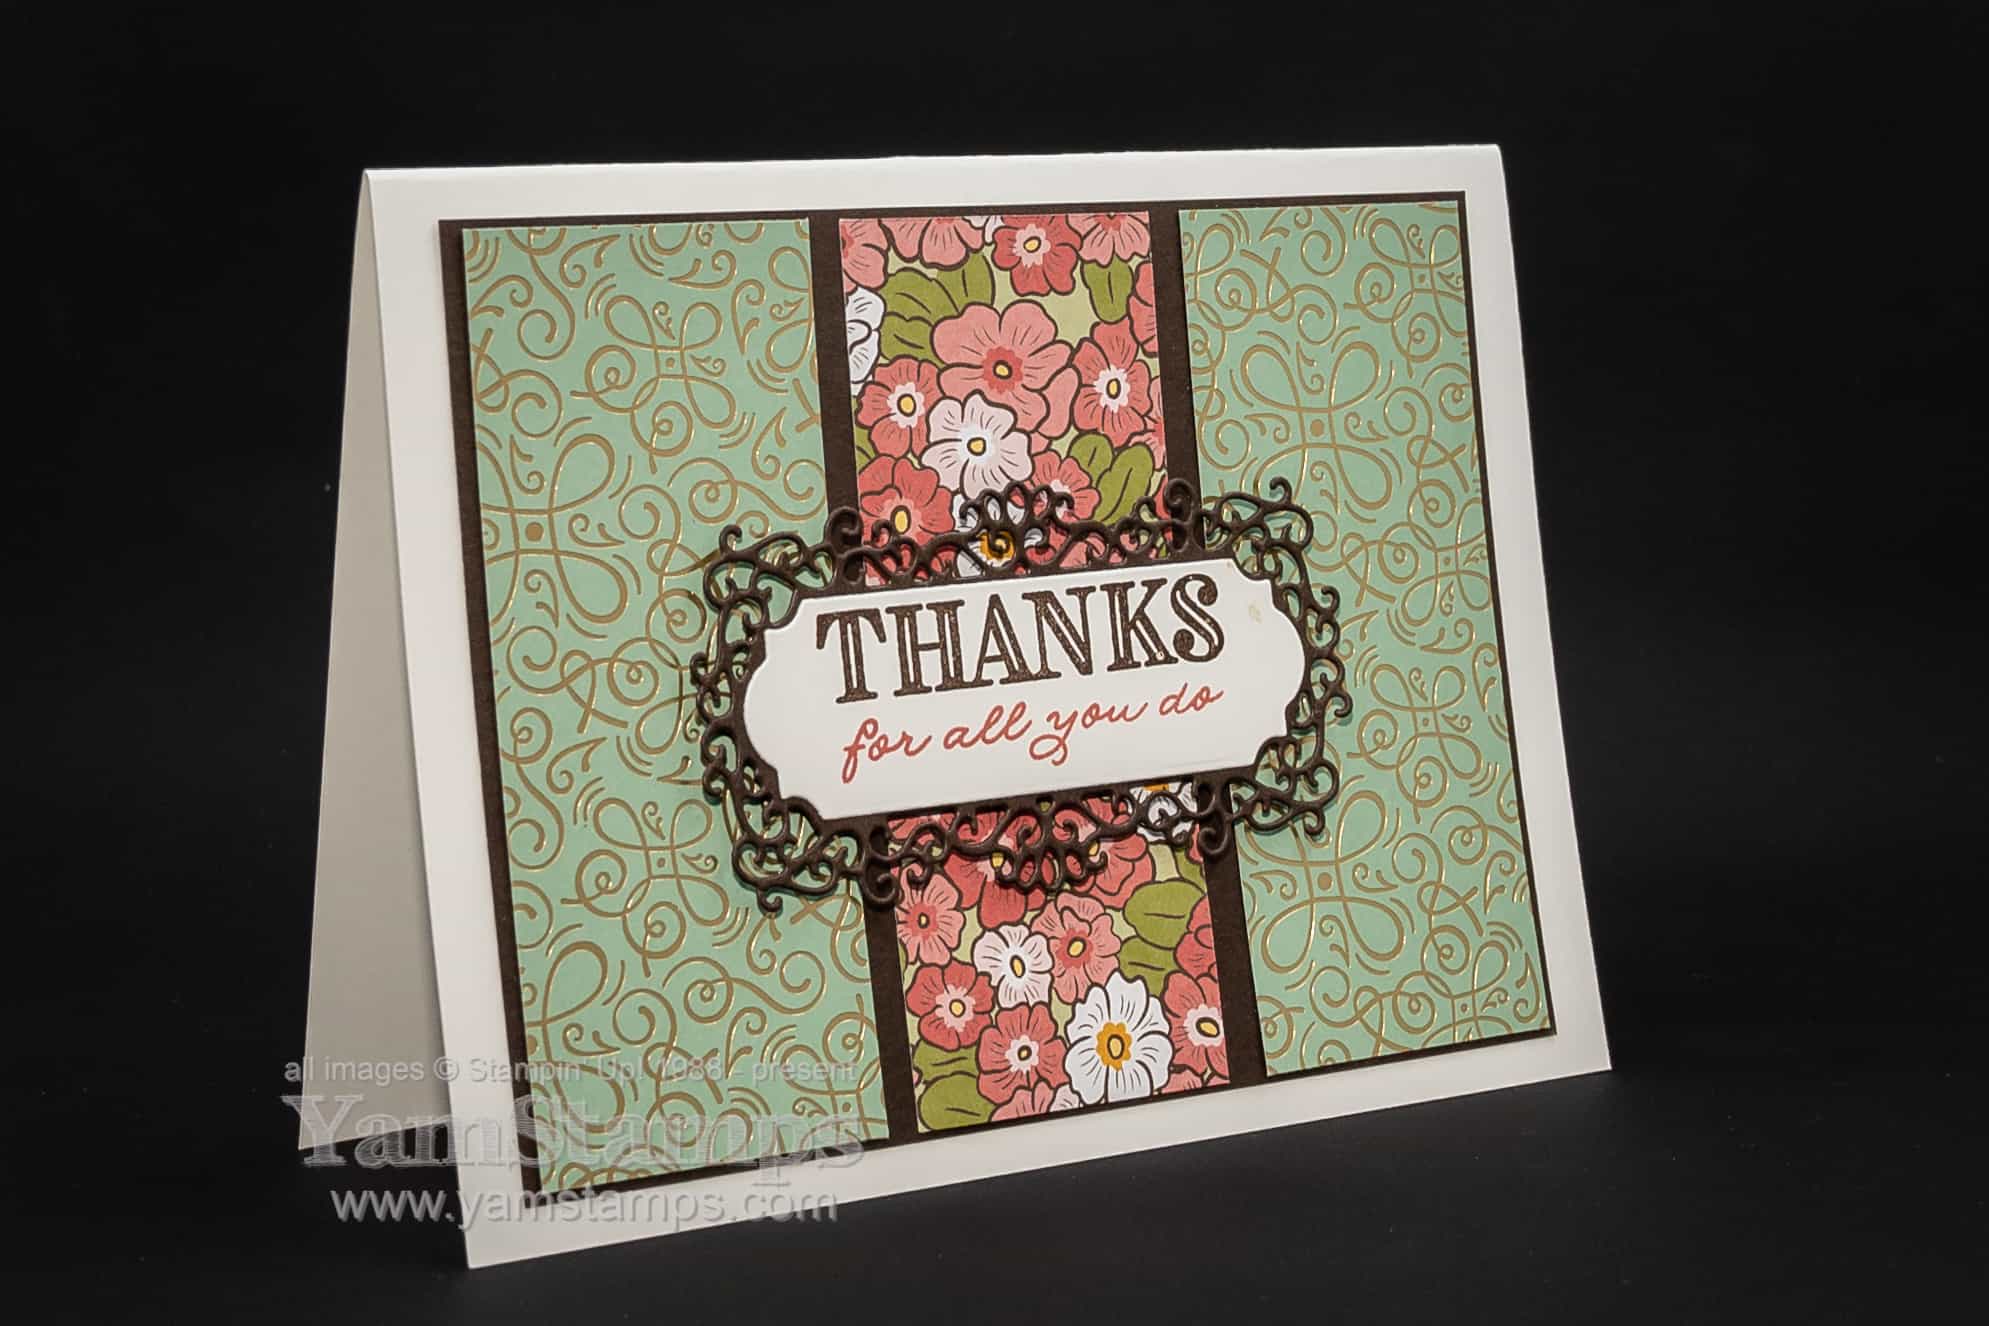
My favourite kind of paper crafting is easy but impressive, so when I say this is an ornate thanks card, it’s because it uses the Ornate Thanks stamp set…and theOrnate Layers dies!
The layout for this card is fairly straightforward – three pieces of the Ornate Garden Specialty Designer Series Paper [DSP] onto a backing piece of Early Espresso cardstock. The centre piece of DSP is the flip side of the other pattern (the papers have double sided designs) – so no thinking involved LOL. The ornate frame is die cut from Early Espresso Cardstock and the sentiment from Ornate Thanks is stamped onto the Very Vanilla label in Early Espresso and Terracotta Tile. I selected the ink and backing cardstock colours by checking out what colours were featured in the DSP so they would match. Stampin’ Up! does a really nice job of having coordinating colour products that make my paper crafting a little easier.
When you order these dies, I would also recommend investing in the Brush Tip for the Take Your Pick tool as it makes it easier to get all the little bits out of the detailed die cuts, so you’ll be able to make your own Ornate Thanks Card even more quickly. After you run the die through your die cutting machine, place the die and or the die cut (sometimes the detailed ones need a bit of coaxing to release) on the foam mat that comes with the Brush Tip, and then run the Brush Tip over to release the die cut and bits.
If you are looking for other crafting ideas and inspiration, the YamStamps Newsletter goes out every Tuesday with information, and tutorials that aren’t featured anywhere else in the YamStamps world. You can sign up for the newsletter here to keep in touch. The multi-project monthly newsletter will be out on August 4th showcasing some August-December Mini Catalogue products so be sure to get on the list before then! In the meantime, happy crafting!
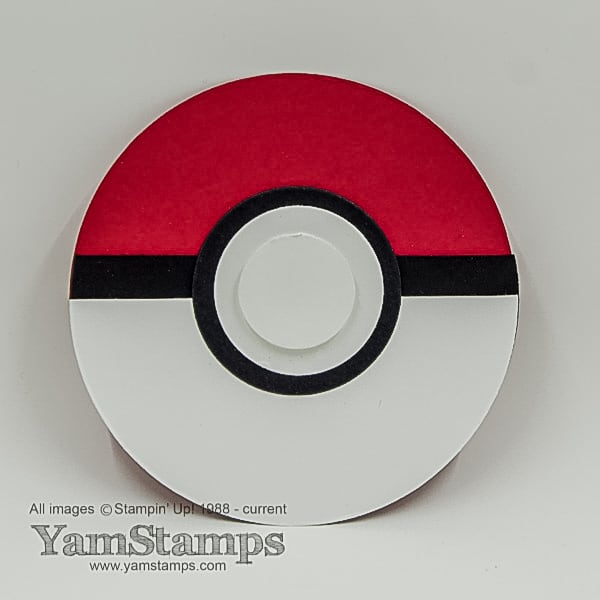
While these are crazy and new Pandemic times that we are living through, there are some positives to be found. I’ve actually enjoyed spending lots of family time over the last few months, with members of the family under the same roof for a while. One thing that my university aged son and I have done recently is played Pokemon Go. He loved Pokemon when he was younger and we spent a lot of time getting Pokemon cards and watching the show and movies. A few years ago when Pokemon Go came out, we played it on our phones, and recently have renewed our interest in playing the game for fun. I thought I’d pull out this older Pokemon Punch Art piece that I did a number of years ago.
All you need are a number of circle dies (like Stampin’ Up!’s Layering Circles Dies) or punches, Whisper White, Basic Black and Real Red Cardstock and you’re good to go! Cut 3 large circles (same size) of each of the colours for the body of the ball, cutting the white one just less than half way and the black one just more. Cut 3 progressively smaller circles in black and white and adhere everything together – it’s a Pokeball!
This project is from four years ago – but it’s amazing how this Pokemon craze lives on and is constantly being rediscovered by kids (of all ages) all the time.
For me this weekend, I’m getting August-December Mini Catalogues into envelopes for mailing [fill out this form if you don’t have a Stampin’ Up! Canada Demonstrator and need a copy!], working on some designs for the Holidays (yes, it’s true) and running outside every once in a while with my son to catch Pokemon during the Pokemon Go Fest. So if you’re passing through my neighbourhood and see me out and about staring at my phone instead of enjoying the scenery, you’ll know why.
Don’t forget that until August 3rd you’ll earn a $6 coupon code when you place an order for $60 (before shipping/taxes). You’ll be able to use the coupon August 4-31 – so you can grab some new products from the August-December Mini Catalogue! In the meantime, when you need a break from the sun – why not create some Pokemon Punch Art? Great gift tags or fun cards for the Pokemon fan in your life. Happy crafting!
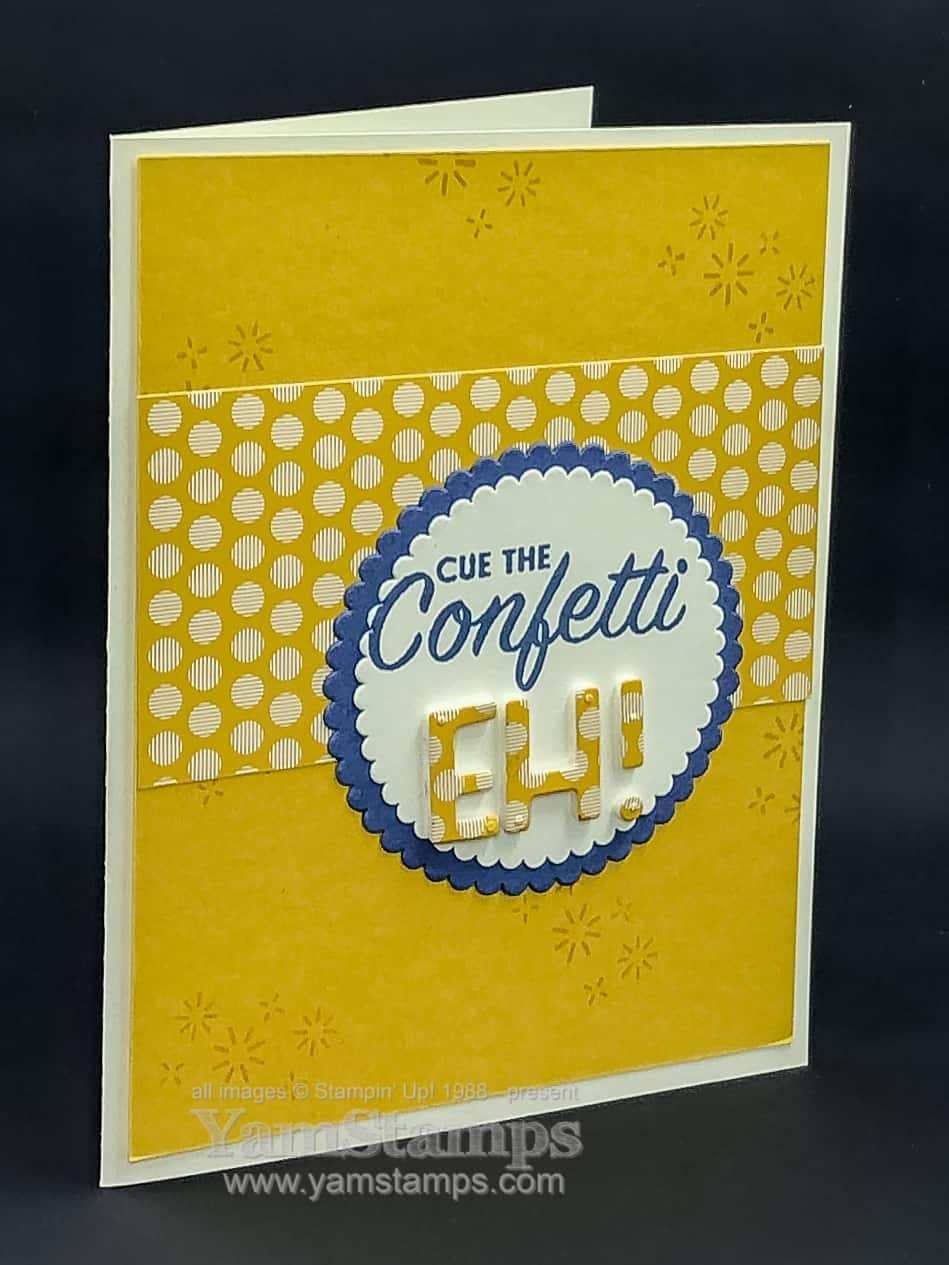
Sometimes you need a celebration card, but it’s something outside of the more common occasions to celebrate, like birthdays or weddings. This sentiment is great for any reason to celebrate! It’s from the Pattern Play stamp set. I used the discounted Pattern Play Bundle that includes the stamp set and the Playful Alphabet Dies to further customize my card.
I made this card to send to some members of my demonstrator group, known as the “Eh” Team, so I used the dies and the Foam Adhesive Sheets to customize the card by adding the EH! I cut the 2020-2022 In Colour Designer Series Paper [DSP] to fit my card front, and then stuck the remaining scraps of the DSP onto a Foam Adhesive Sheet. I was able to cut through the DSP and sheet using the dies, and then positioned them onto the front of the card.
Part of the joy of making handmade cards is the fact that you can make a card that suits your specific occasion and can customize it for the recipient. These cards are to celebrate my team members’ achievements – like making their quarterly sales quotas, adding members to their own demonstrator teams or having a certain level of sales in a month. By using coordinating products and colours it makes it even easier – and that’s my kind of crafting!! I stamped the “sparkle” stamp in Bumblebee ink onto the Bumblebee cardstock, and die cut some scalloped circles from the Layering Circles Dies in VeryVanilla and Misty Moonlight. I could have used the Stamparatus to stamp the sentiment, but because the Pattern Play stamp is photopolymer, I just used a clear block because I can actually see through the stamp (and block) to where I am stamping.
My healthcare job has been increasingly busy over the past couple of weeks, and I’ve been able to take a few days off this week. During my staycation I’ve been able to relax a bit with family, and catch up on some crafting and mail sending! I’m getting the August-December Mini Catalogue ready for mailing as well – if you’re in Canada and don’t have a demonstrator that you already deal with, please fill in this form to request a copy! In the meantime, stay healthy and keep crafting 🙂 I’m back to finishing my celebration cards and mailing them out!
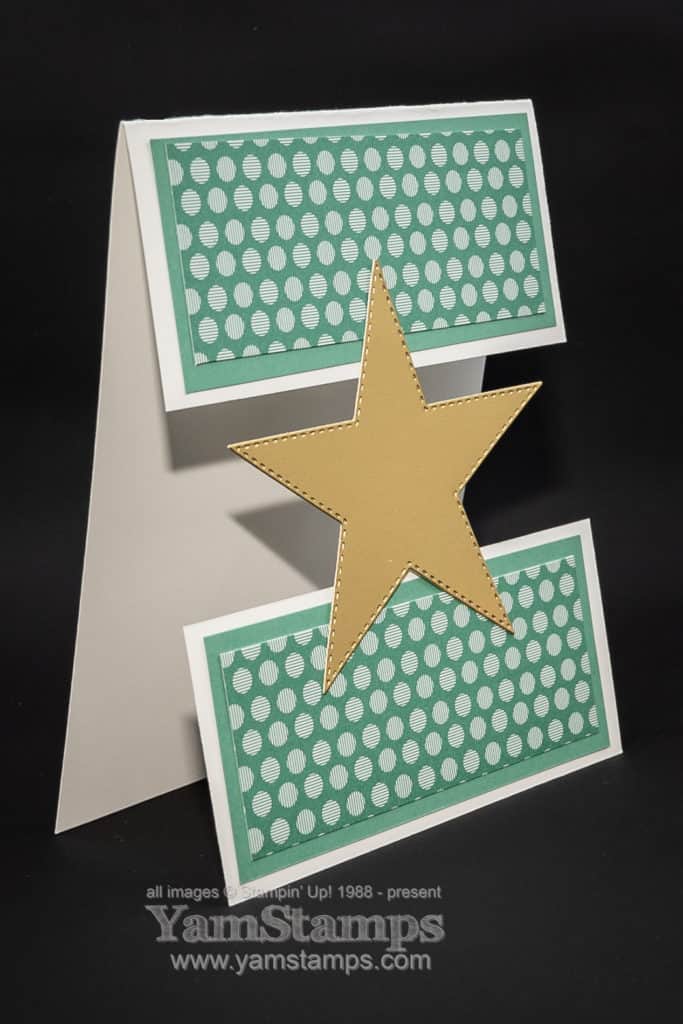
Sharing this starry fun fold card….though I’m never truly sure what is a fun fold and what is just a neat design?? Technically this card doesn’t have extra folds, though it does have extra cuts?! I shared a quick red white and blue (and gold) version on the YamStampsInstagram and Facebook accounts yesterday in honour of the Fourth of July, but here’s a more neutral toned version for other special events.
By cutting out a portion of the front of the card, and then using the die cut star to reattach it and hold it in place, it makes an otherwise straightforward layout a little more interesting! I cut the Whisper White Cardstock to 4.25″ x 11″, then cut the front flap at 2″ and cut another 2″ strip from the portion I cut off. Add a bit of decorative paper – in this case the 2020-2022 In Colour Designer Series Paper in Just Jade, and then added a Stitched Star die cut in Gold Foil.
If you’d like to make a version of this card, I’m offering a Card Class to Go – and this is one of the designs. Due to COVID19 precautions, I’m still not scheduling any in person Monthly Card Classes – so this is what I’m trying. For the regular class fee of $20, you’ll get precut supplies to create 4 different cards. You supply the adhesive (if you need some, you can purchase from me when you register for class and I’ll send it with your supplies). As well, if it’s in the design of the card, I’ll include punch outs or die cuts that you can add a sentiment or image to with your own stamps and inks (or handwriting). This is due to Stampin’ Up! regulations – I can’t include pre-stamped images or sentiments in a class kit. You can pick up your kit if you’re local to Burlington Ontario, or I can mail it anywhere within Canada. You’ll get the supplies plus a sheet with photos of the completed projects and step by step instructions.
CARD CLASS TO GO
WHAT’S INCLUDED IN YOUR CLASS FEE: – precut supplies to create four different cards including card bases, all design elements and envelopes – Instruction sheet with colour photo and step by step instructions for each project – regular postage within Canada/porch pickup in Burlington ON – customer service – I’m available to answer your questions or provide extra guidance if needed!
YOU SUPPLY: – adhesive(s) of your choice (some options available for purchase at time of class registration) – any stamps/inks of your choice to customize your cards as you wish
Interested? I have a limited number of kits available – you can email me to purchase one! Payment by etransfer preferred, but CC options available.
Contact me if you have any questions – or if you’re ready to get the supplies to make your own starry fun fold card!
Wishing you a very happy Canada Day! We will be celebrating a bit differently than usual this year – no big gatherings or big fireworks shows, but 2020 is a year for doing things differently, isn’t it?!
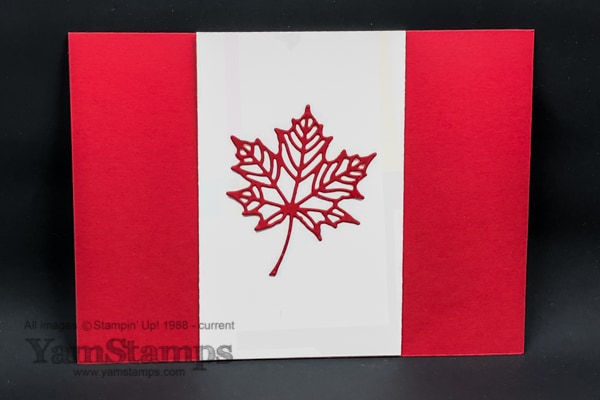
Revisiting this fun card that I did a few years ago, using the now retired Seasonal Layers Dies. I think of it as a stylized flag card!
In addition to celebrating Canada Day, it’s the start of Stampin’ Up!’s Bonus Days! From July 1 until August 3, for each $60 in product you order (in a single order) before shipping/taxes, you’ll earn a $6 coupon code from Stampin’ Up! that you can spend August 4 – 31! So – $60 product = $6 coupon code, $120 product = 2 x $6 coupon codes etc etc etc. Like Sale-a-Bration, this is non-cumulative, so you can’t do a $30 order early in the month, and then another $30 order later and get a coupon. It has to be in one order. Codes will automatically be generated and emailed by Stampin’ Up.
So for my fellow Canadians, Happy Canada Day, and for my non-Canadian friends, Happy Wednesday!