Jan 4, 2009 | 3D samples, Events, rubber stamping
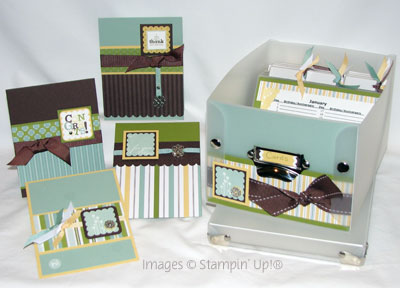
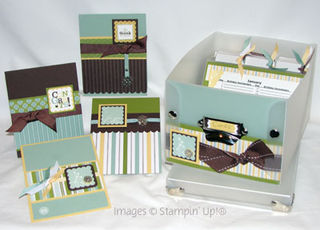 This is a pic of the Card Organizer Class Projects. If you're like me, January brings a time to start fresh and arm yourself with a list of resolutions. A perpetual place on my list has been granted to "Be More Organized"… hmm I guess that's not a good thing if the same item keeps showing up year after year?! lol. Anyway – after this class we'll all have a place to keep cards plus a list for all those dates to remember and a few cards ready to send out. Getting them into the mailbox may be another thing entirely….says she who is still sending out holiday greetings. ahem.
Don't procrastinate any longer! (another thing on my list) – register NOW for this class – deadline is Jan 7th, cost is $40, class date is Wednesday Jan 21st, 7pm. January 7th is also the first stamping class – featuring all occasion cards (which of course, will fit into your card organizer…).
Oh – and what do you think of the blog's new look? I decided to spiffy it up a bit. The photo is in my front yard, where one of the local bunnies took a shortcut! Feel free to leave comments below or send me feedback directly.
Dec 29, 2008 | Business Opportunity, Events
Just a quick note to say that I've updated my calendar to reflect classes and clubs for the next few months – you can see my schedule here (or click at the right – Linda's Class & Event List) or here (the even prettier version on my business website lol). If you are looking to host a class or workshop in your own home in the next few months, please contact me ASAP so I can reserve a date for you!
If you've been thinking about your new year resolutions and one of them is anything to do with money….why not come to my Information evening?! Monday, January 19th at 7pm come on out to find out what owning your own Stampin' Up! business is all about – RSVP to reserve your spot.
Dec 25, 2008 | Christmas, rubber stamping
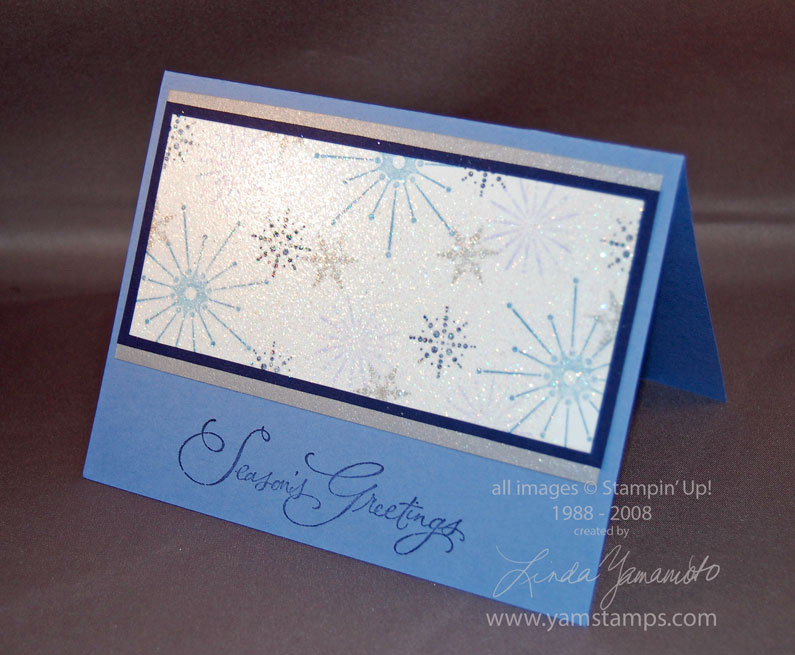
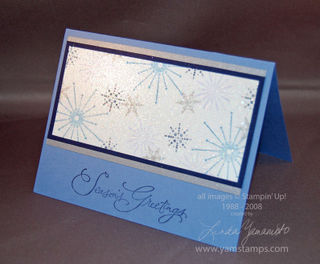 This was my Christmas card design this year. Oh, and hey, it's another blue holiday card!! (Can you tell what colour I like?!) It may be hard to see in the picture, but the Snow Burst images are stamped onto whisper white cardstock in brocade blue, night of navy, almost amethyst and metallic silver. Once that dried, I pressed my Versamark pad over the strip of cardstock, then heat embossed with iridescent ice embossing powder to give it the all over sparkly look. It's mounted onto night of navy cardstock and brushed silver cardstock. The greeting is from Many Merry Messages (my most used holiday set – all greetings!)
Frugal Friday tip on a non-Friday – I cheated on the silver layer – rather than hiding so much cardstock behind the other layers, I cut thin strips and adhered them to the navy cardstock. Same effect but much more economical! You could also punch out the middle of the night of navy strip with various punches to stretch your dollar further. I however, was a bit time strapped so skipped that frugal step in favour of a bit more speed in my card making!
I want to take the opportunity to thank all of you for your readership and time! Happy Holidays to all and wishing everyone a happy, healthy and creative new year.
Dec 24, 2008 | 3D samples, Christmas
This is from week 11 of my 12 weeks of Christmas emails this year – I thought I'd share it here if you still have some packaging needs for tomorrow!!


I know I can't be the only one that hangs on to the "nice" bags that I sometimes get from stores. This is a heavy duty paper bag with cord handles. I simply covered up the logo with this 3D tree I made, and also covered up the inside logos with a thin strip of designer series paper (hard to see in the picture). The tree is made from 4 squares of the Ski Slope Designer Series Paper, topped with 3 stars punched from metallic gold cardstock. I replaced the cord with the felt ribbon from the Alpine Ribbon Originals.
HOW TO:
1) Cut 4 squares from your designer series paper – 3"x3", 2.5"x2.5", 2"x2", 1.5"x1.5"
2) Each is folded the same way, and then adhered together to form the tree shape; I used a the flip side of the designer series paper for the trunk.
Step by step shots below for the basic fold…the first steps are basically scoring the paper.
start with your square fold in half, then unfold again
fold in half the other way, unfold fold diagonally, unfold, then fold on
the other diagonal & unfold


fold in half with crease at top poke in the side along crease lines
* if you are using patterned paper, (bring the top fold down so it's vertical)
to make design symmetrical, have the
design run horizontally*
previous step finished repeat on other side
bring the front right fold to the repeat with the other side – DONE!
centre line & crease
Dec 23, 2008 | specials
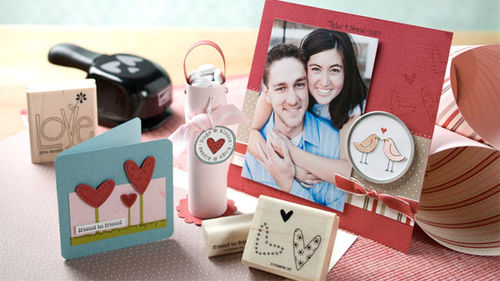
Put some LOVE in your Valentines Day with Stampin’ Up!’s® Love You Much Bundle. The bundle contains the perfect products to create fun and fanciful Valentine’s Day projects that say "I love you" from the heart. And from December 23, 2008, through January 31, 2009, you can purchase the Love You Much Bundle at 20% off the retail value!
Stampin’ Up!’s® Love You Much Bundle (item 115405) includes the following:
| Description |
Retail Value |
|
Love You Much stamp set
|
$30.95 |
|
Candy Lane Designer Series paper (Close to Cocoa, Pink Pirouette, Riding Hood Red, Very Vanilla)
|
$11.95 |
|
Heart to Heart punch
|
$19.95 |
| |
|
|
Bundle Retail Value
|
$62.85 |
| |
|
|
Love You Much Bundle (20% off; item 115405)
|
$50.28 |
Feel free to contact me with any questions or go to www.yamstamps.stampinup.net to place your order directly. Don't forget, if you place an order of $100 or more today you'll receive free shipping as well!! (Free shipping offer on orders of $100 or more ends TODAY)
Dec 22, 2008 | Announcements
 Still need some sets that are RETIRING?
The 10% discount on retiring stamps ends 23 Dec 08 (Tuesday!). The free shipping on all orders over $100 – also ends Tuesday!!
There's also a "love"ly promotion starting on the 23rd – more about that later…
Click here for the retired list in numerical order (by page number)
Click here for the retired list in alphabetical order
Click here for the 10% off price list (in case you don't want to do that much mental math at this point in the day….lol)
Ready to save some money? Click here to go to my business website & shop now! (www.yamstamps.stampinup.net) .
Dec 19, 2008 | 3D samples, Christmas
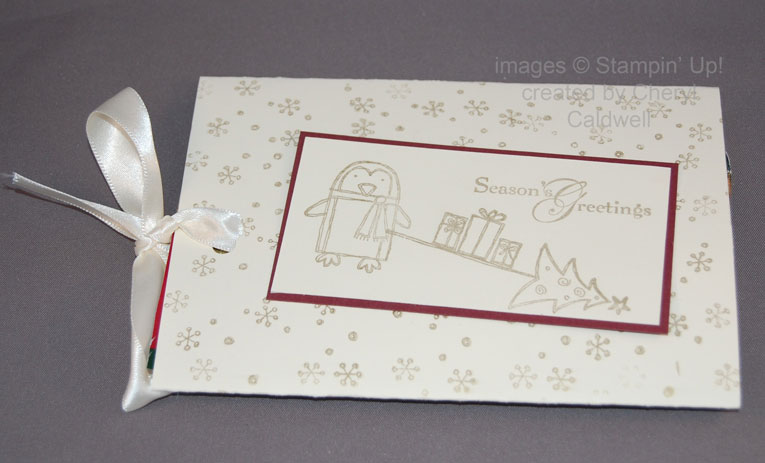
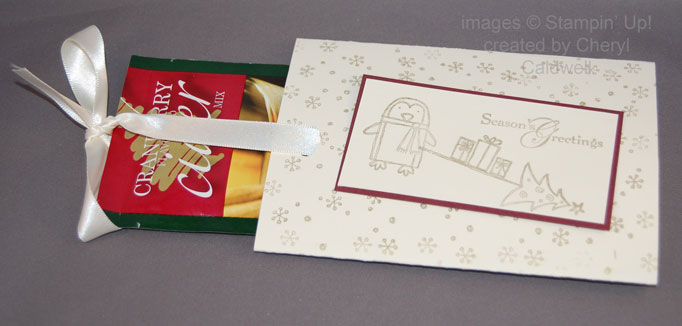
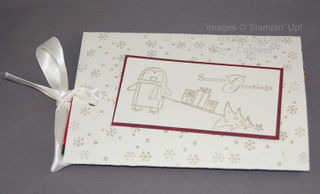 Cheryl gifted my son & I recently – I got to have this portion of the treat! She created a packet holder using the Punch Pals set, with the packages on the tree like a sled – so cute.
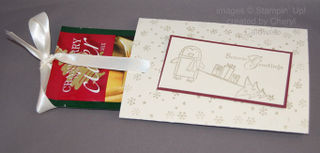 This is the slider portion open – with the treat! Essentially you create a flat tube, then punch a hole through both layers at the top; thread a length of ribbon through. You place the treat into the centre of the tube, on top of the ribbon. Slide it into place, then tie the ribbon. The recipient simply pulls up on the tied ribbon to slide out the treat (no untying necessary – so a great gift packaging idea for little ones to open!).
Thanks Cheryl, for the treat! I had the cider immediately after taking these pics!
Dec 16, 2008 | Christmas, rubber stamping
 Things are a little busy around here right now….what with the last week of school before Christmas, and me still trying to get my own Christmas cards done & mailed out…. My last "Twitter" update reads "Still working on finishing Christmas cards…still hoping to have them mailed before Christmas…" I think it's going to be like that for a while…lol
Anyway – here's another swap sample from the talented Kim – featuring the Deer Friends Hostess set, Ski Slope designer series paper and those great scallop punches! I love how she's cut out around the snowman's head & mounted it to give some dimension.
OK I'm off to work on those cards some more. I'll try to post a shot of my card here later. If you're on my mailing list – it's the TWELFTH week of the TWELVE weeks of Christmas!!! Watch for it in your inbox later this week.
Dec 15, 2008 | Announcements
 Where do stamp sets go when they retire?
The newest retired list is HERE – and for the first time, Stampin' Up! is offering a 10% discount on ALL retiring stamps – but only until December 23rd!
PLUS free shipping on all orders over $100 – also until the 23rd of December…
Click here for the retired list in numerical order (by page number)
Click here for the retired list in alphabetical order
Click here for the 10% off price list(in case you don't want to do that much mental math at this point in the day….lol)
Ready to save some money? Click here to go to my business website & shop now! (www.yamstamps.stampinup.net) or you can contact me by email to place an order.
Dec 3, 2008 | Christmas, rubber stamping
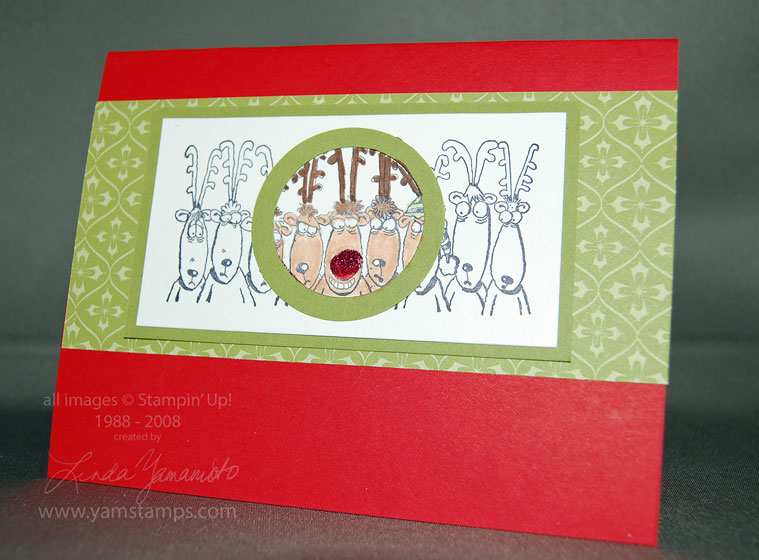
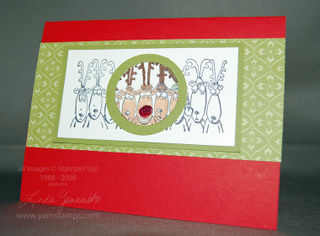 This is such a fun stamp set! Stampin' Up!'s Holiday Line Up features reindeer, elves and snowmen. I am thinking that this might end up being my holiday card this year…or one of them. (NO, I'm still not done them).
This is a cheater verision of spotlighting that we did at my friend Linda's recent workshop. The image is stamped in basic black onto whisper white cardstock. We punched the 1-3/8" circle punch on some old olive cardstock, then (using the punch upside down so we could see what we were doing) used the 1-3/4" circle punch around that hole to create the green ring. Adhering this to the image, we then just coloured inside the circle with stampin' write markers. A bit of 2 way glue on Rudolph's nose and some fine cosmo glitter to jazz it up; mount the image onto a strip of ski slope designer series paper and a real red card – tada! The nice thing about this card is that it's extremely flat, despite the layers, so no worries about mailing issues…(unless of course you have a 3 page Christmas letter plus photos to include…)
 This is a pic of the Card Organizer Class Projects. If you're like me, January brings a time to start fresh and arm yourself with a list of resolutions. A perpetual place on my list has been granted to "Be More Organized"… hmm I guess that's not a good thing if the same item keeps showing up year after year?! lol. Anyway – after this class we'll all have a place to keep cards plus a list for all those dates to remember and a few cards ready to send out. Getting them into the mailbox may be another thing entirely….says she who is still sending out holiday greetings. ahem.