Oct 12, 2014 | cards, Seasonal Catalogue, Stampin' Up!
 Happy Thanksgiving! It’s a gorgeous autumn day here and I started the day by going for a short run with friends, now I’m home ready to get cooking and baking for tonight’s dinner…and tomorrow I’m heading to Kitchener at the “crack of cranky” – bright and early to chaperone for the Burlington Teen Tour Band as they march in the Oktoberfest Parade. So a busy weekend – but popping in to share this card with you all.
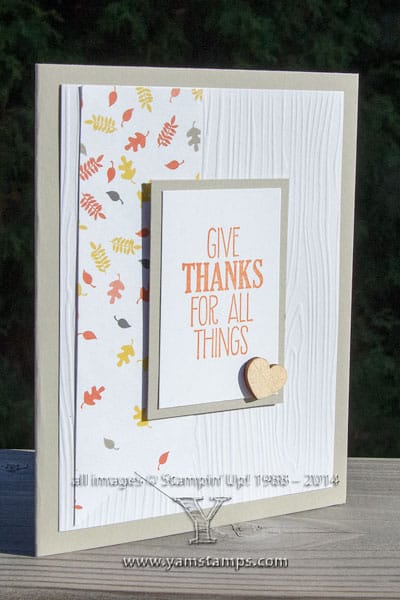
The Designer Series Paper strip is actually from Motley Monsters, which has a Hallowe’en theme. This page has a cute parade of monsters across the bottom…but I trimmed them off to save for another use, and used the gradient of falling leaves on this card. The sentiment is from Stampin’ Up!’s For All Things set, the background textured paper is from the Watercolour Wonder Simply Created Card kit, and the wooden heart is from the Wooden Embellishments package. So this gratitude card is an amalgamation of bits and pieces from all over the Stampin’ Up! product world! I pulled the colours in the card directly from the DSP – thankfully, Stampin’ Up! is now printing all the colours used on the backing cardstock in the package, so I don’t have to look it up in the catalogue each time. In this case, I used Tangerine Tango and Sahara Sand.
I am grateful for the many blessings in my life – hope that you have a chance to reflect upon your gratitudes (even if you’re not celebrating Thanksgiving today!). I am thankful that you stop by my corner of cyberspace to see what’s up!
Oct 9, 2014 | cards, Stampin' Up!
 My taste in cards tends to run toward the clean and simple end of things – at least when I’m MAKING them! LOL I do appreciate the over the top works of artistry, but for me, I often end up at the other end of the spectrum. Here’s a perfect example…
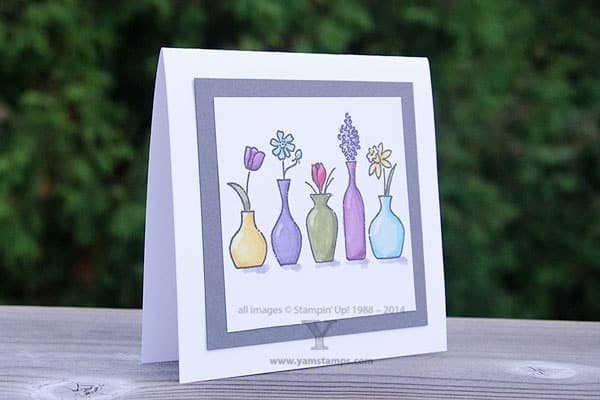
This was a sample for the Blendabilities Class I held a while back – I wanted the image and colouring to be the focus of the card – hence a simple backdrop without a lot of distractions. I love how the Blendabilities…blend! No streaky lines, lots of colour coordination… Don’t get me wrong, I also love my Copics – but Stampin’ Up! Blendabilities come in sets of 3 – light, medium and dark tones of the same colour, so I don’t have to think about what markers might blend together well. *phew* This Vivid Vases image did take a little longer to colour because of the number of vases and flowers…but colouring can be very zen and relaxing. I did a bit of a “cheat” on these images – the highlight on the vase (you can see this quite well on the second vase from the left) was created after the fact by using the Colour Lifter, which just pushes some of the colour out of the way to create that little highlight.
If you missed out on the first Blendabilities Class, have no fear – I am going to offer more classes! The next one is scheduled for November 12th – and this time I will be specifying which markers will be included in the class price. If you already have these markers, you can substitute other colours on your wish list, and then just bring the specific Blendabilities with you to class that night. There’s always more to learn and practice time is important!! Sign ups will start end of the week, and I’ll post more information at that time.
LAST but not least – there’s still a couple of spots available for both the Hallowe’en Wreath Class AND the FREE Paper Pumpkin Introduction Class October 16th – so contact me to register ASAP!!
Oct 4, 2014 | cards, Events, Stampin' Up!, YamStampsMore
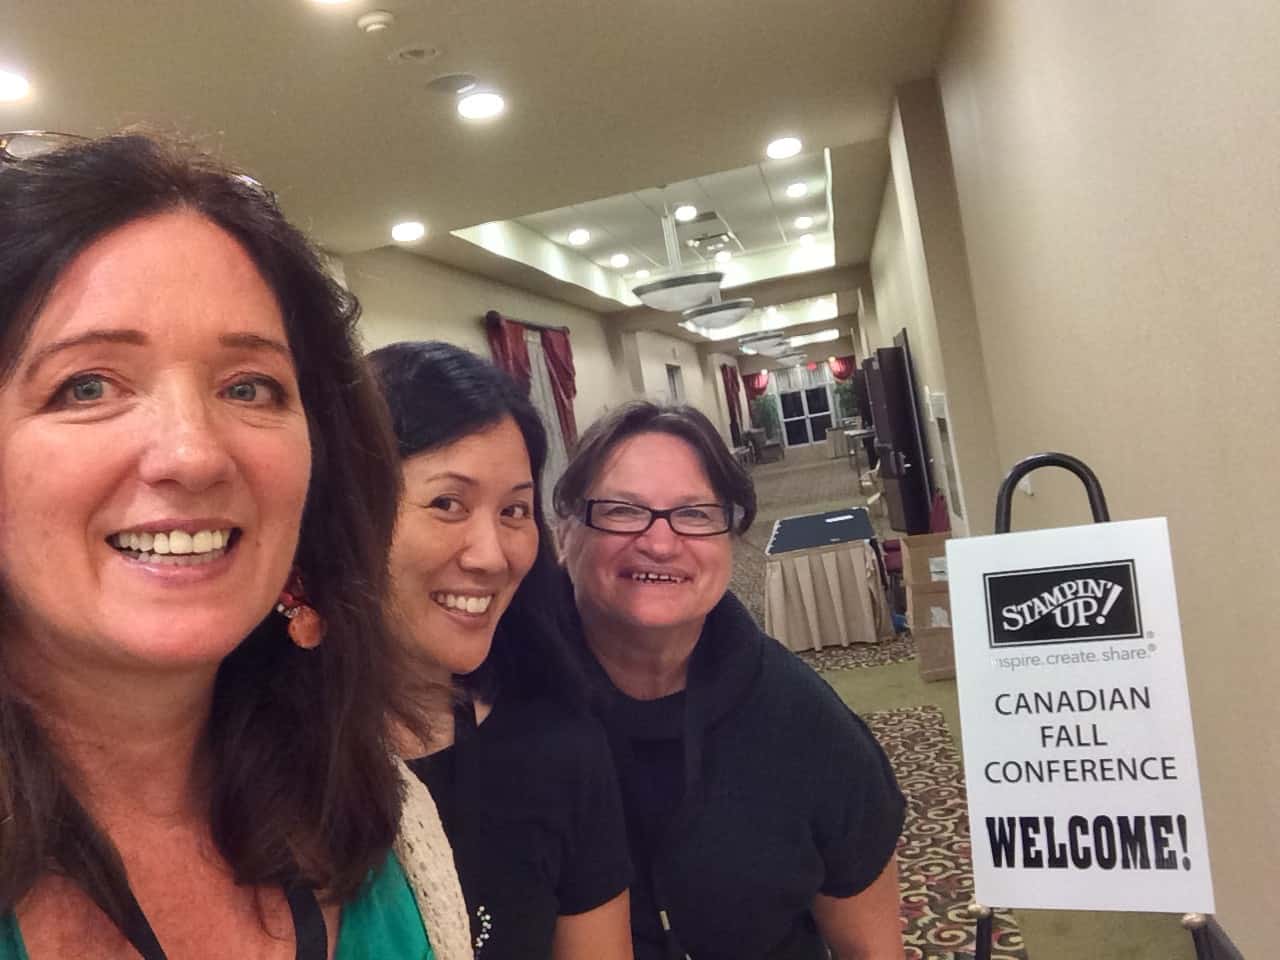
Happy World Cardmaking Day! I hope you get to celebrate by doing something fun and creative….like making cards? I’m spending the day getting business tips and inspiration with fellow demonstrators at a Stampin’ Up! Canada event. Here I am with Leanne and Mary, two demonstrators in my group called the “Eh” team.
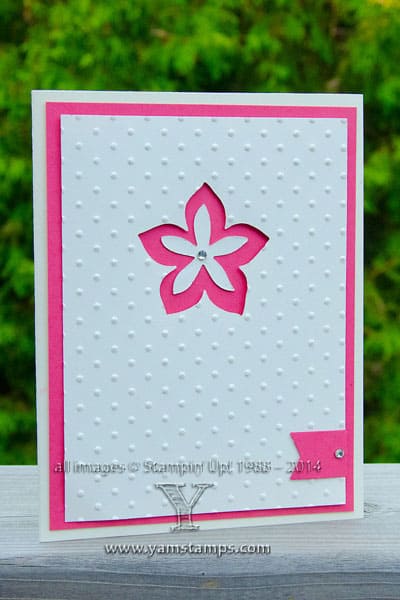 …and because it’s World Cardmaking Day, I do feel the obligation to share a card with you all!! This is fun card I used at last month’s classes. The flower (from Flower Fair framelits) was die cut from the top layer first, before embossing with the Perfect Polka Dots folder. The top layer is applied to the Melon Mambo layer with Stampin’ Dimensionals and then the smaller flower was adhered in the centre of the die cut.
Don’t forget that if you want more card ideas, one of the best way is to come to a class and make them! Monthly card classes happen the first Wednesday of each month, or Stampers Club meets every 3rd Monday of the month – and there’s a new option to attend during the daytime instead of the evening if that works better for you. Please contact me if you need more information or want to register! If you aren’t able to make these times there are options – get a group together and we can set a date just for you – or try an online class from the comfort of your own home!
Now – go be creative!!
Oct 3, 2014 | cards, Christmas, specials, Stampin' Up!
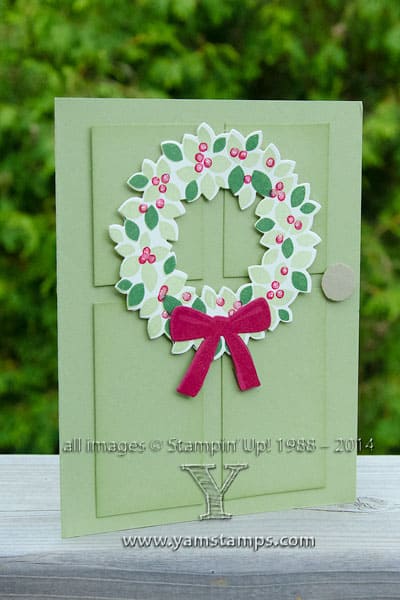 Two step stamping is what first drew me to Stampin’ Up! – I loved that I could have different colours on the same image without a lot of fuss. Recently, Stampin’ Up! has started producing more photopolymer sets which makes it easier to line up the components, and on the set on this card, Wonderous Wreath, there’s actually a “tab” on each stamp and the coordinating framelits! All I have to do is line the tab up the same way each time and it’s pretty no fuss – plus photopolymer is see through so it also helps to line things up. I personally put the tab at “6 o’clock” each time to make it easier to remember (as long as I don’t rotate my paper LOL). These items are available together at a discount – I love this bundle!
This is a fun card that I put together – I used it for Stampers Club and then added a bit more “bling” to it with Dazzling Details and used it for a card swap. If I was really clever (and really did have every item in the catalogue) – I should have used the CHERRY COBBLER Dazzling Details. Ah well, the cards are done now, so I will leave that little extra detail to YOU when you recreate this card! (Please send me a photo!). I used Pear Pizzazz as the base, with Garden Green on top for the darker leaves, and Cherry Cobbler for the berries and bow.
Don’t forget about the Stamp Stock and Save sale going on until Monday – and use the hostess code KEH4WRUB so it will flag me to send you a set of instructions for 3 fun projects! I will be sending them all out via email next week. Happy Friday!!
Sep 21, 2014 | Announcements, cards, Events, Stampin' Up!
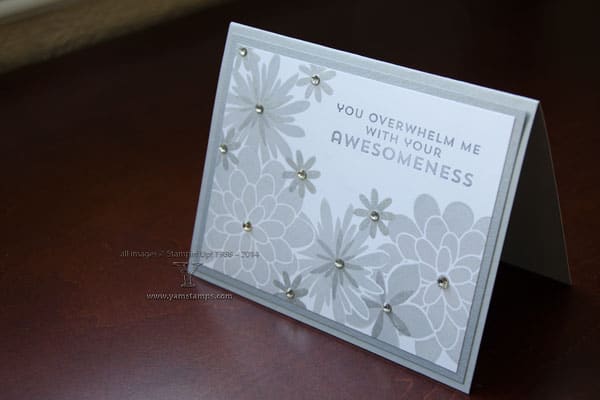 Hmmm not sure if I ever shared this photo or not?! This is another one of the projects I created using Flower Patch and Flower Fair Framelits (available as a bundle). I know, you’re thinking “ummmm where are the die cuts??” I used the framelits to die cut post it notes (being sure to have some of the sticky portion on the die cut) to use as masks for the stamping – this way you get the effect that some of the flowers are behind each other… a fantastically easy thing to do that gives such a great effect! Smoky Slate and Encore Silver Metallic ink pair together to give a beautiful monochromatic look. I love this pairing!
This is a card that stamp club members made a few months back as well. I have BIG NEWS if you’ve been wanting to join in Stampers Club and are able to get to Burlington ON! I’ve decided to open an afternoon session for Club members! Club sessions remain on the 3rd Monday of the month, and now members have the option of attending from either 12:30 – 2:30 OR 7-9 pm. This is great if you’re not working on Mondays, have a flexible schedule, or needed a daytime slot because of childcare! New members can start their 6 month membership at any club meeting (well, you have to give me notice and register, but you know what I mean…) Contact me if you’d like more information or want to reserve your spot.
Sep 8, 2014 | cards
 And before you know it, it’s Monday again…and you haven’t shared anything fun on your blog recently because you’re busy digging through boxes and still trying to sort and organize. I have moved across the country before, and I must say that I think I was FAR more efficient then! There’s something about being able to say to yourself “Do I want to pay $xxx to move this across Canada?” and being able to say “NO!!” that helps to lighten the load. Moving up the street, well that’s another story entirely. I have boxes of “stuff” that I wasn’t sure what to do with before…and they have migrated with me. The smart thing to do, I think, would be to just keep the boxes sealed, close my eyes and send them to the curb…but that hasn’t happened so far. In the meantime, the odyssey continues.
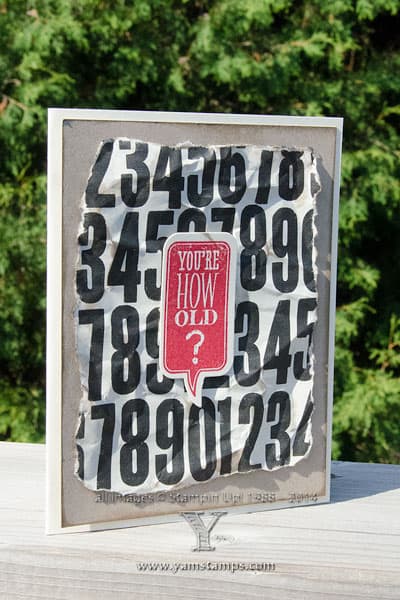
Also in the meantime, here’s another card to share with you! One of the things I love about Stampin’ Up! products is the coordination. As you may be able to tell by my little story above, I don’t like to think too hard or for too long LOL – so when you have things that naturally go together, it’s my kind of crafting project. In this case, the stamps and framelits go together…and then I realized that there were numbers all over this particular sheet of Designer Series Paper, et voila! A card is born. If you’re like some people I know…you may wish to skip the distressing and tearing, and have a neater/cleaner card. Personally I think the crumpled look is perfect for the sentiment on this birthday card!!
So off I go now, to dig into more boxes and pull out some holiday items to prep for my upcoming classes and the Christmas Stamp a Stack. Hope that I get to see you soon! If you’re coming to the Stamp a Stack, my goal is to have the downstairs area (well at least where the class is being held) as a box-free zone. Wish me luck!!