Aug 29, 2014 | cards, Stampin' Up!
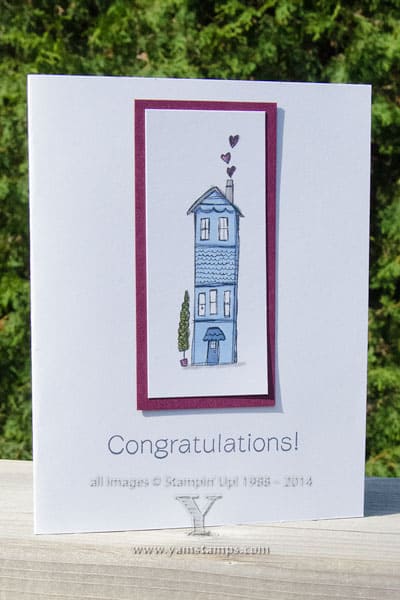
This is a fun card we did at Stampers Club earlier this month. Arlene, who was host for the month (which means she got all the free goodies LOL), needed some new home / moving cards – so this one fit the bill. It uses the hostess set Life’s Adventure which has a nuymber of images in it to celebrate different events, and is fun to colour – so that’s what we did! We used the Blendablities on this card. This one wasn’t so much about shading and tricky stuff, it was just to experience the alcohol based markers and how fun they are to use. I love that you don’t get any streaks in the coloured images, and they do blend nicely (there’s a teeny bit of shading going on, but again, nothing too dramatic). I have Copic markers as well (I’ve done a certification course in them way back when) and the one advantage I will note to the Stampin’ Blendabilities markers is the no-thought process involved. I think that’s why I enjoy SU products so much – there’s a lot of coordination and they really do work to make it easy. In this case, each colour set includes 3 shades – a light one, a medium one and a dark one. So you can use the light one as a main colour and use the other 1-2 to add shading and depth. With Copics, it can sometimes be a bit of a trick to figure out which ones work really well together (well, at least for me LOL!!).
I figured it was also appropriate to post this card today as the sale of my house is official today! We are in the new home (new to us, and just up the street from our old place!), but still in the midst of renovations…but I do see the light at the end of the construction tunnel….I think…
If you are local to Burlington, please consider attending my upcoming Blendabilities class on Wednesday, September 24 at 7pm. Your $50 class fee includes TWO sets of Blendabilities in your choice of colour plus instructions and supplies to create 4 projects using your new markers. Since the fee includes product, you must register and pay for this class by September 10th. Late registrations will be accepted up to September 18th if space allows, but will be subject to a $25 surcharge to cover express shipping in order for product to arrive in time for class. See my Events page HERE. You can register & pay via PayPal on the Events page, or you can contact me directly to register.
Aug 21, 2014 | Announcements, cards, Christmas, Events, Stampin' Up!
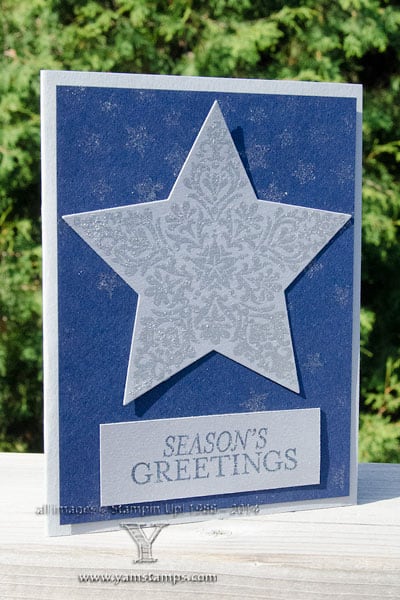 This is a card we made at Stampers Club this month, featuring the Bright & Beautiful Stars Bundle that’s part of the Big Shot Bundle special this month. I love how the stamp images coordinate with the framelits so it’s super easy to cut them out (and centre the image perfectly!).
As for the title of this post, yes, frightening but true – 18 weeks today is CHRISTMAS! So yay for Club members who now have one card done for the season 😉 If you are looking to get going on your holiday cards, I have good news! September brings the first Christmas Stamp a Stack! Sunday, September 14 from 1-4 pm – attendees will make 10 Christmas cards (2 of 5 different designs) – all supplies and envelopes are included.
Registration is now open; space is limited and registration will close September 12th. Click on the link to pay using Paypal.
Aug 7, 2014 | cards, Stampin' Up!
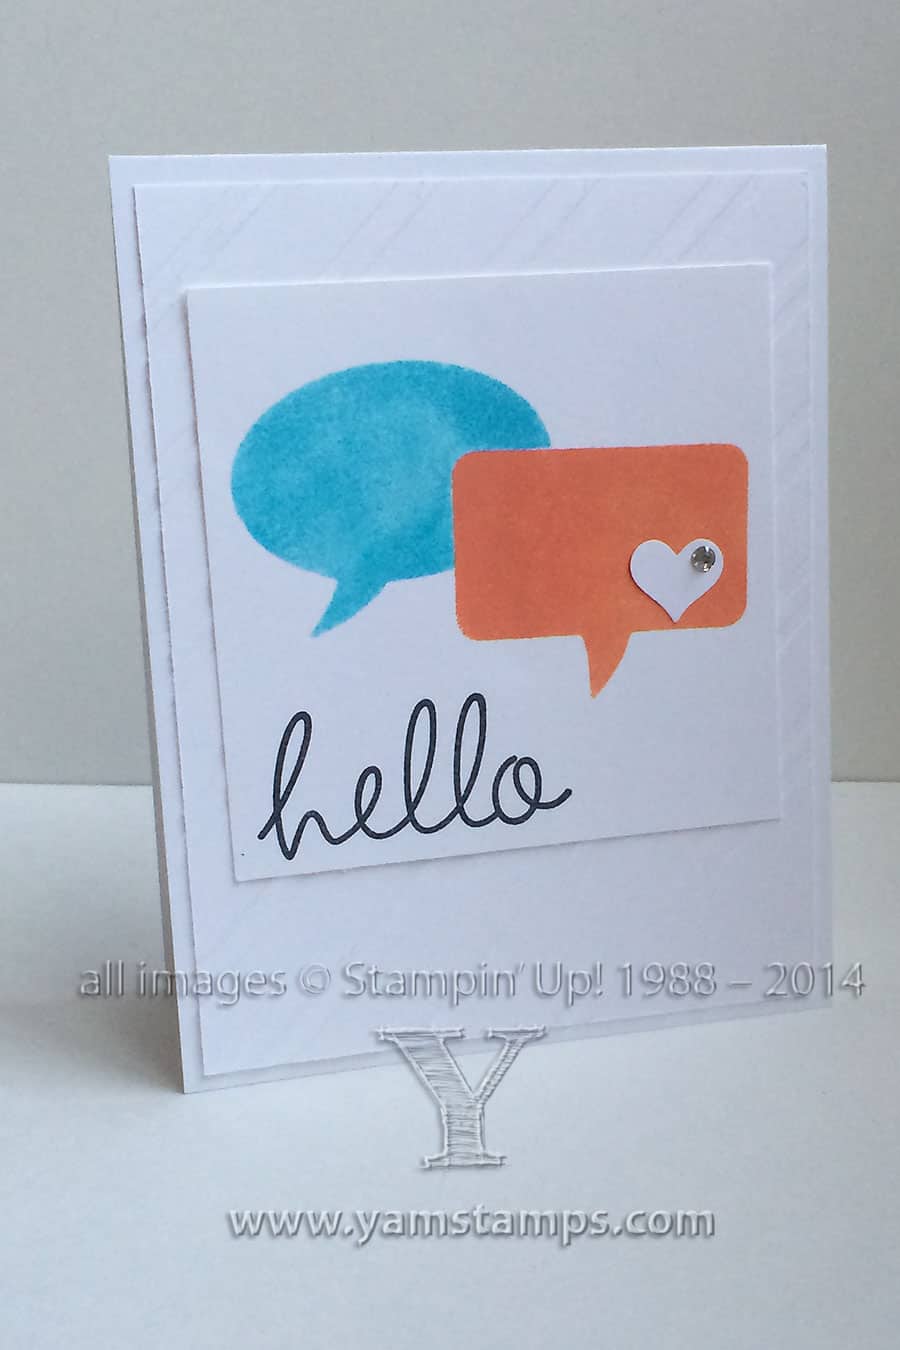
 This is a fun card that I made when I was away at Stampin’ Up!’s Convention (Inspire, Create, Share). My friend Lydia hosted a retreat where we attended a number of different creative classes. I think that’s the best part of going to SU events – catching up with friends and getting new inspiration! This card uses the Word Bubbles Framelits – which, what do you know, happen to be one of the set of framelits featured in this month’s Big Shot Bundle special -teehee. The bundle includes the framelits and the Sumthin’ Sumthin’ set, and you can choose it for free when you purchase your Big Shot this month. (If you’ve already got the Big Shot, you can buy the bundle for 15% off what the items would cost individually!) We used the framelits to cut masks, and used the bigger piece as a stencil to sponge colour onto the cardstock.
Tonight I’m doing a private class with Andrea and her friends – they all work in the school system so this is a fun way for them to get together before they go back to work. After this, I’m taking a bit of time off from in person classes (OK like a week…) as I’m getting ready to move! It’s a bit chaotic around here – what with still working, trying to pack, trying to clear out stuff….I thought I’d done well at paring down what I had, but I realize I was delusional. Don’t worry, Stampers Club members, I’m going to be ready for our August get together on the 18th! (I hope….LOL)
Aug 3, 2014 | cards, Stampin' Up!
When I was asked to make a number of different projects with the Flower Patch set, I wanted to be sure to have an example in the batch that wasn’t overtly feminine. I used one of the smaller images to create a clean & simple pattern and embossed with Gold EP – it reminded me a bit of stars in the sky. At the time I was working on these projects, my son’s grade 8 graduation was drawing near, so I thought this could be an appropriate card to celebrate that milestone. A classy card for my class graduate?! When I’m creating cards on dark card bases, I may put a layer of lighter card stock inside to write on, or more often, I’ll just use my White Gel Pen to write inside.
If you’re interested in spending some creative time, there are still a couple of openings for August’s Card Class on Wednesday at 7pm – please RSVP if you’re interested!
Jul 31, 2014 | cards, rubber stamping, Stampin' Up!
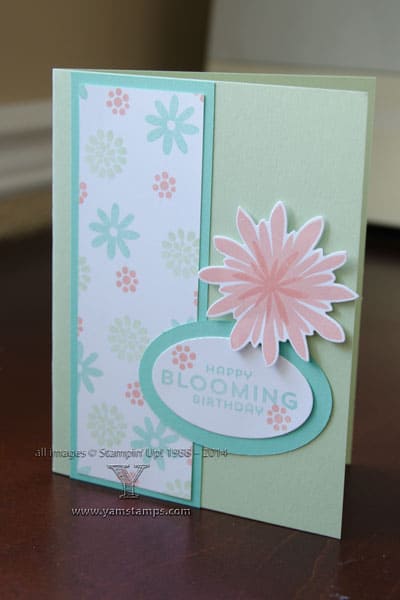 Now I know that Stampin’ Up!’s great Designer Series Papers are on sale right now (Buy 3 Get 1 Free) but there’s always another option when you have stamps, ink and cardstock! Create your own patterned paper with these essential tools. Here’s another card using the Flower Patch stamp set and Flower Fair framelits. I used the smaller stamps in the set to create the patterned paper featured in the left hand panel. One of the secrets to getting good placement with random stamping is roughly creating a visual triangle with one image/colour, and for me, making sure I don’t crowd the images too closely together. You can kind of see that in the panel?! The great thing about this stamp set is that it’s photopolymer – so you can see through to exactly where you’re stamping. They stick to the clear blocks like nobody’s business as well! The slight drawback? Make sure your pad is clean (no fuzzies etc on it) – because the stamps will pick that up. That, and I find them slightly stinky when brand new (of course, that doesn’t last too long!) For this card, I used oval framelits to cut out the main sentiment and added more flowers for colour and accent.
Jul 21, 2014 | 3D samples, cards, Stampin' Up!
So last week was busy visiting with friends and picking up some fun tips and tricks for my Stampin’ Up! business at the Stampin’ Up! 2014 Convention Inspire, Create, Share. I will post more photos in the next while as I’m able. I thought I was so good, uploading photos to my site that I could then whip up a blog post while on the road. HOWEVER…I have learned that I should have just done the whole blog post ahead of time, as the display on my laptop died while I was in Salt Lake City – mid post! I’m taking it to the computer doctor later to see if anything can be done. SO – now I’m home again, and can finish this post for you!
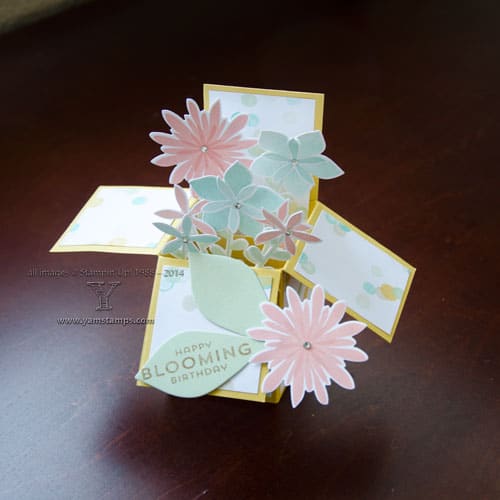 This is a card in a box that I created as a potential project for the Scrapbook & Cards Today blog – featuring the Flower Patch photopolymer set and Flower Fair Framelits (also available as a bundle). This one also uses the Lullaby Designer Series Paper, which is included in this month’s Buy 3 Get 1 Free deal! This project took a little more time than some of my other usual projects – I like quick and easy but impressive…but in truth, this actually wasn’t too awful – because of the coordinating stamp set and framelits. This card comes folded flat and fits in a regular A4 envelope for mailing, but once the recipient opens the envelope, they can turn it into this 3D version!! The construction of this card is not as complicated as it might seem – let me know if you’re interested in instructions or a class and I can see what I can do. In the meantime, I’m off to finish prep for tonight’s Stampers Club. Oh, and unpack my suitcase. Oh, and start some laundry. Oh……LOL!!
(PS And part two of “Why does technology hate me?” means that my internet connection was lost just as I went to publish this post. Never mind, it’s back now, and here’s the post!!)