A bit of ink gives these die cuts a cool effect for this floral card!
I’m all about flowers right now….because I’m ready to stop shovelling snow! This is a floral card that I made for a recent Demonstrator only card swap. We used products from the January-April Mini Catalogue, so I chose to use the Dainty Delight stamp set and dies – which you can purchase separately or purchase together in a discounted bundle. A quick reminder that discounted bundles are often available only for the sales period of initial catalogue in which they appear – something to keep in mind, especially as we draw closer to the end of the Mini Catalogue sales period!
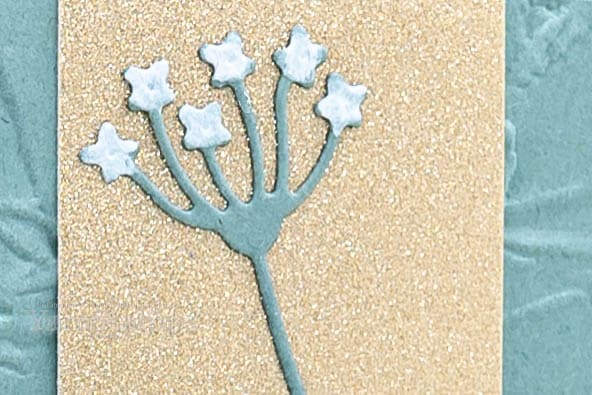
I may have mentioned it before, but I am not a gardener. Inside plants, outside plants – doesn’t matter – they are lucky to survive a few months at my home. That’s why I really like paper flowers and plants!! I decided that these die cuts reminded me of Queen Anne’s Lace, though they may actually be based on a different flower, but the beauty of paper flowers is that you can customize them however you’d like.
To make them more like the flowers (okay, I believe they’re actually considered weeds around here, but they’re pretty weeds), I made the blossom portion white. This was actually the most time consuming part of this floral card, and even at that, it didn’t take long. I placed the die cut onto a silicone sheet, and then squeezed some White Craft Ink refill onto a spare Clear Block. I used a dry Water Brush to apply the reinker onto the blossoms, did a couple of coats to be sure it was opaque enough for my liking, and then left them to dry. Once they were dry, I added them to the card. Easy peasy! I have to try it, but I think you could probably add some coloured reinker on top of the white blossom to make coloured blossoms if you want!
floral card closeup (you don’t have to be an expert painter!)
Die Cut Your Patterned Paper to make this beautiful and EASY card!
Stampin’ Up! Canada has a number of coordinating dies and stamp sets – which I love. What I have grown to love even more, though, is the coordinating dies and Designer Series Papers! When you die cut your patterned paper, you’ll be amazed at how professional your results will look – check it out:
For this card, I stamped the sentiment in Granny Apple Green, and used the Something Fancy Dies to cut the labels. (Using my thrifty trick of cutting the backing label layer from the centre of the backing cardstock). I then die cut a bunch of images from the sheet of DSP that has images just waiting to be die cut…
…and took those die cut pieces and arranged them around the border of the frame! I adhered a different piece of the DSP to the backing cardstock to cover up the hole, and the create a background for the sentiment and die cut flowers. Added some Rhinestone Basic Jewels for a bit of bling and patted myself on the back! Die cut your patterned paper for an easy, professional looking card.
I also used this paper and dies to decorate one of the cards in my Fantastic Florals Online Class – and I made a few prototypes, so you know that there’s plenty of cards to be made with all the die cuts you can get from one package of paper!
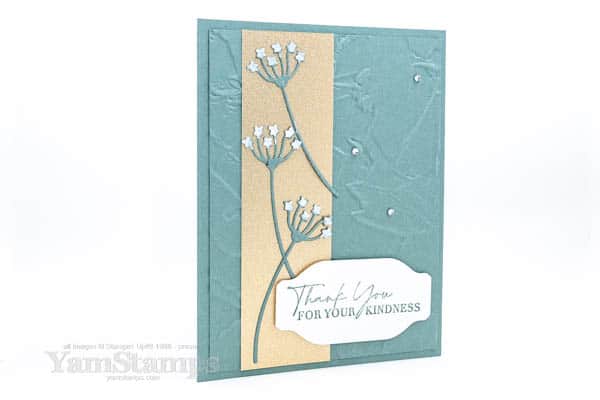
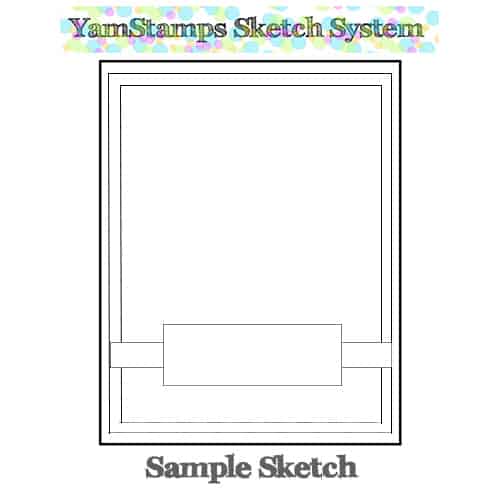
The YamStamps Sketch System is perfect for quick and easy cardmaking!
The YamStamps Sketch System for quick and easy cardmaking – I’ll show you the concept while I share this card that features some gorgeous new Designer Series Paper! The patterned paper in question is the highlight of this card – it’s the Hello, Irresistible 6″ x 6″ Designer Series Paper. It is, literally, irresistible – I had to buy it during the Demonstrator PreOrder period last month!!
Here’s the card:
The Hello, Irresistible DSP patterns are based on resist techniques, with gorgeous washes and bold images – and you want to make sure it’s seen! The paper is not in any catalogue, so if you’d like to take another look at it – check out the YamStamps Online Stampin’ Up! Canada store for this and other Online Exclusive Products! I added a bit of bling to the cardfront with the Iridescent Pastel Gems.
I realize that I often have “go to” designs for my quick and easy cardmaking – it makes it fast for me to come up with variations on a theme by switching out the paper and products used. I started the YamStamps Sketch System Subscription program a couple of months ago to help subscribers kick start their creativity, and they are loving how it truly does make for quick and easy cardmaking! (I also love how it helps me while I’m coming up with the sketches and samples!) It definitely helps overcome “Crafter’s Block” when you can’t come up with an eye catching card design, no matter how hard you try. (Sometimes the harder you try, the worse it gets…).
For example…the Hello, Irresistible card could have been one of the weekly samples to go along with a Sketch System sketch – though in truth, I came up with the sketch after making this card! LOL. This design is a little straightforward – the designs in the Sketch System are a little more involved.
Dimensions: Cardbase: 5-1/2″ x 8-1/2″ scored and folded at 4-1/4″ Large Rectangle: 5-1/4″ x 4″ Medium Rectangle: 5″ x 3-3/4″ Strip: 1/2″ x 4″ Small Rectangle: 1″ x 3″
This is similar to the Week One Email for each sketch in the subscription series. You get the sketch, the measurements, and the first sample. For the next three weeks, you get a different sample showing a variation on that month’s sketch. The last week also brings a summary email – showing the sketch and all four samples. One sample is always a winter holiday themed one – so you’ll have plenty of holiday card ideas when you need them! Quick and easy cardmaking – all year round!
After four weeks, you’ll get a new sketch and a new series of samples – and so on, and so on!
Supply lists for each sample are also provided for your reference, though not all items may be available for purchase at the time you receive the email. The beauty of the Sketch System is that it’s a blueprint for the card, and you substitute in whatever supplies you have on hand, and customize it for your card giving needs!!
Try it out – make a card using this sketch! When you post it online, use the hashtag #yamstampssketchsystem so I can find it – I’ll make it worth your while 😉
What subscribers have to say:
Kathy says “I really enjoy receiving the weekly ideas for a monthly pattern. Great idea. Thanks.”
Merle says “I was able to create a whole bunch of birthday cards really quickly – it made it so easy!”
Visit go.yamstampsmore.com/sketchsystem for more information – and get started! You get your first sketch emailed to you as soon as you sign up!
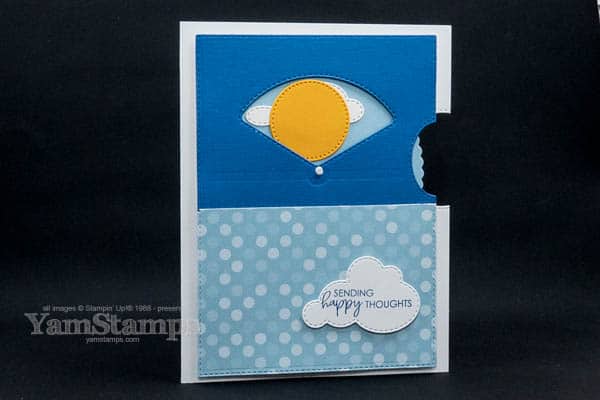
Have you seen the Give it a Whirl Dies in Stampin’ Up!’s Annual Catalogue?
I think the Give It a Whirl dies are one of those buried treasures in the catalogue! Quietly hanging out on the back pages of the book, potentially overlooked – but I would like to correct that! This is a fun set of dies to create interactive spinner cards easily! Interactive cards are always a sure way to grab someone’s attention, and they always impress!
This is the card – designed to send happy thoughts to someone who could use some cheer in their day.
I designed this Give it a Whirl Card for February’s Stampers Club, so we did use a couple of Sale-a-Bration items on it (Dandy Designs Designer Series Paper and Beautifully Happy stamp set) which are no longer available, so if you didn’t pick them up during Sale-a-Bration, you could always use something similar from your stash! When I cut the Designer Series Paper to fit the piece on the cardfront, I actually ran it through the Stampin’ Cut & Emboss Machine with the same die so that it would have the same stitched element around the outside edges – I think it makes it look more finished!
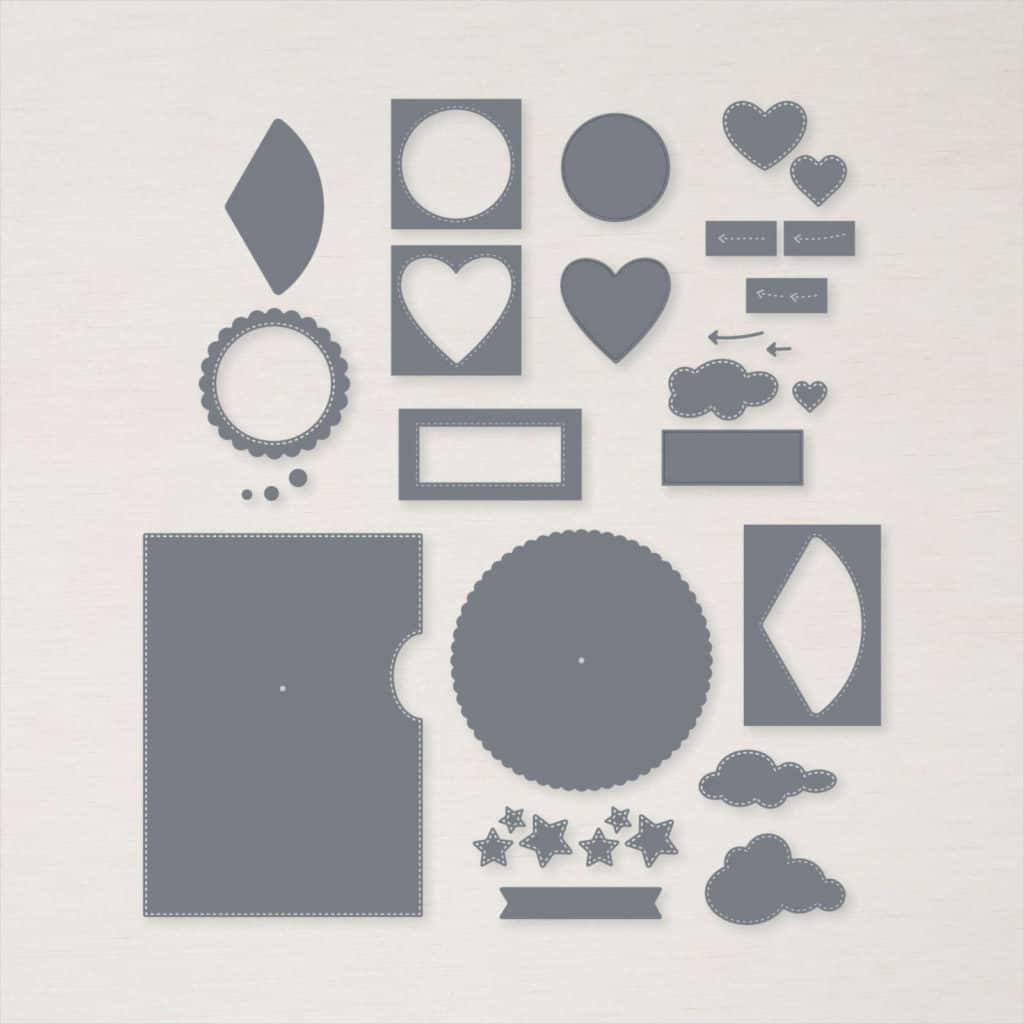
This die set has a number of items that can be used to cut out the window portion, or that could be used to embellish the finished card! You will want to have brads on hand – this card uses one of the Round & Square Brands – to attach the wheel, but other than that, all the components are in the die set.
I love the number of coordinating shapes in this die set! I did add an extra cut out in the actual card front, using a stitched circle from the Stylish Shapes Dies, just to make it easier to spin the wheel. I think it also highlights that there’s an interactive feature that way!
If you’re looking for an easy way to make a spinner card – Give it a Whirl! You can shop online, 24/7 for delivery to your door anywhere in Canada in the YamStamps Online Stampin’ Up! Canada store – shortcut for shopping is yamstamps.com/shop. You can message me for assistance placing your order, or if you’d like to pay by etransfer. Please note that while I’m travelling, I will still be able to access emails but there may be more of a delay than usual due to time zone differences and schedule!
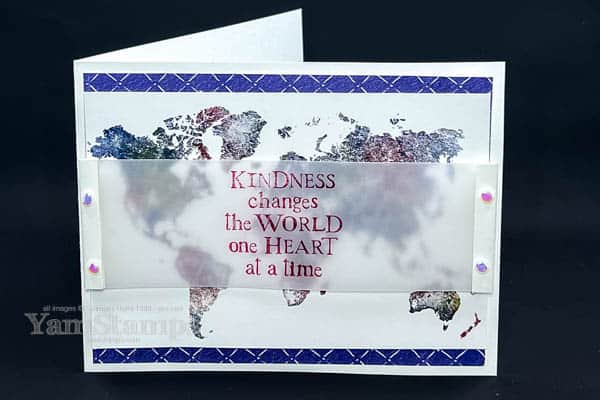
I made this watercolour world map card more colourful by using a tried and true technique!
When you want your cards to be even more special than usual, pull out some old favourite techniques like I did on this watercolour world map card! The name of the stamp set I used is Watercolor World, but since I’m in Canada, I reserve the right to add in the “U”.
Watercolo(u)r World is a single stamp, so I guess I shouldn’t call it a set! The stamp itself has an irregular texture to it so it has the look of a watercoloured image without you having to do anything. I made it more watercolour-ish by using the “Baby Wipe” technique – or in my case, the “Make up Remover Wipe” technique since I didn’t have any baby wipes on hand.
Essentially, you just want a wet wipe that doesn’t have anything too harsh in it – so no bleach, alcohol etc!! Just add a few drops of reinker to the surface, then use that as your ink pad! For this watercolour world map card, I blotted the stamp on the inked wipe a number of times, moving it around, since it’s a fairly large stamp. This blended the inks a bit more, so you’ll want to watch what colours you choose.
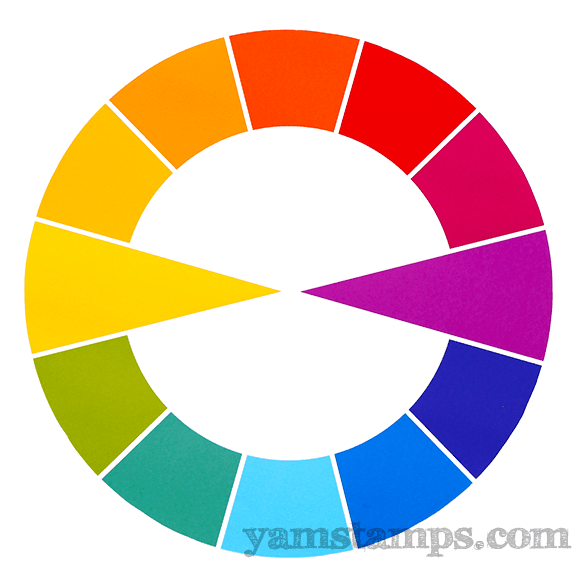
(From a non-art major…) I try to pick colours that are not opposites – so the ones that would be opposite each other on a colour wheel – like the two indicated above. These colours tend to blend together and create mud LOL! They end up brownish in tone, which is usually not the look I’m going for. I’ve also learned not to pick colours that are too close together on the wheel for these kind of techniques because they often end up looking like one solid colour.
Anyway – the reinkers I chose to use were Cherry Cobbler, Night of Navy and Crushed Curry for my watercolour world map. (I ended up picking shades of the three primary colours). Getting close to some opposite colours but if it’s a “fresh” application there’s not as much blending of tones. If you look at the image, you’ll see very little Crushed Curry – it tended to blend with the other colours and not stand out on its own. I stamped a few of these with the same wipe “ink pad” and found that the more I stamped, the more muddy/blurred the colours became.
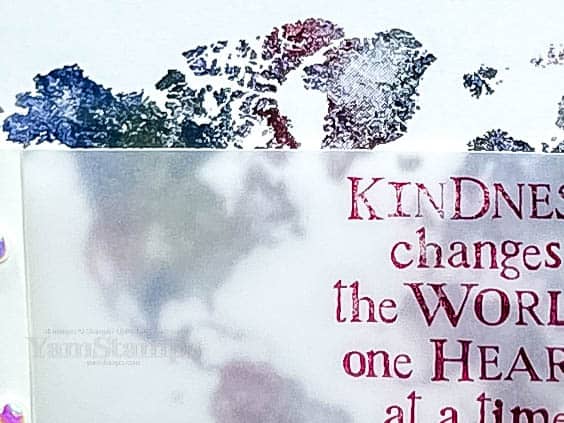
watercolour world map card close up
The other tip I have is to have the dots of reinker farther apart on the wipe when using a larger stamp – that way, you just move the stamp around a bit and get the ink blend happening. When I put the dots too close together they bled together before they inked up the stamp so you couldn’t see areas of distinct different colour (which is the look I wanted). OH also – you may want to wear rubber gloves for this! I tend to pick up the wipe and daub it on the stamp to add colour where I wanted it (what can I say, I’m a little controlling that way I guess) – which worked well except for the fact that my hands were super inky afterwards!!
I didn’t want to hide the image, so I stamped the sentiment from the Begin with a Dream stamp set onto some Vellum Cardstock and then added that to the cardfront, using some Foam Adhesive Sheet pieces under the borders I created (to hide the attachment!). I added some Opal Rounds that reflect in similar shades (I think!) so felt like they matched the colour scheme as well.
I stamped a number of these images at the same time, so have got a copy to put into my travel journal – since I’ll be travelling again! So exciting! It’s been four years since I’ve been on a plane….so it’s taking me longer to pack than it used to. I’ll be travelling to Ireland with the Burlington Teen Tour Band – taking photos for them while they perform and sightsee! They finally get to march in the St Patrick’s Day parade in Dublin, a few years after they were initially set to do so. I will still be posting and checking messages, but it may take me a little longer than usual due to the busy schedule and time zone difference! (and jetlag, always my nemesis). I’ve never been to Ireland (though it’s been on my list of places to visit for FOREVER it seems) so I’m looking forward to it!