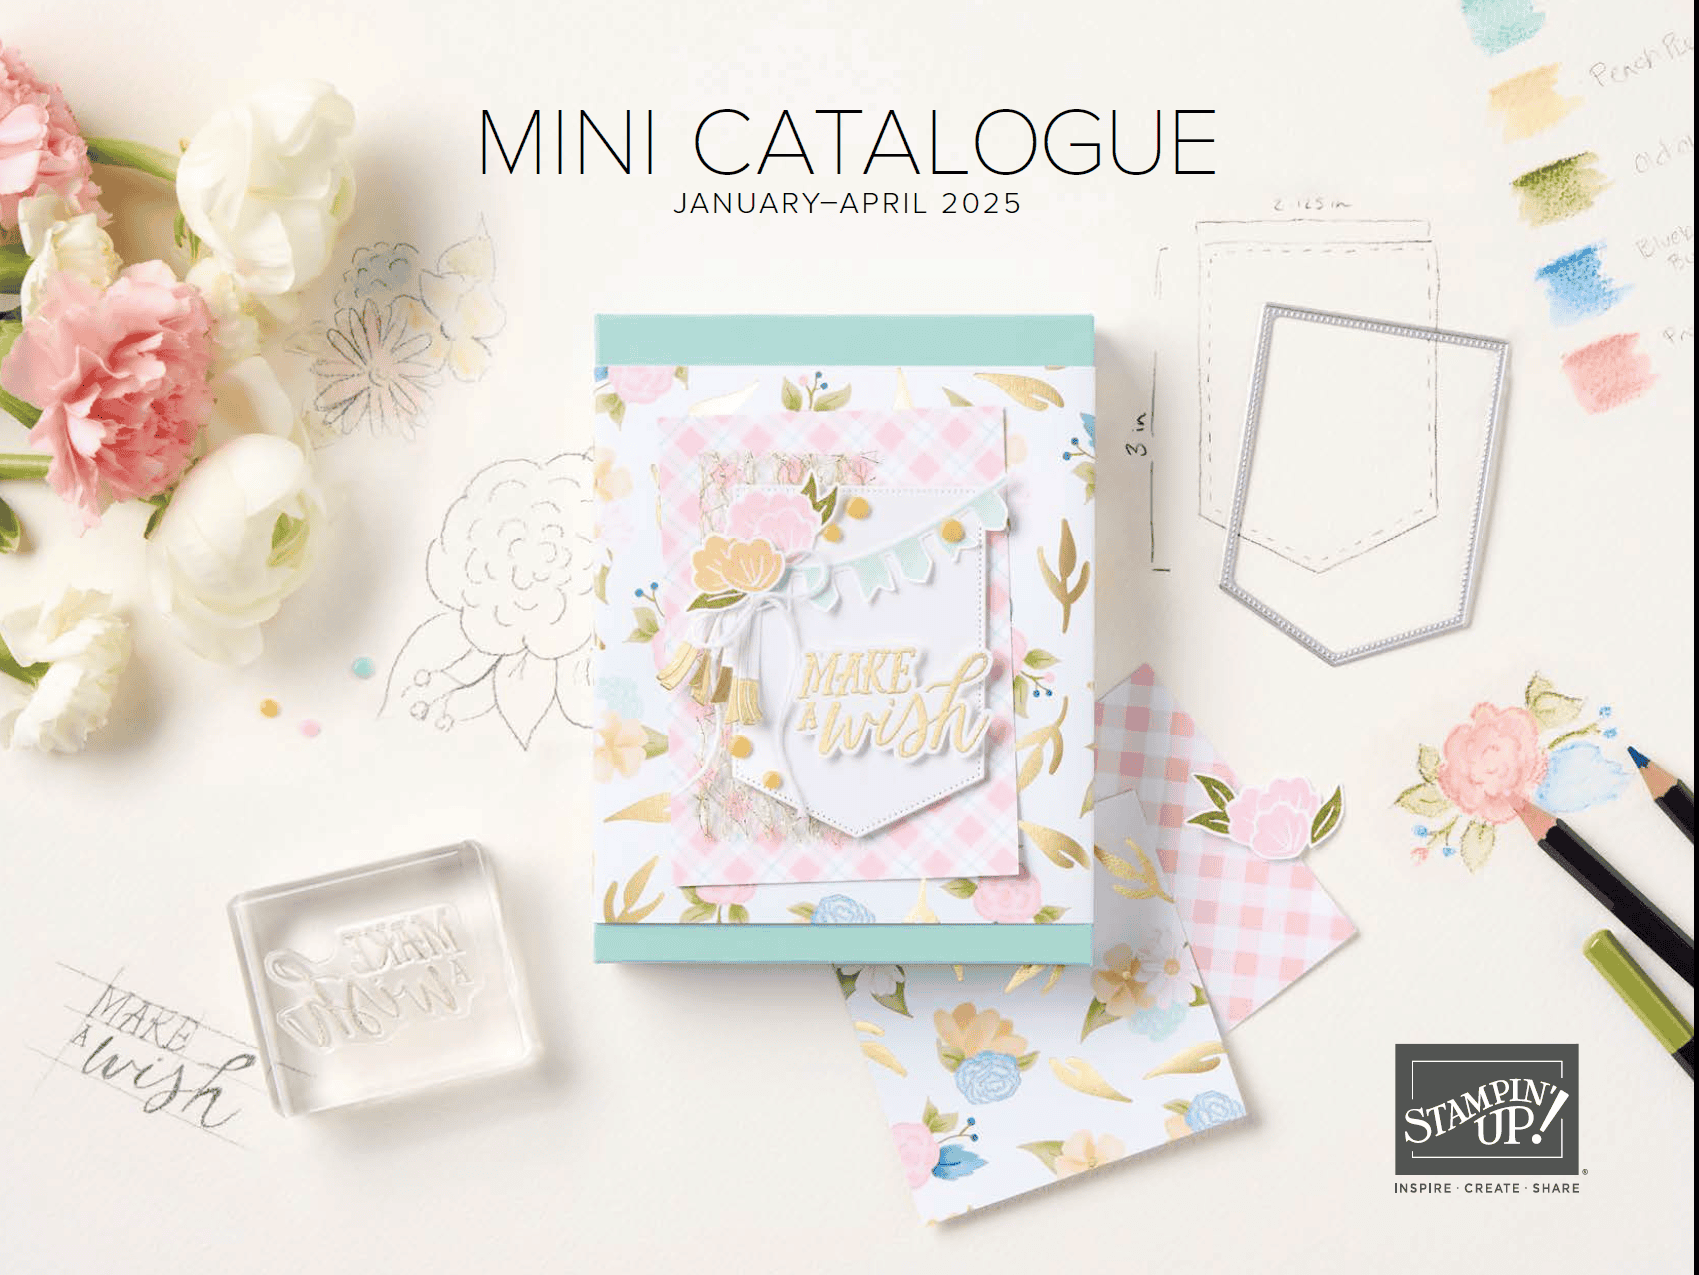
Happy New Stampin’ Up! Catalogue 2025 to all my crafty friends!
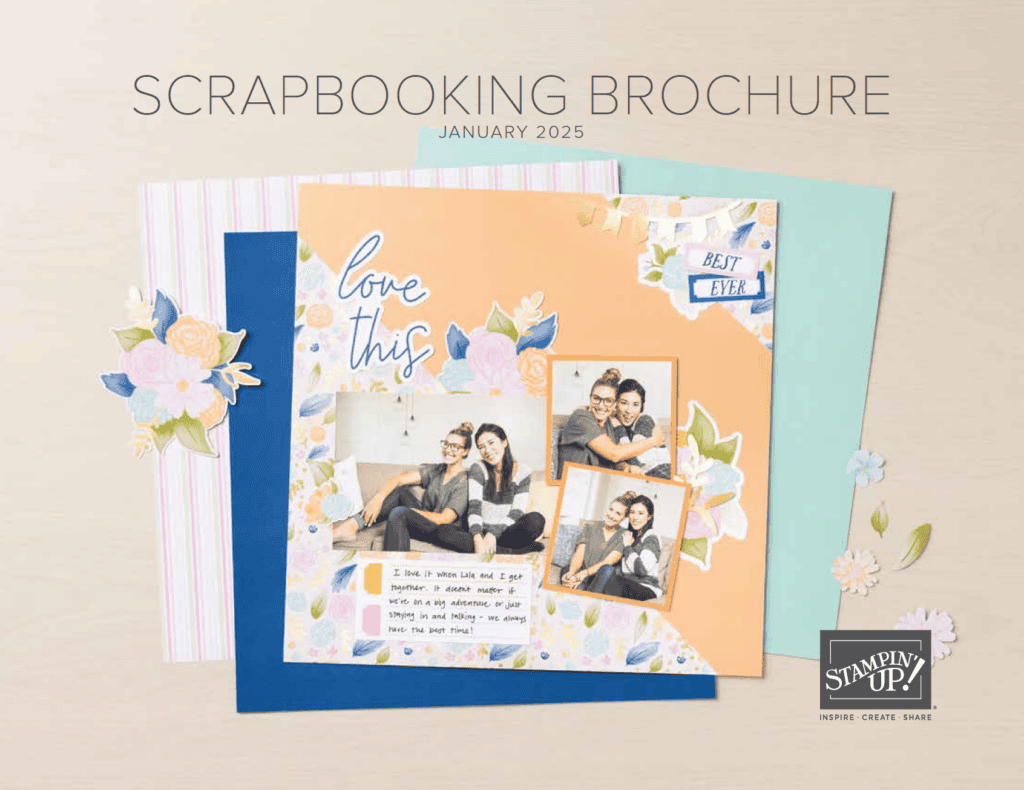
It’s finally official – Happy New Stampin’ Up! Catalogue 2025, my crafty friends! It’s a super bonanza this time around – there’s the January – April 2025 Mini Catalogue, the Scrapbooking Brochure (online only) and last, but definitely not least – Sale-a-Bration!
For each $75CAD product ordered in a single order (before taxes/shipping, after any coupon/discounts), you earn a Level 1 Sale-a-Bration item; at $150CAD you can choose between two Level 1 items OR one Level 2 items…and so on, and so on… no limit to the number of times you can earn Sale-a-Bration rewards!
JOIN Stampin’ Up! as a demonstrator and receive the usual great deal of $165CAD product for $135CAD, plus catalogues, and a Paper Pumpkin kit, pay no shipping and no blended tax (HST/GST); PLUS January 7 – February 28, you’ll get TWO sets of Stampin’ Write Markers and the Handmade Designs Stamp Set! A $294CAD Value – for just $135CAD!! Check out my Frequently Asked Question Page here – we’d love to have you as part of the “Eh” Team – my group of Stampin’ Up! Canada Demonstrators!
The shortcut to shop all these products in Canada is YamStamps.com/shop – delivery straight to your door! Please message me if you have any questions, would like to pay by etransfer, or need assistance placing an order or signing up as a demonstrator with my group!
A downloadable pdf with step by step tutorials for three different inked embossing folder techniques, plus I’m throwing in fifty tips for using your Embossing Folders! On sale December 26-28 ONLY, it’s a limited time special item – for just $9.99CAD, and the download is available as soon as your purchase is completed.
This is one of the step by step tutorials you’ll get:
I love the look of this! If you don’t recognize the products I used, it’s because they’re from the January-April 2025 Mini Catalogue! The Quick Sheet Tutorials include a supply list, plus step by step instructions. You aren’t limited to the supplies in the list – you can use the techniques with whatever embossing folder you might have in your craft room.
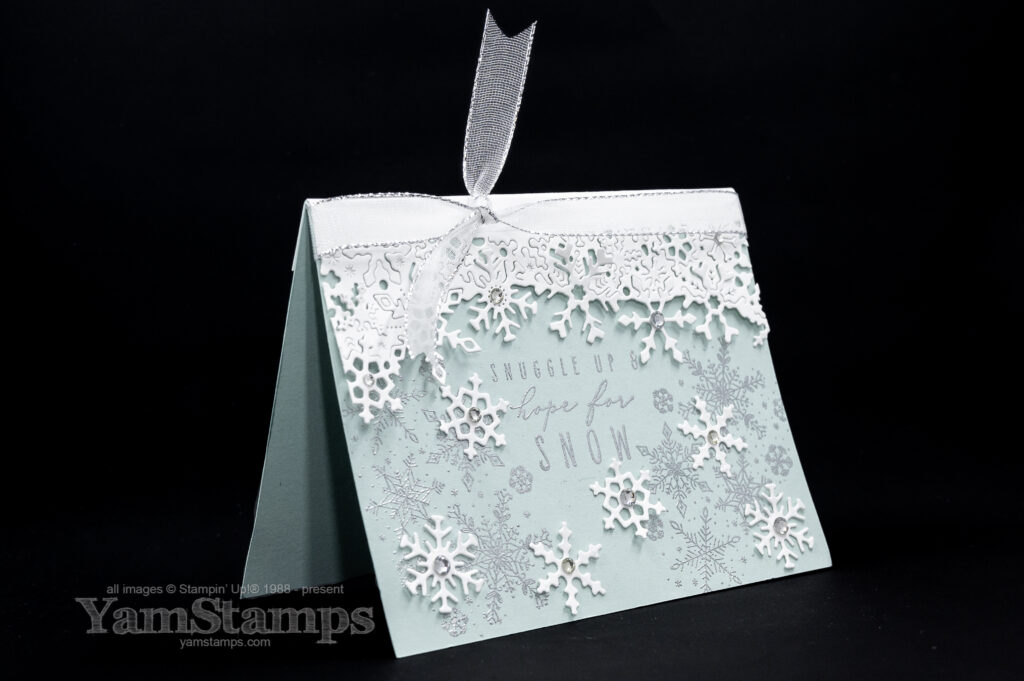
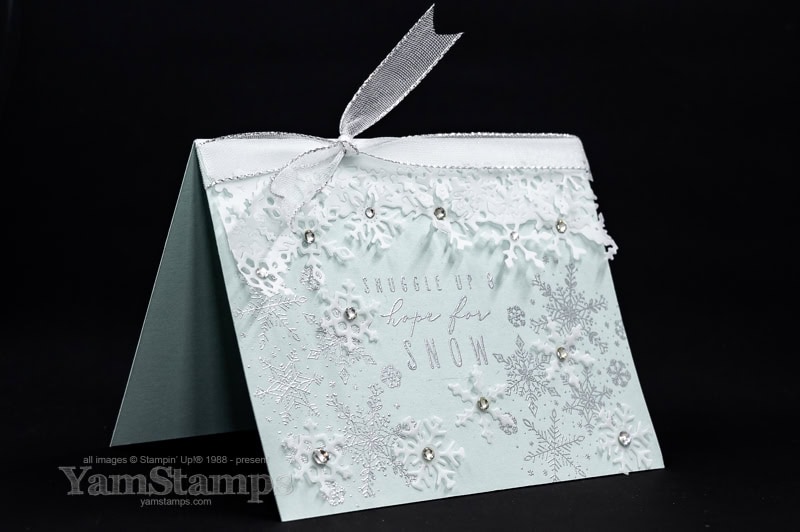
Here’s a beautiful Frozen Edges Snowflake Card to celebrate winter!
Winter is in the air, and what better way to celebrate the season than with a handcrafted snowflake card? This Frozen Edges Snowflake Card features embossing and die cutting, and is perfect for sending warm winter wishes or simply adding a touch of frosty magic to someone’s day.
Whenever the winter seasonal mini catalogue comes out, I have to control myself and not get all the snowflake things. There are certain images or themes that I am always drawn to, and snowflakes are my go-to images for the winter season. I love that you can use them for a holiday card, or an in season card for birthdays or thinking of you! Or if you’re like me, and totally did NOT plan on sending out holiday cards and then got caught short when Canada Post was ordered back to work…..New Years / Winter cards….or perhaps “I know it’s supposed to be spring so why is there still snow” cards…(depending on when I get around to mailing them).
Frozen Edges Snowflake Card
This Frozen Edges Snowflake Card has a few more steps than some of my cards, but really, it’s quite easy to recreate. The Frozen Edges dies are on the Last Chance List right now, so you’ll want to grab them before they’re gone! The Frozen Edges stamp set is already sold out, but you could substitute another snow-themed stamp set for the sentiment and extra images.
Variations on the Frozen Edges Snowflake Card: change out the colour of the cardstock, or try using vellum for the snowflakes. Stampin’ Up! doesn’t carry vellum at this point in time, but I still have some in my crafting stash – check out this version with vellum….
Frozen Edges Snowflake Card – Vellum Version
Use the Frozen Edges dies to make warm greeting cards!
Come back on Boxing Day to check out my Boxing Day Special, especially if you love Embossing!
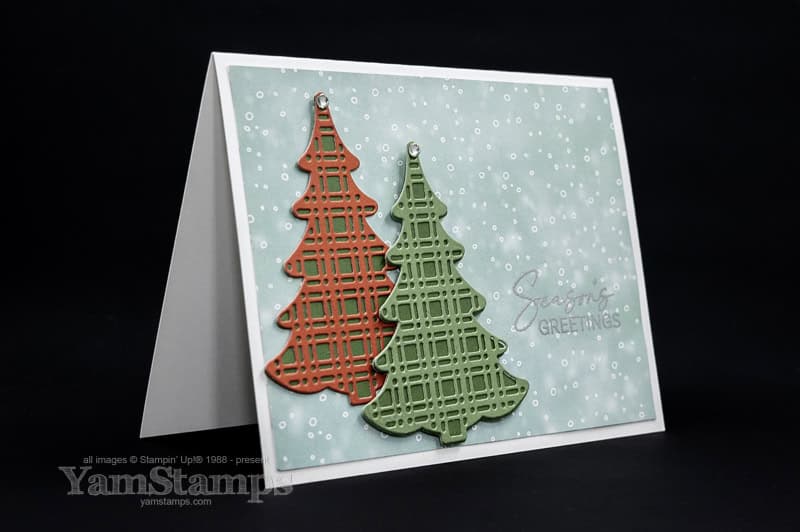
Sharing this plaid Christmas tree card tutorial to spread some joy!
Well, hello there! I’m still here! Sorry for the bit of radio silence there. Anyway, I’m here with a holiday card to share with you – and you can download the tutorial for this plaid Christmas tree card too!
You may remember that I love projects that are easy to make but that are still impressive. The thing that I love about this card is that the paper makes it easy! I have a free download of this Plaid Christmas tree card tutorial for you! I used the new two toned cardstock from Stampin’ Up! – in festive colours, of course. These are from the Snow Day 12″ x 12″ Two-Tone Cardstock package. Each cardstock has a side that is a lighter tone and the other side is the darker tone of the same colour. Makes crafting easy peasy, and especially when there’s coordinating products. The Snow Day cardstock has colours that coordinate with the Snowy Scenes Designer Series Paper and Sticker Sheet.
Hope you enjoy the plaid Christmas tree card tutorial!
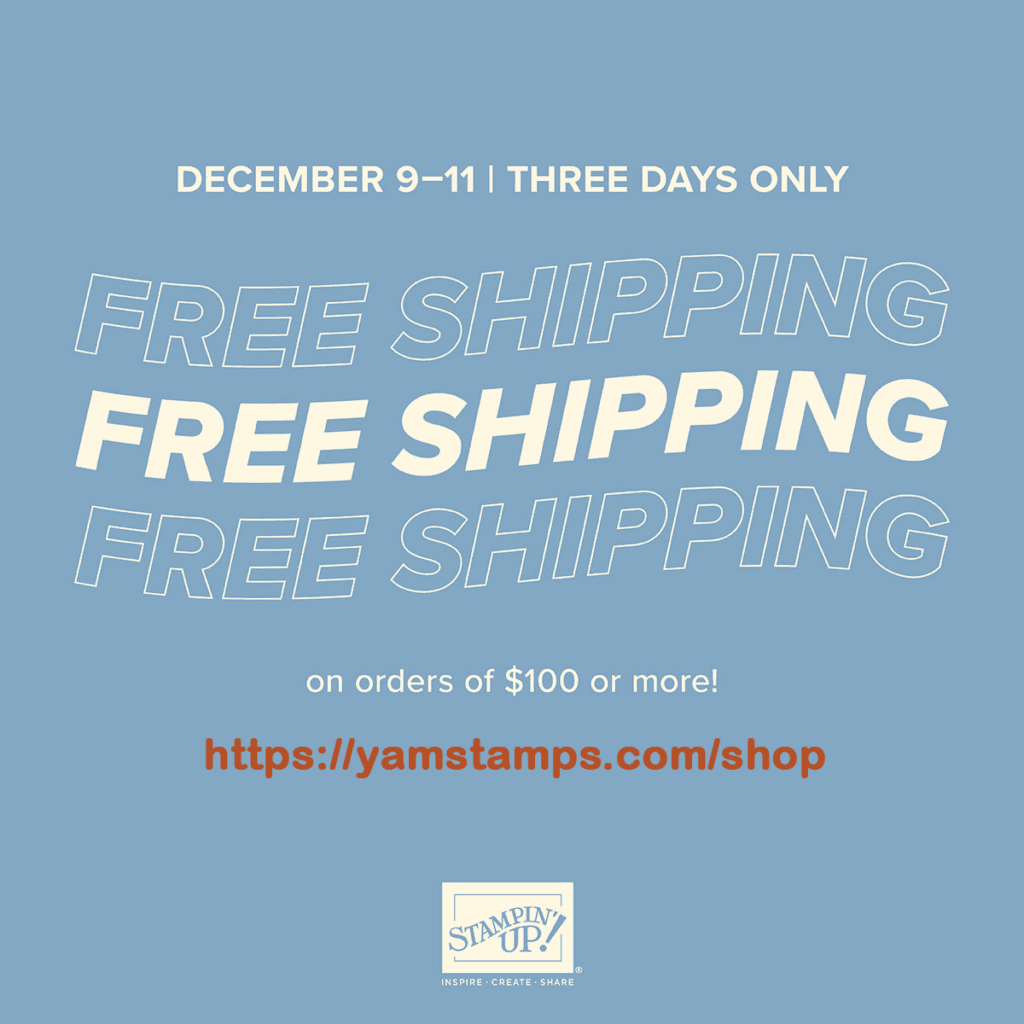
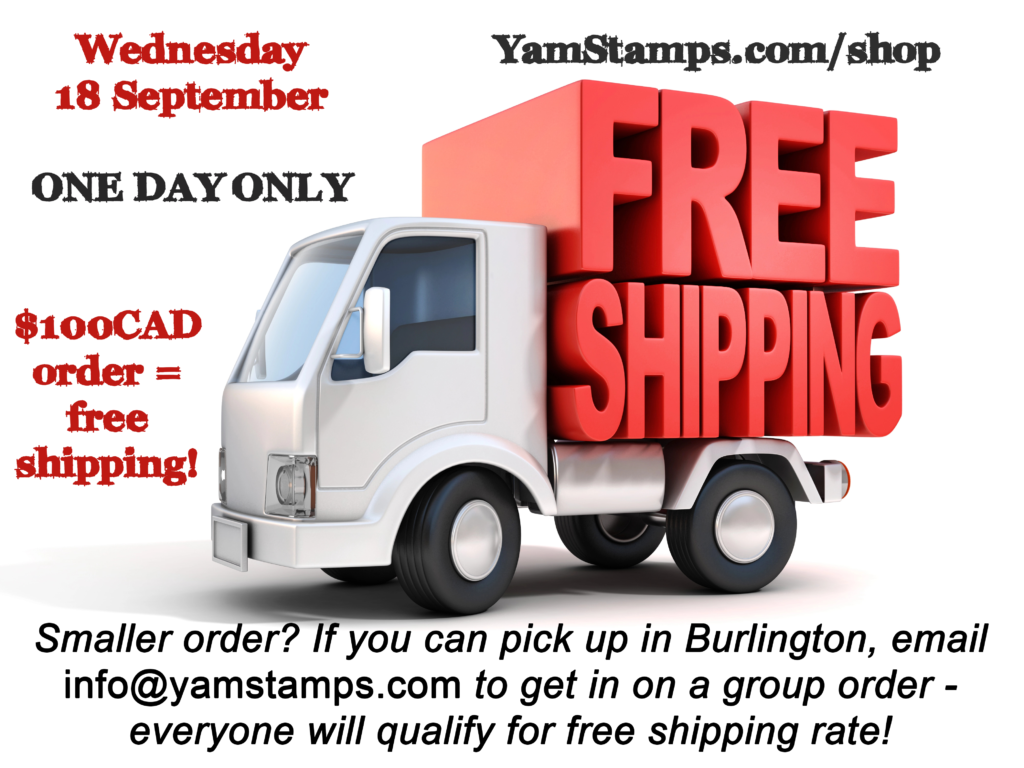
Free Shipping! Dec 9-11
Stampin’ Up! Canada is having a FREE SHIPPING promotion December 9-11 (THREE DAYS!). Pay no shipping fees on product orders of $100CAD! Shortcut to shopping is yamstamps.com/shop. If you have a smaller order, and can do a porch pickup in Burlington ON, message me and I will group together orders so that everyone can benefit from free shipping!
If you need any supplies from the plaid Christmas tree card tutorial, you could shop Dec 9-11 and save some money on shipping!
Please reach out if you have any questions or need assistance placing an order! Happy shopping! Happy free shipping Monday December 9 to Wednesday December 11!
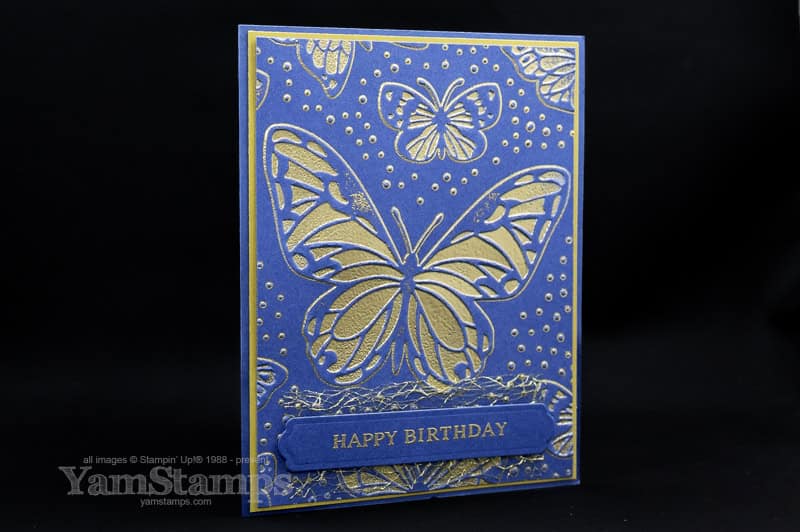
Sharing a fun and easy technique for World Card Making Day!
This ticks all the boxes – quick, easy and impressive! Check out this easy technique for World Card Making Day (which is today, Saturday October 5th!).
To celebrate World Card Making Day, I created a quick video showing the process of how to create the inked embossed background, and some tips to get good ink coverage. You can also download a written tutorial for the entire card here:
This is not a new technique, and I’ve used it before, but it’s so effective and I like to pull it out every once in a while. It’s good to revisit favourite styles, layouts and designs, and often you’re able to tweak things to make them even better!
I’m a few months into a new position at work – learning all the ins and outs of a new job is very time consuming (not to mention the brain workout!). I finally got around to editing the video for this technique (and now am wondering what took me so long because it actually wasn’t too hard LOL). You can find it on YamStamps Social Media (Tik Tok, YouTube, Instagram, Facebook) – but I’ll post it here as well/
Here’s the video of this easy technique for World Card Making Day:
I hope that you can grab a few moments to make a quick card on this World Card Making Day….and make sure to send it to someone special as well!
If you have a smaller order and can arrange to pick up your items in Burlington (ON), you can message me to get in on a group order! I’ll place orders once there is a total of at least $100CAD product so that everyone will qualify for free shipping!
Happy shopping made even happier with free shipping!!