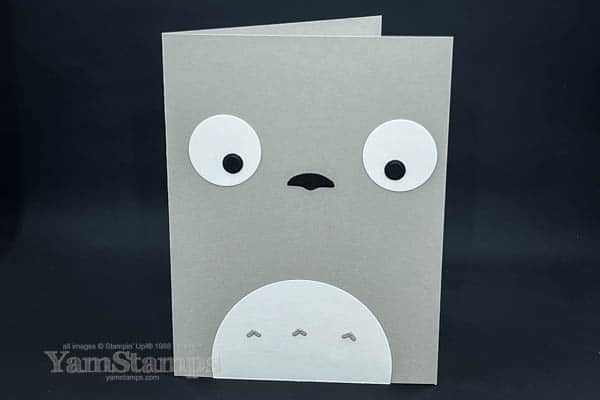
So I was “procraftinating” the other day…you know, when you’re supposed to be doing something and craft instead…and came up with this super fun Totoro punch art card! OK technically it’s not punch art, it’s die cut art…but you get the idea. Basically use die cuts to piece together a totally different look!
Totoro Punch Art Card
Technically, I think I should have the belly circle lower on the card front, but it’s stuck in place now LOL!
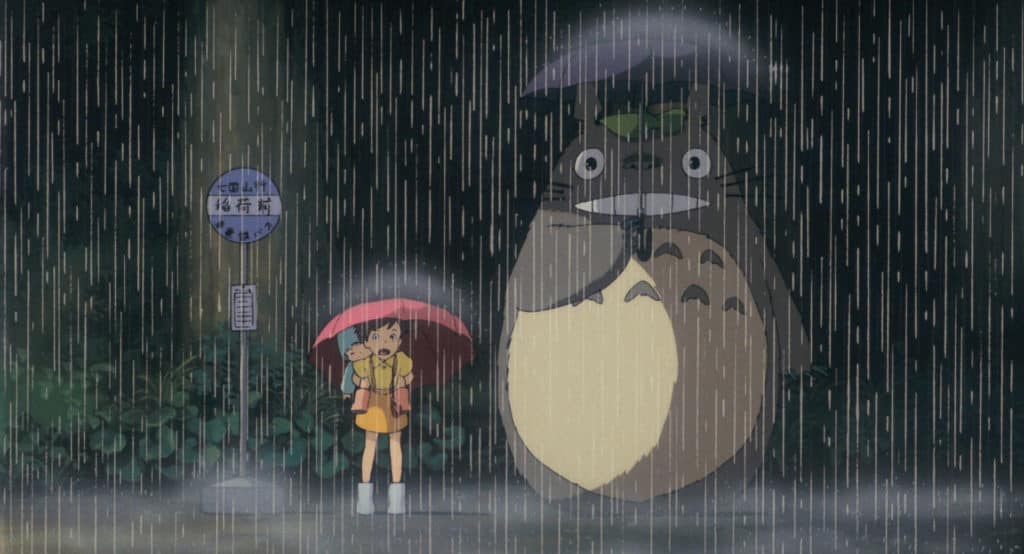
image from Studio Ghibli site (with permission as per site settings)
So the above is a photo for reference…obviously my version is simplified! I used circle die cuts (from Layering Circles Dies and Warm Welcome Dies)for the eyes, and the nose is the end cast off piece from the label in the Waves Dies; the marks on the belly are created using the accent from the Alphabet A La Mode Dies!
This Totoro punch art card was a lot of fun to create – and I made a short video of the process which I uploaded to pretty much all my social media platforms – TikTok, YouTube, Instagram and Facebook….because everyone has their “go to” platforms where they watch their content! I’ve embedded the YouTube version below.
Eventually I did get some other work done….but I am really good at procraftinating…..how about you? If you want to keep in the loop about other tools to help you procraftinate, or craft on purpose, even, be sure to be signed up for the YamStamps Newsletters (click on the link or use the box on the YamStamps site) – they are sent out each Tuesday at 1pm Eastern – so no more procraftinating for me – I’m off to write a newsletter!
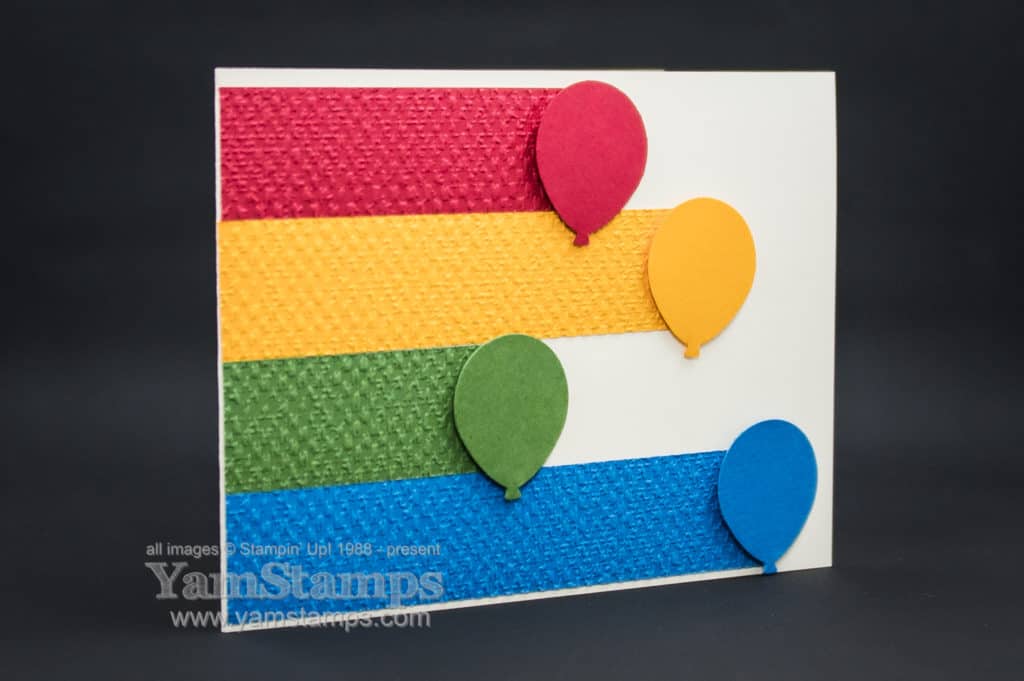
So apologies if that song is now stuck in your head…but I thought it was appropriate for this balloon card! It’s a fun and easy card to send to cheer someone up or celebrate an occasion.
Up, up and away with my beautiful balloon card
I love doing rainbow colours because they’re cheery and easy to figure out. ROYGBV! In this case, RYGB since there wasn’t quite enough room on the cardfront. Real Red, Mango Melody, Garden Green and Pacific Point to be precise. Once I cut the strips of cardstock, I texturized them using the Tasteful Textile 3D Embossing Folder. I used the Balloon Bouquet Punch on scraps of the same cardstocks, and then assembled my card. I decided to pop up the balloons using Stampin’ Dimensionals to make them stand out a little more. Adding dimension is the easiest way I know to give a card a little more “wow” factor.
In the meantime, I’m finishing up some customer thank you cards (which I’ve sadly fallen a bit behind on…) and also the Tutorial Bundles. Don’t forget that when you place a $50 order with me, you’ll (eventually?! LOL) get an exclusive tutorial bundle – different ones each month! You can place an order online at the YamStamps Online Stampin’ Up! Canada store (shortcut yamstamps.com/shop) or contact me. I can accept etransfers or credit cards for payment. If you’re looking for an easy way to get crafting, consider grabbing a Card Class to Go! This Balloon Card was in a previous card class. Contact me to purchase – $20 includes precut supplies to create 4 different cards. Just add adhesive! You can customize with whatever stamps and ink you have on hand or use the suggested inks/stamps listed on the supply list. Due to Stampin’ Up! regulations, open to Canadian residents only.
OK back to crafting for me – it’s a tough job, but someone’s got to do it, right?!
Much like last week’s papercrafting representation of my weekend – here’s this week’s version of how I spent my Saturday.
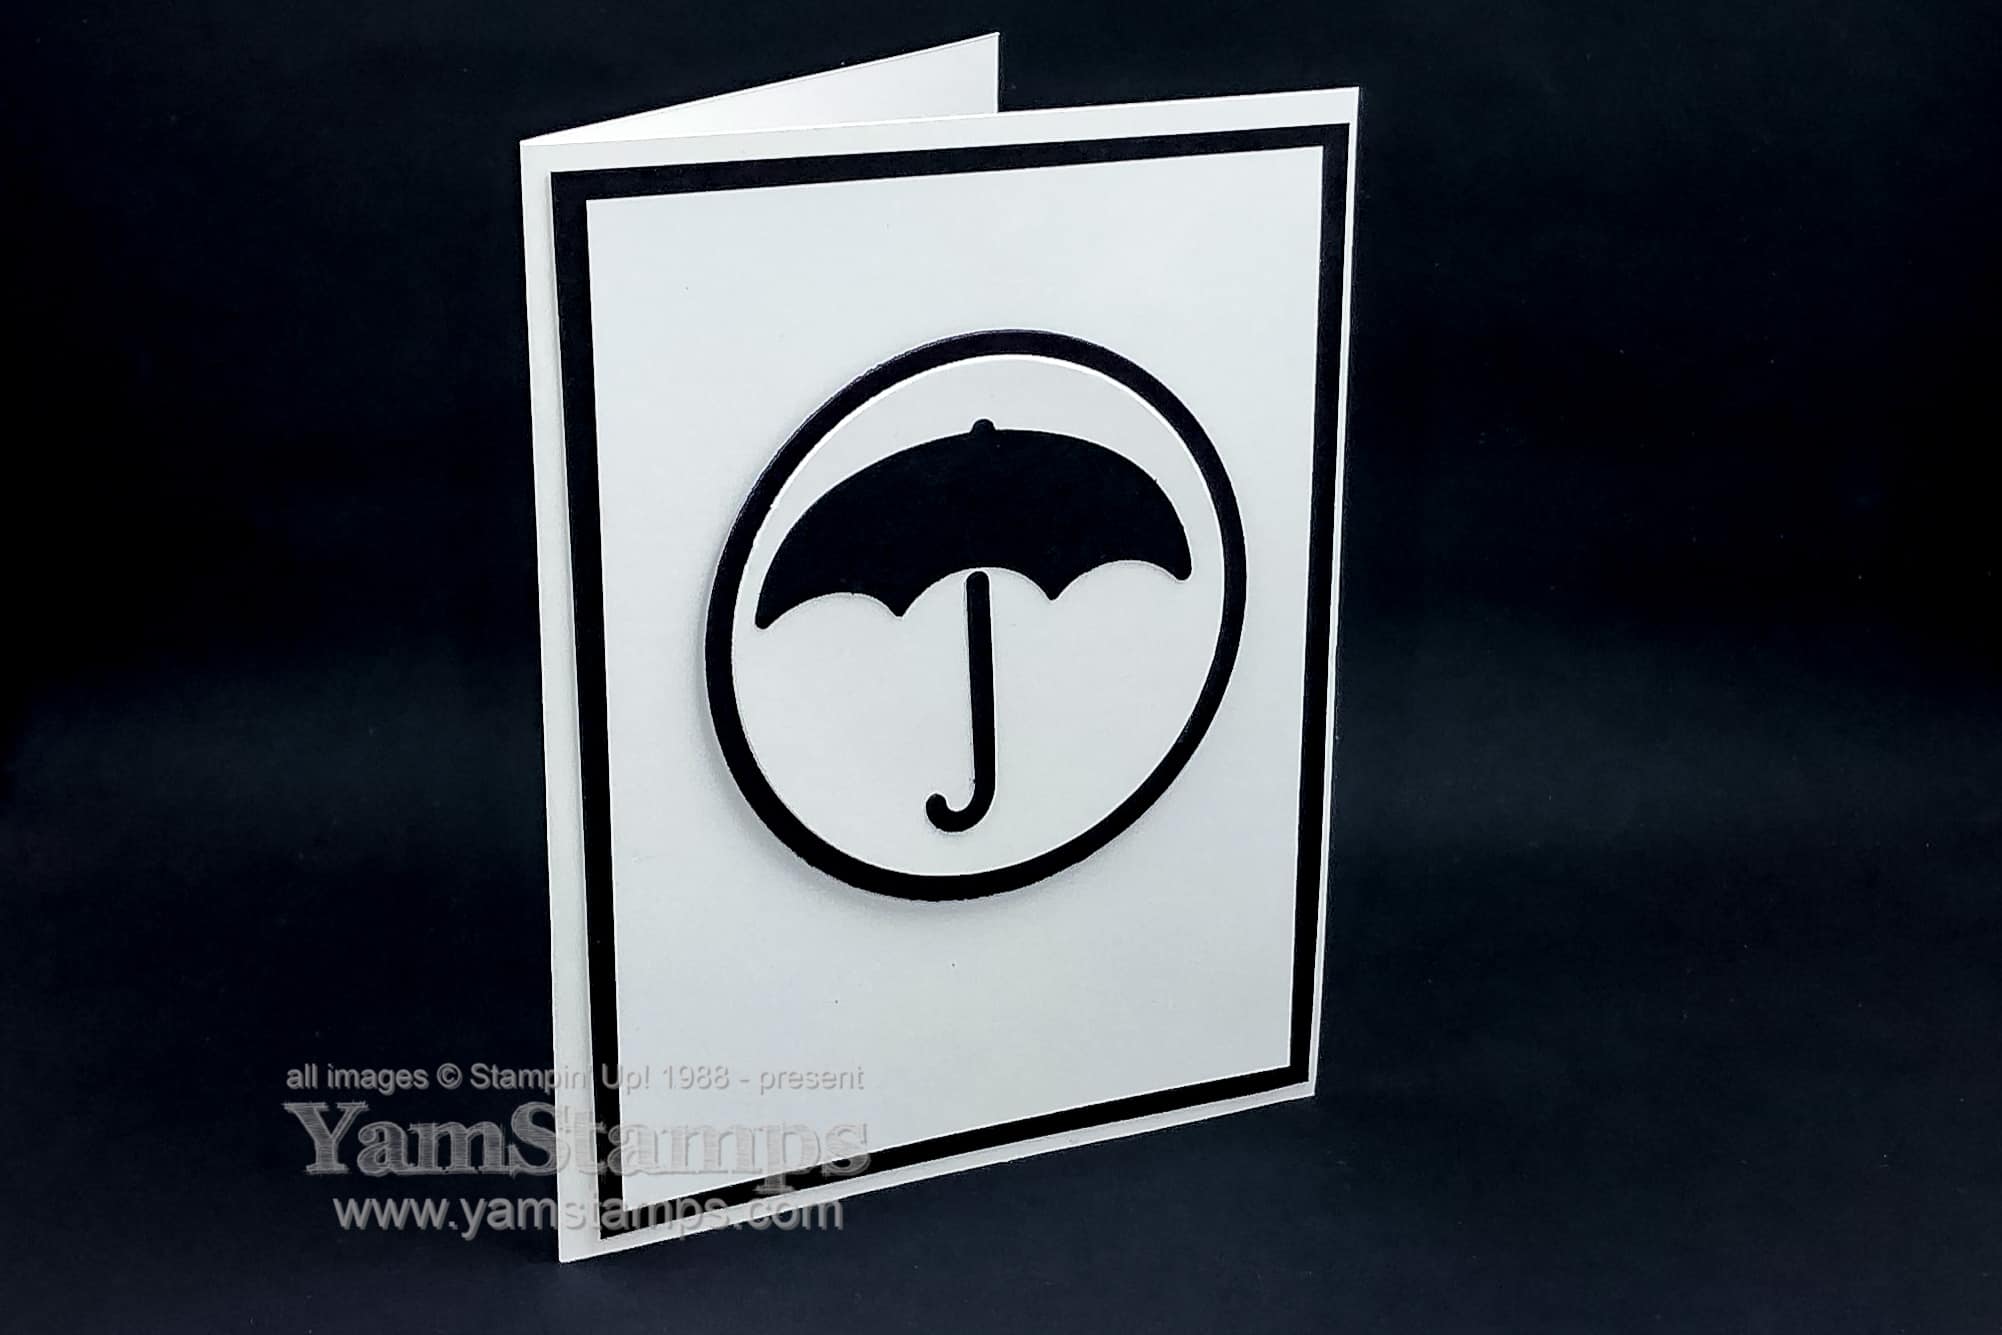
f you recognize this logo, you’ll probably have spent a few hours like me binge watching the second season of the Umbrella Academy on Netflix. In all honesty, I watched the first season initially because I was looking for local landmarks since it was filmed next door in Hamilton, Ontario (well, also Toronto). I did recognize a number of locations that they used for filming, which is fun. I got hooked on the storyline (though I did close my eyes for some of the gorier portions, something I learned to do a long time ago LOL). After spending a number of hours burning through the episodes, I was feeling a bit guilty for neglecting some other tasks (just a bit, though – it is a holiday weekend, after all), so I whipped up this super fast card to share on the blog. Really easy with Stampin’ Up!’s Umbrella Builder Punch and Layering Circles Dies, and since the logo is black and white themed, the colour choices were also really easy LOL.
Just a heads up – you may want to spend a moment or two this weekend to check that you actually know your Stampin’ Up! site password if you shop online. On Tuesday, Stampin’ Up! is rolling out a new website/platform, so your browser will likely not recognize the site as one you’ve visited before, and won’t automatically fill in your username/password (if you use your browser settings for that). So make sure you know your password because you will probably have to enter it yourself (at least the first time! Fingers crossed for a smooth transition. The August-December Mini Catalogue will also be live on Tuesday, so lots of excitement happening that day!
If you are a fan or know a fan of the Umbrella Academy, leave me a comment and I’ll randomly pick someone and send this card to them! (This way I can also test if comments are working on my site…) When I send out thank you cards in my business, I use post-it notes for my notes inside the card – that way, the recipient can remove the post-it and mail it to someone else!
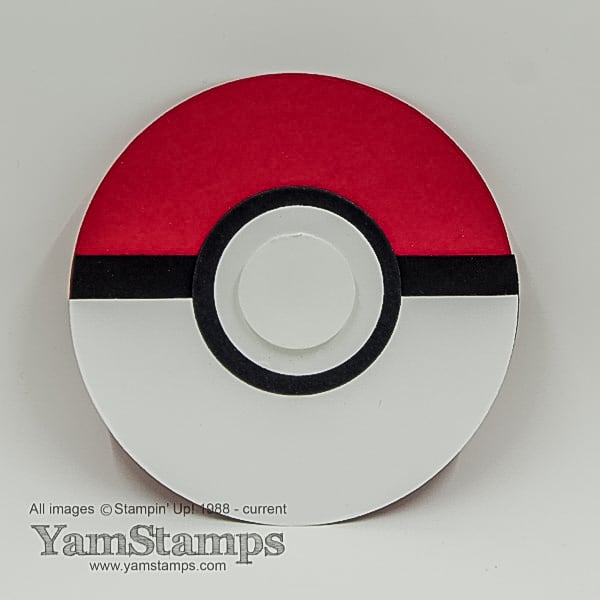
While these are crazy and new Pandemic times that we are living through, there are some positives to be found. I’ve actually enjoyed spending lots of family time over the last few months, with members of the family under the same roof for a while. One thing that my university aged son and I have done recently is played Pokemon Go. He loved Pokemon when he was younger and we spent a lot of time getting Pokemon cards and watching the show and movies. A few years ago when Pokemon Go came out, we played it on our phones, and recently have renewed our interest in playing the game for fun. I thought I’d pull out this older Pokemon Punch Art piece that I did a number of years ago.
All you need are a number of circle dies (like Stampin’ Up!’s Layering Circles Dies) or punches, Whisper White, Basic Black and Real Red Cardstock and you’re good to go! Cut 3 large circles (same size) of each of the colours for the body of the ball, cutting the white one just less than half way and the black one just more. Cut 3 progressively smaller circles in black and white and adhere everything together – it’s a Pokeball!
This project is from four years ago – but it’s amazing how this Pokemon craze lives on and is constantly being rediscovered by kids (of all ages) all the time.
For me this weekend, I’m getting August-December Mini Catalogues into envelopes for mailing [fill out this form if you don’t have a Stampin’ Up! Canada Demonstrator and need a copy!], working on some designs for the Holidays (yes, it’s true) and running outside every once in a while with my son to catch Pokemon during the Pokemon Go Fest. So if you’re passing through my neighbourhood and see me out and about staring at my phone instead of enjoying the scenery, you’ll know why.
Don’t forget that until August 3rd you’ll earn a $6 coupon code when you place an order for $60 (before shipping/taxes). You’ll be able to use the coupon August 4-31 – so you can grab some new products from the August-December Mini Catalogue! In the meantime, when you need a break from the sun – why not create some Pokemon Punch Art? Great gift tags or fun cards for the Pokemon fan in your life. Happy crafting!
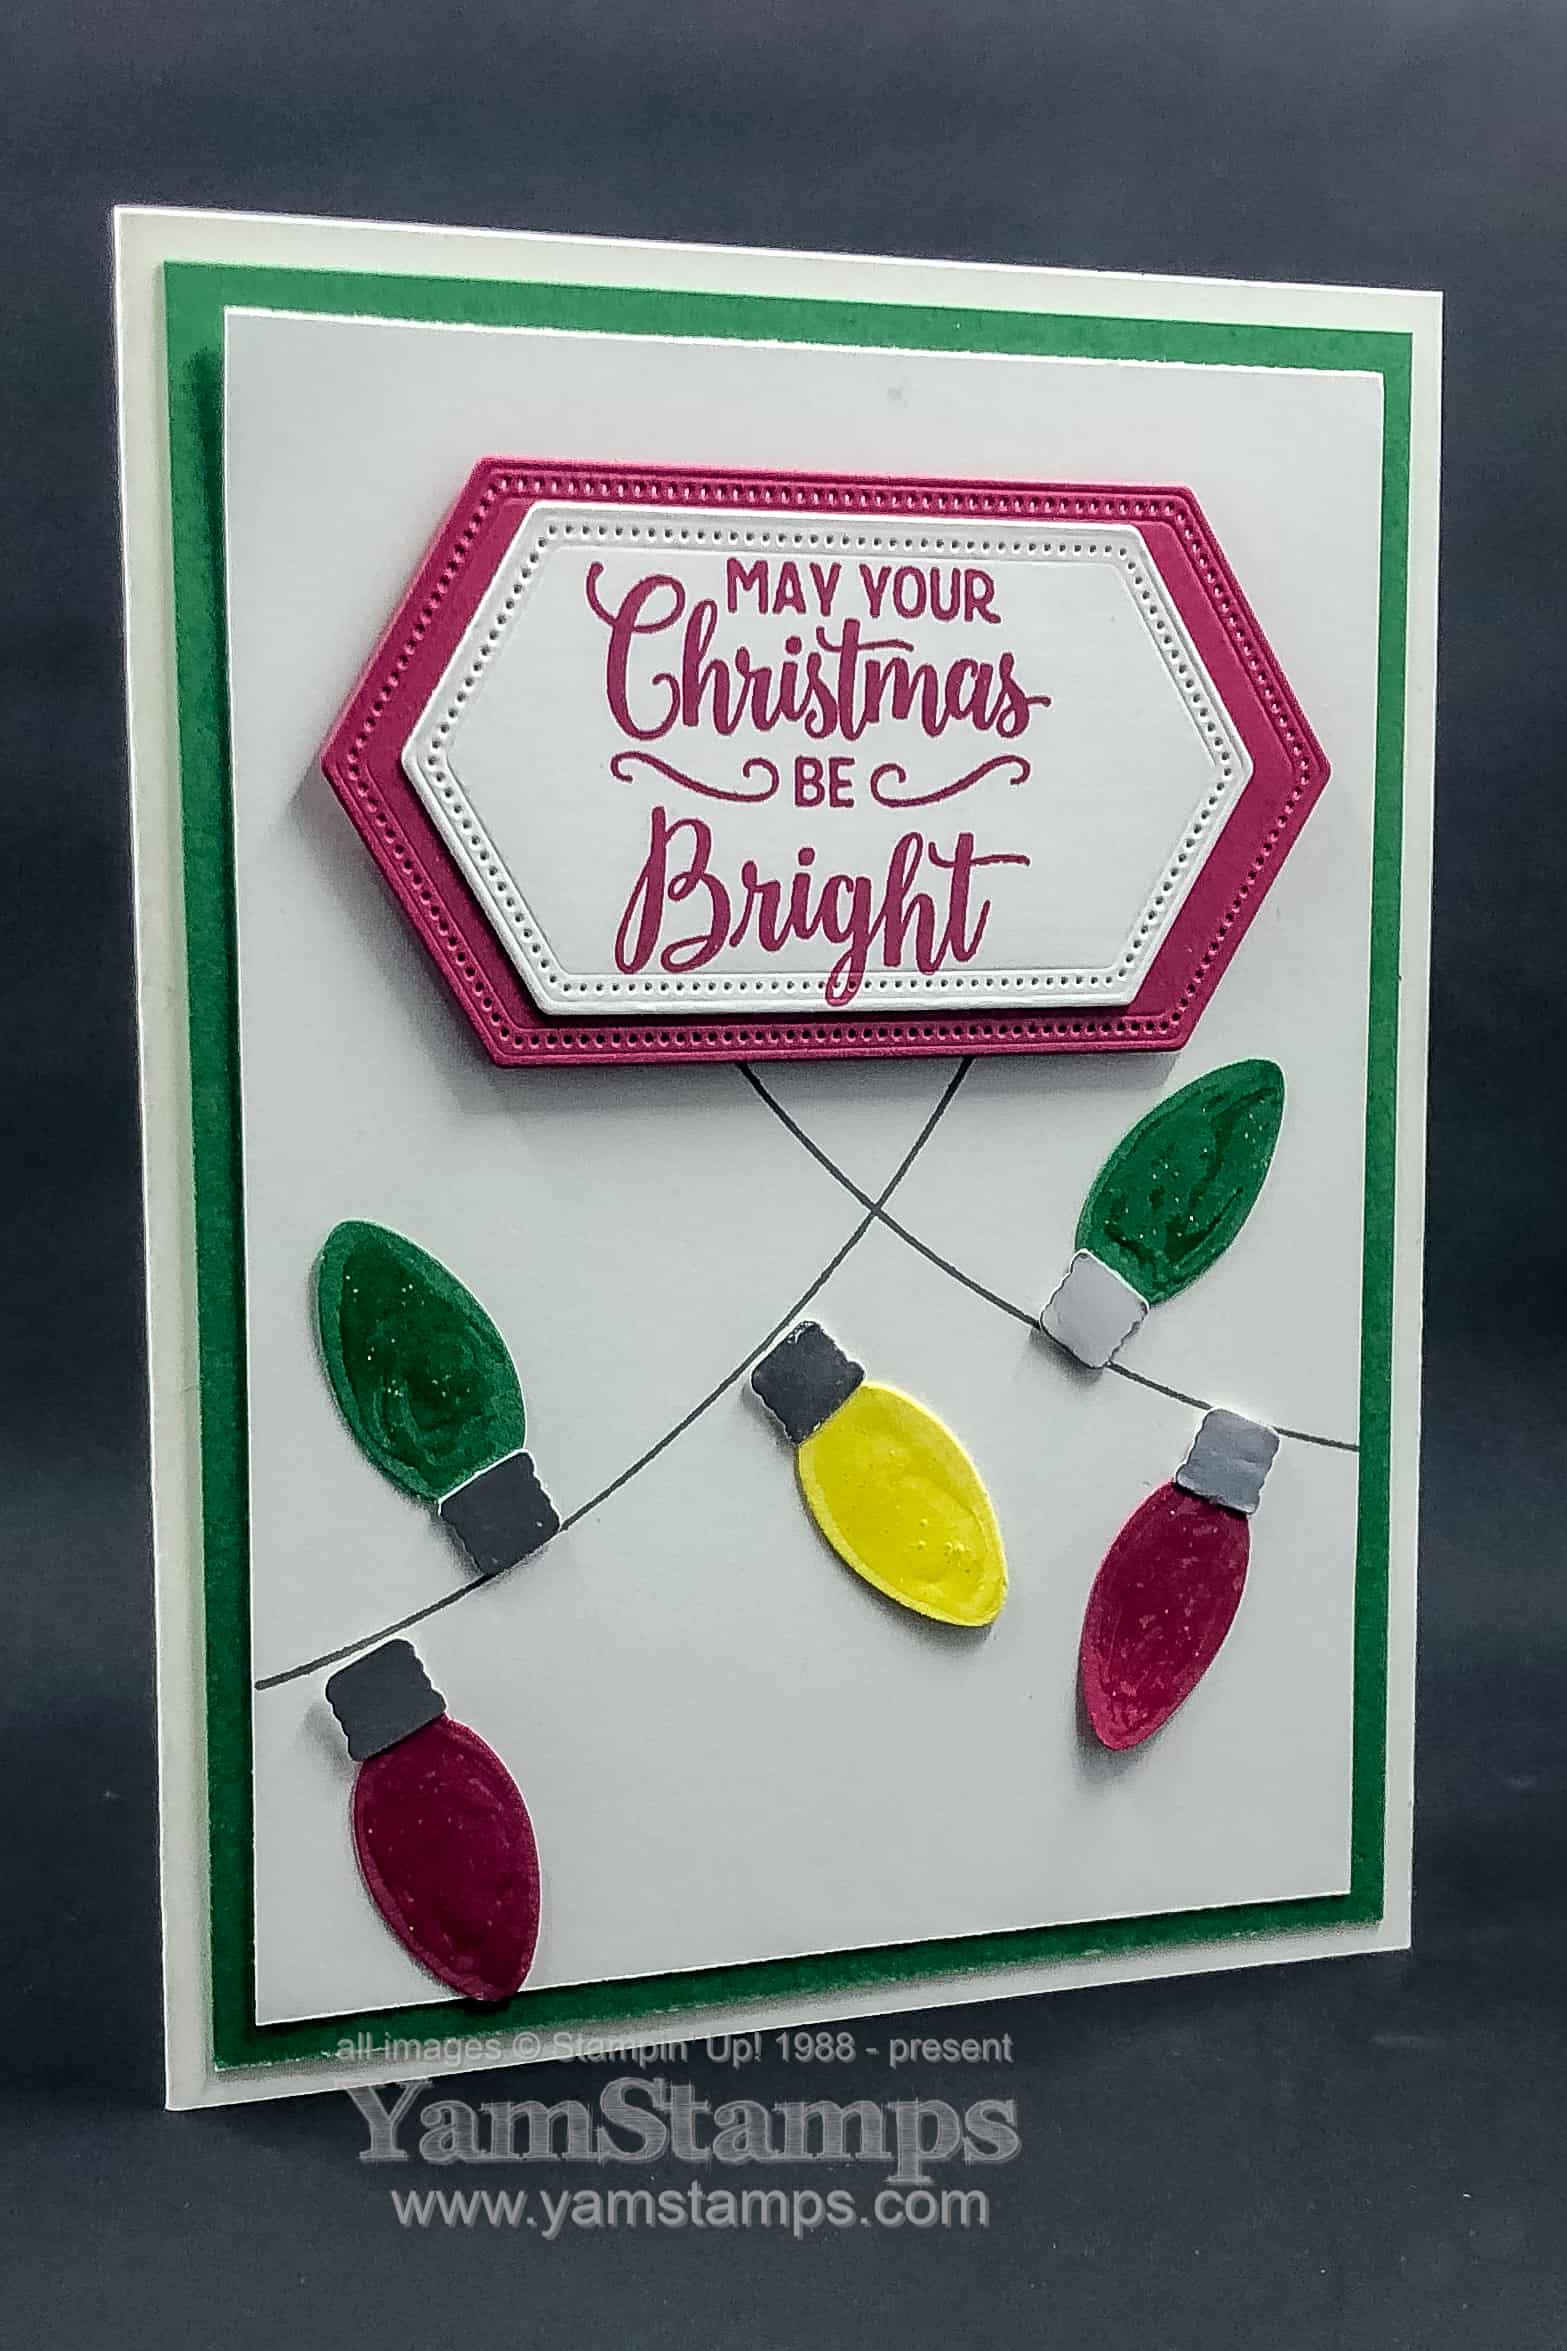
The bulbs were made glittery by an application of Shimmery Crystal Effects. It was a quick application, if you can’t tell LOL!! I figure the recipient should be distracted by the shiny objects and will overlook the not totally perfect application….and as I always say – if the person who receives a handmade card criticizes it, THEY DON’T DESERVE THAT CARD! (joking). (not really).
In the meantime, I’m already looking ahead to next year – as I’ve got my new January-June Mini Catalogues and Sale-a-Bration Catalogues on order! I’m anxiously awaiting their arrival. I’ve used the Stampin’ Up! mailing system to send a bunch out to those who have placed orders with me in the last year and will follow up with those on my list to be sure that they arrive safely in the next while!
If you are signed up for the YamStamps Paper Crafting Newsletters, you’ll be receiving the FINAL week of the Twelve Weeks of Christmas Projects next week. Can you believe it?? In the meantime, I will be *cough* finishing up my own holiday cards with the hope that they will get into the mail system by Valentine’s Day…..so while I go to work on that, please continue to enjoy this sparkly Christmas Lights Card…because it may be the only way I manage to spread a little paper crafting holiday joy at the rate I’m going!!
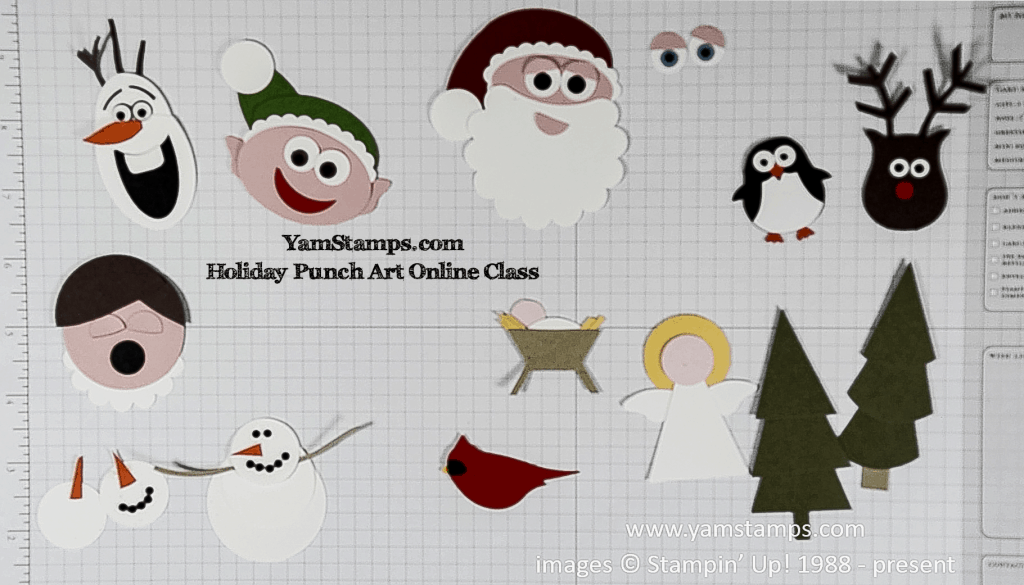
I’m bringing this class out of the vault for four days only! My Holiday Punch Art Online Classfeatures 11 different punch art creations, all seasonally themed.
Special pricing of $5 CAD – but only available for the next few days – after Monday, it’s going back into the vault! Get more information here or click below for instant access!
You’ll get lifetime access to the videos and pdf downloads! While some of the punches and colours may have retired, you may very well still have them in your craft stash – or you can substitute similar punches or dies and get the same effect.
Questions? Message me – otherwise I will “see” you in class!