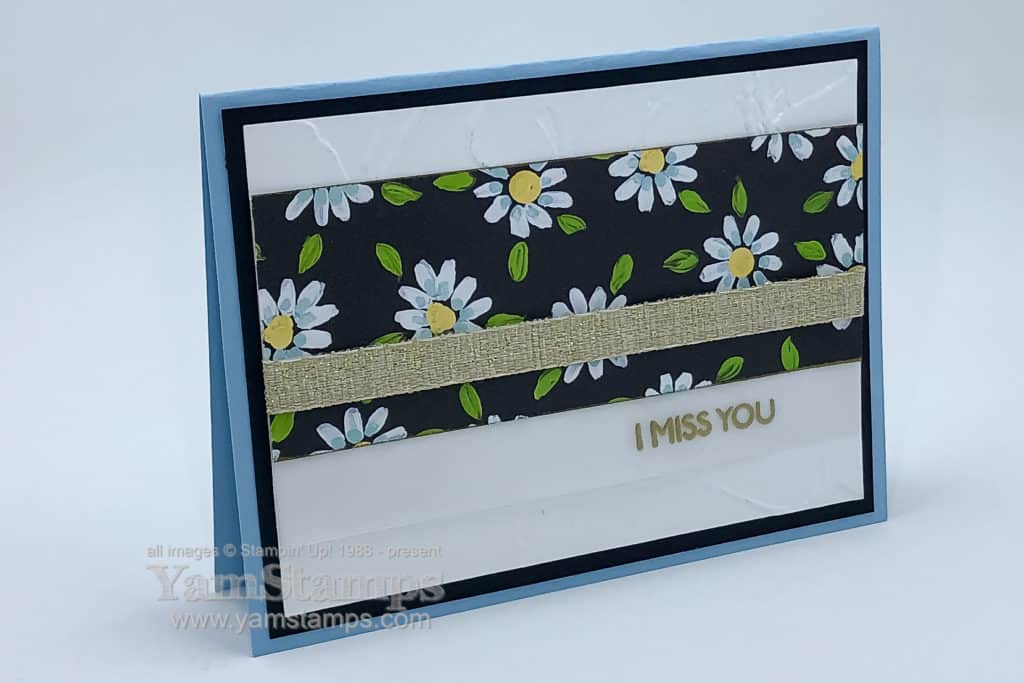
Seems like an appropriate type of card to make these days, doesn’t it? An “I Miss You Card” is one to send to someone who doesn’t live close by, or to someone you haven’t been able to meet up with because of current circumstances. This card also has a neat design feature that makes it easy to make easily customizable cards.
I Miss You Card
I made this card using products from the January-June 2021 Mini Catalogue (J-J Mini because too much typing) and Sale-a-Bration Catalogue. It’s a little hard to see in this photo, but the background cardstock is embossed using the Painted Texture 3D Embossing Folder from the Fine Art Suite in the J-J Mini. It gives the cardstock texture, without the mess of embossing paste (or the drying time). I cut a strip of the Flower & Field Designer Series Paper (Level 1 Sale-a-Bration option), tapped the top and bottom edges into my Versamark Ink Pad, then heat embossed with Gold Stampin’ Emboss Powder. I wrapped some of the 3/8″ Fine Art Ribbon around the bottom edge of the paper; can you see the gold flecks in the ribbon? Love it!
So my card design hack? I heat embossed the sentiment on a piece of Vellum Cardstock, cut slightly larger than the Designer Series Paper (but narrower than the White Textured Cardstock). I then adhered it between the layers with the sentiment showing underneath. This is a great way to add whatever sentiment you might need for your card sending occasions without pulling a lot of focus from the other elements of the card. My other design hack on this card – no knot or bow on the ribbon so that it’s easy to send through the mail.
It’s easy to change up this I Miss You Card by changing the Designer Series Paper strip or the sentiment on the vellum…and if you need some more patterned paper options (including the one shown on this card), you may want to get in on my January-June 2021 Mini Catalogue Designer Series Paper Share. You’ll get 1/4 of each of the packs included, plus the 3 Sale-a-Bration papers! You can check out more details about the share here or contact me for payment links. Cost is $55CAD plus actual postage costs if shipping is required (otherwise porch pick up in Burlington ON).
In the meantime, we all continue to cope as best as we can with the current situation. I hope that you’re hanging in there and able to take a few moments for yourself. For me, current self care includes music and shows that don’t require too much of me and aren’t too stressful. For those who have met me before, you’ll realize that this has not really changed…LOL though perhaps the amount media being consumed is slightly higher than usual. Happily, I can also usually multitask and can craft or prep for Stampers Club while listening/watching, so it makes me feel slightly productive. Slightly. Thanks for stopping by the YamStamps Blog!
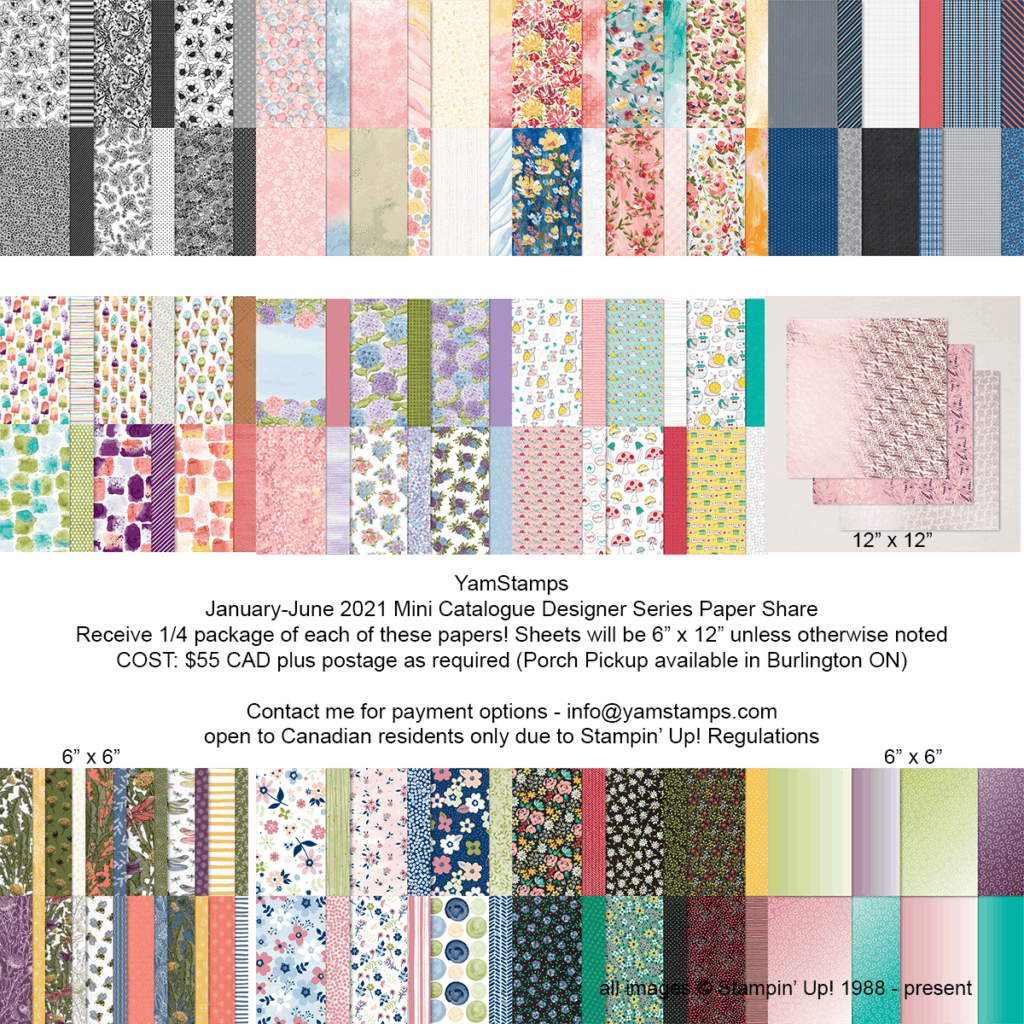
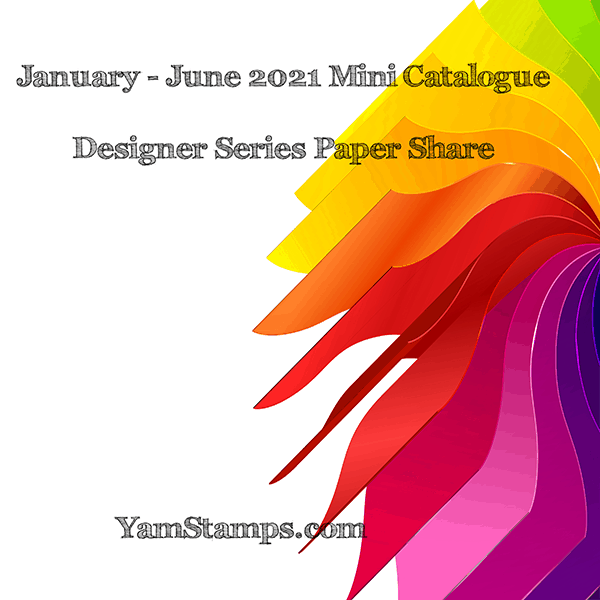
Just a quick post here to share this image of the January-June 2021 Mini Catalogue Designer Series Papers that are included in the Paper Share. (Oh, plus the three Sale-a-Bration papers, too!).
Each share includes 1/4 package of each of the pictured papers. Other than those noted, the sizes of the sheets in the share will be 6″ x 12″. The one set of Specialty Papers will be a 12″ x 12″ sheet, and the 6″ x 6″ papers will be 6″ x 6″….(hopefully that one was obvious).
January – June 2021 Mini Catalogue Designer Series Papers included in Share
Please contact me to get a spot in the share/get payment options. Cost of $55 CAD, porch pickup in Burlington; exact shipping costs as needed. The Paper Share is a great way to get a bit of most of the DSPs available in the new Mini Catalogue. You’ll have paper in sizes that will allow you to use them for scrapbooking or cardmaking (or other paper crafting), but you’ll also discover if you want to order an entire package of a certain design. Please note that the paper share will not qualify for Sale-a-Bration rewards or towards Stampers Club requirements.
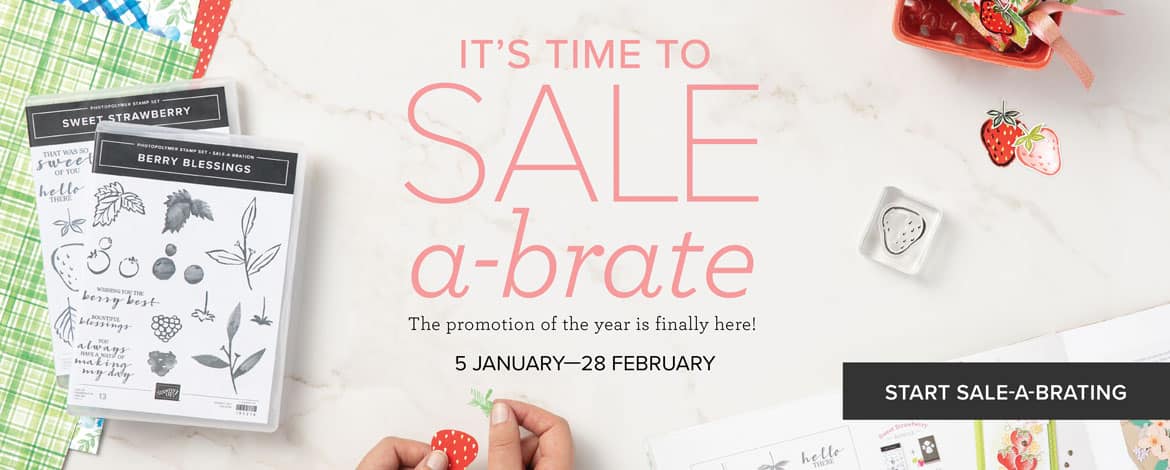
From now until 28 February, you will earn free product with qualifying purchases! Take a look at the Sale-a-Bration Catalogue (Canadian English) (Canadian French) to see what you can select. HOW TO GET FREE STUFF>>> SHOP: For every $60 or $120 in product (or multiples thereof) that you order in a single order, you can choose between two levels of free items (Level 1 = $60, Level 2 = $120). HOST: Host an online party/catalogue party/gather orders and place them at one time….and a qualifying total of $375 will get you an exclusive host stamp set! JOIN: Purchase a Demonstrator Starter kit during Jan-Feb Sale-a-Bration ($135 CAD for $165 worth of product of your choice – the “usual” deal) and you will receive an additional bonus of 5 packages of 6″ x 6″ Designer Series Paper in the Stampin’ Up! Colour Families (Regals, Brights, Neutrals and Subtles) plus the 2020-2022 In Colours! You can check out my info page/FAQ on becoming part of my Stampin’ Up! Demonstrator group called the “Eh” Team here, or you can contact me to RSVP to my Online Information Event this Thursday, January 7 at 7pm (or to ask any other questions you might have).
New Products Available Today!
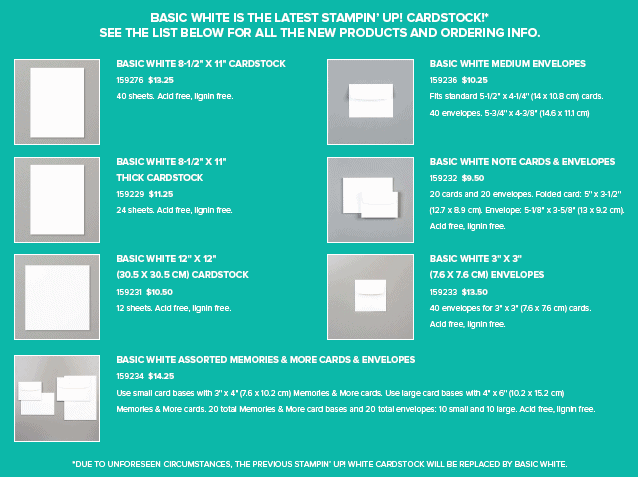
Basic White Cardstock products
Basic White Cardstock products are now available to order! Thankfully Stampin’ Up! was able to source a new producer for White Cardstock without too much delay in availability – so no need to panic. I’m looking forward to trying some out so will be placing an order soon!
Also…the Mini Stampin’ Cut & Emboss Machine is now available to order! This mini machine is good for smaller die cuts and great for those with space issues or who want portable crafting tools.
*phew* that’s a lot in one day, right? To top it off, the World Junior Hockey Championship game is set to start shortly, so I think I finished this post just in time – GO CANADA GO! Oh – and message me if you have any questions or need assistance placing an order! I’m able to multitask. A little bit at least. (or during the commercial breaks! LOL).
Happy New Year! I’ve been enjoying some time off work and enjoying spending some time with my son who is home from university (at least for a little while longer). I thought this stand up triangle card would be a fun one to share on the blog to help celebrate a new year.
Stand Up Triangle Card
This is a card we did in December’s Stampers Club – as I’ve mentioned, we are currently meeting online rather than in person, so our projects are usually more focused on die cuts and punch outs rather than stamping itself because of the fact club members don’t all have the same stamps or inks at home (and my brain can only manage so much LOL). I precut supplies for the projects, and then we work on finishing them together online (or some of us finish them and others watch and then complete them in their own time later, using the video that is stored on the membership site). The videos also tend to be a good guide for members who want to recreate the projects later with different supplies.
The stand up triangle card is actually easier to create than it looks! It’s three squares combined so that they can be assembled to stand up but also ships flat in a regular medium Stampin’ Up! envelope. The only trick is getting the card to stay together. My sample used magnets to hold the flaps together – which worked for the sample but I think it also depends on how strong the magnets are – I think if you have weaker magnets you either need a bigger piece of them (I still have to check that theory though). We used cut up pieces of promotional magnets but I believe not all promotional magnets are created equal…
I was also proud of this card because it features Mango Melody, which is not a frequently used colour in my repertoire for paper crafts. I picked it from the Artistry Blooms Designer Series Paper sheet that I used as the accent piece. I die cut some stars and the swirly star piece from the Stitched Stars dies which I think make this a great card for a celebration.
I was so happy to connect with some friends and family over the last month, though it was definitely different than in previous years. I hope that you were able to do the same! Thank you for stopping by and connecting with me here. I look forward to bringing you more creative ideas and inspiration over the year (and years to come!).
Try saying that ten times fast….anyway – I’m doing another paper share! Paper Shares are a great way to get a whole sample of papers, and are large enough that you can use them for your projects – and if you really love a particular set, you can purchase another package just for yourself!
Each share will include a 6″ x 12″ piece of each design of these 12″ x 12″ Designer Series Papers from the Mini Catalogue (one quarter of each package) True Love Love You Always (Specialty Designer Series Paper) Hydrangea Hill Fine Art Floral Sand & Sea Ice Cream Snail Mail Well Suited PLUS the Sale-a-Bration Papers: Paper Blooms Flower & Field
Each share will include12 sheets from the 6″ x 6″ Designer Series Paper Dandy Garden PLUS the Sale-a-Bration PaperOh So Ombre
That means each package will include 54 – 12″ x 12″ and 24 – 6″ x 6″ sheets
Each share will cost $55 CAD. Porch pickup in Burlington ON; Shipping available – contact me for exact costs.
Please message me for invoicing – payment by etransfer preferred but PayPal also available. Once payment is received, your share is confirmed. Limited to Canadian residents only due to Stampin’ Up! regulations. Sale-a-Bration Papers will be included while supplies last.
I hope that you had a good Christmas! I am so grateful that I am able to spend time with my son and my mother (yay for being under the same roof!). I was actually on call for Christmas Day and Boxing Day but thankfully it was quiet (health care professionals will understand why I didn’t actually say that word while I was still on call though…no need to jinx it LOL). I’m now enjoying some days off and obviously needed it since I feel like I’m a bit “checked out” at present. HOWEVER. I will endeavour to post here more in the next while. Today’s share is an ornamental die cut card that you can create with the supplies that you have in your craft room.
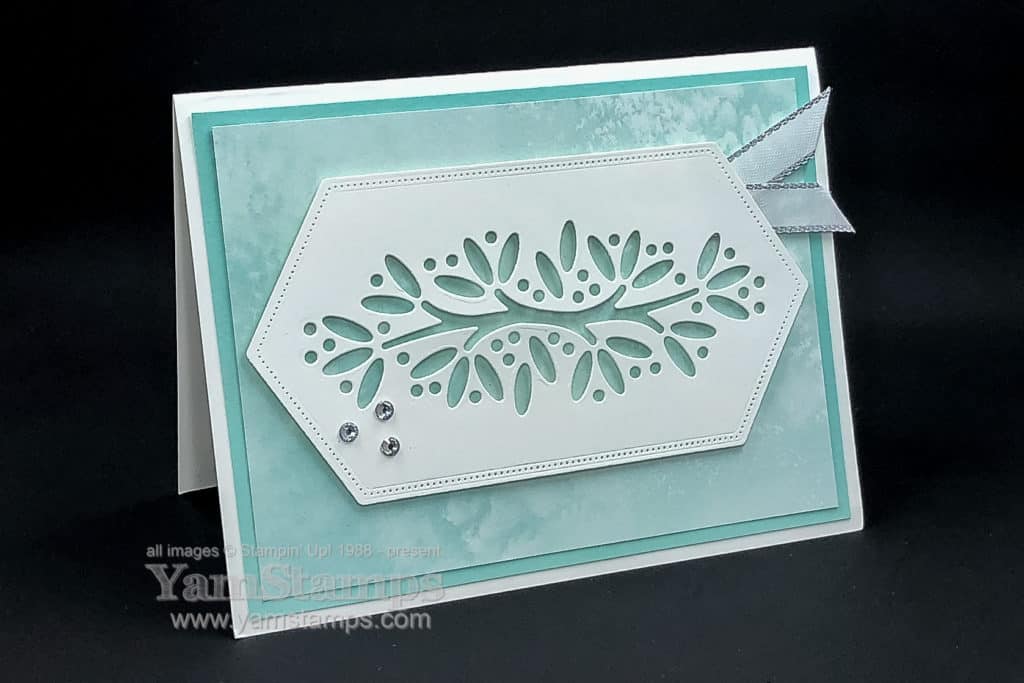
Ornamental Die Cut Card
I combined a couple of die cuts to create the focal image on this card. I used the Envelopes Dies, which are retiring from the August-December Mini Catalogue and are on sale as part of the Year End Closeout. after die cutting the centre design (don’t you love it?!) I then die cut again with the Stitched Nested Labels die that fit around the graphic. Once I had that focal piece, I then just added it on top of a portion of Designer Series Paper backed with coordinating cardstock. We made this card as part of December Stampers Club, so each member received a packet with precut card supplies – so thankfully the Whisper White and Snowflake Splendour Designer Series Paper selling out did not affect our crafting efforts (since I had the supplies ahead of time – phew). Yes, unfortunately at this time, they’re sold out, so if you’re wanting to recreate this card and don’t have those exact supplies on hand, use a different tone of cardstock and different Designer Series Paper – it’s not too difficult to swap out as you need, really!
If you are looking for a way to keep busy and creative in 2021, please consider joining us in Stampers Club!Our next session takes place on January 18th. If you’re in Canada and can join us online, we’d love to have you! One of the things that club members have mentioned lately about our online sessions – is that they join us live for the companionship and to see how to do things/ask questions – but often will make their cards later on. I record our online session and then post it in our membership site, where current club members can access the video and follow along while they make their cards using their kit supplies, and can pause the video and rewatch portions as needed. Please contact me to join us, or if you have questions/want more information. Our club kits include die cuts and precut materials, and members can add sentiment stamps or additional accents with whatever supplies they have on hand. This ornamental die cut card is an example of the projects that we are making – something with interest but that isn’t totally dependent on stamped images, since each member has a different stash of crafting supplies in their own home.
So in this blurry time between Christmas and New Year (I am pretty sure that I’m not the only who feels that way), I hope that you are able to find some time to recharge your batteries and maybe even get some crafting done. Thank you for stopping by the site and being part of the YamStamps community!
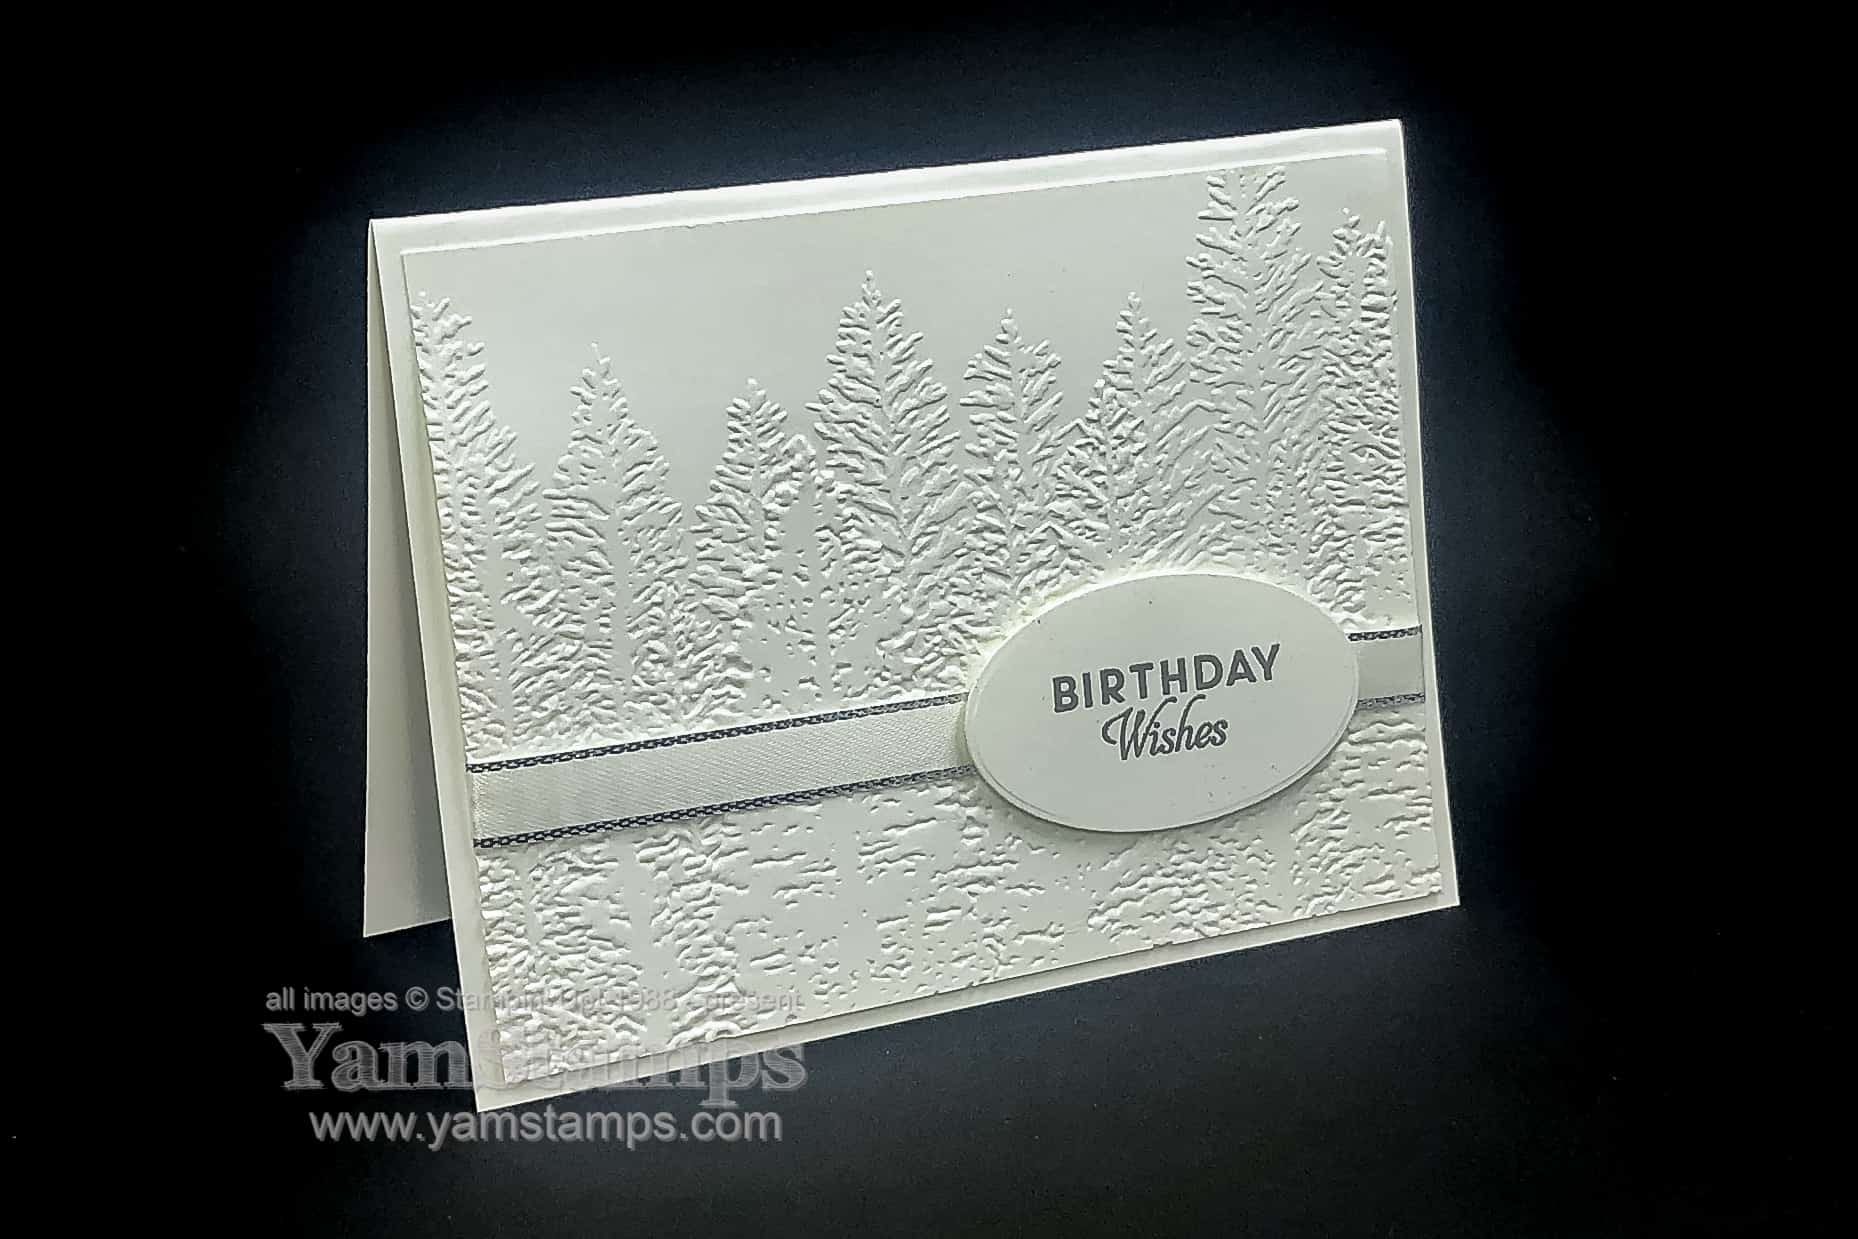
I created this card before hearing the news that Whisper White cardstock/products are discontinued due to the closing of the factory producing it….but I am sharing this all white card in celebration of the product. (Plus at time of writing, Whisper White cardstock is still showing in the YamStamps Online Stampin’ Up! Canada store…)
All White Card
I love the elegance of monochromatic themes – and an all white card is definitely elegant. When making a one colour card, though, I do find it important to use texture or something to help it stand out a bit more. The Evergreen Forest 3D Embossing Folder gives a lot of detail to the cardstock, so I thought it was great to use as a backdrop. To keep things super simple, I added the Silver 3/8″ Metallic Edge Ribbon and the sentiment from Butterfly Wishes in Smoky Slate Ink on a Layering Ovals Die Cut. I think maybe next time I might add either a heat embossed silver edge or a Silver Foil Oval behind the sentiment to give it more definition.
You could use this card design with any single colour you like – though if you’re using a darker cardstock you may want to heat emboss your sentiment so it stands out, and add a lighter coloured cardstock insert inside the card so your message will be readable.
This is one of December’s Stampers Club cards – though really I should maybe start calling it “Card Club” because in the day and age right now of virtual gatherings, we tend to focus more on card making techniques and die cuts, which I can send out to everyone in their class packets (Stampin’ Up! regulations prohibit us from sending out pre-stamped images). It’s fun to see each other on our Zoom get togethers as we make the cards together (or watch everyone else make them and make them in our own time later on LOL). I record our Zooms and then upload them to our club website so that members can access them after the fact. If you’re interested in joining us, you can start at any time for a six month period. Since our meetings are online, you can join from anywhere in Canada. You can contact me for more information on how to join us.
In the meantime, maybe I’ll create another all white card with Whisper White Cardstock until Stampin’ Up!’s replacement is available – it will be called Basic White. Looking forward to seeing what it’s like!
Shocking I know! Apparently the mill that provides Stampin’ Up!’s Whisper White cardstock has unexpectedly shut down – meaning that Stampin’ Up! will be replacing Whisper White cardstock and with a new one called “Basic White”.
So – for the time being, while supplies last, these items are available to purchase with a limit of 2 per order:
Whisper White 12″ x 12″ (30.5 x 30.5 cm) Cardstock (124302) (Sold Out)
Assorted Memories & More Cards & Envelopes (149710)
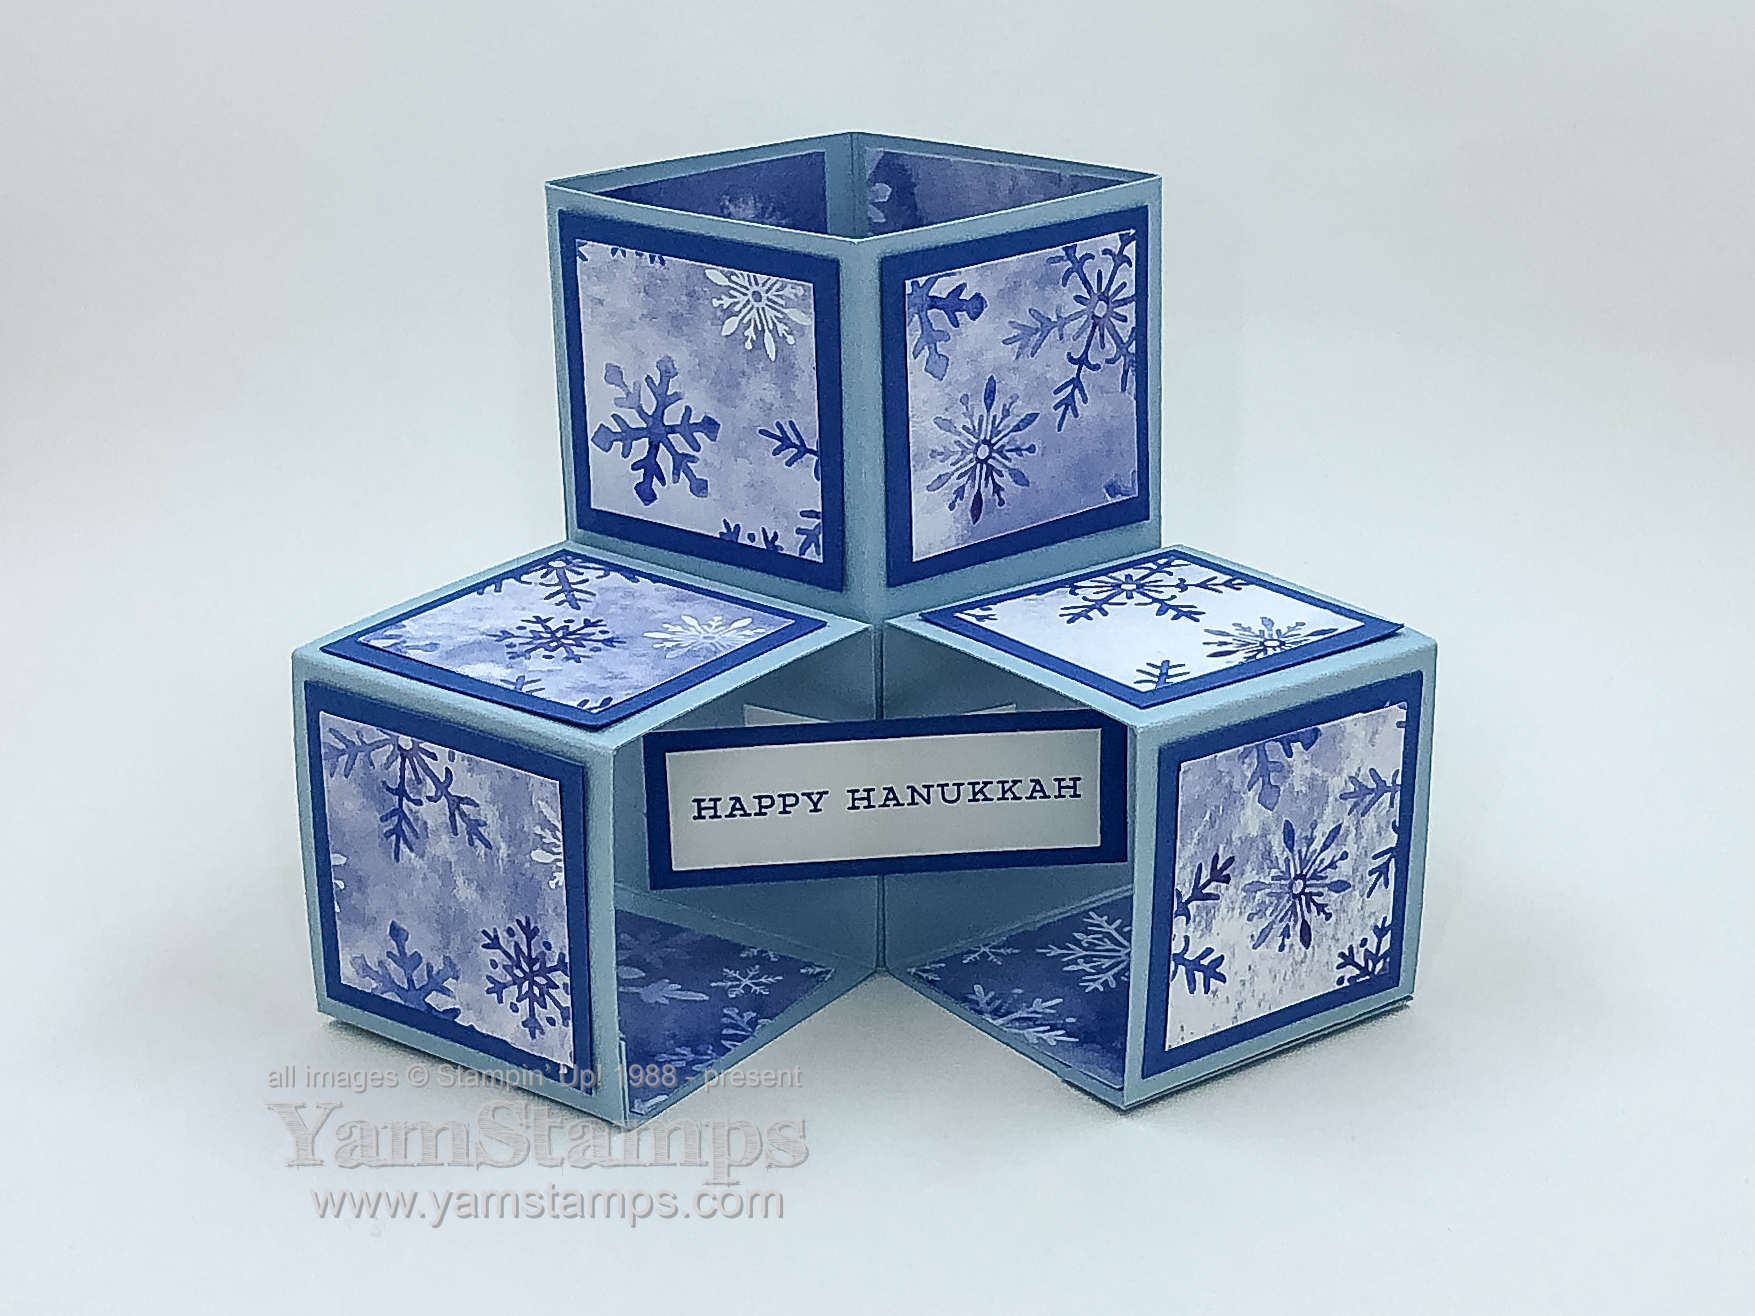
Sharing a version of a triple cube card that we made in Stampers Club and Card Class to Go. This is a fun 3D pattern, and once you’ve made one, it’s pretty straightforward (really!). I used this sentiment from the Snowflake Wishes stamp set to create a Hanukkah Card.
Hanukkah Card
The lovely thing about this design is that if you fold/flatten the bottom cubes upward, the card will fit in a medium Stampin’ Up! envelope for easy mailing! If you were at Stampers Club, you will remember that it had to be pointed out to me… LOL. I thought I’d messed it up because it didn’t fit in the card, but I was flattening the bottom boxes down vs up – so that the flat card was 6″ long rather than 4″….*sigh* If you’ve been around the Stampin’ Up! / cardmaking world for a while, this is a variation on the “2-4-6-8″ box design (your cardstock is scored at 2” increments, then folded to create a box/cube).
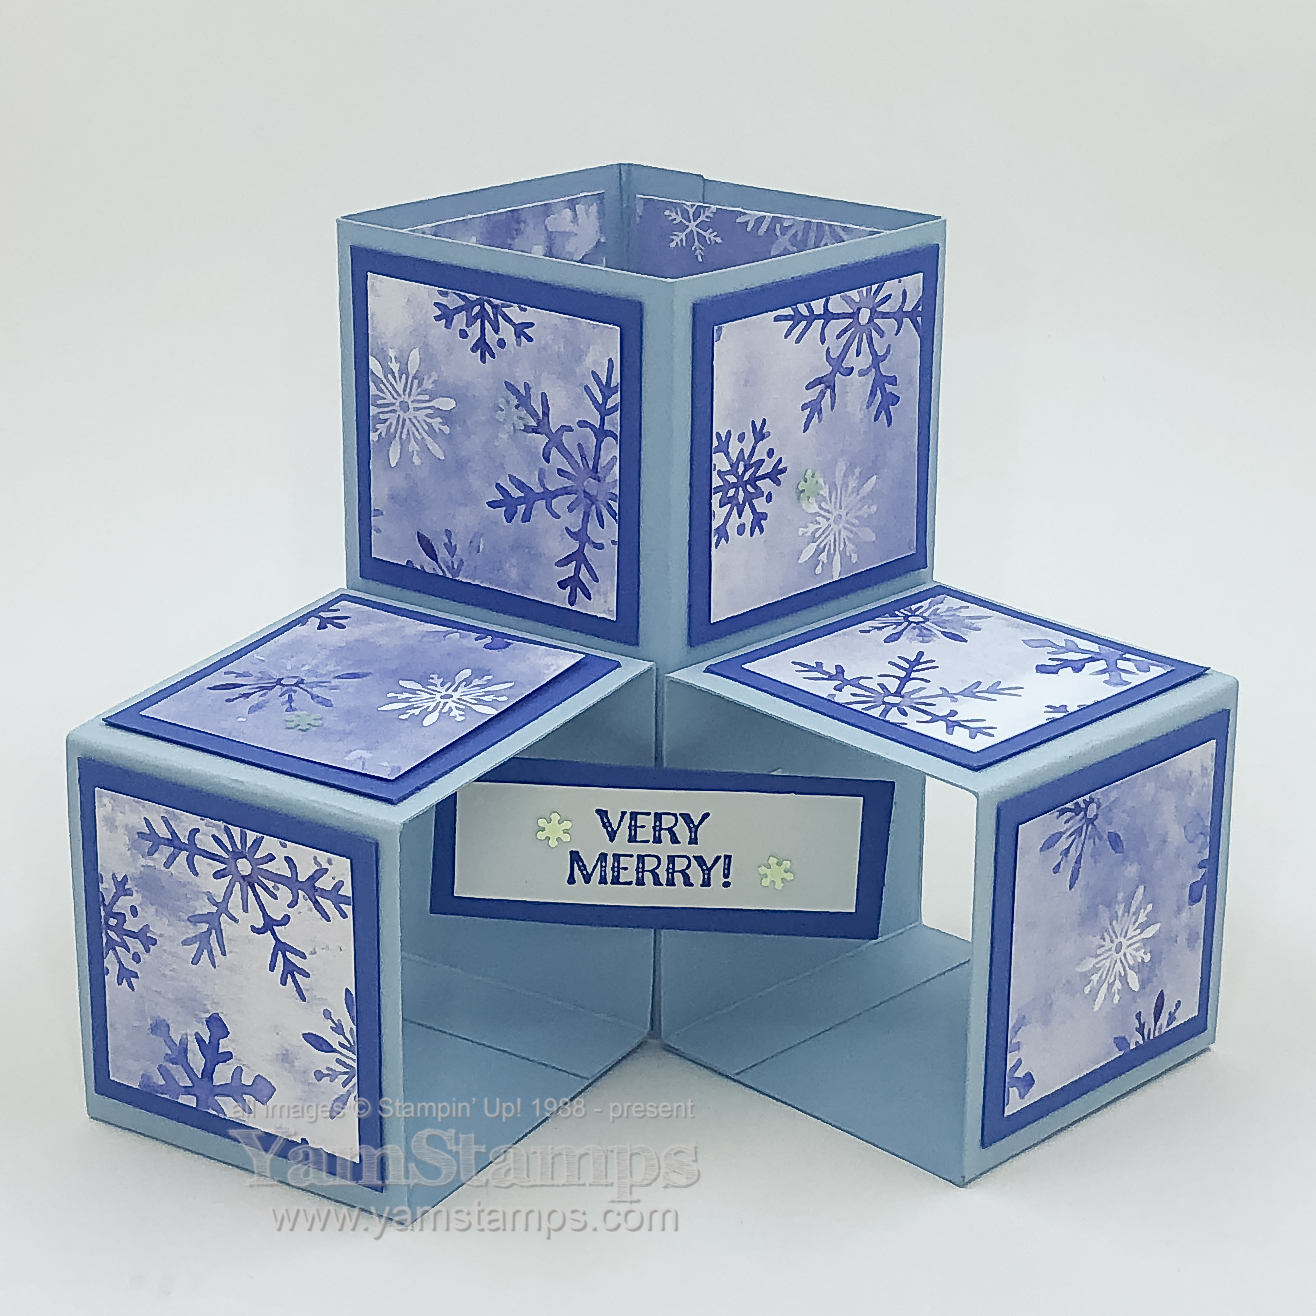
Here’s one where you just change out the sentiment…
I love the Snowflake Splendo(u)r Designer Series Paper that’s decorating this card, and it’s part of the Year End Closeout Sale – so it’s on sale until the end of the August-December Catalogue sales period (January 4) or while supplies last – whichever comes first.
So probably the only thing I’d change on this Hanukkah Card is the placement of the Designer Series Paper in the bottom boxes. I put it on the bottom portion – but next time I would put it on the “back” portion, to cover the little “legs” that hold the sentiment in the centre. The things you notice when you go to take photos of your projects…LOL. (Either that or next time I take the photo from a different angle…).
As well as the Year End Closeout Sale, the Clearance Rack has been refreshed – so there’s plenty of bargains to be had right now. I noticed that there are some individual Stampin’ Blends Markers up for grabs – because they’re currently only sold in pairs – so if you need a replacement or really like a certain colour you should get it while supplies last! As always, please contact me if you have any questions, or need assistance placing an order. Sometimes technology does not play nicely – believe me, I know – so if you’re having issues trying to complete an order at YamStamps.com/shop , please contact me. I can often enter orders from the “back end” of the Stampin’ Up! system for you, and still have it shipped directly to your door.
In the meantime – stay warm, happy shopping and Happy Hanukkah!
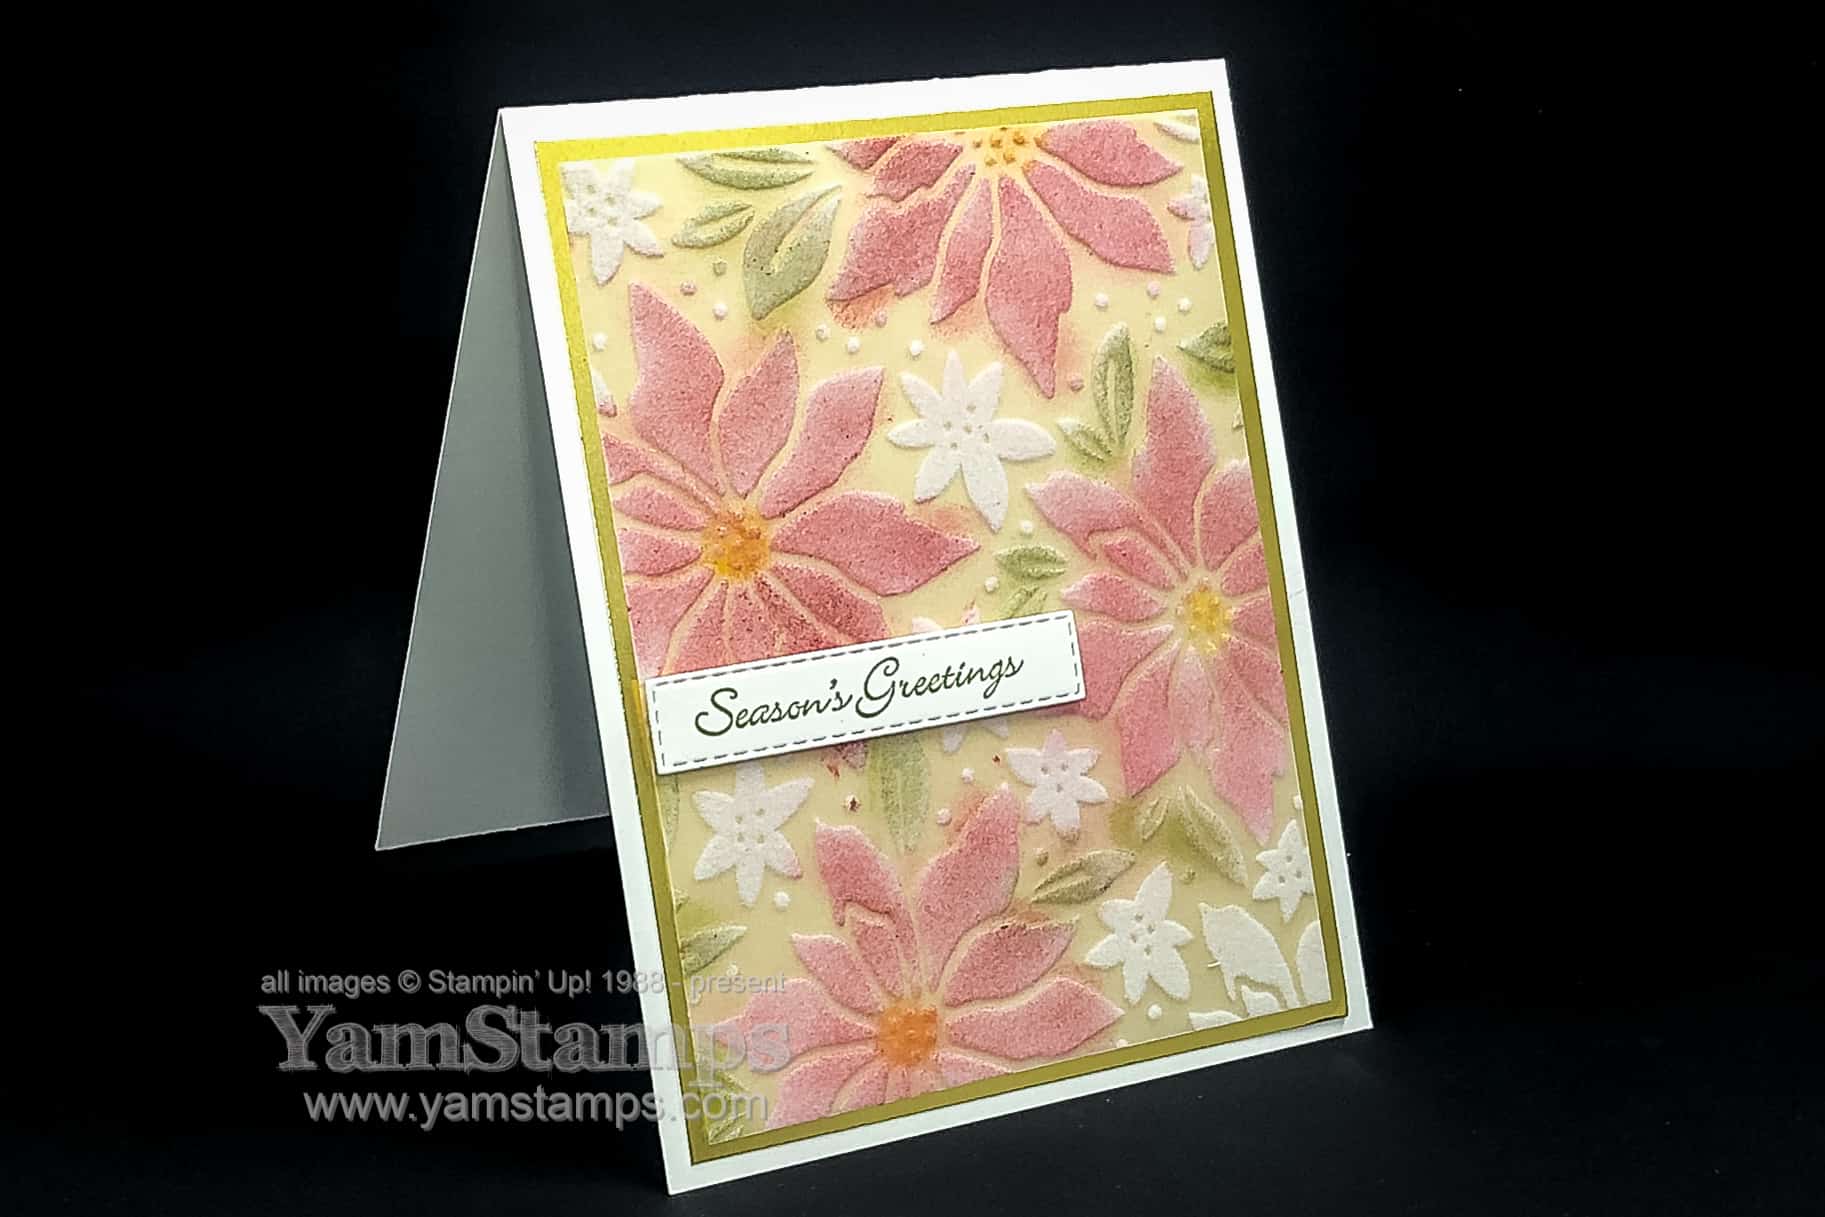
I love how easy this Poinsettia Card was to make – using Stampin’ Up!’s Plush Poinsettia Specialty Paper from the August-December 2020 Mini Catalogue.
Poinsettia Card
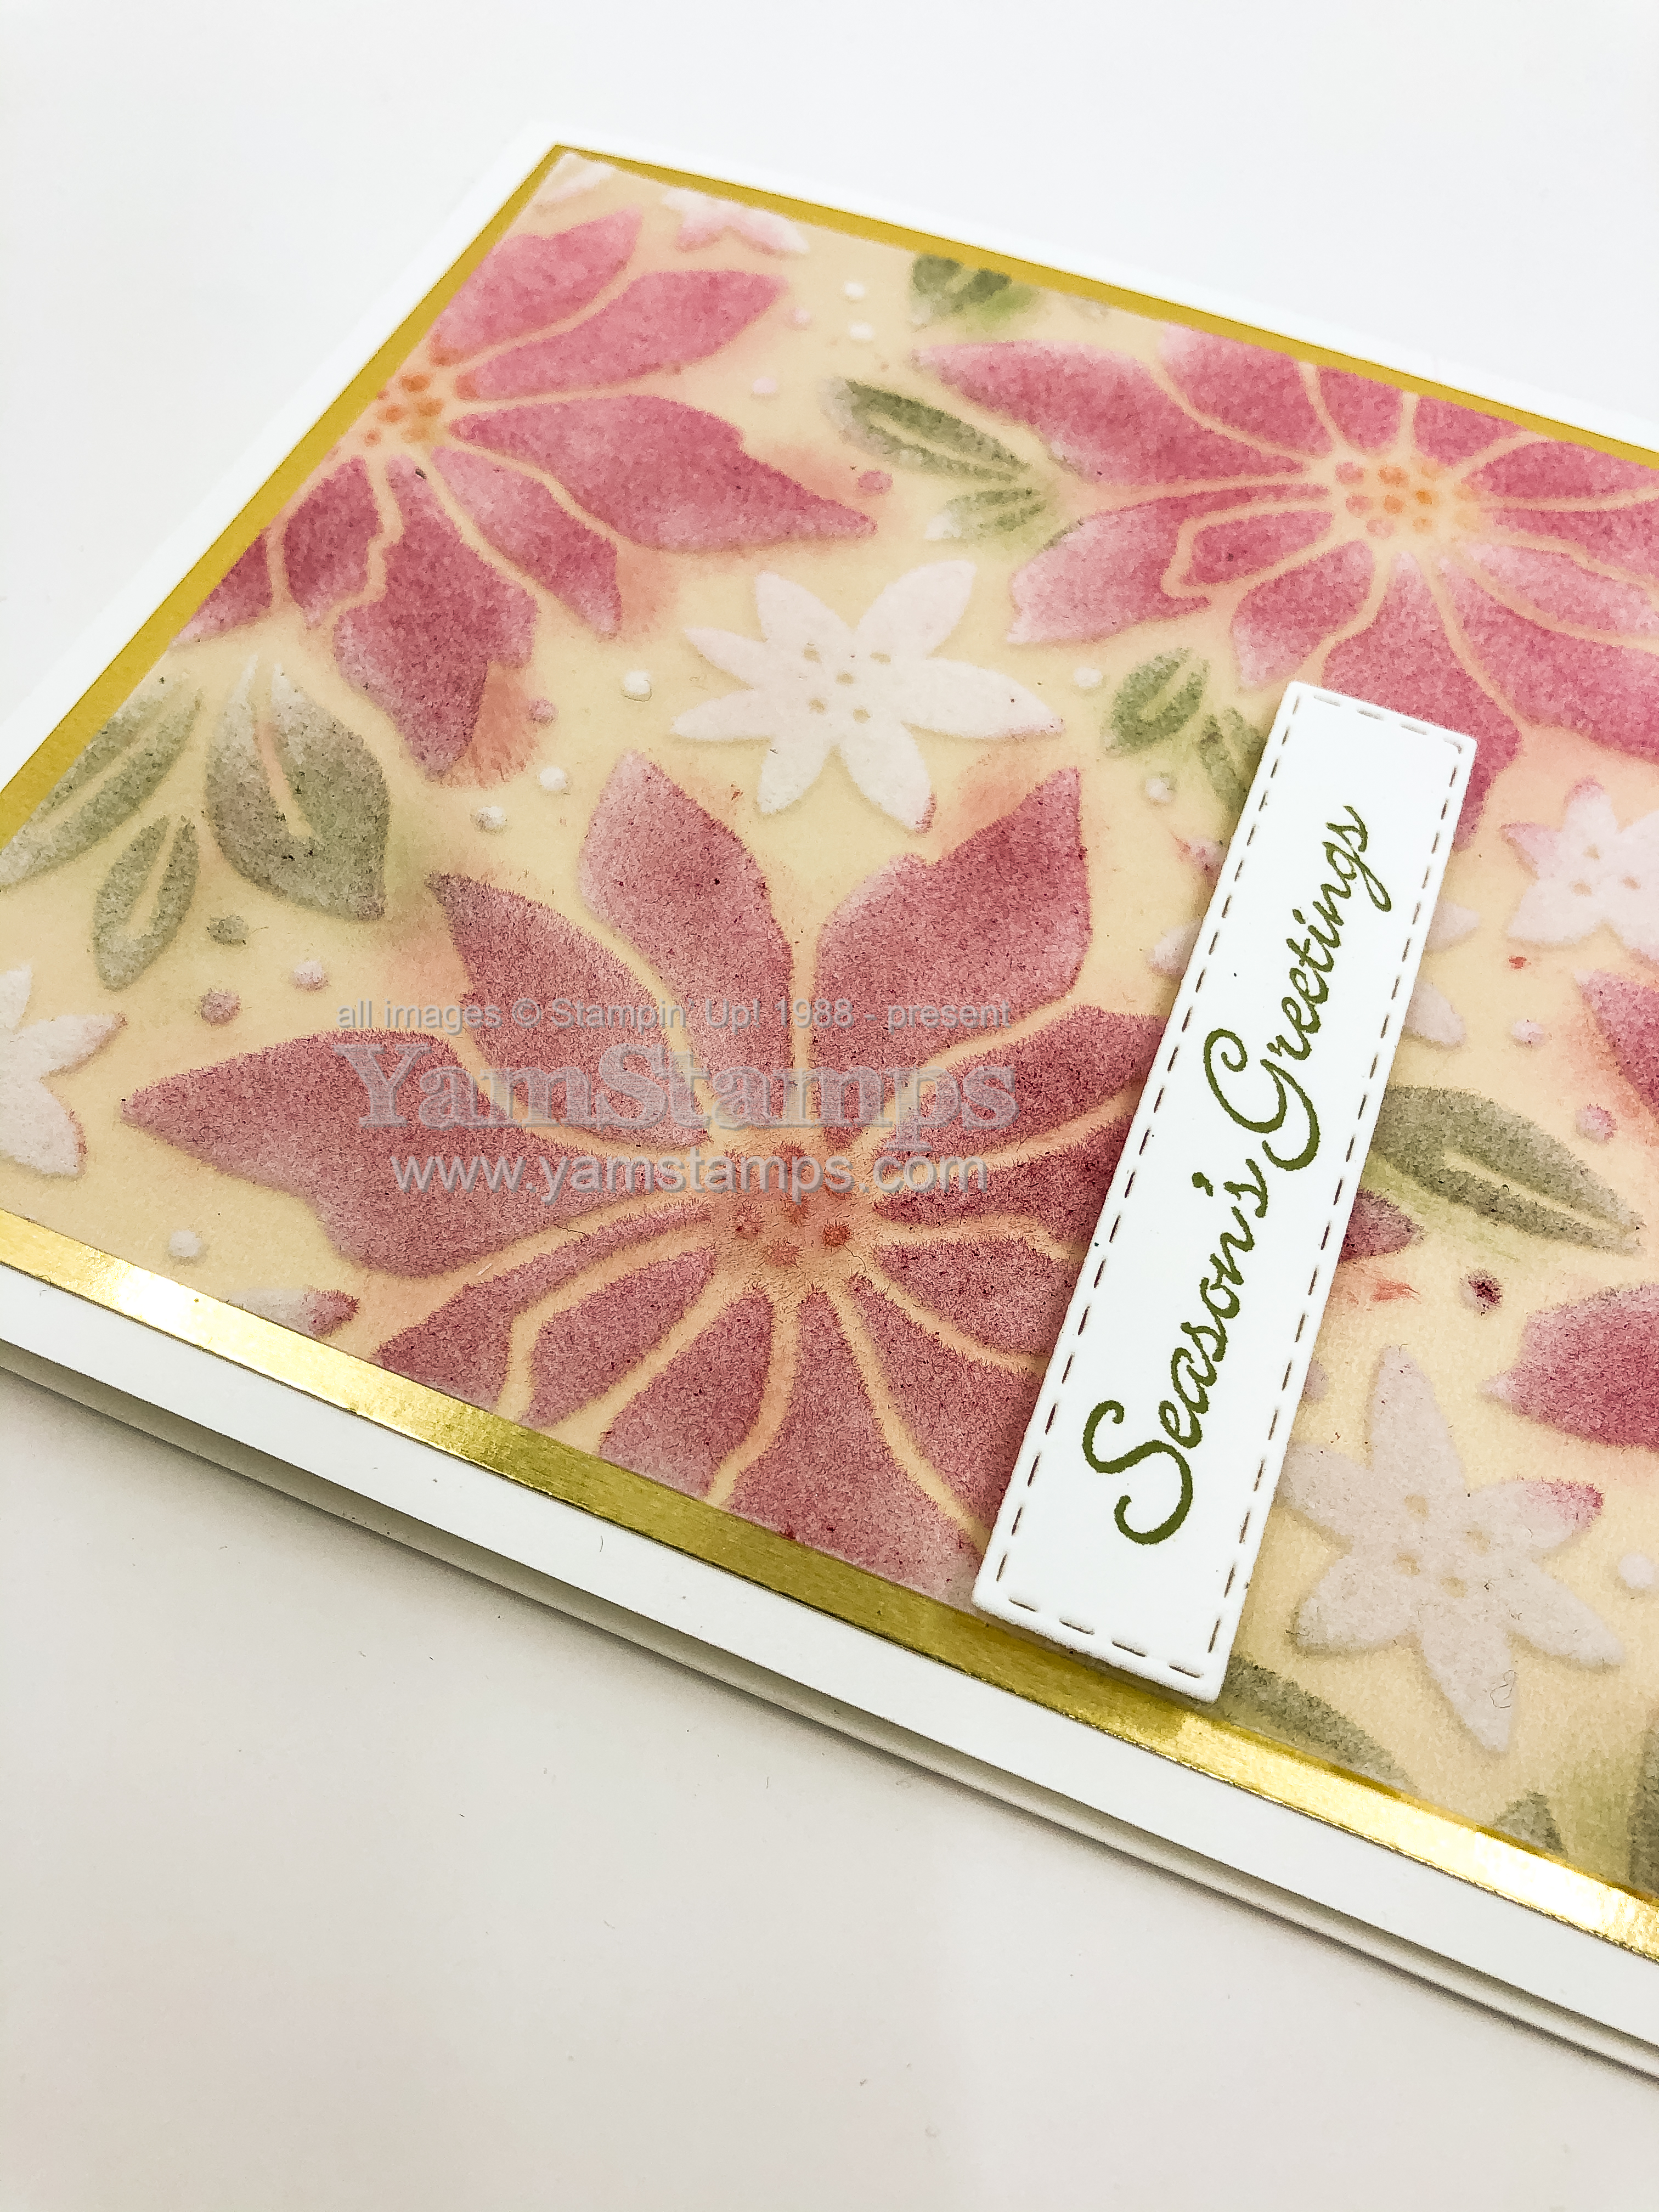
I coloured the plush portions of the vellum using a sponge dauber, and then adhered it onto a Gold Foil sheet and added the sentiment from Itty Bitty Christmas die cut with a Stitched Rectangle die. When I was colouring, I tried to stay mostly on the plush portions but didn’t get too fussed if it was off a little bit – I figure it’s more artistic that way LOL.
Poinsettia Card
If you’ve been loving the products from the August-December Mini Catalogue, you’ll also maybe realize that they will be leaving us soon! Stampin’ Up! has let us know which products will make another appearance – either in the next Annual Catalogue OR the next “holiday” Mini Catalogue – which will actually be July– December (an extra month vs this year!). You can download the spreadsheet here for the returning products. NOTE that on the returning products spreadsheet there are tabs indicating which catalogue they will be appearing in.
In terms of items that are retiring – Stampin’ Up! has announced a Year End Sale on selected retiring August-December Mini Catalogue products. REMEMBER that “Bundles” typically “retire”, though the individual elements may return in a future catalogue – just not as part of the discounted bundle. Selected retiring products are on sale from December 8 – January 4 – and all items are WHILE SUPPLIES LAST. Here’s a spreadsheet of retiring items; here’s a pdf version if you prefer.
Your best bet is to place your order online at YamStamps.com/shop – it can be delivered directly to you in Canada – or if you need assistance placing an order or prefer me to place the order for you, I’d recommend contacting me ASAP – if you can send me a message by 8pm on Monday December 7th, I’ll do my best to get things organized so that I can place the orders early on the 8th for best possibility of getting things before they’re gone.