Oct 10, 2013 | Big Shot, cards, Christmas
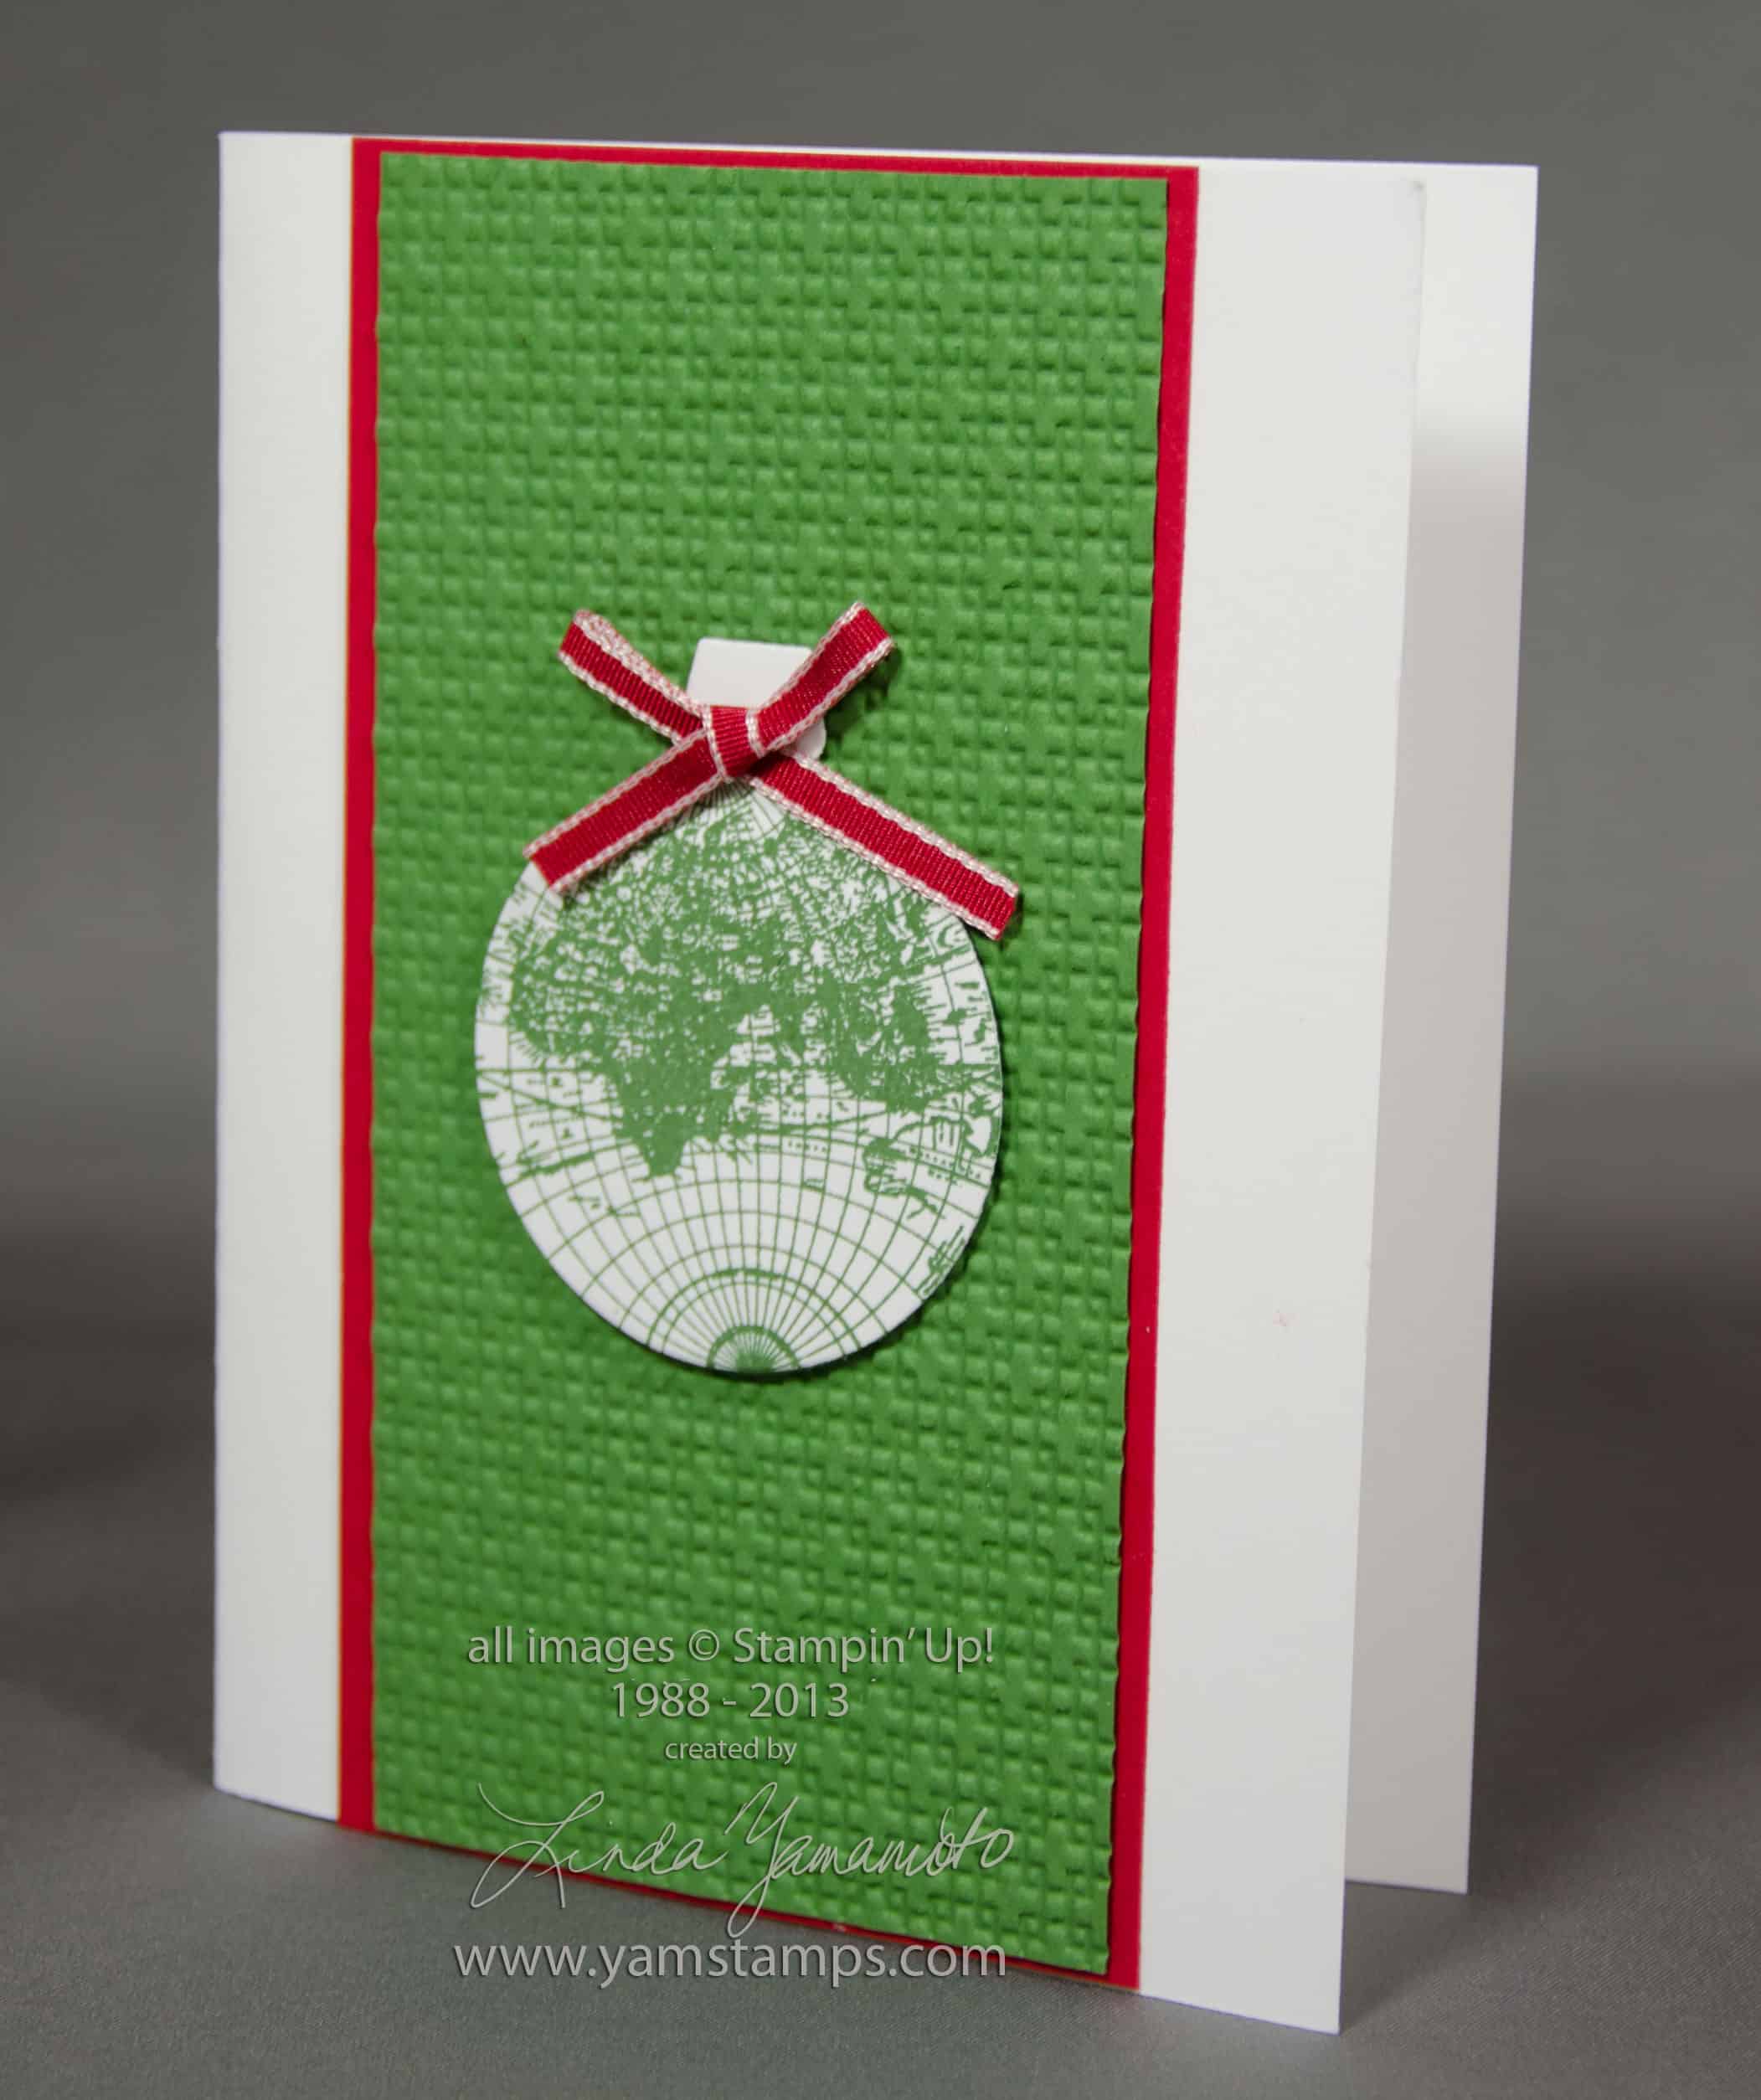
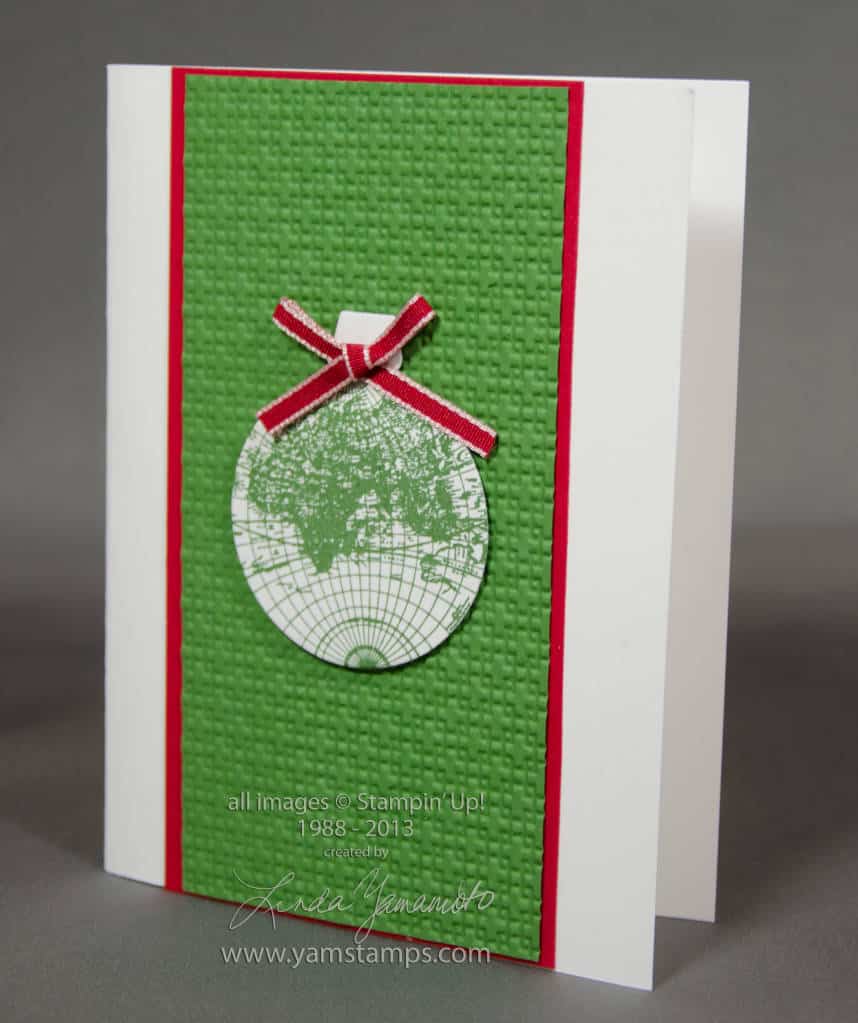 I’d tweeted about a great idea I’d visualized for a card…but you know how it goes with those ideas, sometimes…looks fantastic in your imagination, but in real life, doesn’t work out. Well this one worked! OK so I may rework the background again at some point, but it was the “ornament” that I was visualizing. I used the globe stamp from The Open Sea (a non-Christmas set), and paired it with the ornament framelit from the Holiday Ornaments framelits set that is still available (though not featured in the current catalogue and kind of hard to find on the online store site!). Anyway, it fit well enough for me to be happy with the result. Add a ribbon and there you go! The inside sentiment is “Joy to the World” but “Peace on Earth” would also be appropriate, don’t you think??
I designed this card for the October Christmas Card Class. If you are just getting into holiday card mode (or vaguely realizing that there’s a holiday coming up at some point in the next while…) there’s the November & December Christmas Card Classes still to come. Each month features 4 different cards (and different from the month before as well). You’ll have plenty of ideas if you want to recreate some of them for mass mailing. OR….consider attending my November 30th Stamp a Stack or Christmas Card Clinic. You’ll have your choice – 10 cards of 5 different designs, or 10 (or more) cards of the same design. Watch for the sign up in the next couple of weeks. Of course, there’s also the 12 Weeks of Christmas mailings – 2 weeks down, 10 to go…if you’re on my mailing list, you’ll automatically receive these special mailings.
In the meantime, I’m off to start thinking about my Thanksgiving menu! (Order turkey – check; everything else for the meal: ummmmm)
Oct 2, 2013 | Announcements, Christmas, specials
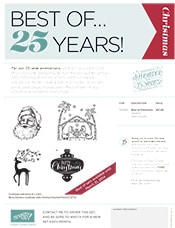 Stampin’ Up! is releasing a new set every month to celebrate 25 years in business. This month is the “Best of Christmas” set, just in time for all of your holiday crafting! These “best of” sets are a collection of previous favourite images and one new image in clear mount, and are available until March 31, 2014. Each set comes with a special sticker, and once you’ve collected 6 stickers, you get to pick a set worth $17.95 for FREE!! Click on the image to see the flyer, or click on the set name to go to the online store….but before you do – read below!
Now for the opportunity to WIN! For this month, I’m trying something new. If you place an online order from anywhere in Canada during this month, use the hostess code WAUDSM7E When you do, you’ll be entered into a draw for hostess benefits!
If you’re new to shopping online at my Stampin’ Up! store, here’s an image of the screen. You’ll want to be sure it has my name at the top left, and the arrow at the bottom left shows you where to enter the hostess code.
IMPORTANT!! If your order is $200, DO NOT USE THE CODE as you will get your own hostess benefits (or “Stampin’ Rewards” as it’s referred to on the online shopping site! If you order is less than $200, that’s when you should use the code. Minimum shipping charges will apply, and the order will be delivered directly to you! If you have any questions, please contact me.

Oct 1, 2013 | Announcements, Christmas
 Before you get to open the first gift! Last call to sign up now to be sure to get all twelve of the Twelve Weeks of Christmas exclusive project emails!
Sep 30, 2013 | Announcements, Christmas
I’ve got it set and scheduled – the first of my Twelve Weeks of Christmas emails is in the chute! This exclusive free gift is a thank you for my subscribers. If you are signed up to my list before 1pm on Wednesday, October 2nd, you’ll receive all twelve of the emails…and if you sign up before 1pm on Tuesday, October 1st, you’ll also receive my monthly newsletter, featuring techniques and projects that won’t be seen outside your inbox! Sign up HERE if you aren’t already on my list!
Sep 25, 2013 | Announcements, Christmas
 One week today, my annual “Twelve Weeks of Christmas” mailings will begin – yes, you read that correctly – 12 weeks til Christmas!! Each week, you’ll receive an email featuring a different holiday card, gift idea or packaging idea, complete with photo and instructions – BUT ONLY IF YOU’RE ON MY MAILING LIST! This is a gift for all my email subscribers. What are you waiting for? Sign up now! You have your choice of locations – the home page of YamStamps.com, the box at the top right of the blog page, the link HERE, or that mysterious box that may pop up every once in a while during your visits here. Lots of options! Lots of great ideas will be coming your way, and will not be repeated!
Sep 22, 2013 | Big Shot, cards, Christmas, Stampin' Up!, Tutorial
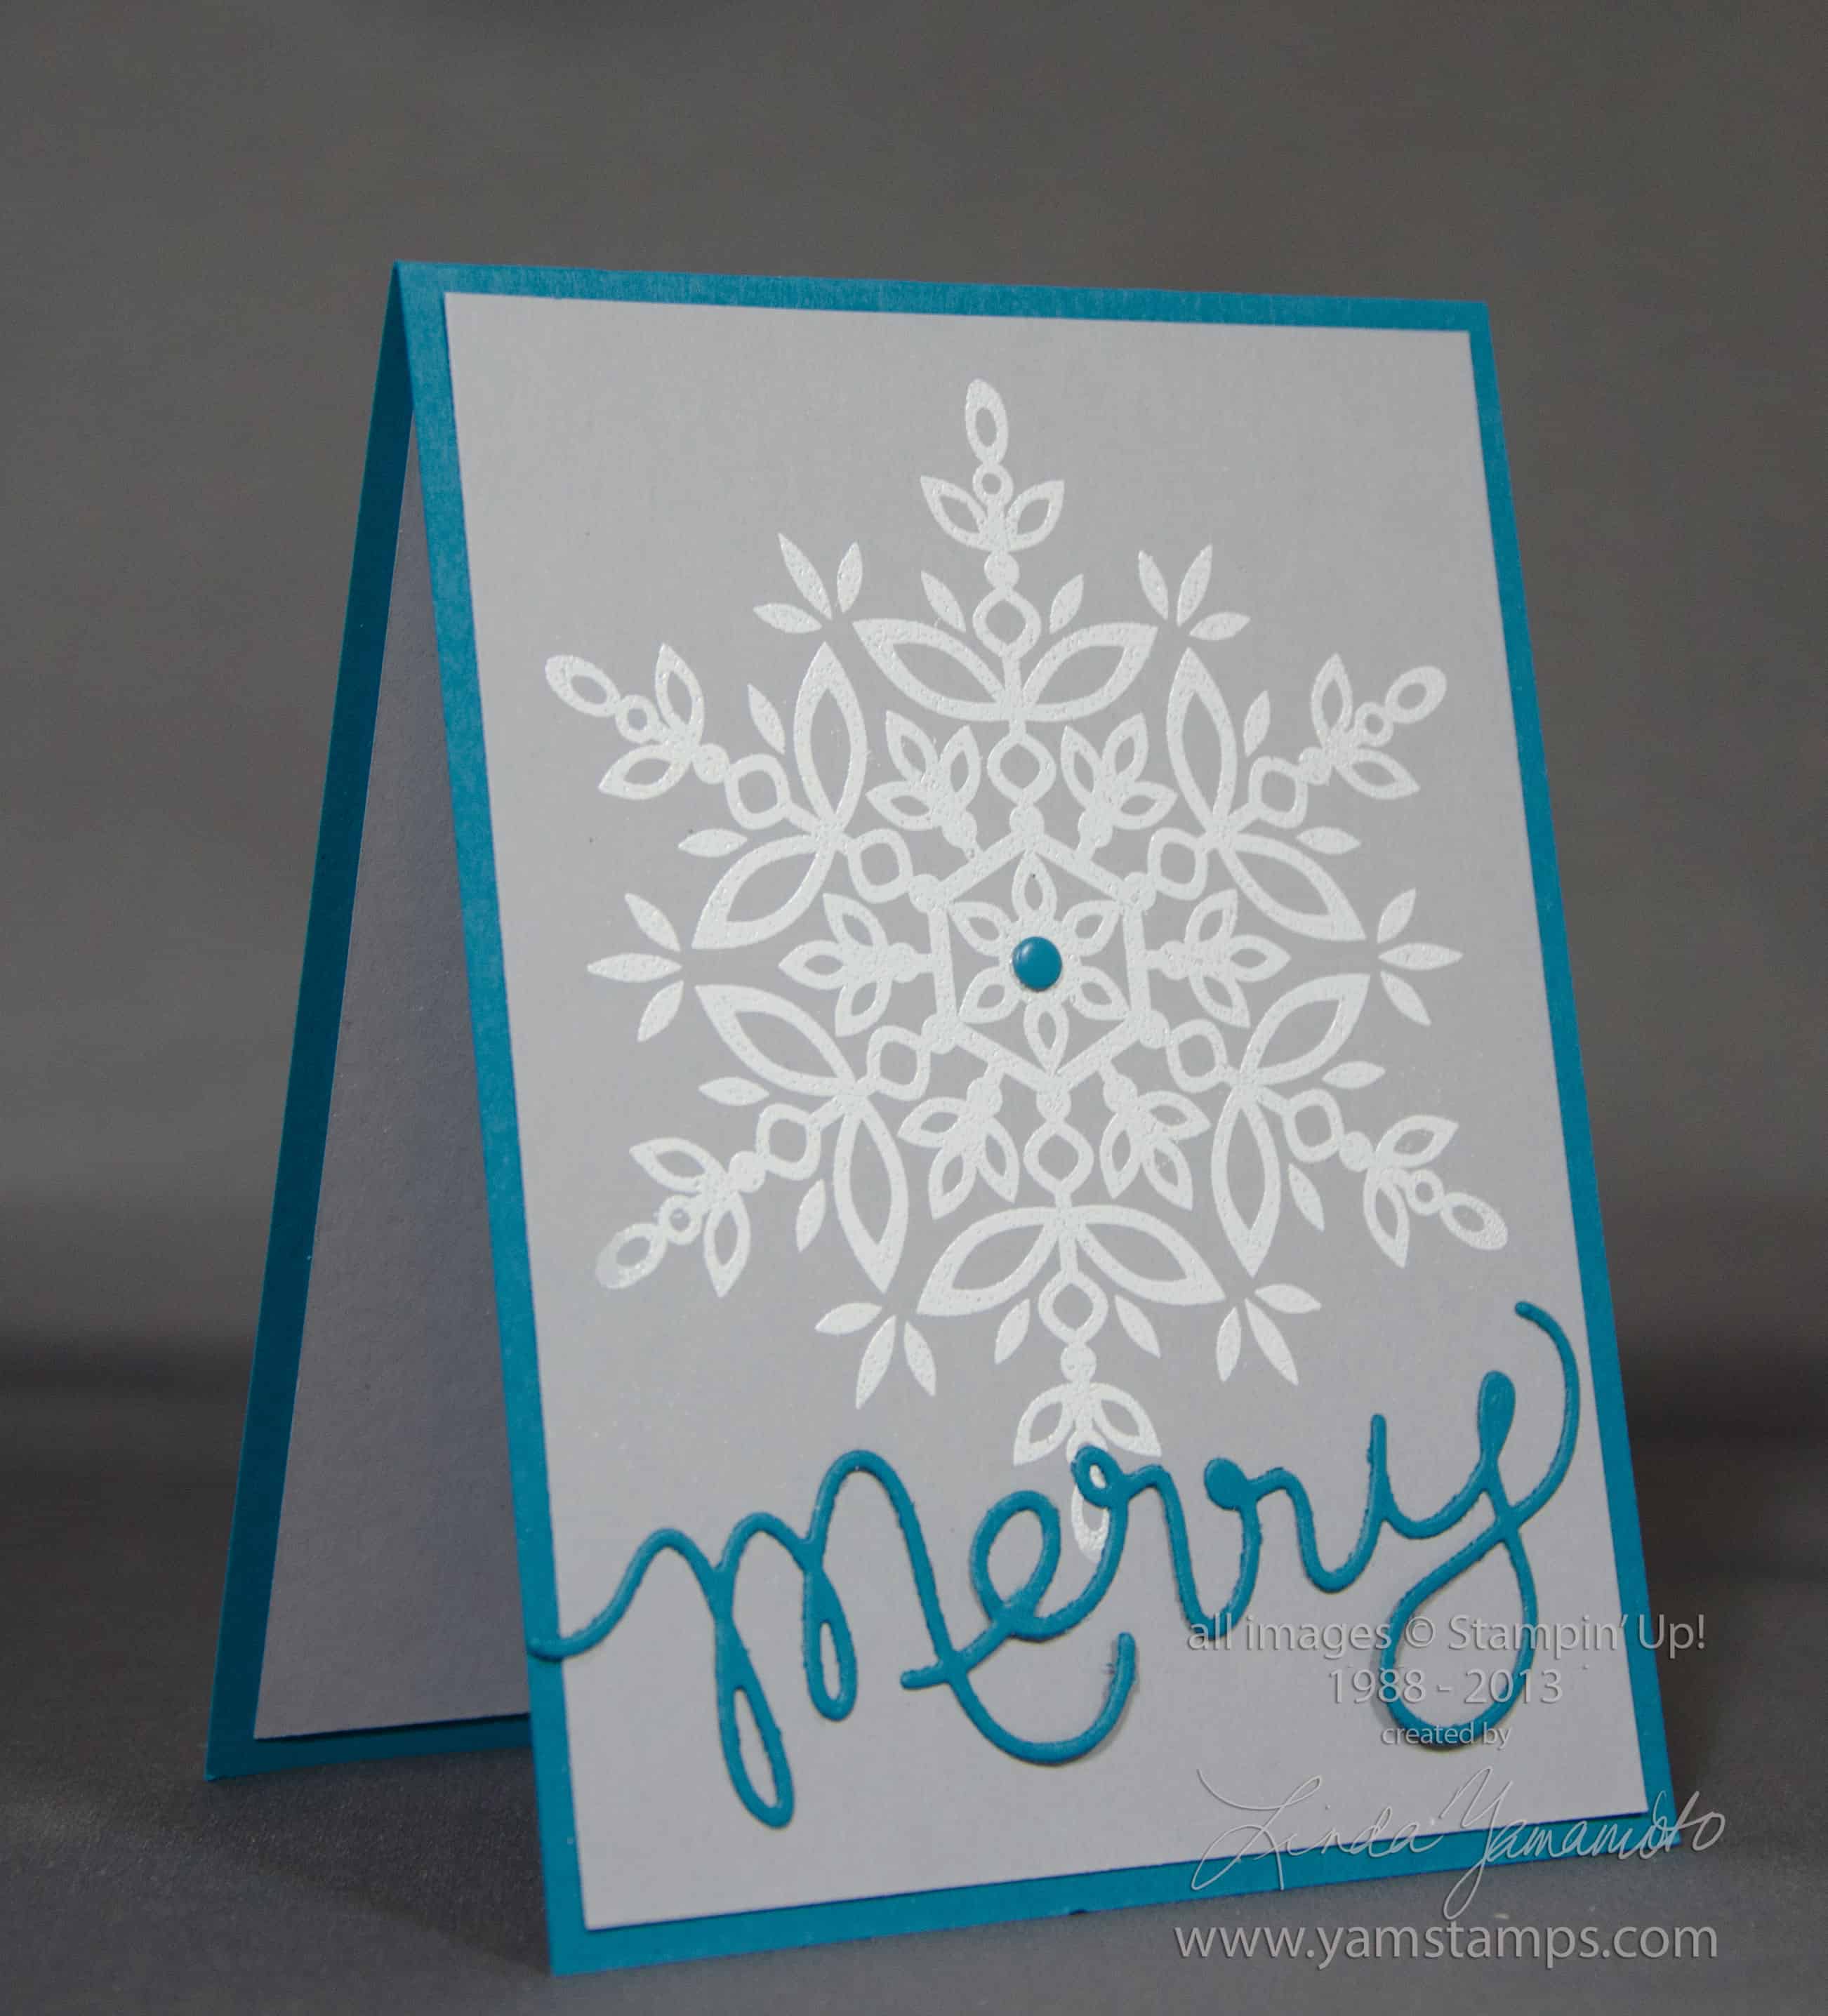
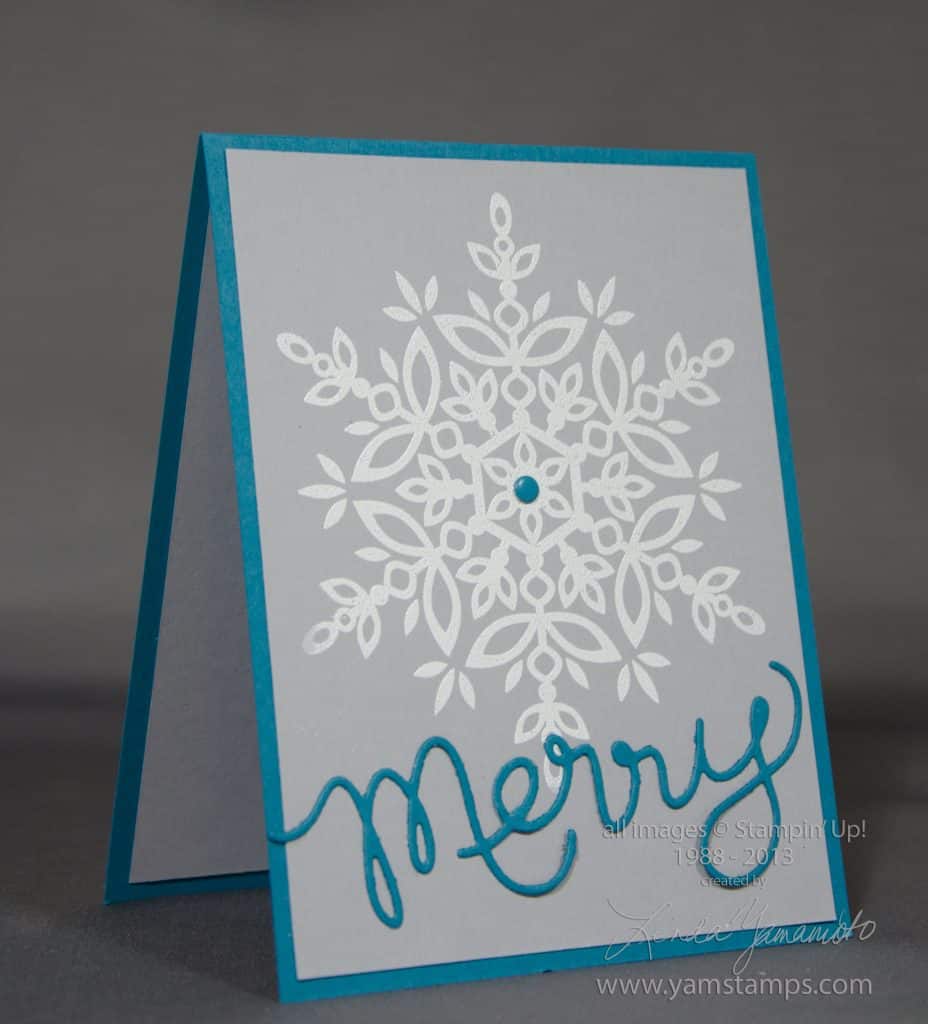 Never too early to start prepping those holiday cards. We created this card during Stampers Club this month. The large snowflake from Stampin’ Up!’s Festive Flurry set is heat embossed in white on Smoky Slate cardstock (love this new colour), and the Expressions Thinlit “Merry” adds the sentiment. An Island Indigo Candy Dot ties it together. I really like this card, but I have to admit that initially during Club it was driving me crazy…until I figured out a hint – and I’ll share it here.
Expressions Thinlits Hints
1) Use the Magnetic Platform. I looooooove this tool. You don’t need to have brand new, pristine cutting plates, but you do need to have ones that are fairly straight – not warped, in order for the magnet to be able to hold the metal framelit or thinlit in place.
2) Use a layer (or two) of waxed paper between your cardstock and thinlit if you’re having trouble getting the cardstock to “release”.
3) Use your paper piercer tool to poke gently through the little holes in the thinlit to push your diecut out if you’re having trouble getting the cardstock to “release”
4) Use an extra piece of cardstock on top of the cutting plate as a “shim” to add extra pressure along the thinlit
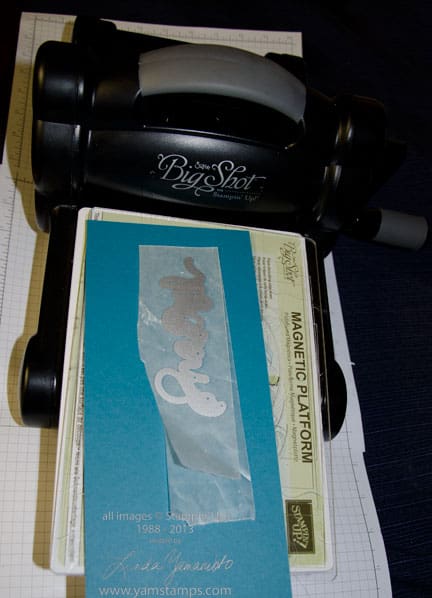
5) Run the thinlit through lengthwise rather than widthwise!!! This is the hint we discovered at Club night. If you run the word through horizontally, you may have uneven pressure across the thinlit. In my case, the centre of the thinlit wasn’t cutting as cleanly as the edges. It may be that my cutting plates were slightly warped or perhaps because my Big Shot has been used and abused since I got it…LOL. Anyway, check out the photo below for the visual as to the set up (the top cutting plate is missing in the photo just so you can see it better). Obviously with some of the longer words (i.e. “thankful”) it’s a given, but with the word “merry” or “love”…not so much!
If you have any tips or tricks you’d like to share about using the thinlits or Big Shot, please leave a comment below, or on my facebook page so we can all learn!

 I’d tweeted about a great idea I’d visualized for a card…but you know how it goes with those ideas, sometimes…looks fantastic in your imagination, but in real life, doesn’t work out. Well this one worked! OK so I may rework the background again at some point, but it was the “ornament” that I was visualizing. I used the globe stamp from The Open Sea (a non-Christmas set), and paired it with the ornament framelit from the Holiday Ornaments framelits set that is still available (though not featured in the current catalogue and kind of hard to find on the online store site!). Anyway, it fit well enough for me to be happy with the result. Add a ribbon and there you go! The inside sentiment is “Joy to the World” but “Peace on Earth” would also be appropriate, don’t you think??