Could I pick a longer title? Blended Ink Stamped Background Technique is an accurate, if a little wordy description of my latest video upload on YouTube.
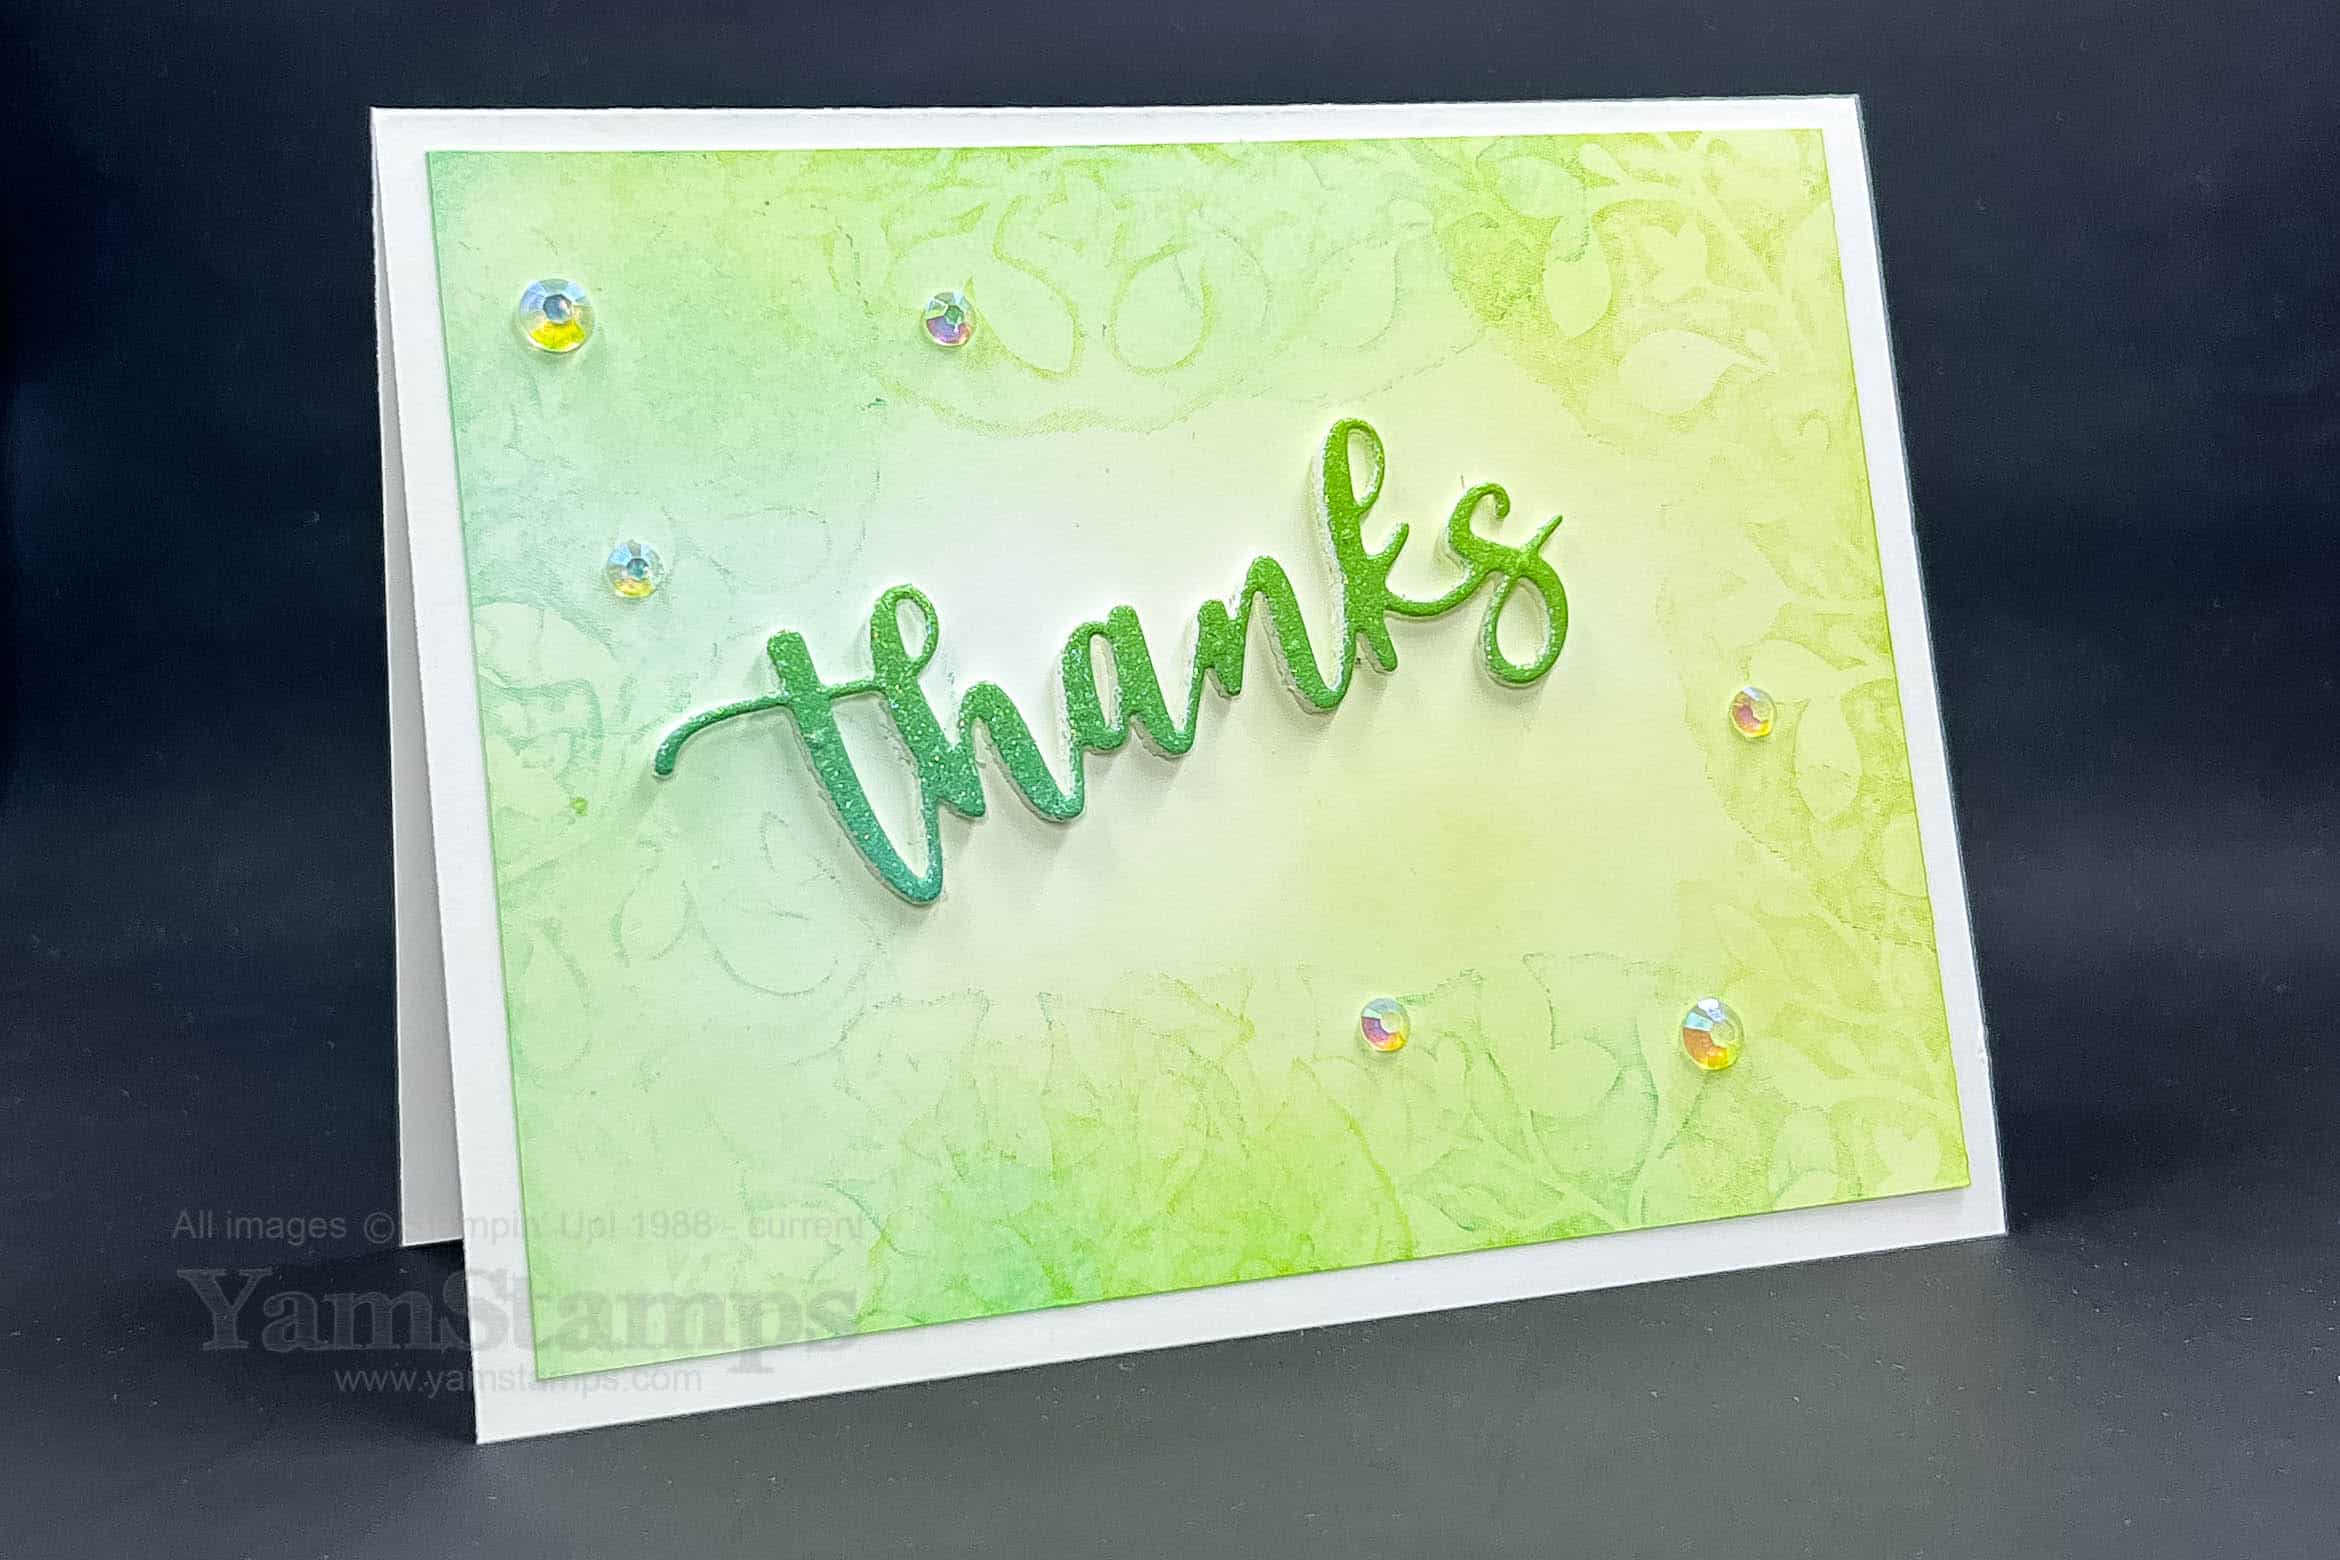
Blended Ink Stamped Background Technique Card
If you come up with a better description, please let me know….in the meantime, I showed how I created this card in the video. I used my Blending Brushes (hence the “blended ink”), and then I stamped with one of the stamps from the Amazing Silhouettes stamp set (hence the “stamped”). The picture is a little more vibrant than the card is in real life, but I still love the subtle effect of the “ghostly” leafy plant on the inked background. Since I used some of the Rainbow Glimmer Paper, I tried to add the same tones into the background that I created – so I used Coastal Cabana and Granny Apple Green. I love that I could come up with thousands of variations for this technique by varying the colours used. Easy and impressive – always my motto for crafting!
I’m partial to blue tones, and Misty Moonlight is one of my current favourites. It is also one of the 2020-2022 In Colours, so it will be retiring at the end of April – and I am really going to miss it! If you like it too, you’ll want to be sure to stock up on your supplies of it sooner rather than later. As with all retiring product, it will be “while supplies last” or until 2 May 2022 (the end of the sales period for the current Annual Catalogue) – whichever comes FIRST. In Colours usually sell out before the end of the catalogue period, so please don’t hesitate!
I am working on getting more videos onto my various social media channels, so I did a video celebrating circles and Pi Day by showing the Bokeh Technique used on this card. I posted the full video on the YamStamps YouTube channel.
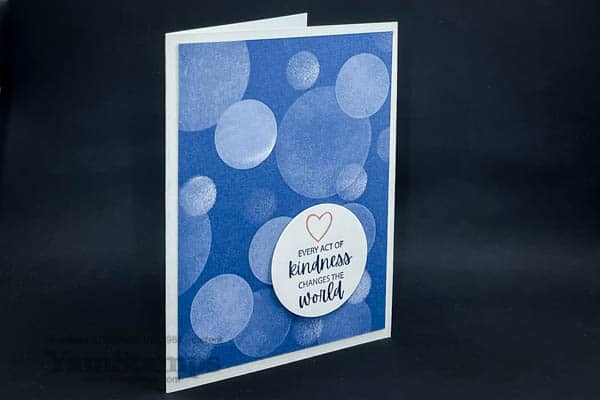
Celebrating Circles – Bokeh Effect Tutorial Video for Pi Day 2022
You may have seen that I also did an Instagram Reel on this card. I could get addicted to doing reels – short videos with music, what’s not to like? Take a look at my Celebrating Circles Reel and let me know what you think – do you prefer the full length video or a mini length sped up version – or both?
I’ve revisited the inked embossing folder technique for my demonstrator team and customer cards this month. If you’ve been reading the YamStamps blog for a while, you’ll know I like easy techniques that make big impressions – and this definitely fits the bill. I did a video as well!
Here’s the card I will be sending out to those who have made purchases with me in the last few months. I was reminded what a good technique this is – in part due to the popularity of this pin on the YamStamps Pinterest Account.
Inked Embossing Folder Technique Card
This card uses the Parisian Flourish 3D Embossing Folder. I find that the 3D Embossing Folders are really good for this technique because of the depth of the impressions – it makes it a bit easier to keep the ink in the right place…(a bit…you can see there’s some ink on the raised surfaces, but doesn’t ruin the overall effect, in my opinion!)
The Inked Embossing Folder Technique is timeless! I look forward to sharing other tips and techniques with you – I’m working on some classes and offerings that I’ll be rolling out in the next few months. if you’re on the YamStamps list you’ll be sure to be notified. In the meantime, there’s always the Stampers Club (Virtual meetings!) or the Card Class to Go if you’re needing a crafting inspiration injection! (note: limited to Canadian residents only due to Stampin’ Up! regulations). Check out the YamStamps Events Page for more information – or contact me. In the meantime – happy crafting!
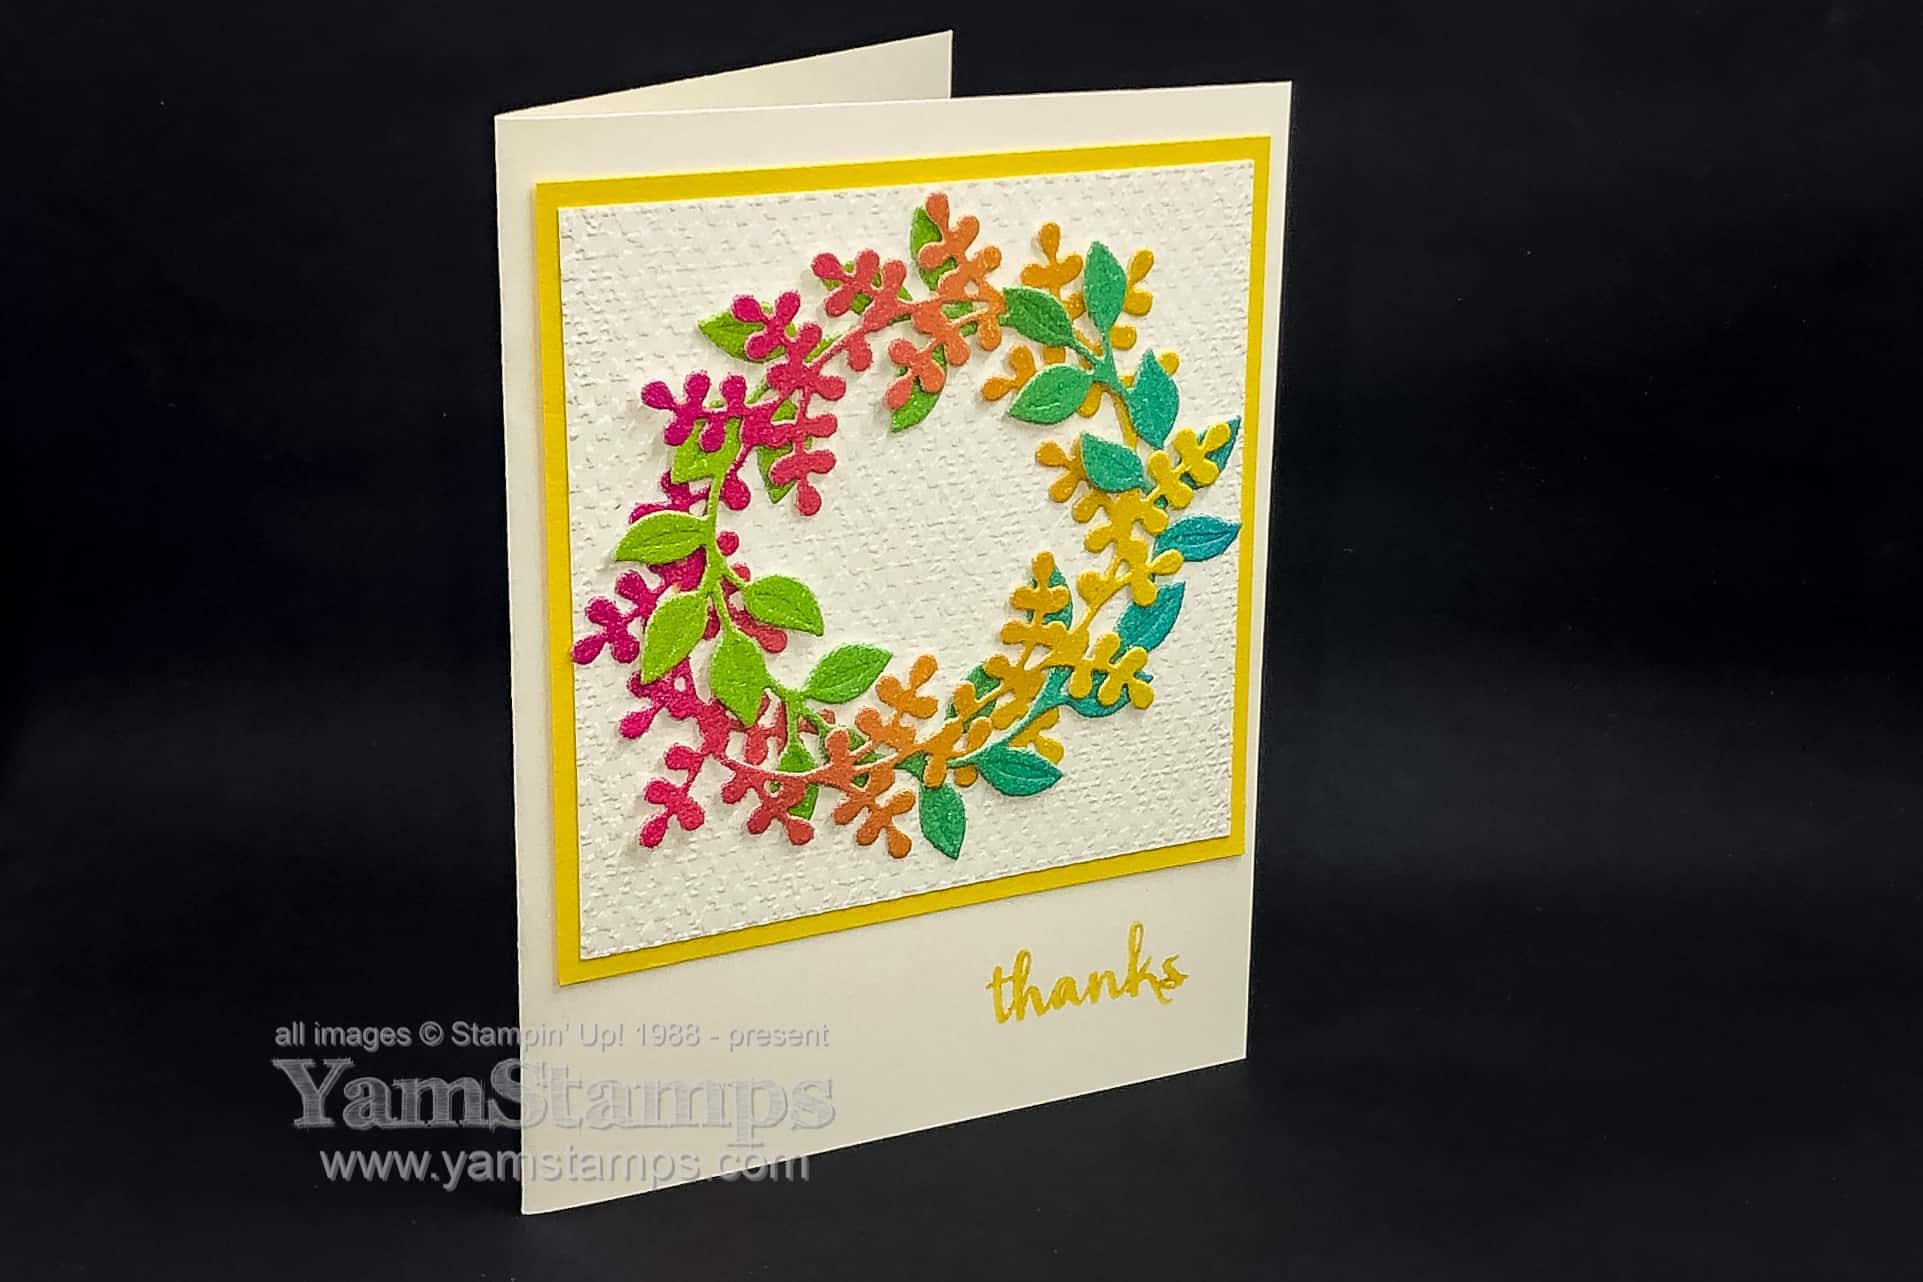
I promise to move on to other shapes and forms next….but I am sharing this rainbow wreath card before I do!! This is a variation on the original wreath card I did in this post. My friend Gloria saw the Facebook Live that I did, and then used the Rainbow Glimmer Paper in her card variation – so I used her take on it when I created the latest Class to Go/Stampers Club Class.
For Stampers Club we are doing Zoom meetings, and I’m starting to get the hang of it – getting the packages all done up for pick up/mailing, and then creating together online….except that I have forgotten to hit “record” a few times now… My Stampers Club members have access to an online site where the project photos and video are shared, so I had to re-shoot the “how to” video for the last club! My tech error means that I had a video that I could edit down to focus on one project at a time and post it elsewhere as well – so I uploaded my first IGTV video on the YamStamps Instagram Page, and uploaded to the YamStamps YouTube as well. I edited out all my talking, and just used written captions to give the instructions/highlights during the video. Let me know what you think – do you prefer listening to verbal instructions or like the quick read version instead?
Here’s the video (click on the above links if you can’t see it here for some reason). I added music just so it had something for sound…
OK now that you’ve seen the video of the Rainbow Wreath Card, I’ll be off to see what else I can create that doesn’t have a circular wreath as the main focus….the pressure…
If you’re interested in joining Stampers Club – please contact me or check out the YamStamps Events Page for more information! We welcome new members at any time. We meet once a month – our next date is Monday September 21st, and members commit to a 6 month cycle. Since we are meeting virtually for the next while, you’ll be able to join us from wherever you are in Canada! Also – with access to the members only site, technically if you can’t make it at the get together (though it is more fun if you do) – you’d be able to access the information afterwards anyway. If you don’t want to commit to club membership, you can always grab a Card Class to Go. You can either pick up or have your class packet mailed to you with the photo/instructions for the projects. You supply your own adhesive and stamps/ink (I’ll make suggestions as to the sets/ink colours in the instructions) and create the projects on your own time.
Good luck to all starting school today! I thought I’d get us all back to school by doing a Tutorial Tuesday! This Circles Card tutorial is an example of what you’ll get when you subscribe to the YamStamps Newsletter. Each week brings paper crafting information and inspiration – whether it be a heads up about current promotions, upcoming events or ideas that you can use in your crafting.
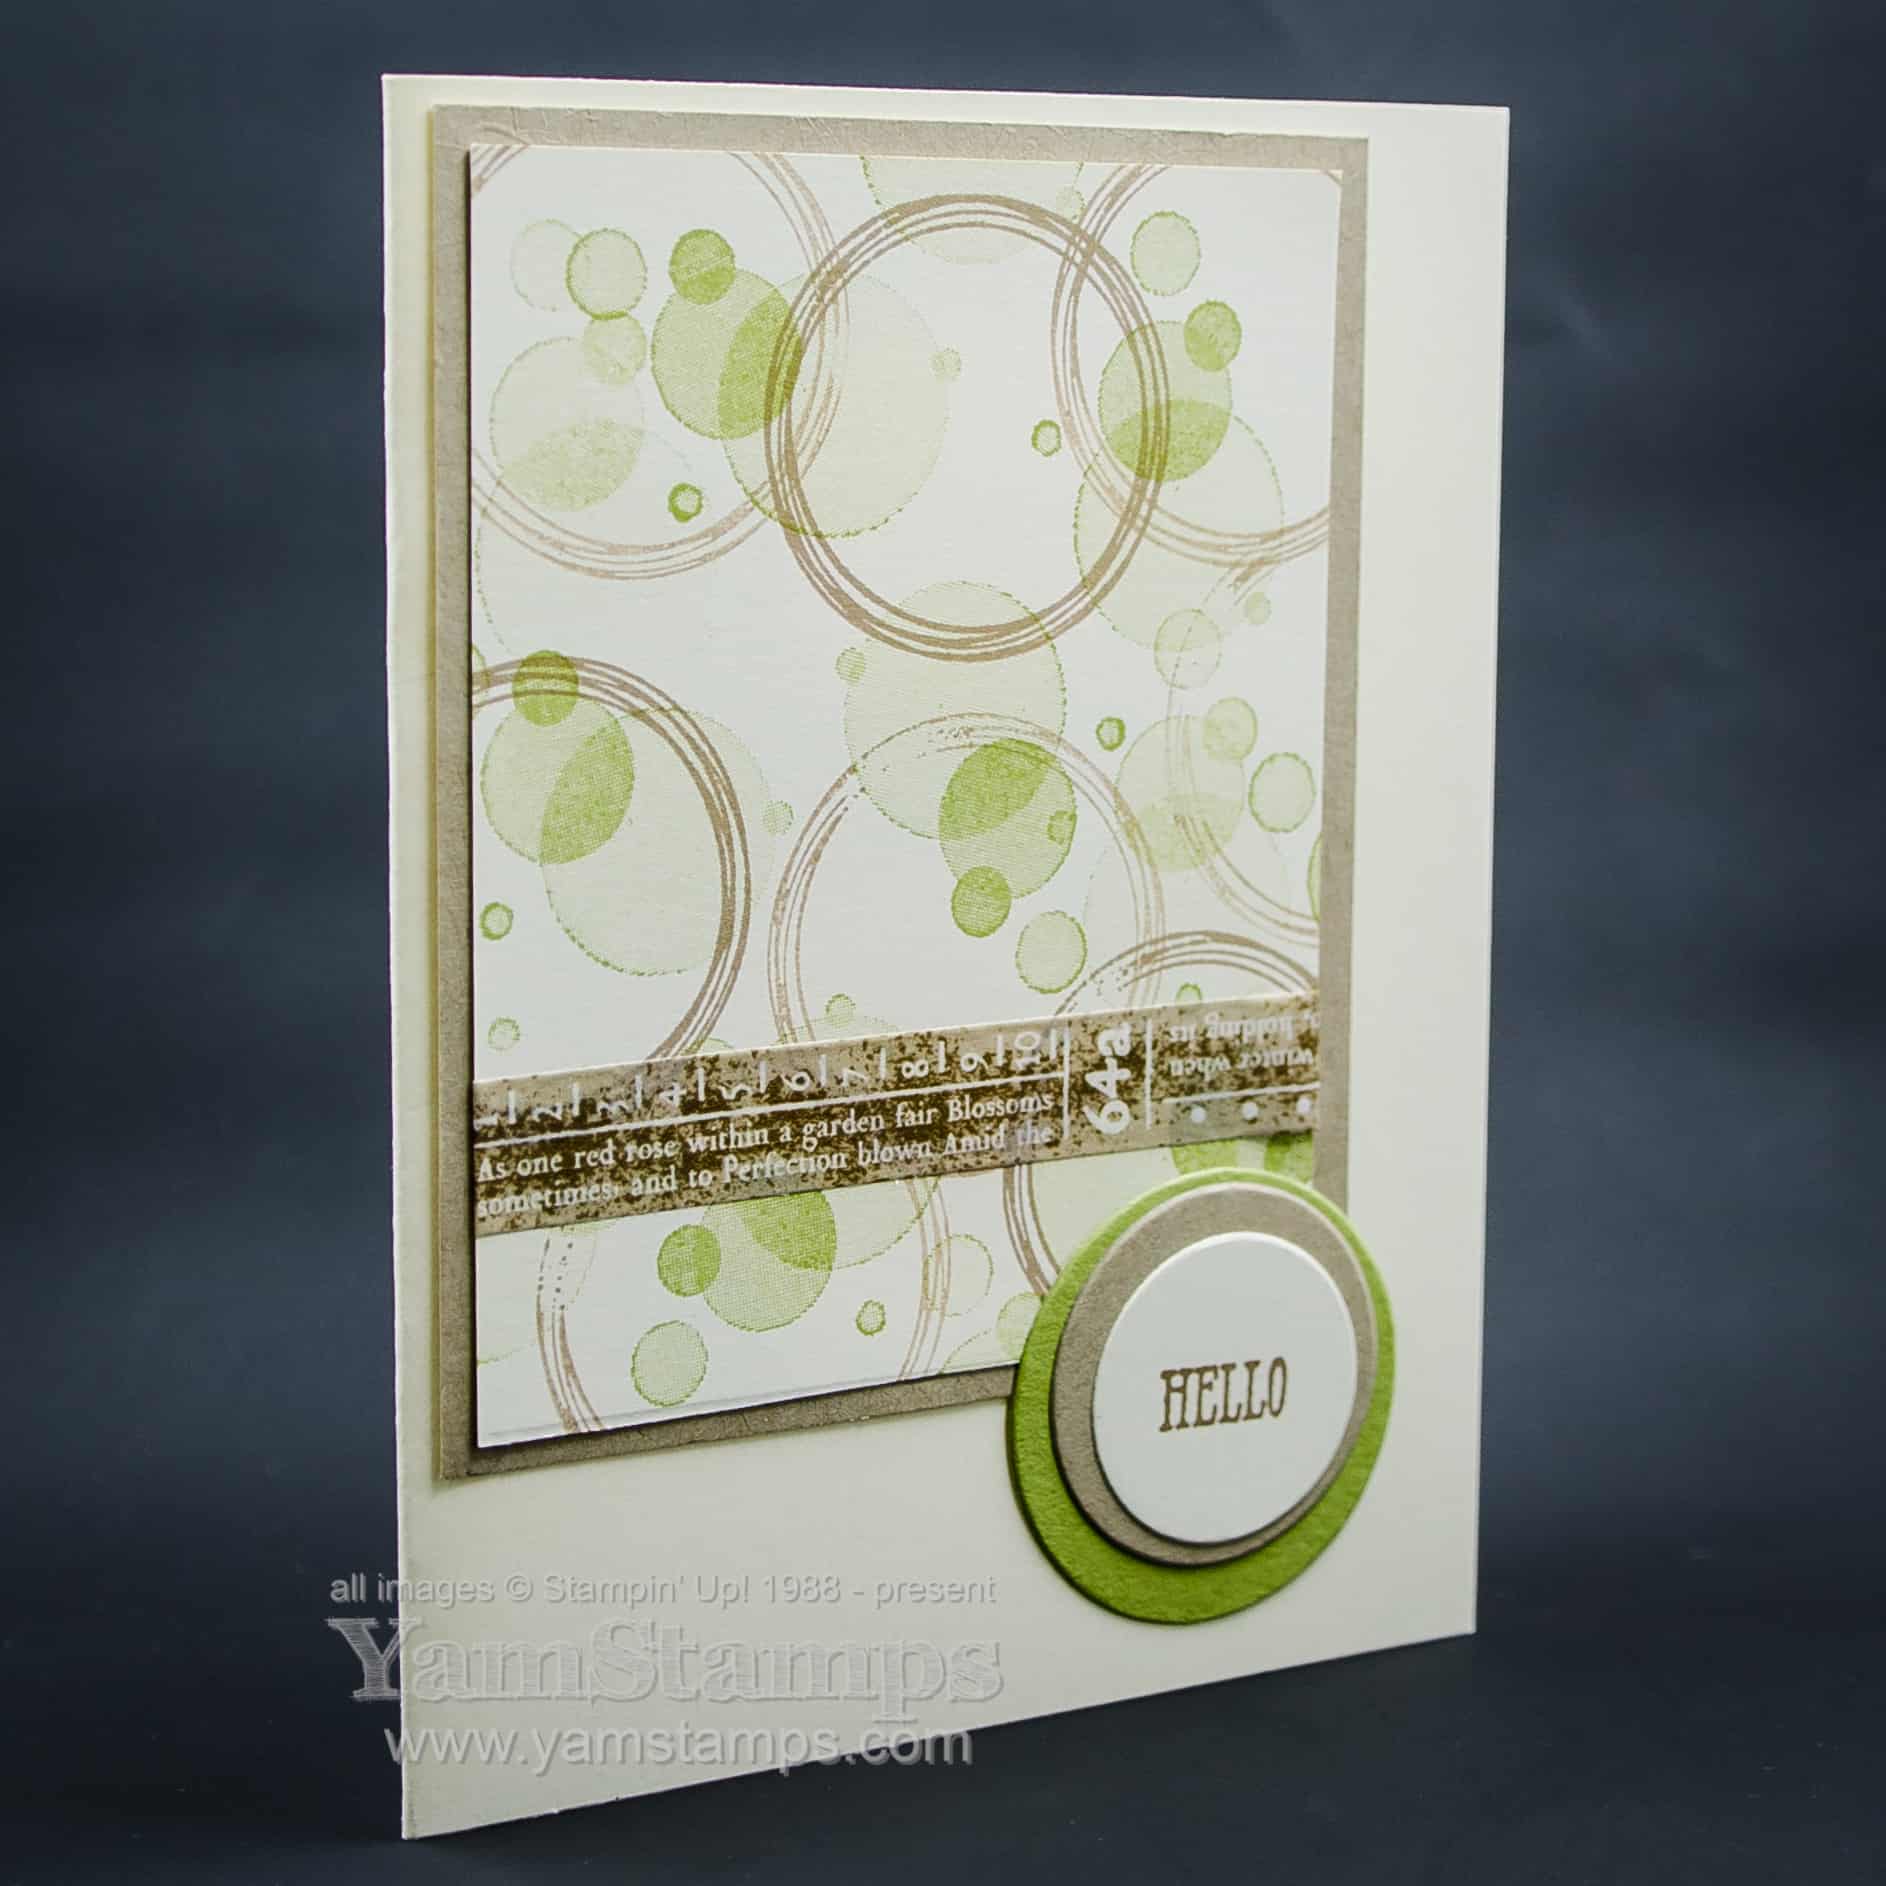
First of all the tutorial will have a photo – here’s the Circles Card photo
Next, there will be a list of supplies and measurements in some format or another…LOL. The Item numbers are beside the item description and are usually links to see the item in the online YamStamps Stampin’ Up! Canada store.
Stamp Sets: Beauty Abounds (148726) Swirly Frames (146519) Well Said (148796)
Ink: Pear Pizzazz Ink Pad (147104) Crumb Cake Ink Pad (147116)
Paper: Very Vanilla Cardstock (101650) – 5.5″ x 8.5″, 3.25″ x 4″, scrap Pear Pizzazz Cardstock (131201) – scrap Crumb Cake Cardstock (120953) – 3.5″ x 4.25″
Accessories & Tools: Layering Circles Dies (141705) Pressed Petals Specialty Washi Tape (149585) SNAIL Adhesive (104332) Die Cutting Machine
Then step by step instructions: 1) Fold larger piece of Very Vanilla Cardstock in half to create cardbase, set aside 2) Diecut the 1-3/8″ diameter circle from the centre of the Crumb Cake cardstock, set both pieces aside for now 3) Stamp the smaller, solid circles in Pear Pizzazz randomly over the smaller piece of Very Vanilla Cardstock 4) Stamp the larger outline circles in Crumb Cake randomly over the smaller piece of Very Vanilla Cardstock 5) Adhere a piece of Pressed Petals Specialty Washi Tape along the lower portion of the Cardstock 6) Adhere the cardstock onto the Crumb Cake Cardstock (covering the hole from the die cut) then to the cardfront. 7) Stamp “hello” in Crumb Cake onto scrap Very Vanilla cardstock and die cut with 1-1/8″ diameter circle 8) Diecut 1-5/8″ circle from scrap Pear Pizzazz cardstock 9) Adhere the circles together, then to cardfront.
So then you can recreate the project on your own – or change it up and customize it to suit your needs.
The first newsletter of each month is the biggest one – with a variety of projects/techniques and news, and each week following usually focuses on one project or news item. The newsletter projects are not shared elsewhere in the YamStamps media world – so only subscribers see them! The first September newsletter is due to come out TODAY at 1pm Eastern, so be subscribed before that time to receive it! Starting in October subscribers will receive an additional bonus newsletter with an exclusive holiday project tutorial!
Hope you enjoyed this Circles Card Tutorial! Any questions or feedback – please leave a comment below or message me!
I love this effect! For this card, we tapped the Balmy Blue ink pad onto the inner surface of the Country Floral Dynamic Embossing Folder. (A Sale-a-Bration Level 1 reward – you can select it for free with a $60CAD product order!). Tap onto the side with the Stampin’ Up! logo. Once there’s an even coating of ink, place your cardstock inside and run it through the Big Shot – don’t forget the special sandwich for these extra thick folders – Regular Platform, folder with cardstock inside, top Plastic Cutting Plate only.
Clean up for this inked embossing folder technique is also super easy – I just run the folder under the tap and pat dry with a paper towel. Stampin’ Up!’s inks are dye based so they’re water soluble.
The sentiment is from Flourishing Phrases (available in red rubber clear mount or red rubber wood mount), and it’s punched out with the new Story Label punch which is available for purchase during March as part of the Sale-a-Bration Coordination product suite. We used a sponge dauber to add a bit of Balmy Blue ink around the edges of the label. I am using up some of the Organdy Ribbon I had from my earlier Sale-a-Bration order – because if you blinked….it’s gone again! I think everybody who had been waiting on it jumped in to order and it’s unavailable once again in North America (this time gone for good).
However – there are LOTS of new regular catalogue items available to select for free as well as the original offerings (other than the ribbons, obviously…). You can go to the YamStamps Online Stampin’ Up! Canada store and check out the Sale-a-Bration options currently available. Remember that we are now into the “March 31 or while supplies last” phase of Sale-a-Bration. I shared a strategy for planning out your Sale-a-Bration redemptions on the YamStamps Facebook page a while back. Stampin’ Up! manufactures their own stamps in the US, so they are better able to quickly deal with varying levels of demand for stamp sets, but the accessories and tools tend to be sourced from outside the US and so are often affected by shipping times.
In the meantime, we will continue to Sale-a-Brate until the end of March! Please feel free to contact me if you have any questions, or need assistance placing your order. Comments are working again, too, so feel free to leave a comment for me!