Are you on the list? The 12 Weeks of Christmas List, that is… If you receive the weekly YamStamps Paper Crafting Newsletter, then the answer is YES! If not – well, I think you can figure that one out…
You’ll want to be on the list by Wednesday, October 2nd at 1pm so that you can receive the first of the Twelve Weeks of Christmas Projects! This is an exclusive subscriber THANK YOU. In appreciation of being on my list, I send subscribers an additional email over the 12 weeks leading up to Christmas. Each week has a different holiday project, complete with photo, supply list and instructions – like you’re used to with the regular YamStamps Newsletters. The Twelve Weeks Projects will be cards for the first few emails, then we’ll move on to gifts and wrapping ideas. Lots of inspiration for your holiday crafting!
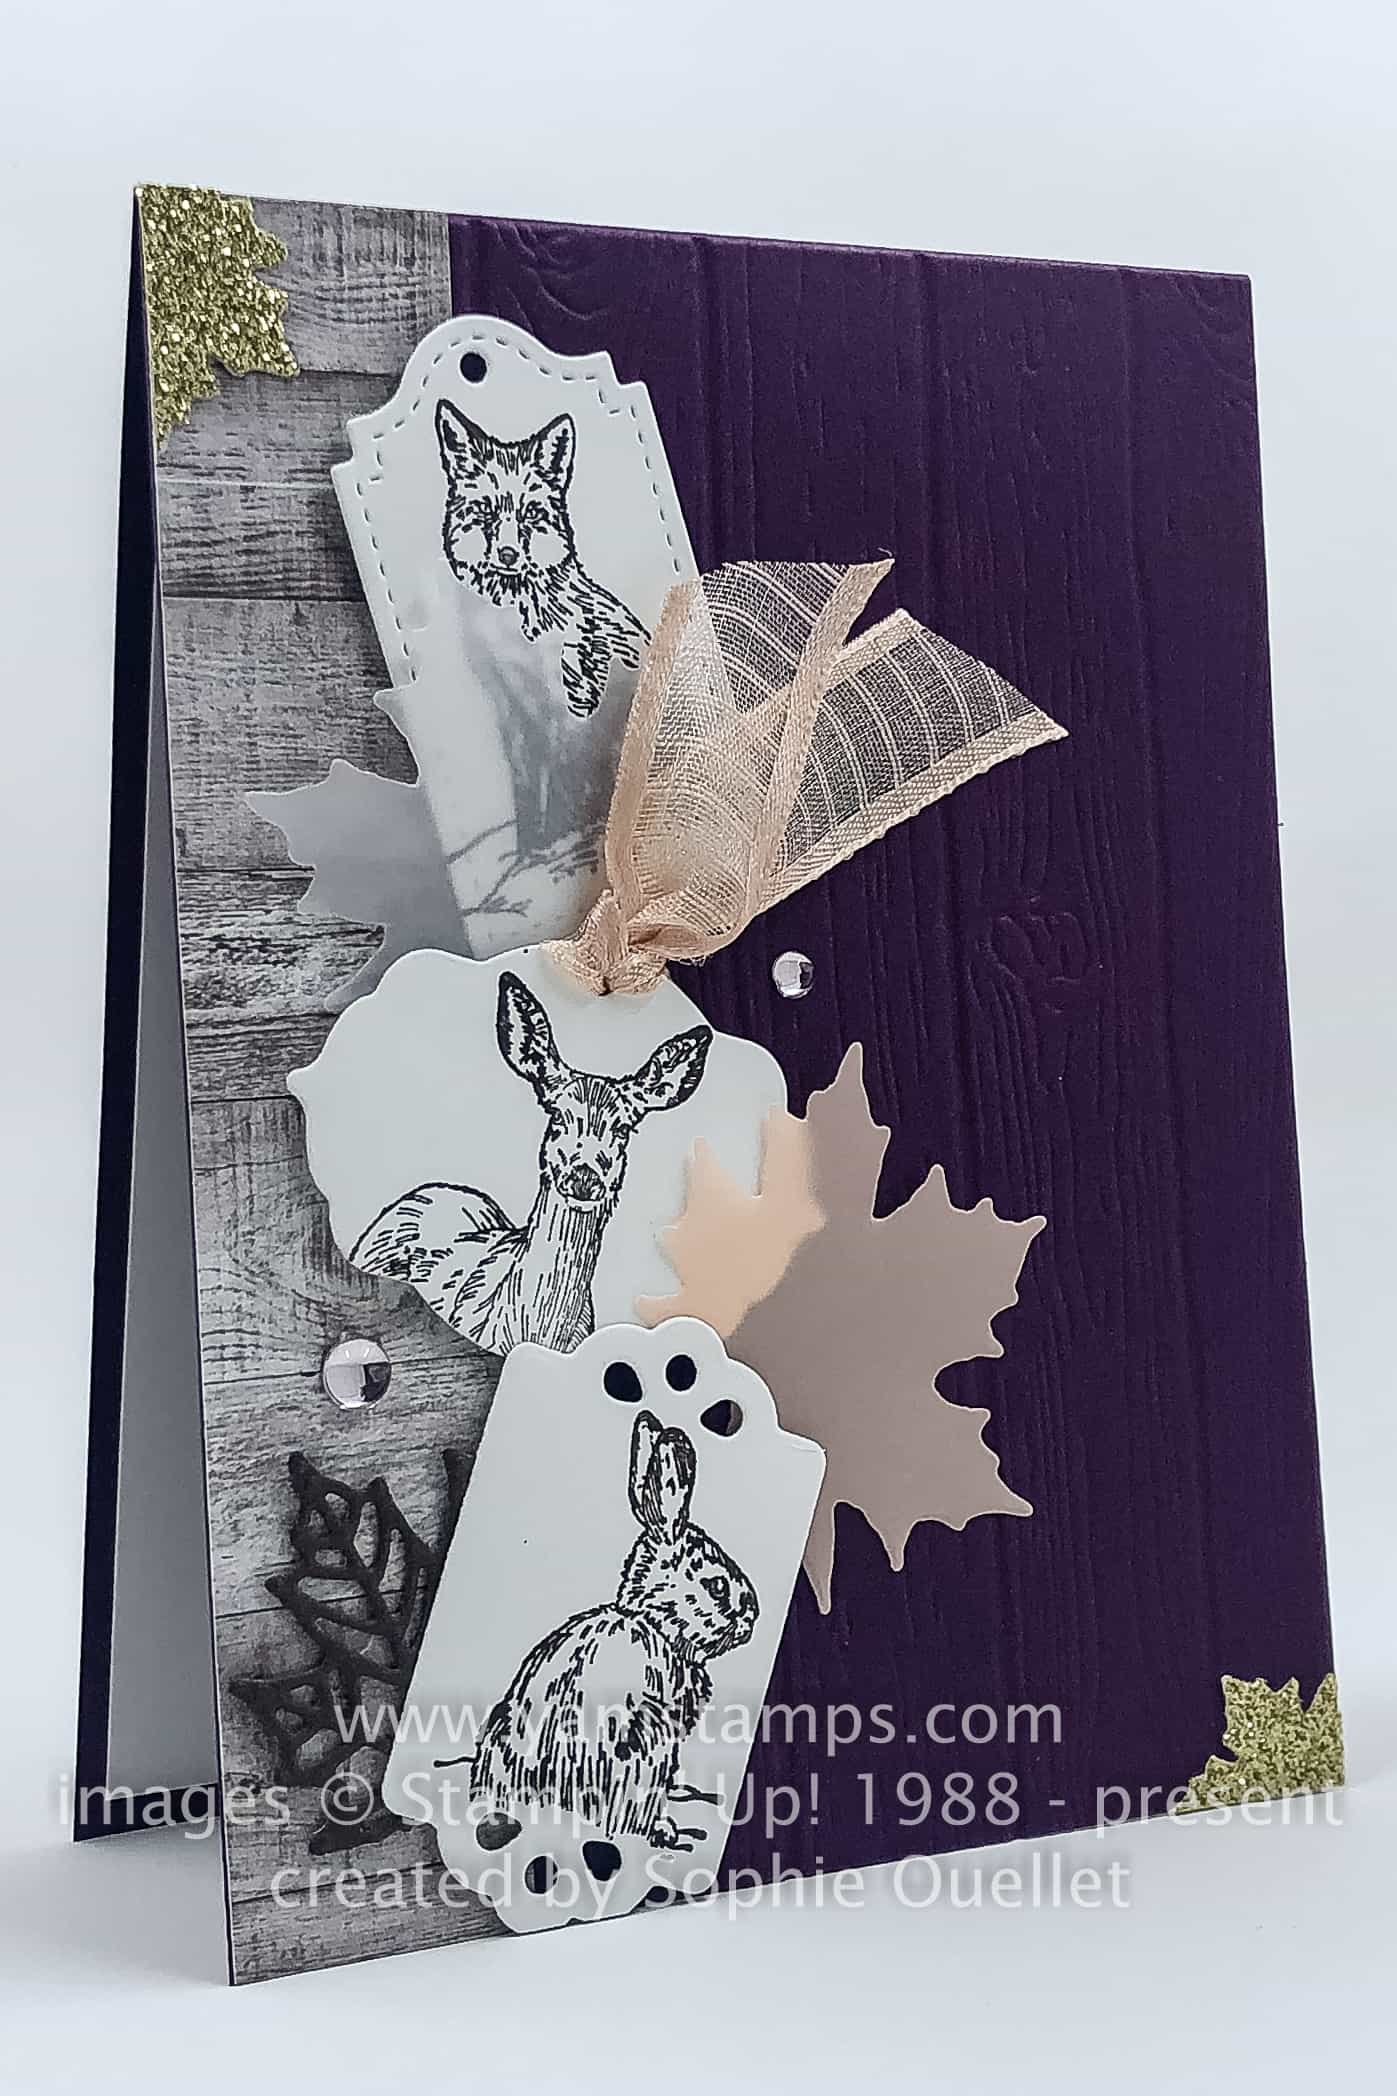
This week’s Sunday Swap Share has an autumn feel to it – though it’s using product from the Holiday Catalogue, which often seems like the Christmas and Halloween Catalogue…LOL. Created by Sophie Ouellet, this wildlife card features Stampin’ Up!’s Nature’s Beauty Stamp Set and seems appropriate for the first official Sunday of fall!
One other thing to note – a portion of each sale of this stamp set goes towards supporting mental health in the country in which it is sold. Stampin’ Up! has designated the Centre for Addiction and Mental Health as the Canadian beneficiary. I know that crafting is a great stress reliever for me, and helps my mental health – and it’s great to know that this stamp set goes towards helping support mental health in Canada!
The Petal Pink Vellum is from the Perennial Essence Vellum Cardstock package and coordinates with the Petal Pink Organdy Striped Ribbon. I would never have thought to use Petal Pink and Blackberry Bliss on an autumn card – part of the reason I love participating in swaps! I don’t have to think up every single design on my own, and can borrow from ideas and inspiration from others. While I do enjoy coming up with my own designs, there are times when I need a little creative boost.
Did you know that if you purchase a starter kit through me, you become part of my group of demonstrators known as the “Eh” Team? You aren’t out there on your own – you have my support and training, plus Stampin’ Up!’s trainings, plus our team in total – when you want it or need it. I’m having an Information Night on Thursday, October 9th at 7pm. It’s a short, free event for you to have your questions answered. If you’re not local to Burlington, ON, or can’t make it that evening, you can contact me for other options. Check out my Demonstrator Information Page by clicking the link, or typing in the shortcut yamstamps.com/join. As always, you can contact me if you have any questions or need any information – about becoming a demonstrator with my team, crafting supplies, or paper crafting techniques! Thanks to Sophie for this great wildlife card, thanks to Stampin’ Up! for a great fundraiser, and thanks to you for stopping by the YamStamps blog.
If you’ve been visiting the YamStamps site for a while, or checking out the YamStamps Facebook Page or Instagram Account, you’ll know that I like projects that look impressive but don’t take too much work. Sometimes I like to colour – but it’s got to be something that will be effective while also being easy!! Here’s the latest in that line of Lazy Crafting…in which I colour ON the lines.
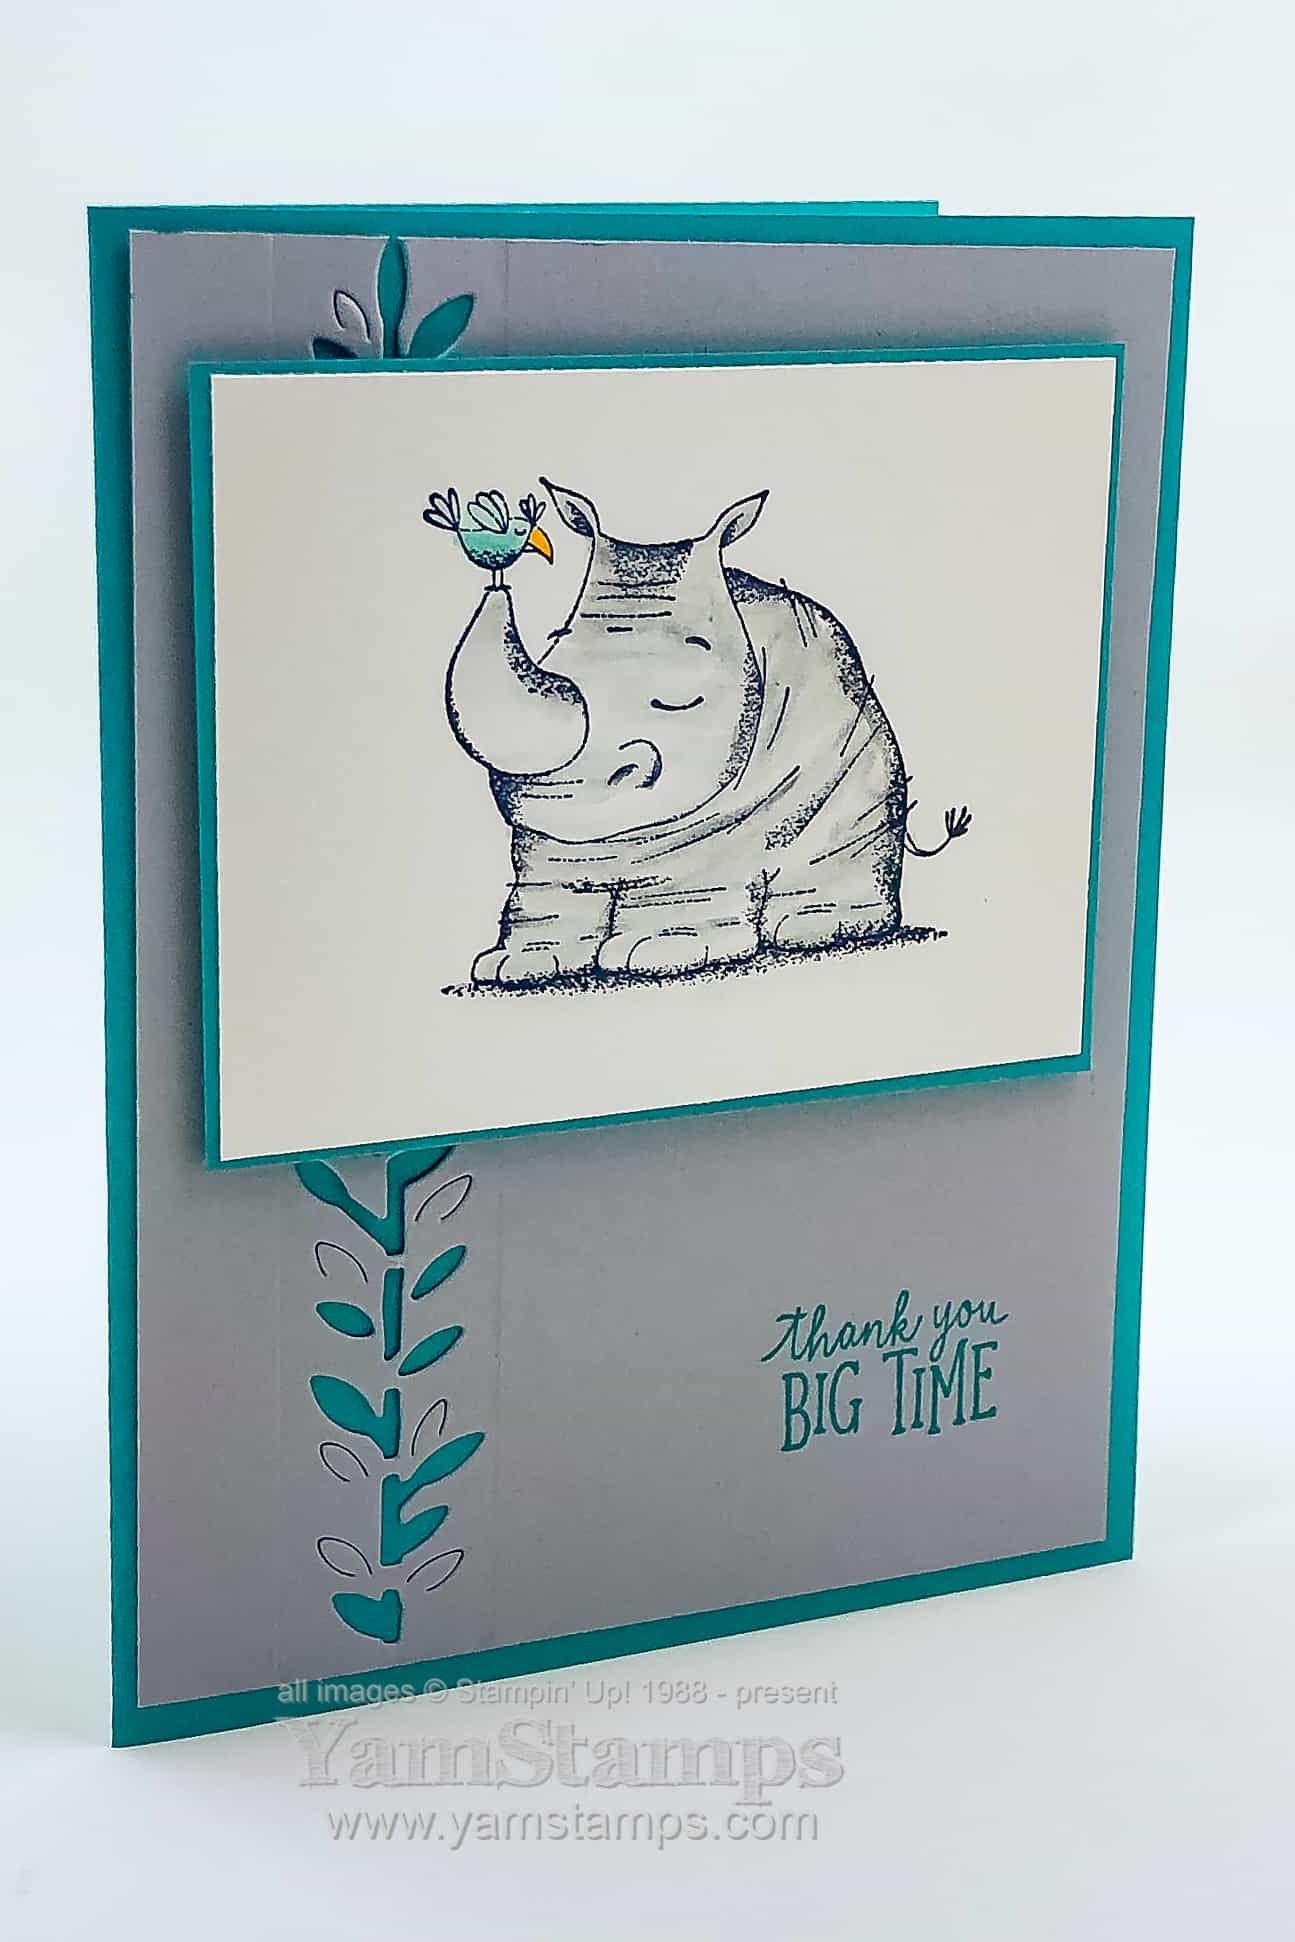
This easy colouring card uses the Animal Outing stamp set and coordinating Animal Friends Dies. How is this an easy card? Well, I only used 3 colours of Watercolour Pencils and a Blender Pen. I took advantage of all the artist drawn shading and contouring lines to give the image a bit more dimension. The image is stamped in Staz On Jet Black ink onto Shimmery White cardstock – which deals well with wet media and techniques. I coloured along the outlines and shading lines with the Watercolour Pencils, then went over it with the Blender Pen to move the colour out to the rest of the image. I used Bermuda Bay Cardstock to tie in the colour of the card with the pencil that was used to colour the bird.
The leaves were cut along the side of the Smoky Slate Cardstock and had to be cut twice to span the entire length of the card. What you can’t see behind the rhino image is that there is a bit of an overlap of the cut images which isn’t so pretty….but it’s hidden so it’s all good!
So remember – colour ON the lines to make your colouring quick, easy and effective! If you’re interested in learning more paper crafting tips and techniques, be sure to be subscribed to my Paper Crafting E-Newsletters. Starting NEXT WEEK all subscribers will receive a bonus newsletter installment – the Twelve Weeks of Christmas! Each week, for the next twelve weeks, in addition to the regular YamStamps Email, you’ll get an exclusive Christmas Project email – complete with picture, supply list and step by step instructions. Don’t delay – the first of the Twelve Weeks emails goes out October 2nd!!
Sometimes you want to send a card for “no reason” or to let a friend know you’re thinking about them. Here’s a card to say hello that will serve those purposes!
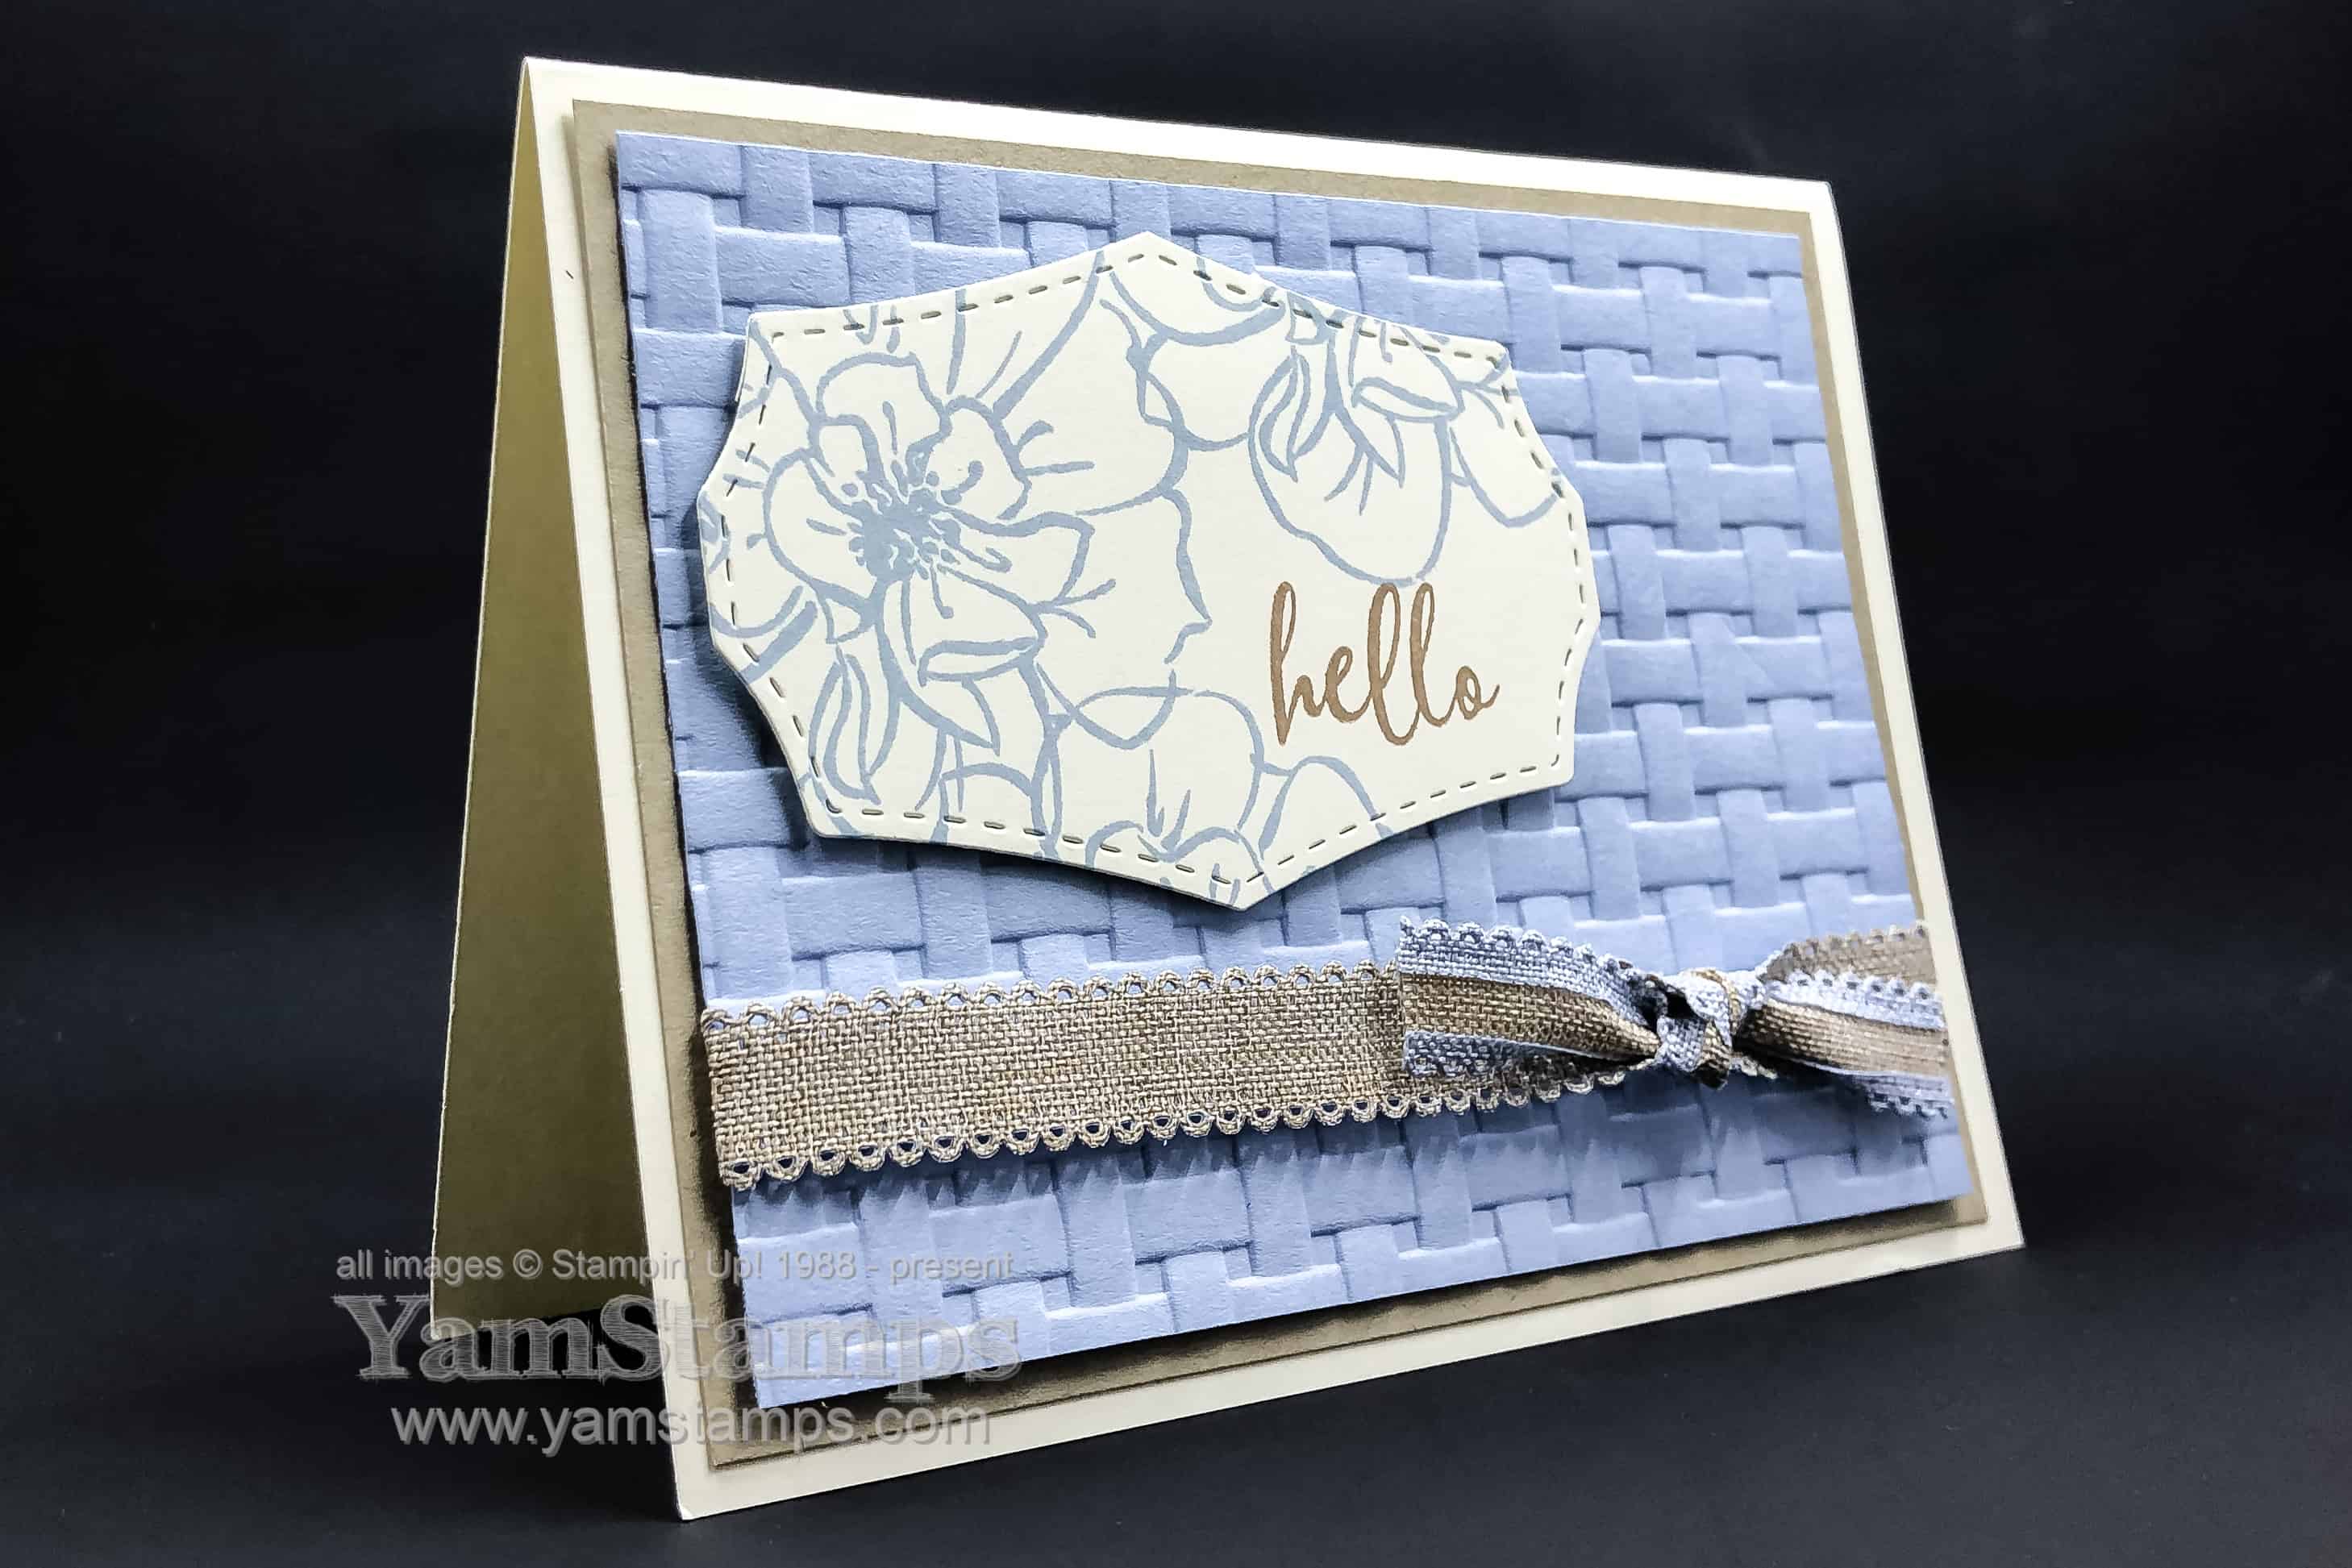
I might have a bit of an issue with this Basket Weave 3D Embossing Folder – in that I LOVE using it for my cards. It’s one of those things that I will have to force myself away from when designing class cards (because class attendees might like to try out different products – go figure). However, you will notice that it’s another blue card….LOL. I can only do so much outside my typical comfort zone, people!!
This card features the To a Wild Rose Bundle which includes the To a Wild Rose stamp set and Wild Rose Dies, at a discount vs buying the products individually. LAZY CRAFTER ALERT / #craftinghack I lifted the colour palette for this card from the ribbon. The Seaside Spray Scalloped Linen Ribbon is so pretty that I wanted to highlight it. I used Crumb Cake as the brown tone for the card. I placed the plain linen side out on the front of the card and then used the other side when tying the knot. Some class attendees opted to use the blue edged side showing for both portions though! My lazy crafter way of doing the knot – one length of ribbon goes on the card (tape the ends in behind with SNAIL or adhesive tape), and then use another slightly shorter piece of ribbon and tie it around the first. By doing it this way, you can move the knot around to where you’d like it on the card front without undoing the entire ribbon piece!
If you are in need of a card to say hello to a friend, or just want to get out and try some techniques and products, come to a class! The Monthly Card Class is held the first Wednesday of each month (generally…) in north Burlington ON, and there’s an afternoon and an evening session. Your class fee includes all the supplies required for the 4 cards we create during class – including adhesive and envelopes. You can check out the upcoming dates on the YamStamps Events Page or message me to register or get more information. Hope to see you in class soon!
Please come back to visit the YamStamps site for future Sunday Swap Shares – and all the other regular postings during the week! If there’s something you’d like to see here – leave a comment below or message me. Thanks for stopping by!