Sep 22, 2013 | Big Shot, cards, Christmas, Stampin' Up!, Tutorial
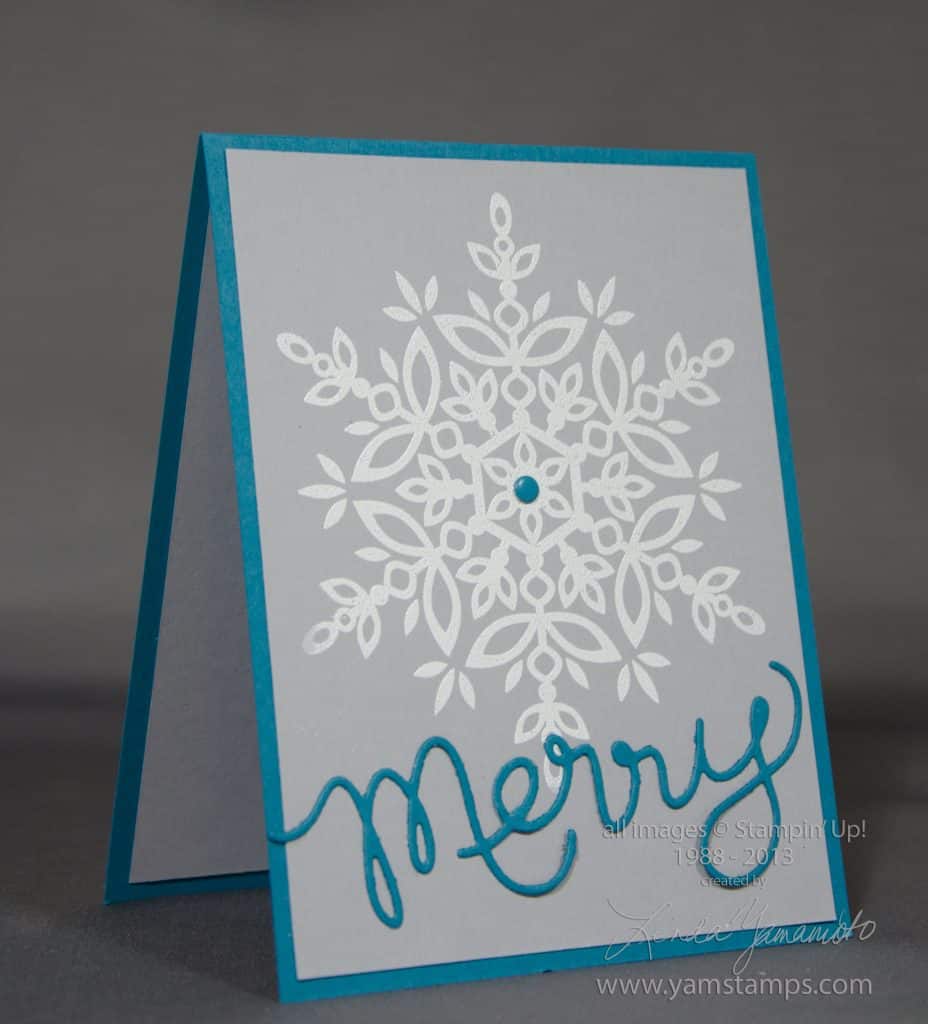 Never too early to start prepping those holiday cards. We created this card during Stampers Club this month. The large snowflake from Stampin’ Up!’s Festive Flurry set is heat embossed in white on Smoky Slate cardstock (love this new colour), and the Expressions Thinlit “Merry” adds the sentiment. An Island Indigo Candy Dot ties it together. I really like this card, but I have to admit that initially during Club it was driving me crazy…until I figured out a hint – and I’ll share it here.
Expressions Thinlits Hints
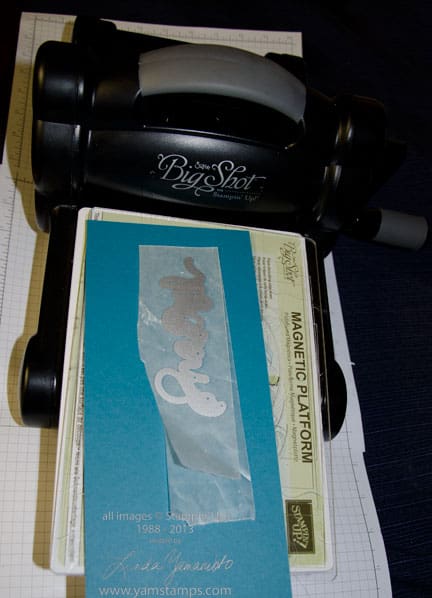
1) Use the Magnetic Platform. I looooooove this tool. You don’t need to have brand new, pristine cutting plates, but you do need to have ones that are fairly straight – not warped, in order for the magnet to be able to hold the metal framelit or thinlit in place.
2) Use a layer (or two) of waxed paper between your cardstock and thinlit if you’re having trouble getting the cardstock to “release”.
3) Use your paper piercer tool to poke gently through the little holes in the thinlit to push your diecut out if you’re having trouble getting the cardstock to “release”
4) Use an extra piece of cardstock on top of the cutting plate as a “shim” to add extra pressure along the thinlit
5) Run the thinlit through lengthwise rather than widthwise!!! This is the hint we discovered at Club night. If you run the word through horizontally, you may have uneven pressure across the thinlit. In my case, the centre of the thinlit wasn’t cutting as cleanly as the edges. It may be that my cutting plates were slightly warped or perhaps because my Big Shot has been used and abused since I got it…LOL. Anyway, check out the photo below for the visual as to the set up (the top cutting plate is missing in the photo just so you can see it better). Obviously with some of the longer words (i.e. “thankful”) it’s a given, but with the word “merry” or “love”…not so much!
If you have any tips or tricks you’d like to share about using the thinlits or Big Shot, please leave a comment below, or on my facebook page so we can all learn!
Sep 18, 2013 | Events, specials, Stampin' Up!
So in all the craziness of the past little while, including the largest club gathering to date, I forgot to shut down registration to the Thankful Mini Scrapbook and Hallowe’en Banners classes!! SOOOOOOO….I will take registrations until the end of tomorrow (THURSDAY, SEPTEMBER 19TH) and then close down the registrations for these events. You will still be able to register for the October Card Class, October Christmas Card Class and Christmas Banner offerings for a while, but you can bet I will be paying a bit better attention to my calendar!! LOL.
Visit the YamStamps Events page to register and use your credit card to pay, or contact me if you have questions or would like to pay by cheque or cash.
Sep 15, 2013 | 3D samples, cards, rubber stamping, Stampin' Up!
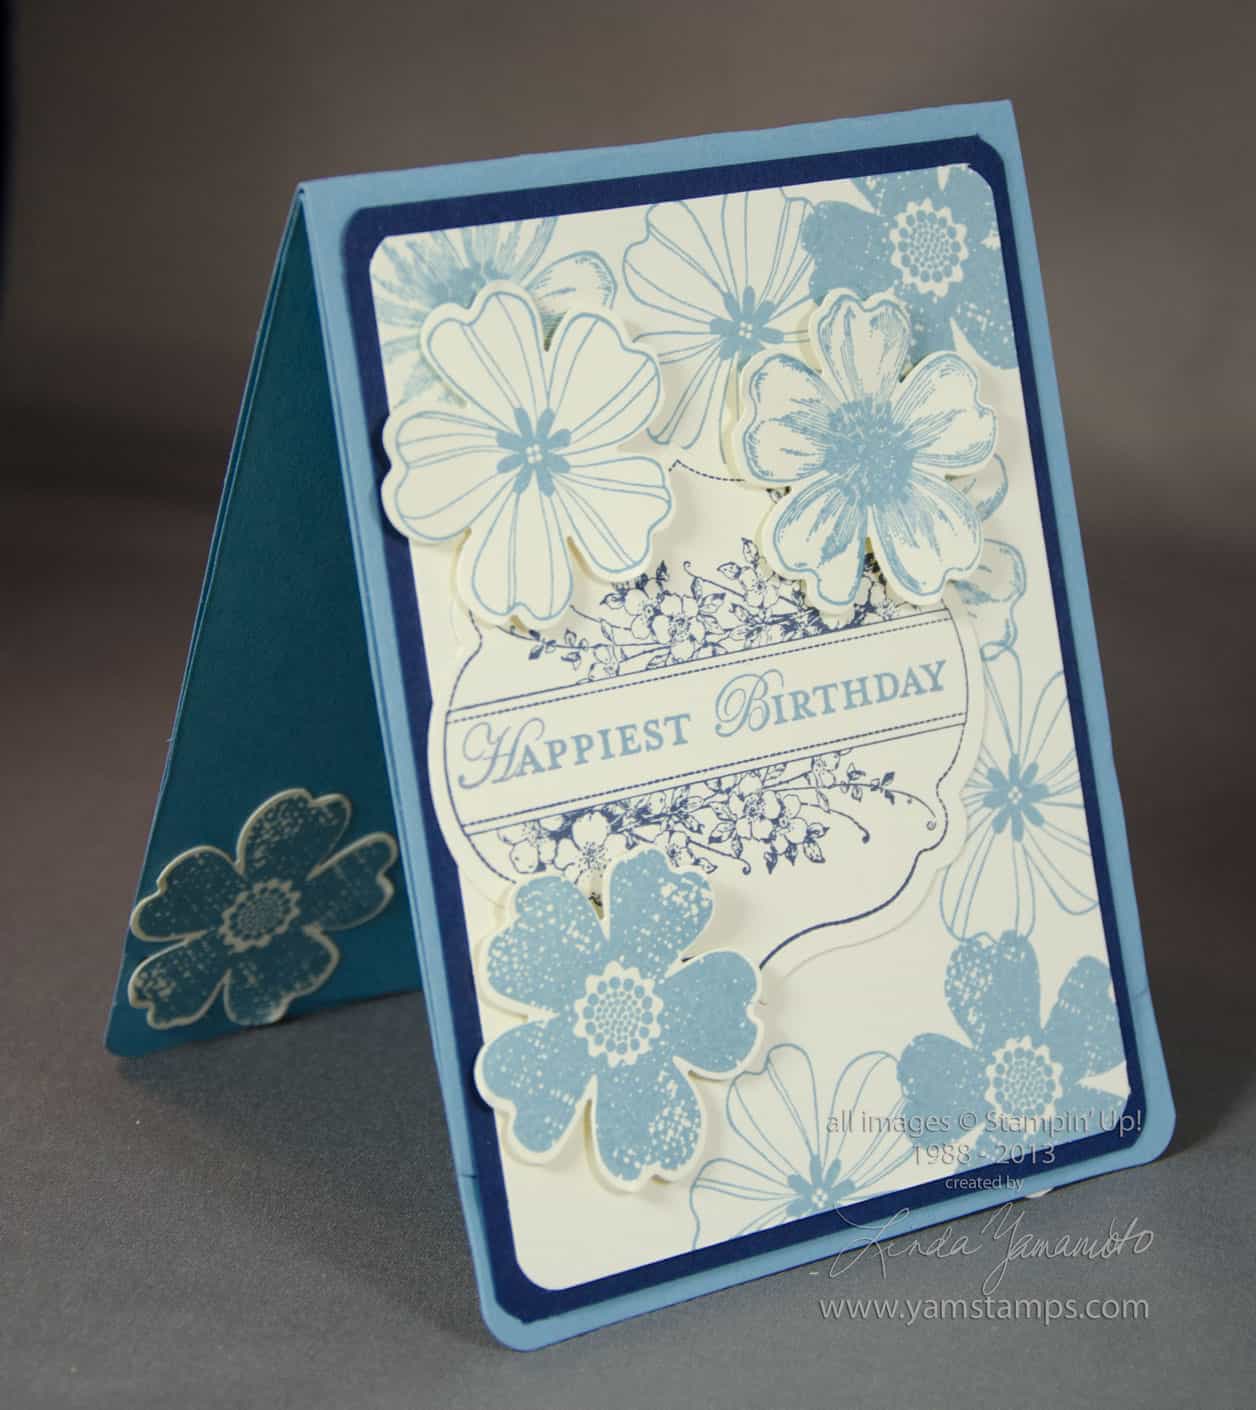
 There are times when you need an extra special card. One of the great things about making cards is that you can customize it for the recipient – this comes in handy especially on special occasions! In this case, my grandmother turned 95…so instead of having to run around to 4-5 different stores to find a card that had “95” on it, I was able to make one myself and save myself some time!
Guess what my grandmother’s favourite colour is….LOL. Anyway, I had fun creating this 3D card and it wasn’t too difficult at all. I used Stampin’ Up!’s Label Pop ‘n Cuts and Card Base Dies in my Big Shot to create the 3D card and just had to choose how to embellish it! I used the Flower Shop set with coordinating Pansy Punch and Apothecary Art to decorate the outside of the card.

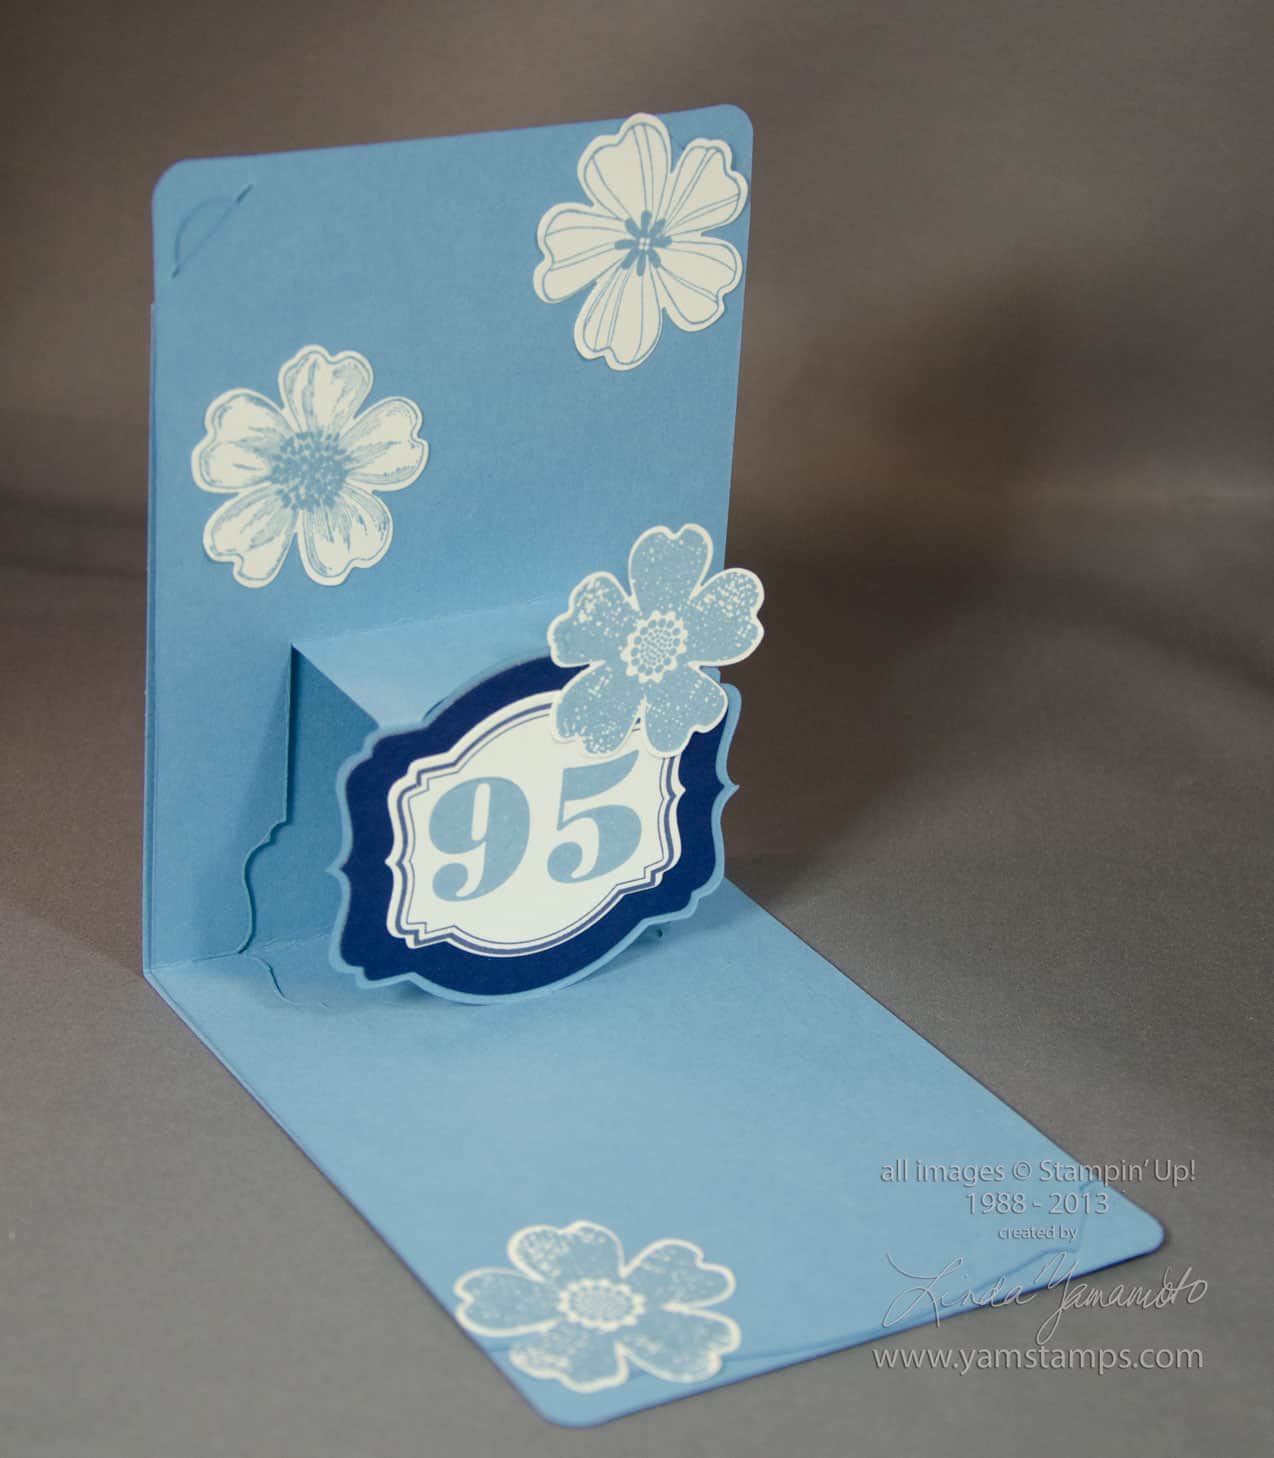
I used the Morning Post Numbers set and the Deco Labels framelits to customize the inside of the card.
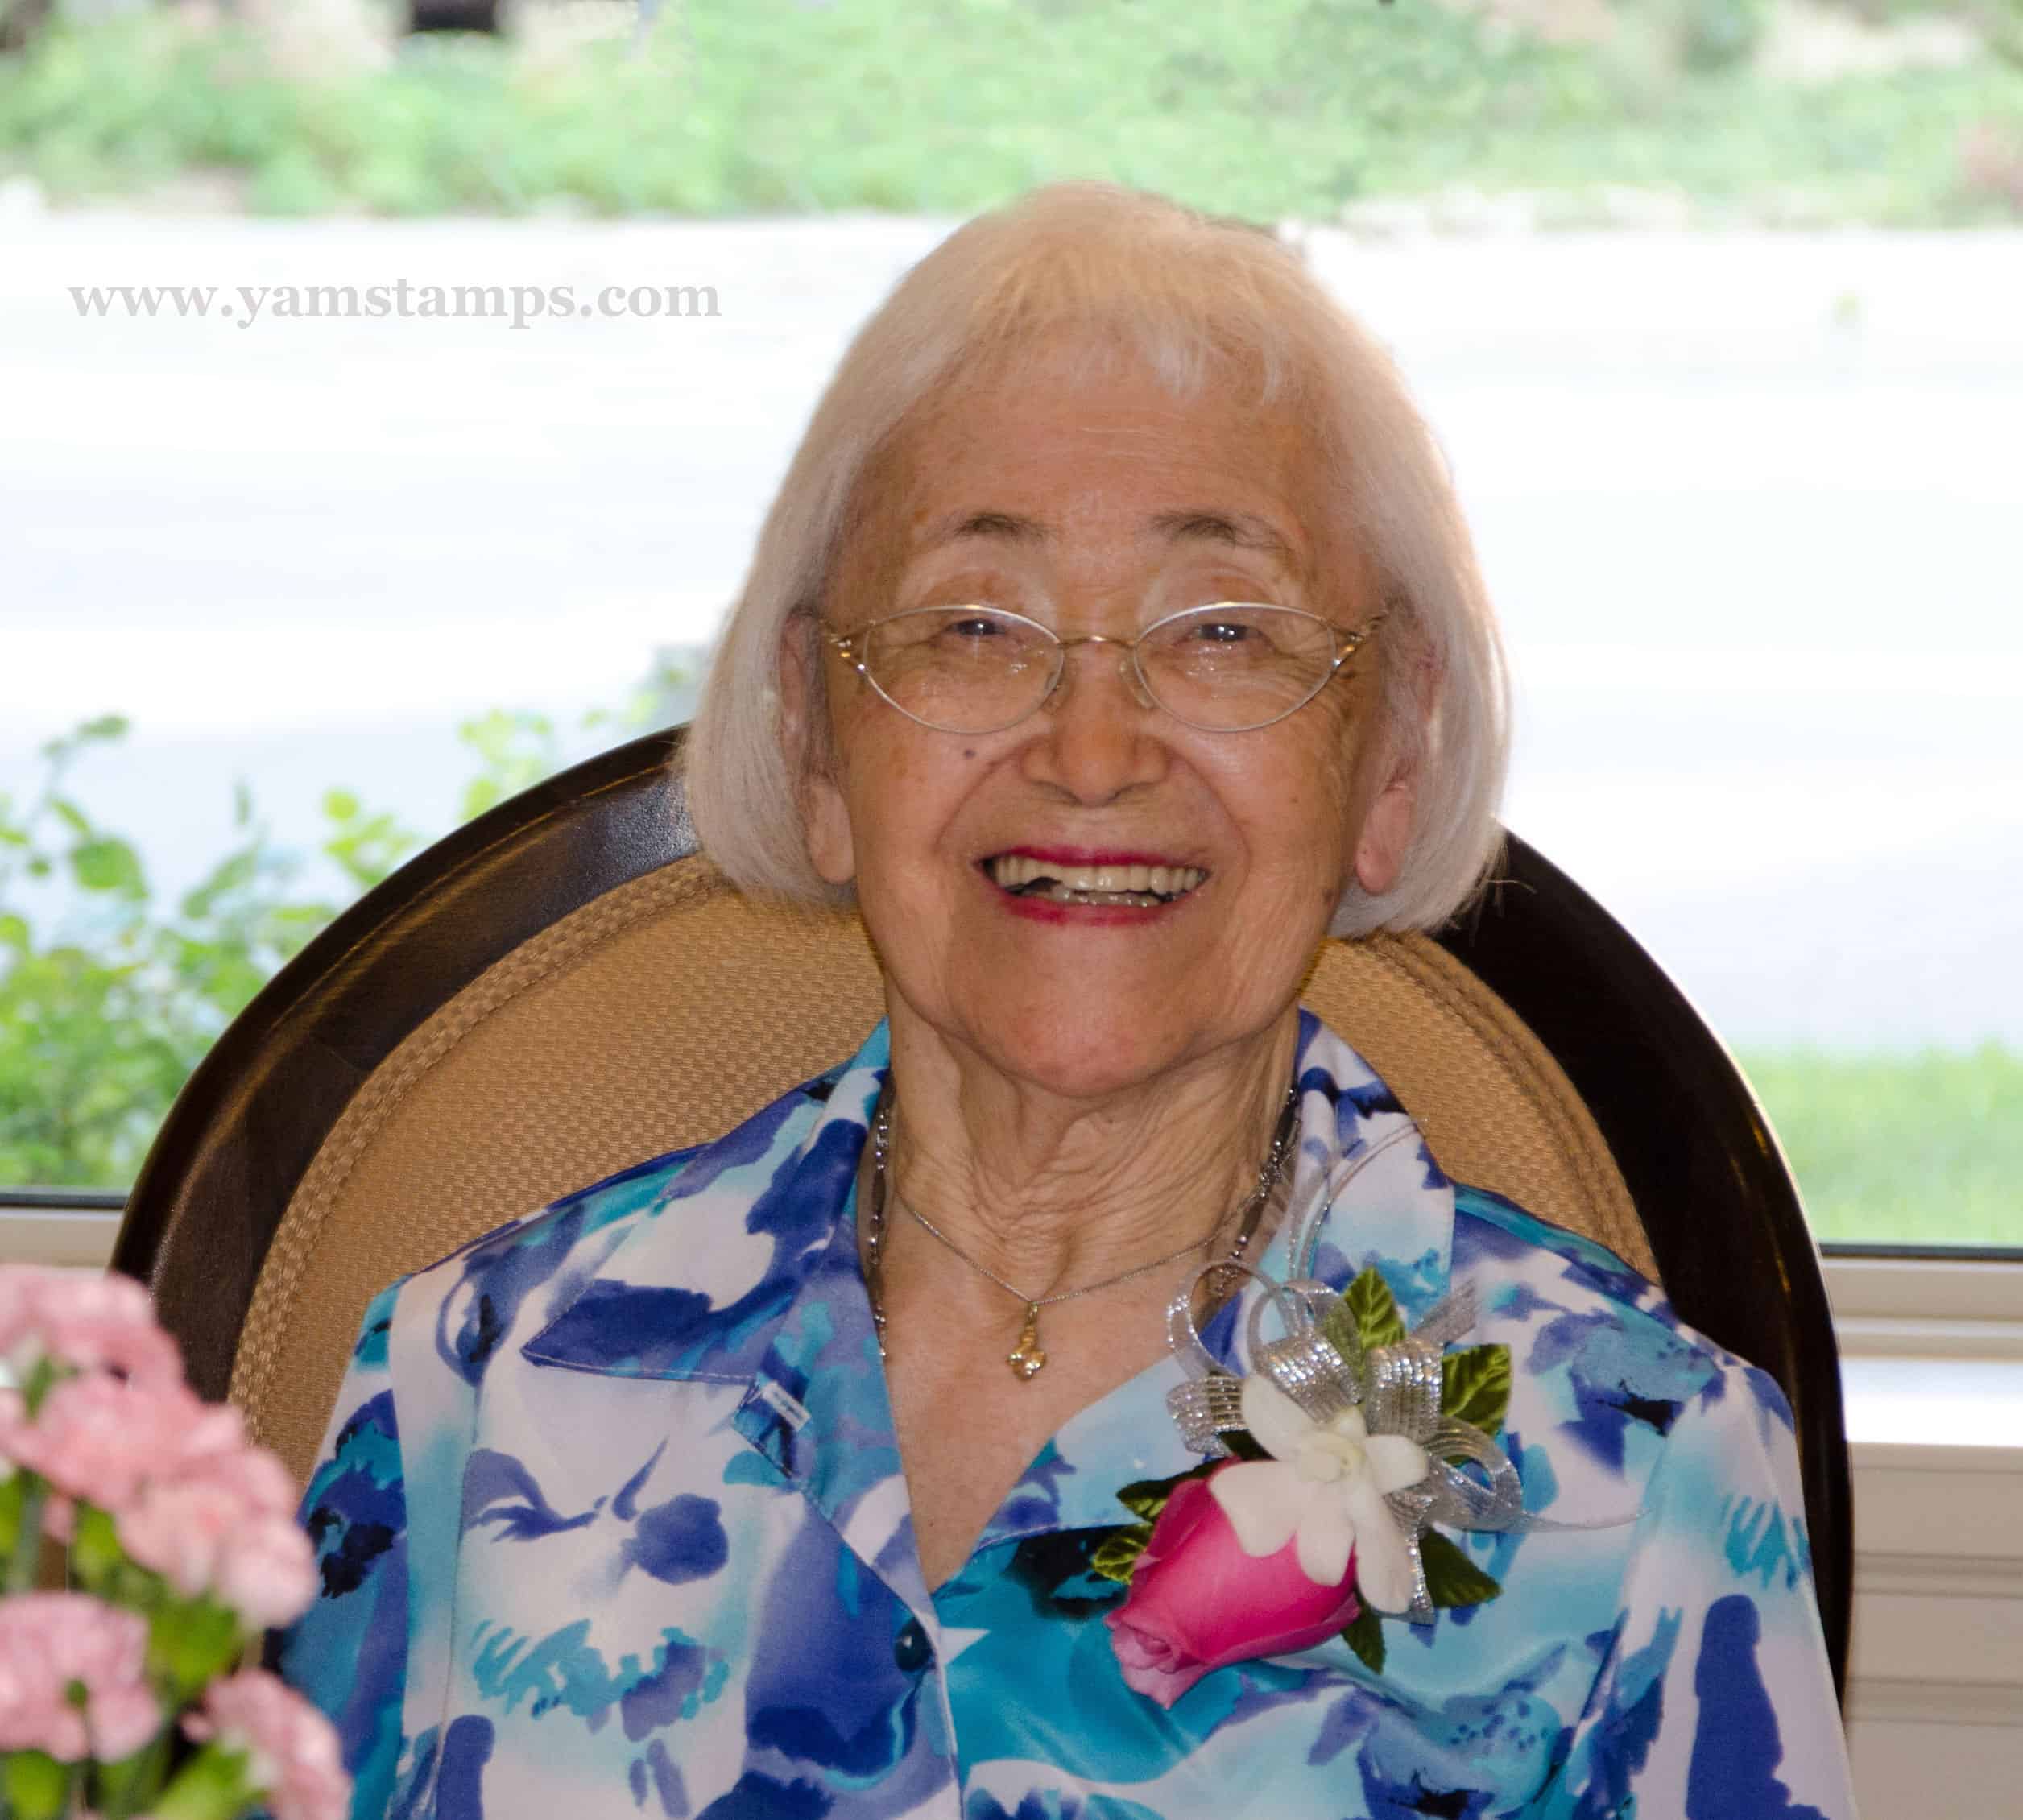
And it seems only appropriate to finish this post with a picture of my grandmother herself…

We were blessed to be able to celebrate with four generations on her special day and are looking forward to another gathering with extended family in the near future. Happy 95th Birthday, Nan!!
Sep 9, 2013 | cards, Christmas, Stampin' Up!
 The first of my monthly Christmas Card classes was held this past week, and the attendees got a good jump on their card needs for the holidays! Then over the weekend, while some people were watching football….others were not….LOL. I spent some much needed time sorting out things in my craft room. It seems I create chaos at the same time I create cards…and then tend to wander off and be distracted by some other shiny object…I decided it was time to have more than a few square inches of that larger desk surface to work within. So between prepping, holding classes and cleaning up I fell behind on keeping up here – apologies!
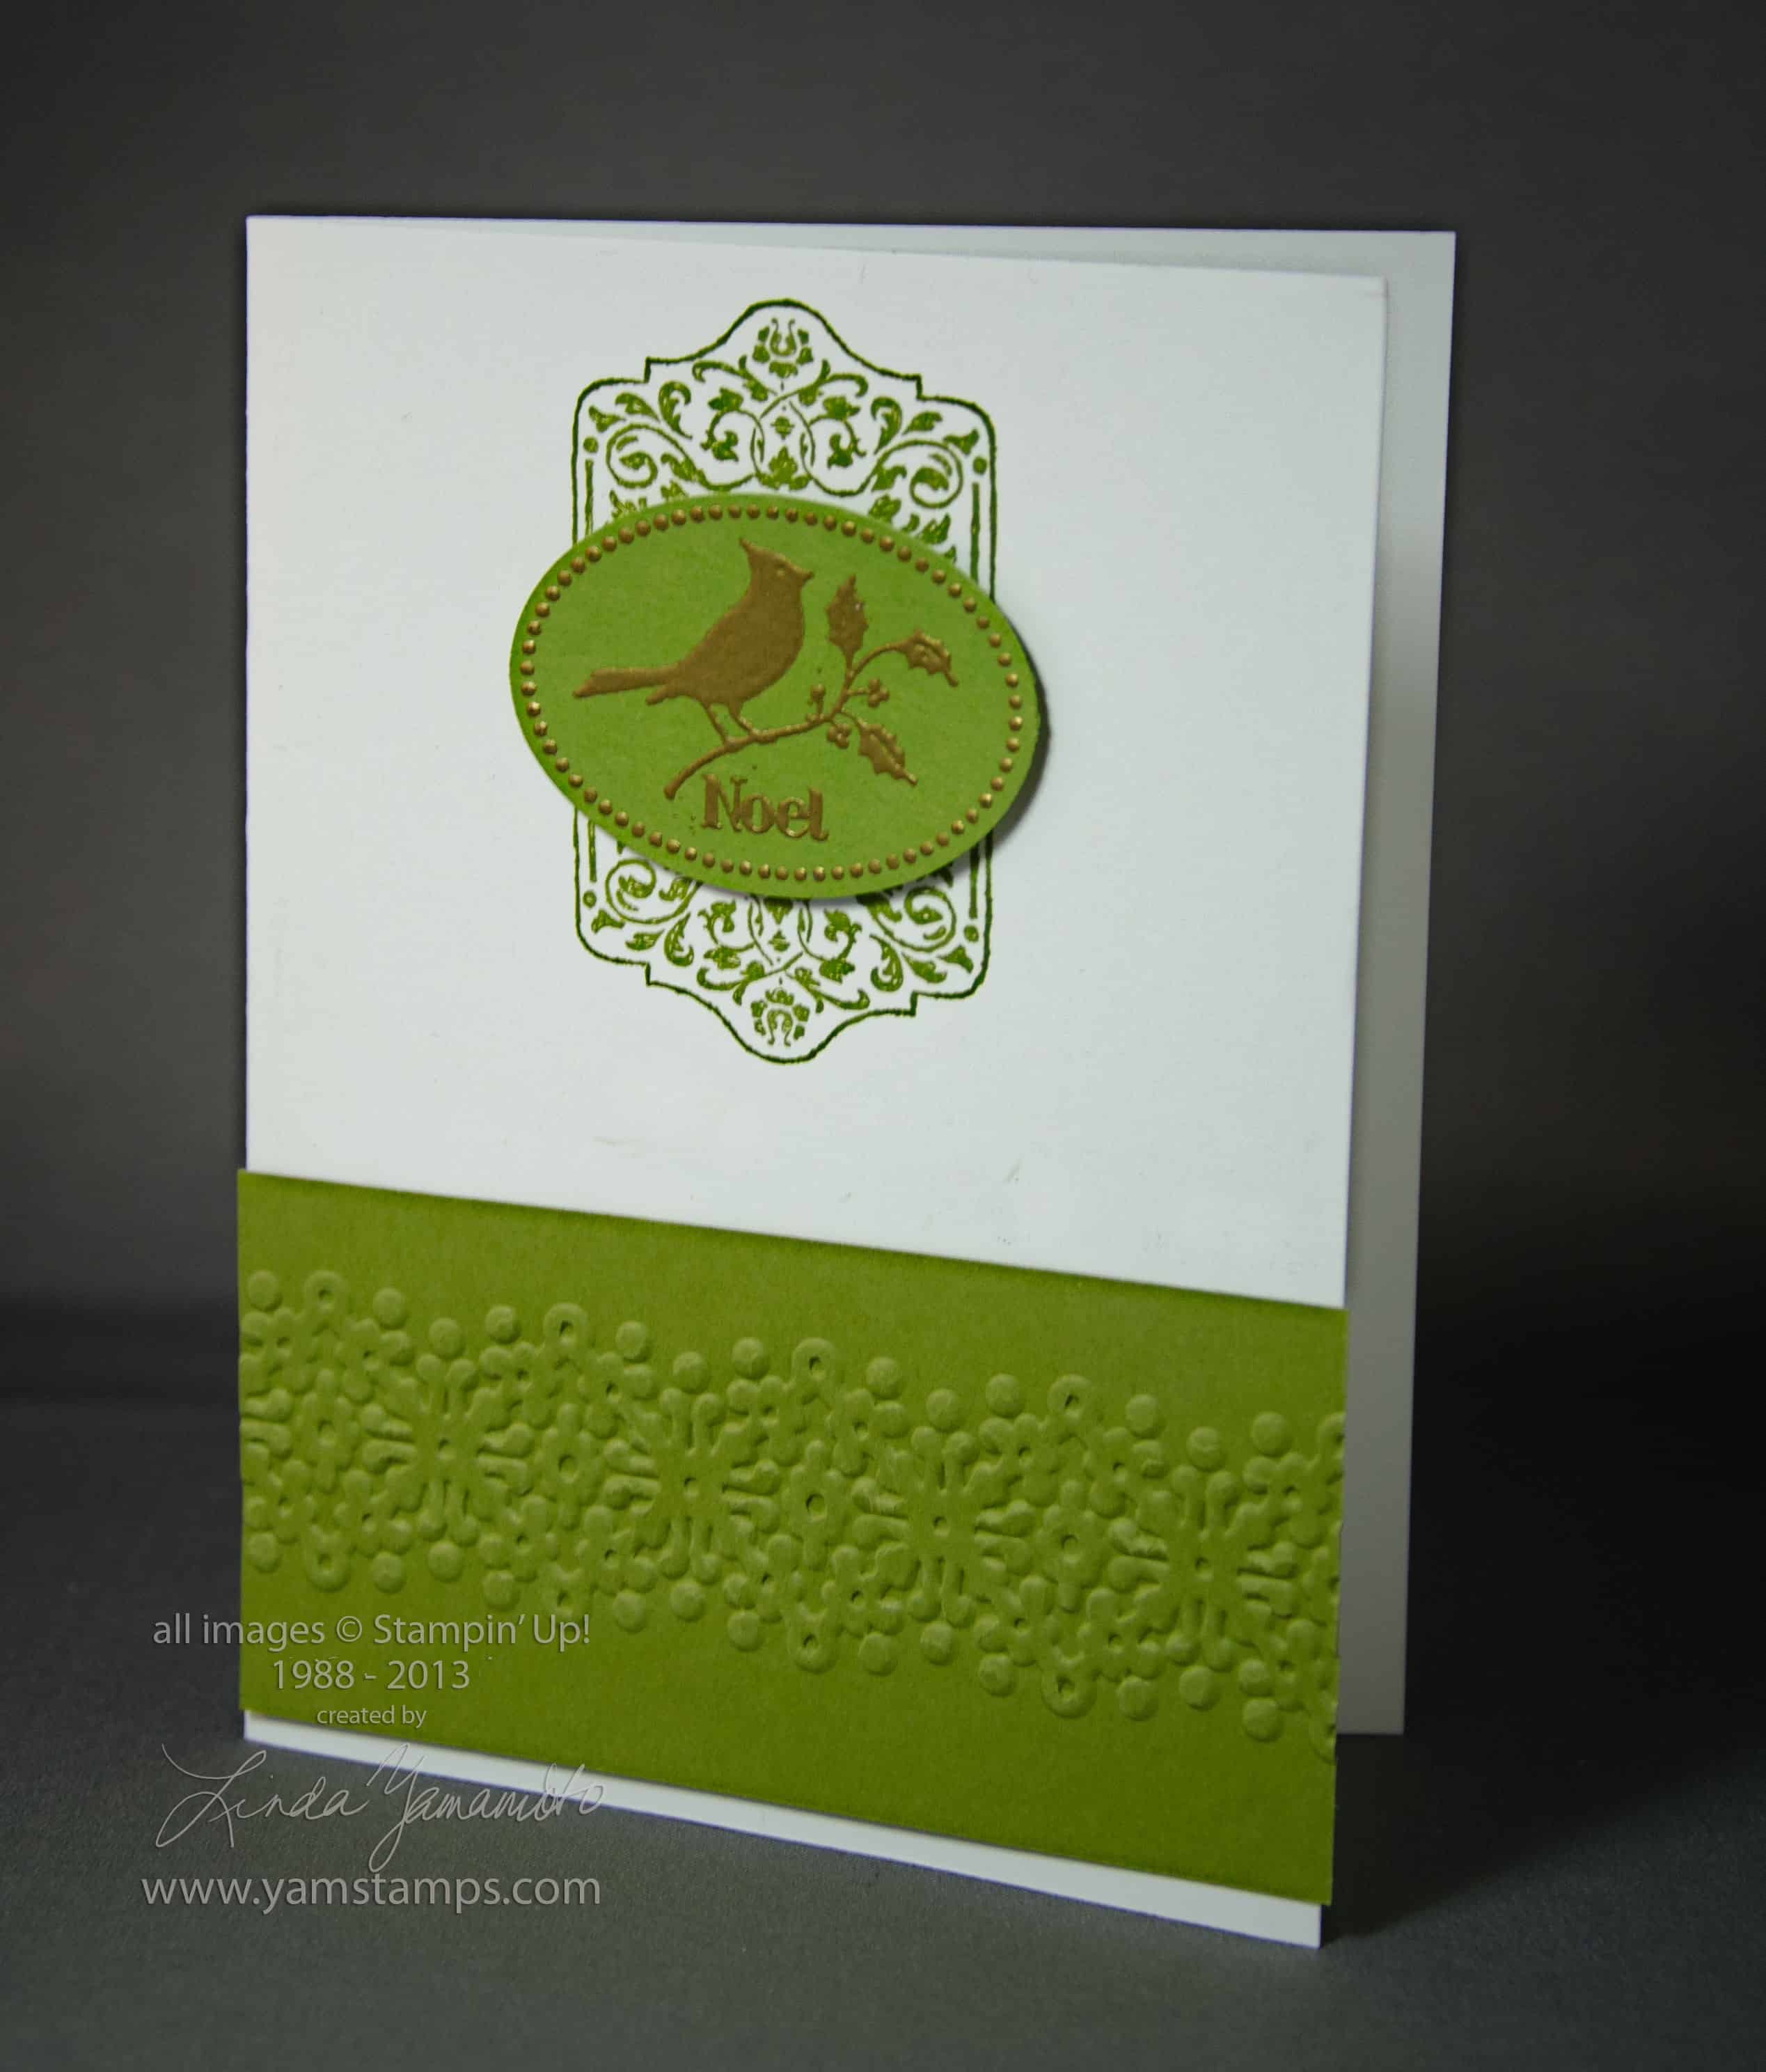
Anyway – we used the Chalk Talk set for the background image and the Warmth and Wonder hostess set from the Holiday Catalogue in the foreground. The strip on the bottom is embossed with one of the Delicate Designs border embossing folders.
I’m working with some new lights for photography & video and am still playing with positioning etc but I am also working with the motto “Done is better than perfect”. Don’t get me wrong, this doesn’t mean that I’m just going to throw things together for www.yamstamps.com or for my classes (online or in person), but it’s me pushing myself to complete things rather than having projects get stalled part waybecause I keep fussing with something until it’s “perfect”. I’m finding once I get things “done” sometimes I do have the time and ability then to turn around and work on it a bit more to make myself even happier with the end results. Are you like that? (Please say I’m not the only one!! LOL).
In the meantime, I’m getting ready for my Stampers Club get together next week. Stampers club is always open to new members, and the current length of commitment is 6 consecutive months. It’s a great way to do some regular crafting, have fun, budget your craft dollars and earn Stampin’ Up! hostess benefits without thinking! Contact me if you’re able to join us in Burlington or want more information!
Sep 2, 2013 | Announcements, Events, scrapbooking
Stampin’ Up!’s latest “best of” set is Best of Autumn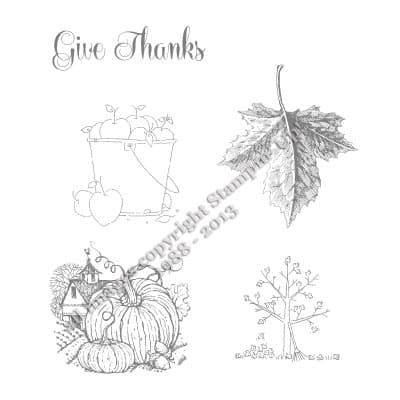 – featuring some seasonal images (and one saying) that will evoke that fall feeling….like the back to school rush isn’t enough to do that?! Anyway – a variety of styles is sure to suit your autumnal crafting needs! See the flyer here. Remember that each “Best of” set comes with a sticker, and once you’ve got six of them, you get to pick a free stamp set worth up to $17.95!
I personally always loved back to school time. I always loved (still do) shopping for back to school supplies! I think that’s part of my fascination with crafting – all those blank pieces of paper and tools waiting to be used….*sigh* If you’re also ready to get back to classes, come to one of my upcoming card making classes! This Wednesday is the monthly card class featuring 4 designs, and this Friday is the first of my Christmas Card Classes – featuring four different holiday cards each time. This way, you’ll have a number of unique cards to give to those special people, or discover a design that you like and get supplies to create a number of them, for your bulk card needs! Please contact me to register or use the paypal links on the events page for ease. Don’t forget if you register and pay for your Christmas classes before the first class, you’ll be able to make an extra card at each of the upcoming monthly classes!!
Also – I’m adding a few different classes to my slate of offerings – Wednesday, October 2nd I’m offering a Thankful mini-scrapbook using the Thankful Tablescape Simply Created Kit. Class fee will be $35 and you MUST register and pay by September 16th as I need to pre-order all the supplies. This class runs the same time as the monthly card class, and you CAN register for both classes (and you WILL NOT be here all evening! LOL) Friday, October 4th, I’m offering a Hallowe’en banner class. We’ll create a fun banner to decorate your door or mantel for Hallowe’en. Cost for the banner class will be $40, again, registration and payment required by September 16th. So – LOTS of different opportunities for you to get crafty in the upcoming while! As always – if you aren’t able to make it on the class date, get a group of friends together and I can bring the class to you! Visit the events page or contact me if you have questions or prefer to register via email!

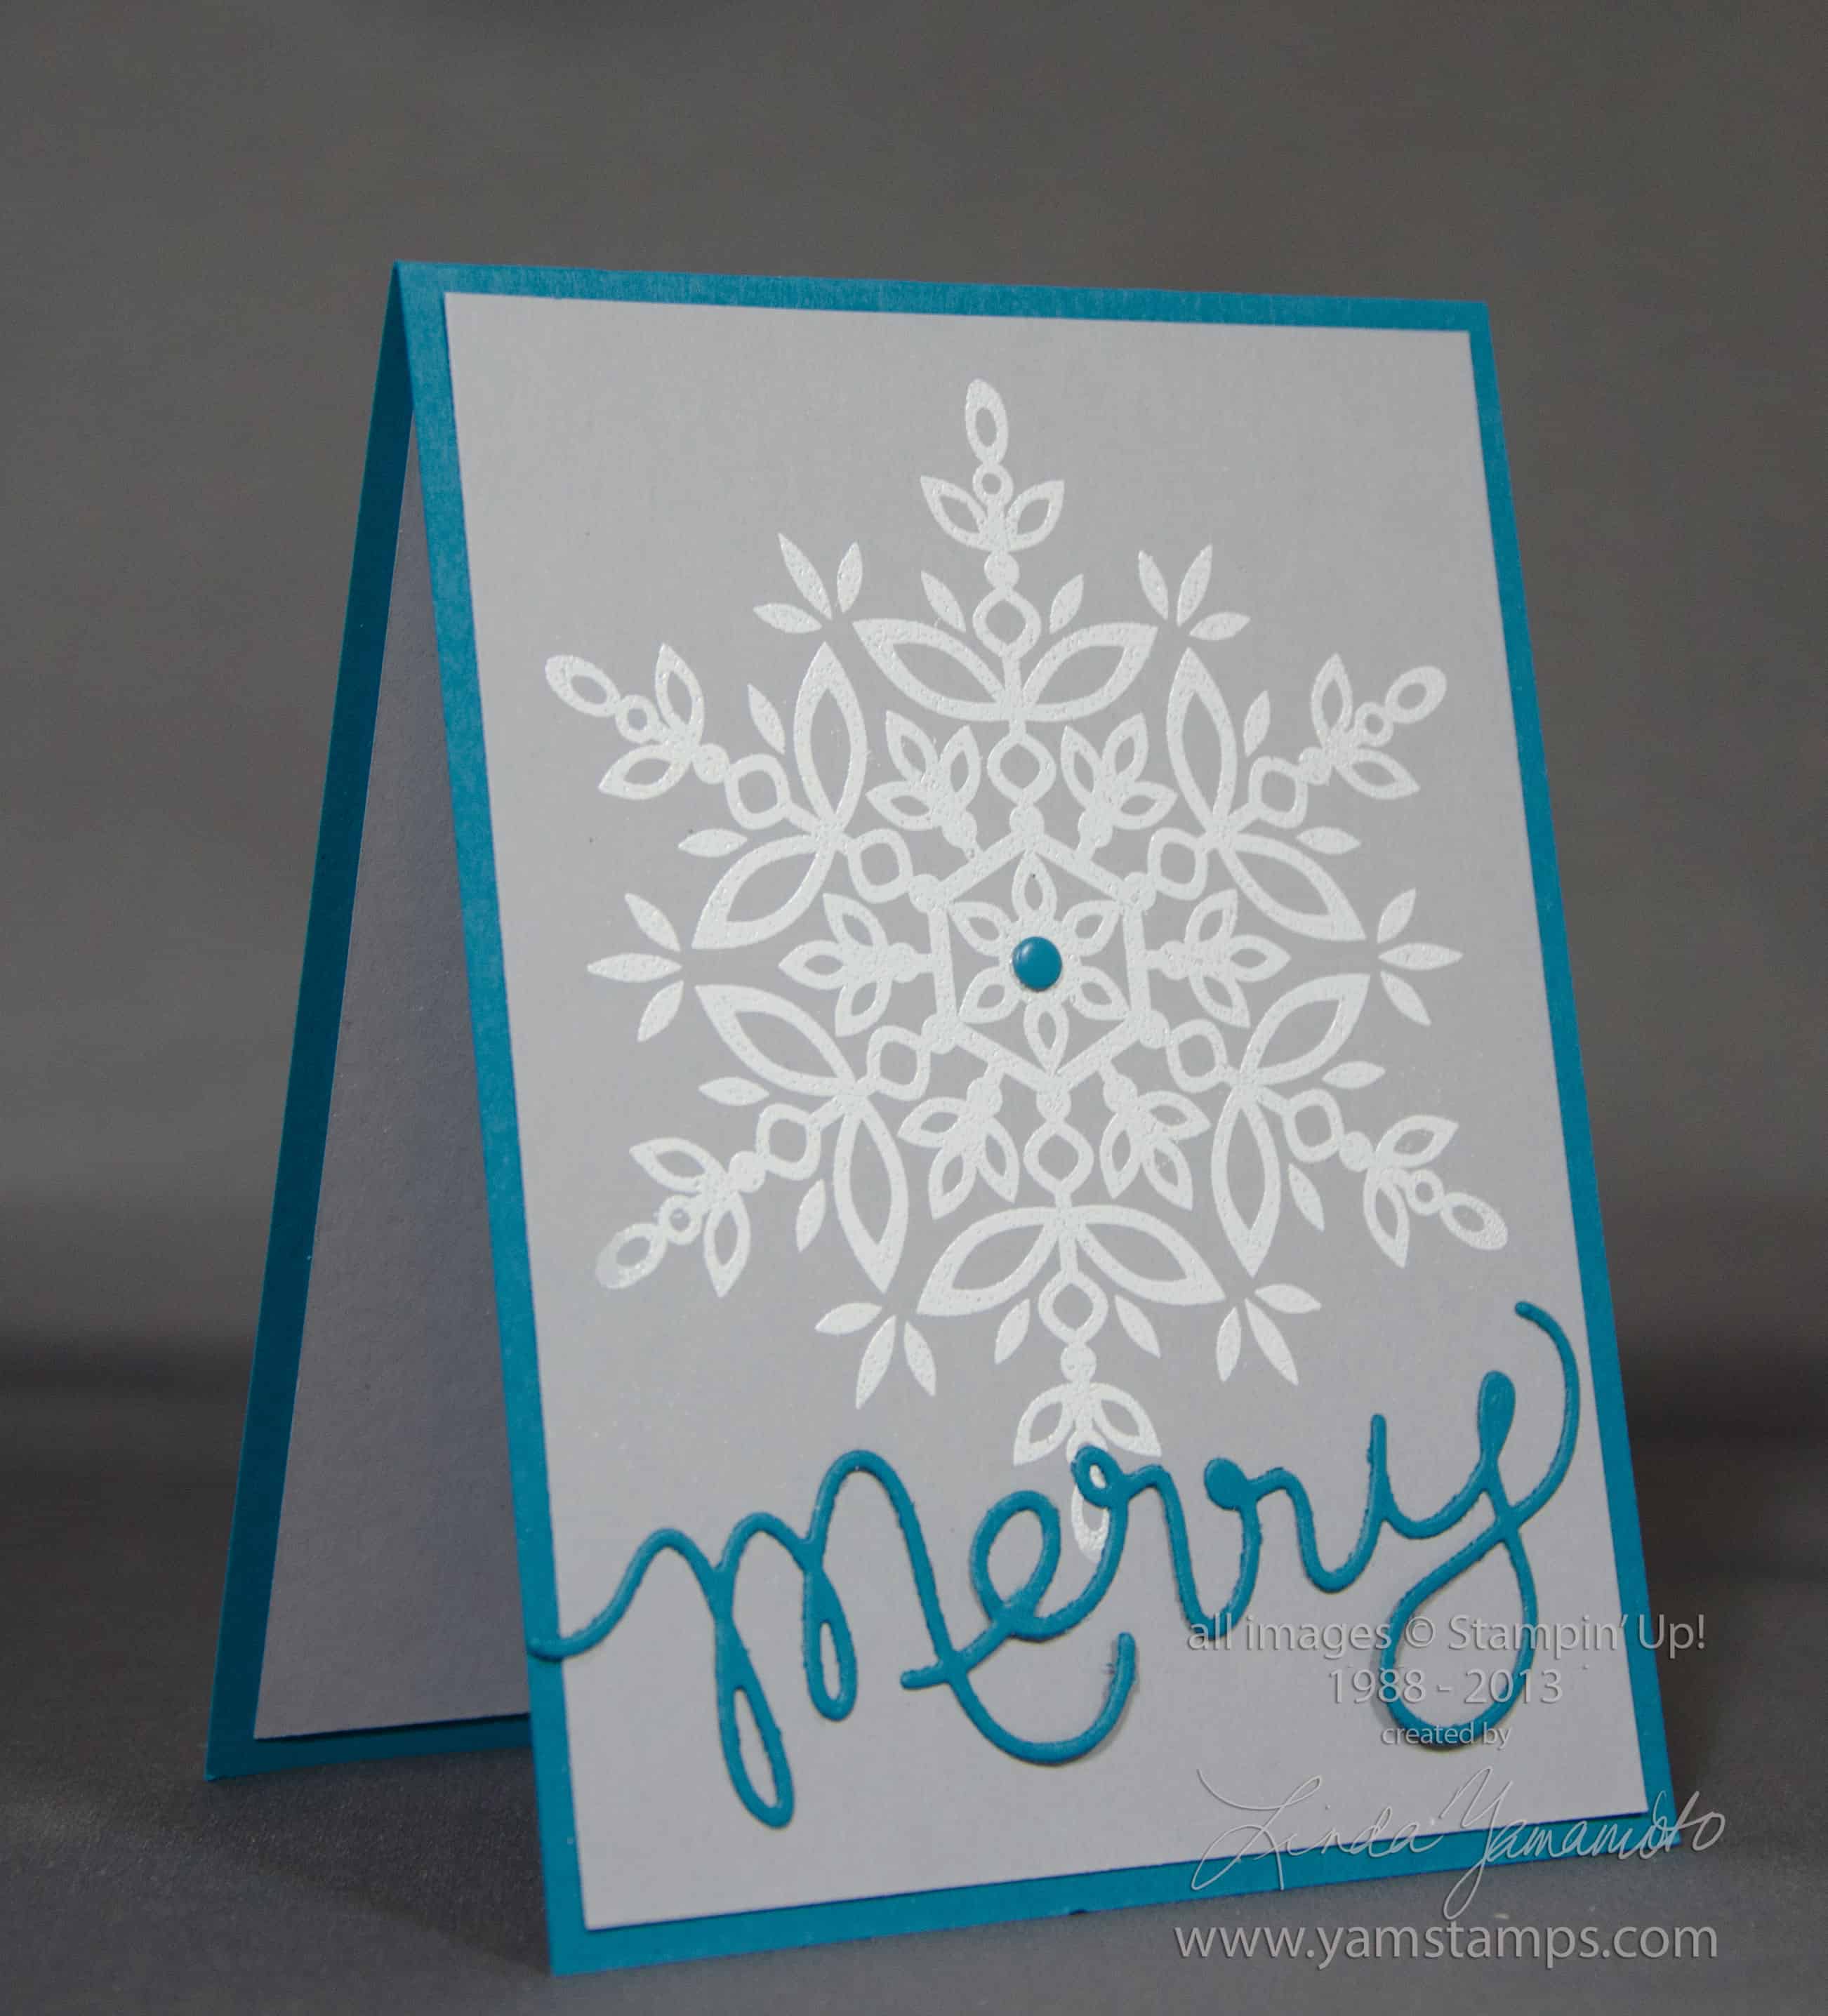 Never too early to start prepping those holiday cards. We created this card during Stampers Club this month. The large snowflake from Stampin’ Up!’s Festive Flurry set is heat embossed in white on Smoky Slate cardstock (love this new colour), and the Expressions Thinlit “Merry” adds the sentiment. An Island Indigo Candy Dot ties it together. I really like this card, but I have to admit that initially during Club it was driving me crazy…until I figured out a hint – and I’ll share it here.