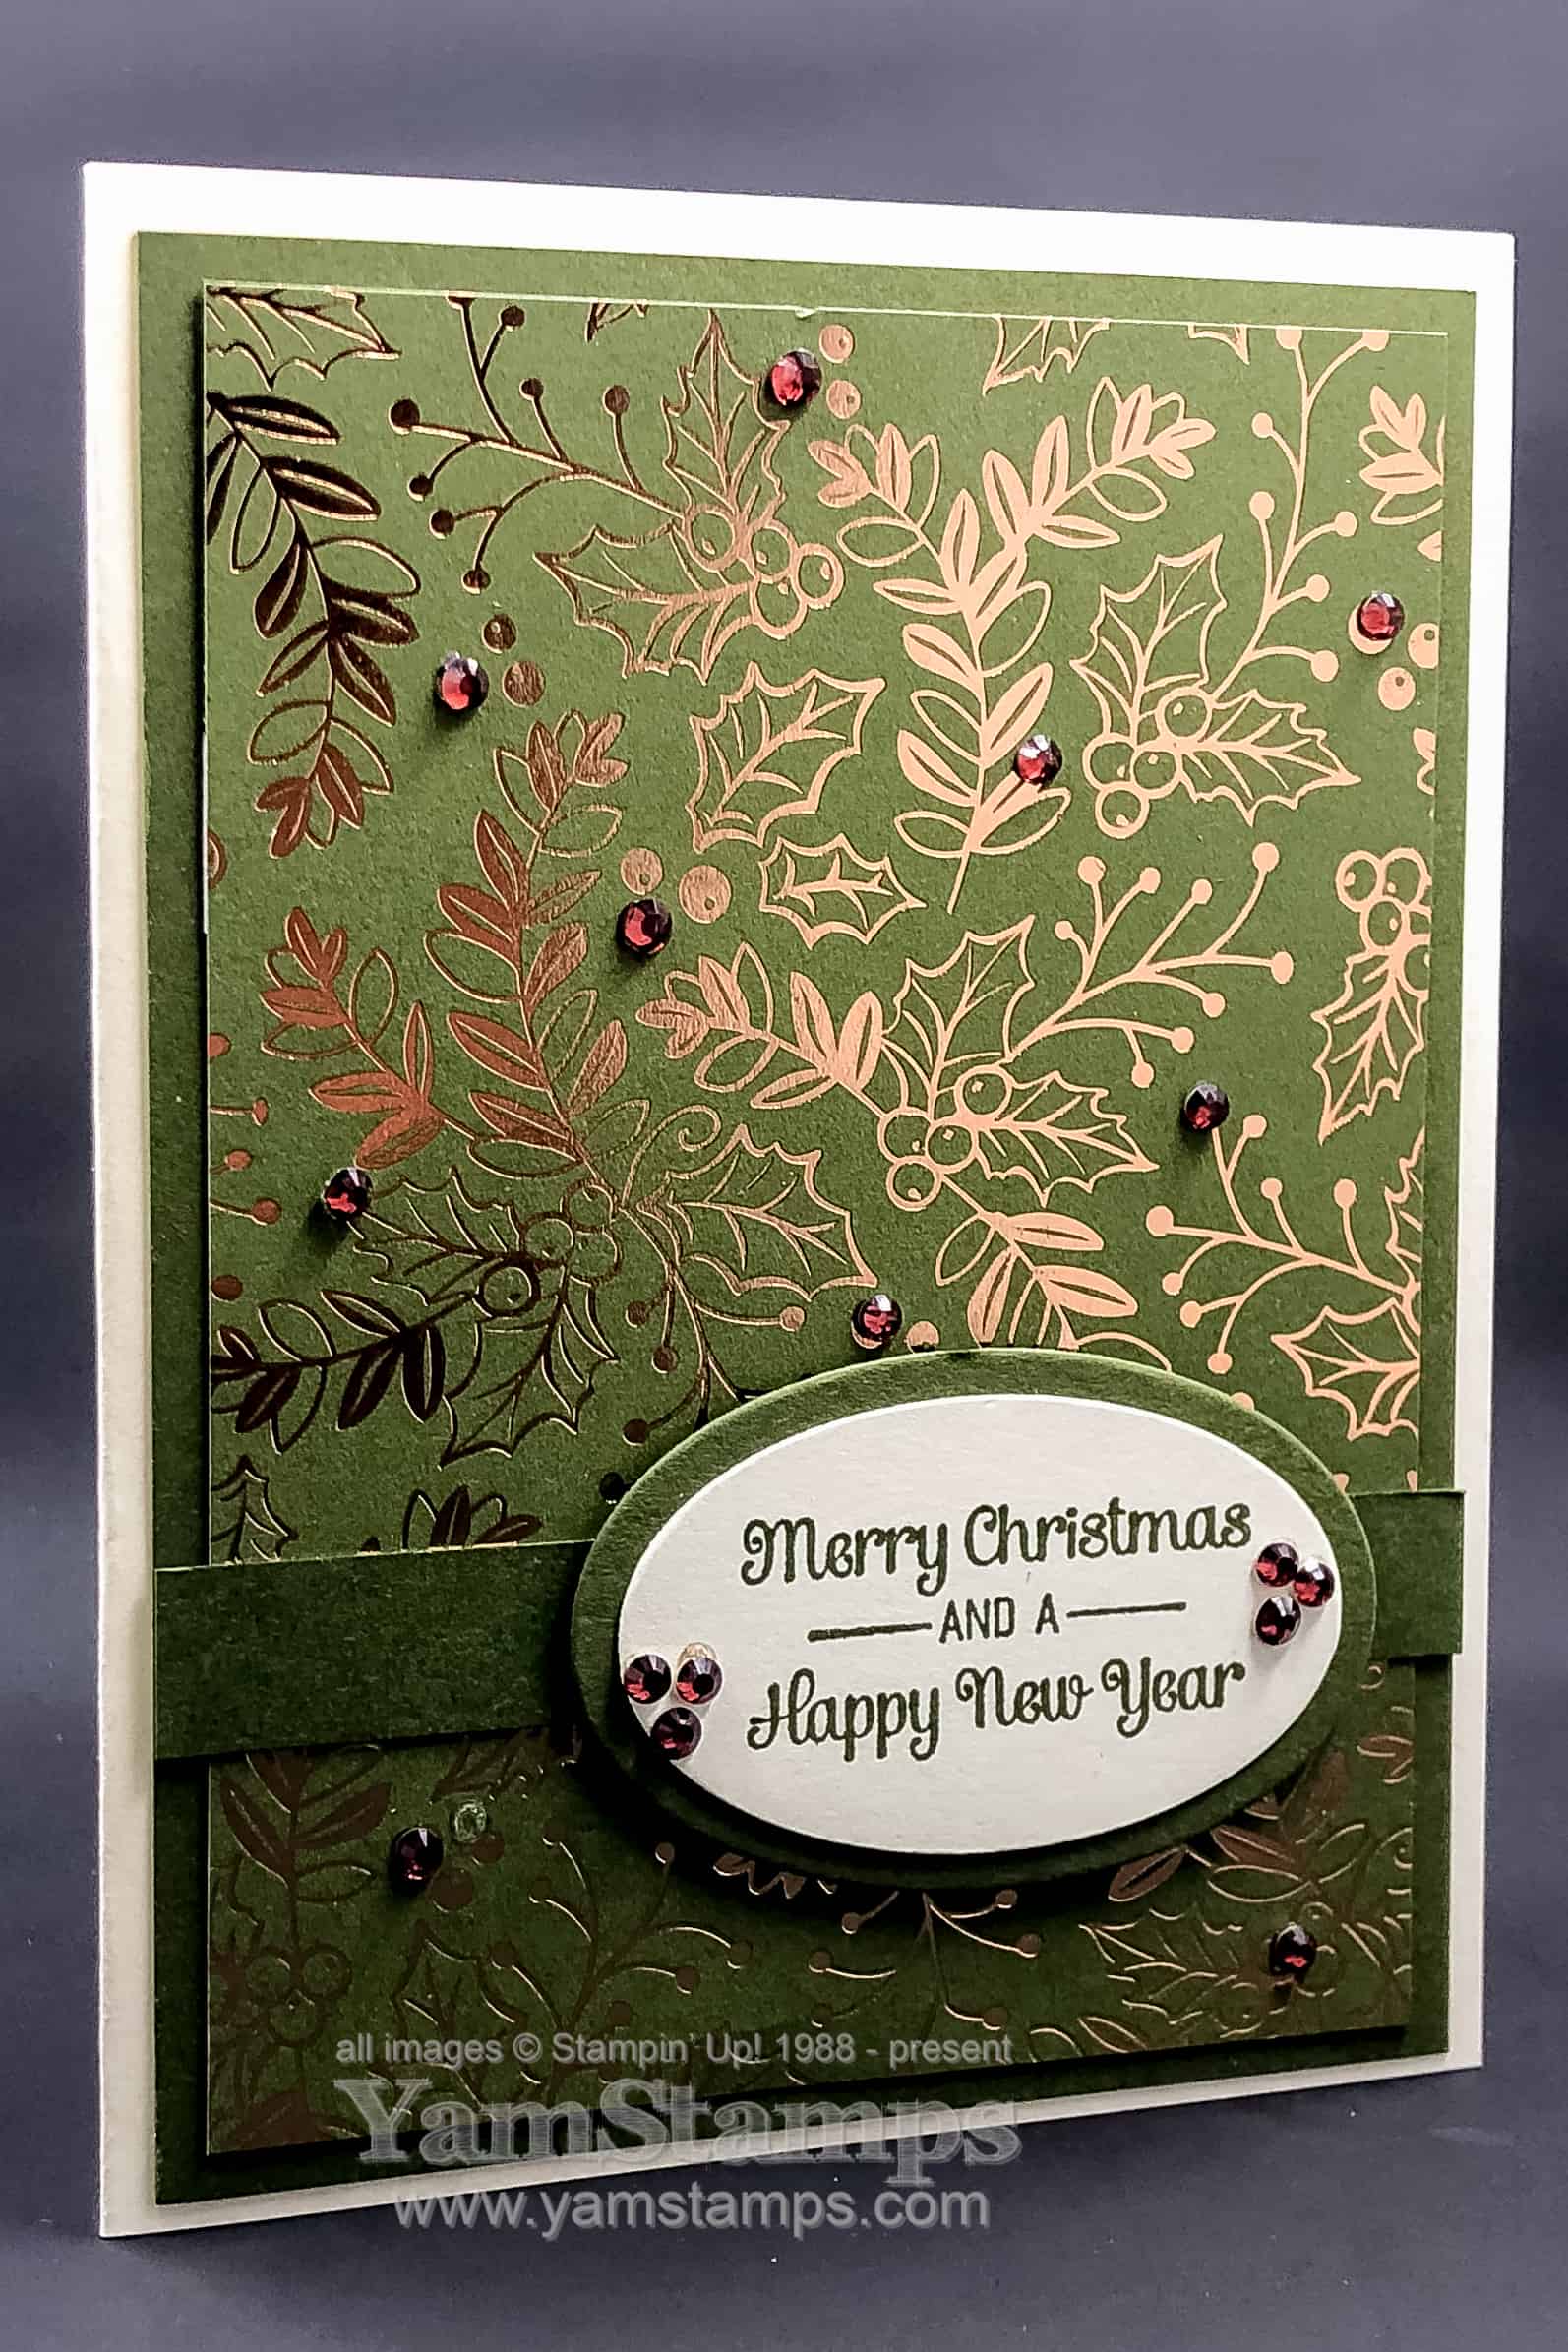
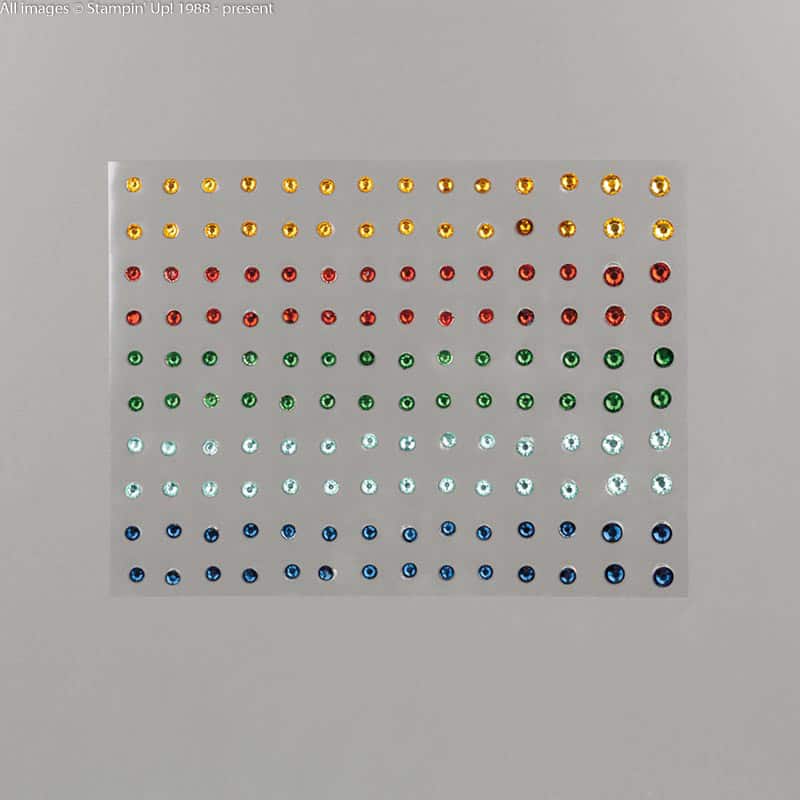
Here’s a beautiful and easy Christmas Card for you! We made this as part of the October Christmas Card Class. Participants received a full package of Holiday Rhinestone Basic Jewels along with all their other class supplies. We used some rhinestones for our projects and then they took the rest home. Or they chose not to put them on their projects and reserved the right to do so later! LOL
I love the Brightly Gleaming Specialty Designer Series Paper from the Stampin’ Up! Holiday Catalogue. It’s featured on this quick card, which is blinged up a little to give it a little more glamour. (More glamour optional, of course).
According to the paper description, the green colour used is Mossy Meadow, so I used Mossy Meadow Cardstock and Mossy Meadow Ink to coordinate. I also used Very Vanilla Cardstock for the main card and sentiment. I like using Vanilla or White as the cardbase because it’s light enough to write on for the inside of the card, and it’s pretty neutral. I tend to use Whisper White more often than not, so have to “remind” myself to use Very Vanilla too! It’s appropriate for this card, I thought, since the Mossy Meadow has more warm/yellow tones. (Plus Very Vanilla is one of the colours also used in these patterns!)
The sentiment is from Itty Bitty Christmas – not all the images are itty bitty…and then it’s die cut with the Layering Ovals Dies. Frugal Friday Fanatics will probably realize that the backing oval of Mellow Moss is cut from the centre of the backing cardstock. If I was totally clever, I would have cut that belt strip from the centre of the backing cardstock, but I know my limits…so cut that from a scrap of Mellow Moss Cardstock instead.
I actually went a little overboard with the rhinestone accents and ended up removing some…and when I posted this picture I realized I hadn’t managed to scrape the glue dot off along with one of the rhinestones. Can you find the spot I missed? (Well at least the one spot I can see right now, who knows, there may be more). I’ll be sure to remove it before I put the card in a matching Very Vanilla envelope….otherwise the recipient won’t be able to get it out!
If you’d like to join me – there’s ONE more Christmas Card Class coming up – November 27th, in Burlington ON. See the YamStamps Events Page for details, and contact me to register. Otherwise, if you’re on the YamStamps Mailing List, you’ll be receiving the next installment of the Twelve Weeks of Christmas project emails next Wednesday – starting on 3D projects/gifts and packaging! Of course, I will also still be sharing other beautiful and easy Christmas Cards here on the YamStamps blog – because we’ve got a bit more time before Christmas arrives!
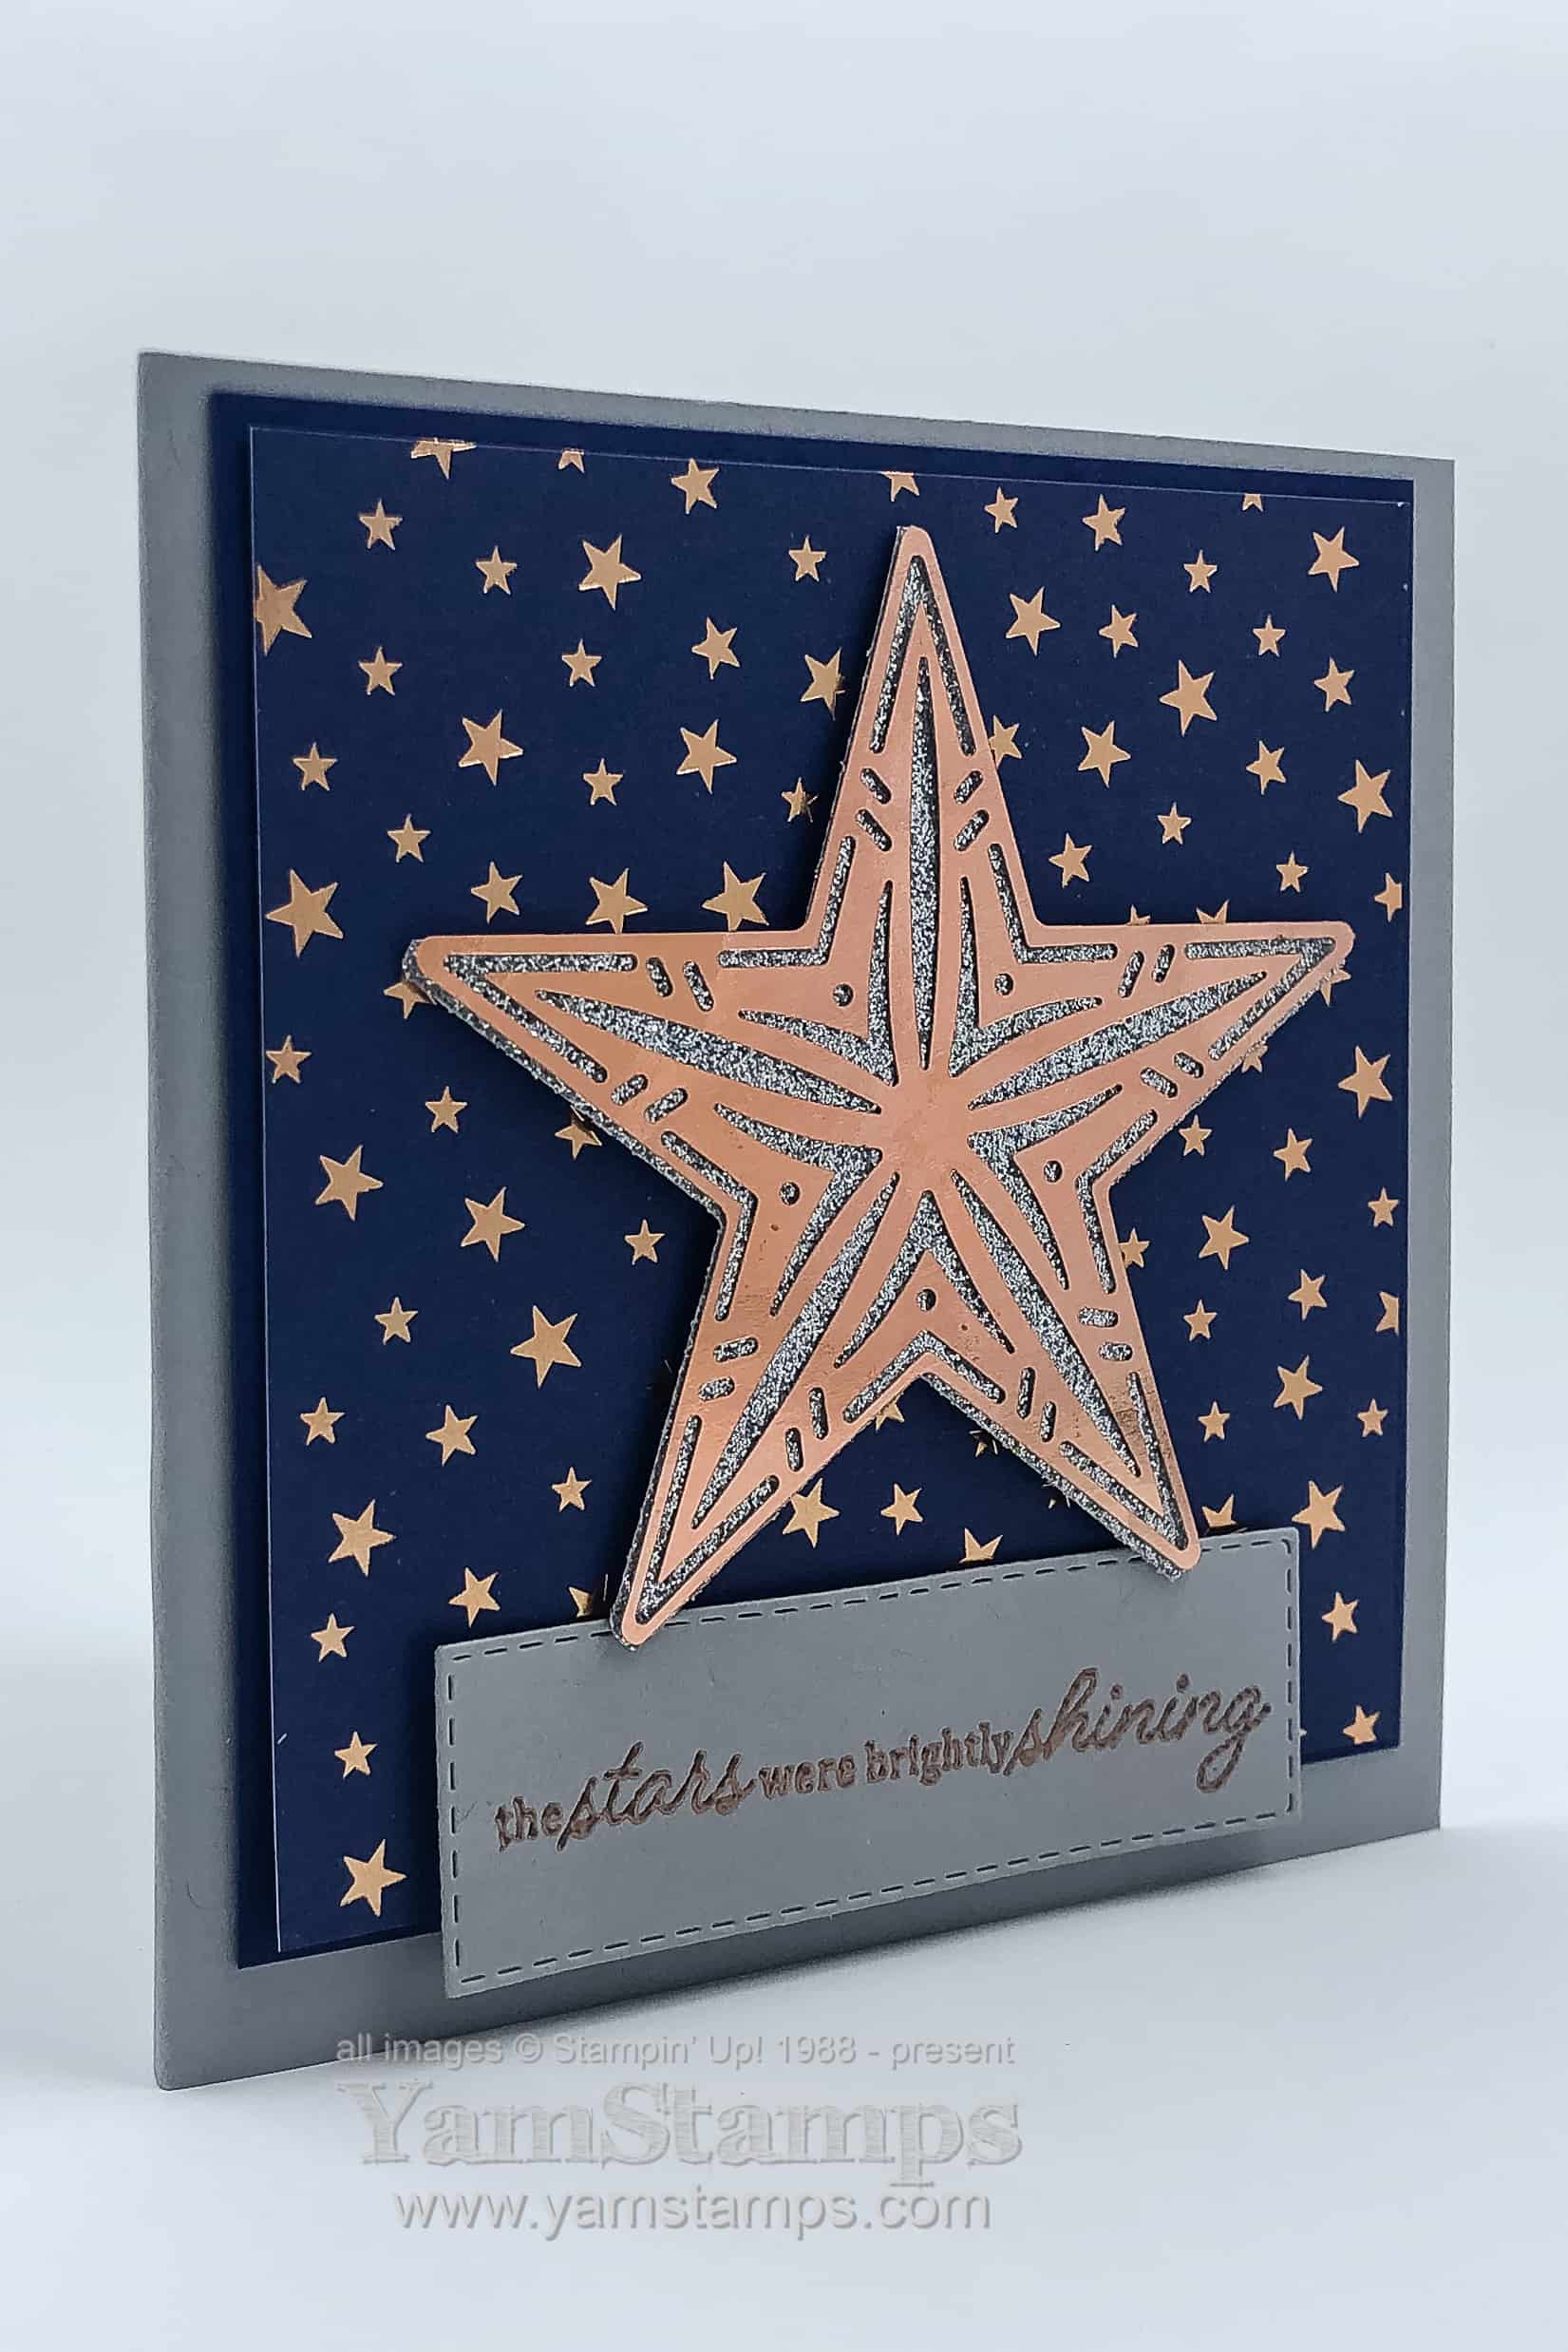
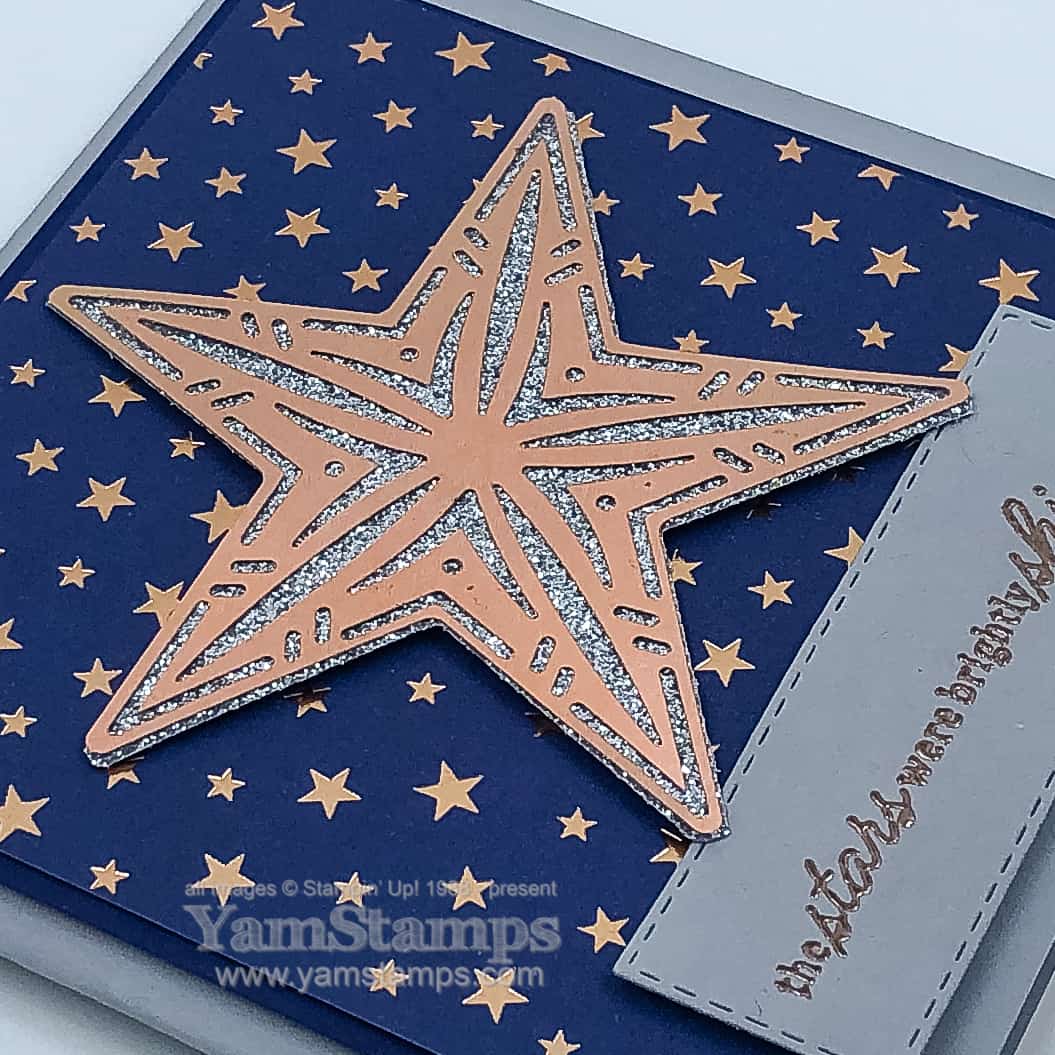
This glittery star card was one of my personal favourites from last month’s Christmas Card Class! While we set it up as a holiday card, I’m sure you could use this accent on a celebratory card for any occasion. (Oh, and surprise, it’s navy and silver….but there’s copper accents and the card is grey….so I’m kind of getting away from that recurring theme? Maybe? I’m trying, really I am!). Though now that I write that, I realize what the colour scheme was for the first of the YamStamps Twelve Weeks of Christmas project emails yesterday…. (Get on my newsletter list so you don’t miss any more of the subscriber exclusive projects!).
This is a square card, because I really wanted the large star to take up a lot of space on the cardfront. The background is the Brightly Gleaming Specialty Designer Series Paper so I took my colour scheme from that. The large copper foil star is from the Brightly Gleaming Foil Elements – you get 10 of them in the package (if I counted correctly). While I was playing around with the elements, I discovered that the star is the same size as one of the Stitched Stars Dies! So the Silver Glimmer Paper was cut with the star and then the Copper Foil Star was stuck onto it. Once it was secure, we just had to trim the ends of the silver star – because the die has pointy star ends and the foil element is rounded.
I try not to stray too much outside a bundle if possible, but I couldn’t resist using the Shine Bright stamp set sentiment – because I thought it was perfect! If you’re keeping track – the Stitched Stars Dies come in a discounted bundle with the So Many Stars stamp set, while the Shine Bright stamp set comes in a discounted bundle with the Stitched Brightly Dies. It’s heat embossed with Copper Embossing Powder and cut out with a Stitched Rectangle Die. Even though it’s an extra step to die cut a sentiment, it often means I don’t have to re-do a card because at the last moment I stamped the sentiment crookedly! Just stamp the sentiment on a scrap piece of cardstock, then die cut (and of course, position the die so the sentiment is squared and centred within the cut out portion!).
And it was pointed out to me that I missed an embellishment opportunity – a little rhinestone bling in the centre of the star?! Ah well – for the next time I make this card – or YOU could make it!
Are you a member of the Paper Crafting with YamStamps Facebook Group? I did a last minute Facebook Live on Wednesday, showing how you can heat emboss with Stampin’ Up! inks. Click on join and follow so that you can be notified of future Lives – because I’m on a mission to do a few more live videos on a regular basis! If you make a version of a glittery star card, please post it in the group – I have a participation challenge going on right now! Thanks for stopping by.
Are you on the list? The 12 Weeks of Christmas List, that is… If you receive the weekly YamStamps Paper Crafting Newsletter, then the answer is YES! If not – well, I think you can figure that one out…
You’ll want to be on the list by Wednesday, October 2nd at 1pm so that you can receive the first of the Twelve Weeks of Christmas Projects! This is an exclusive subscriber THANK YOU. In appreciation of being on my list, I send subscribers an additional email over the 12 weeks leading up to Christmas. Each week has a different holiday project, complete with photo, supply list and instructions – like you’re used to with the regular YamStamps Newsletters. The Twelve Weeks Projects will be cards for the first few emails, then we’ll move on to gifts and wrapping ideas. Lots of inspiration for your holiday crafting!
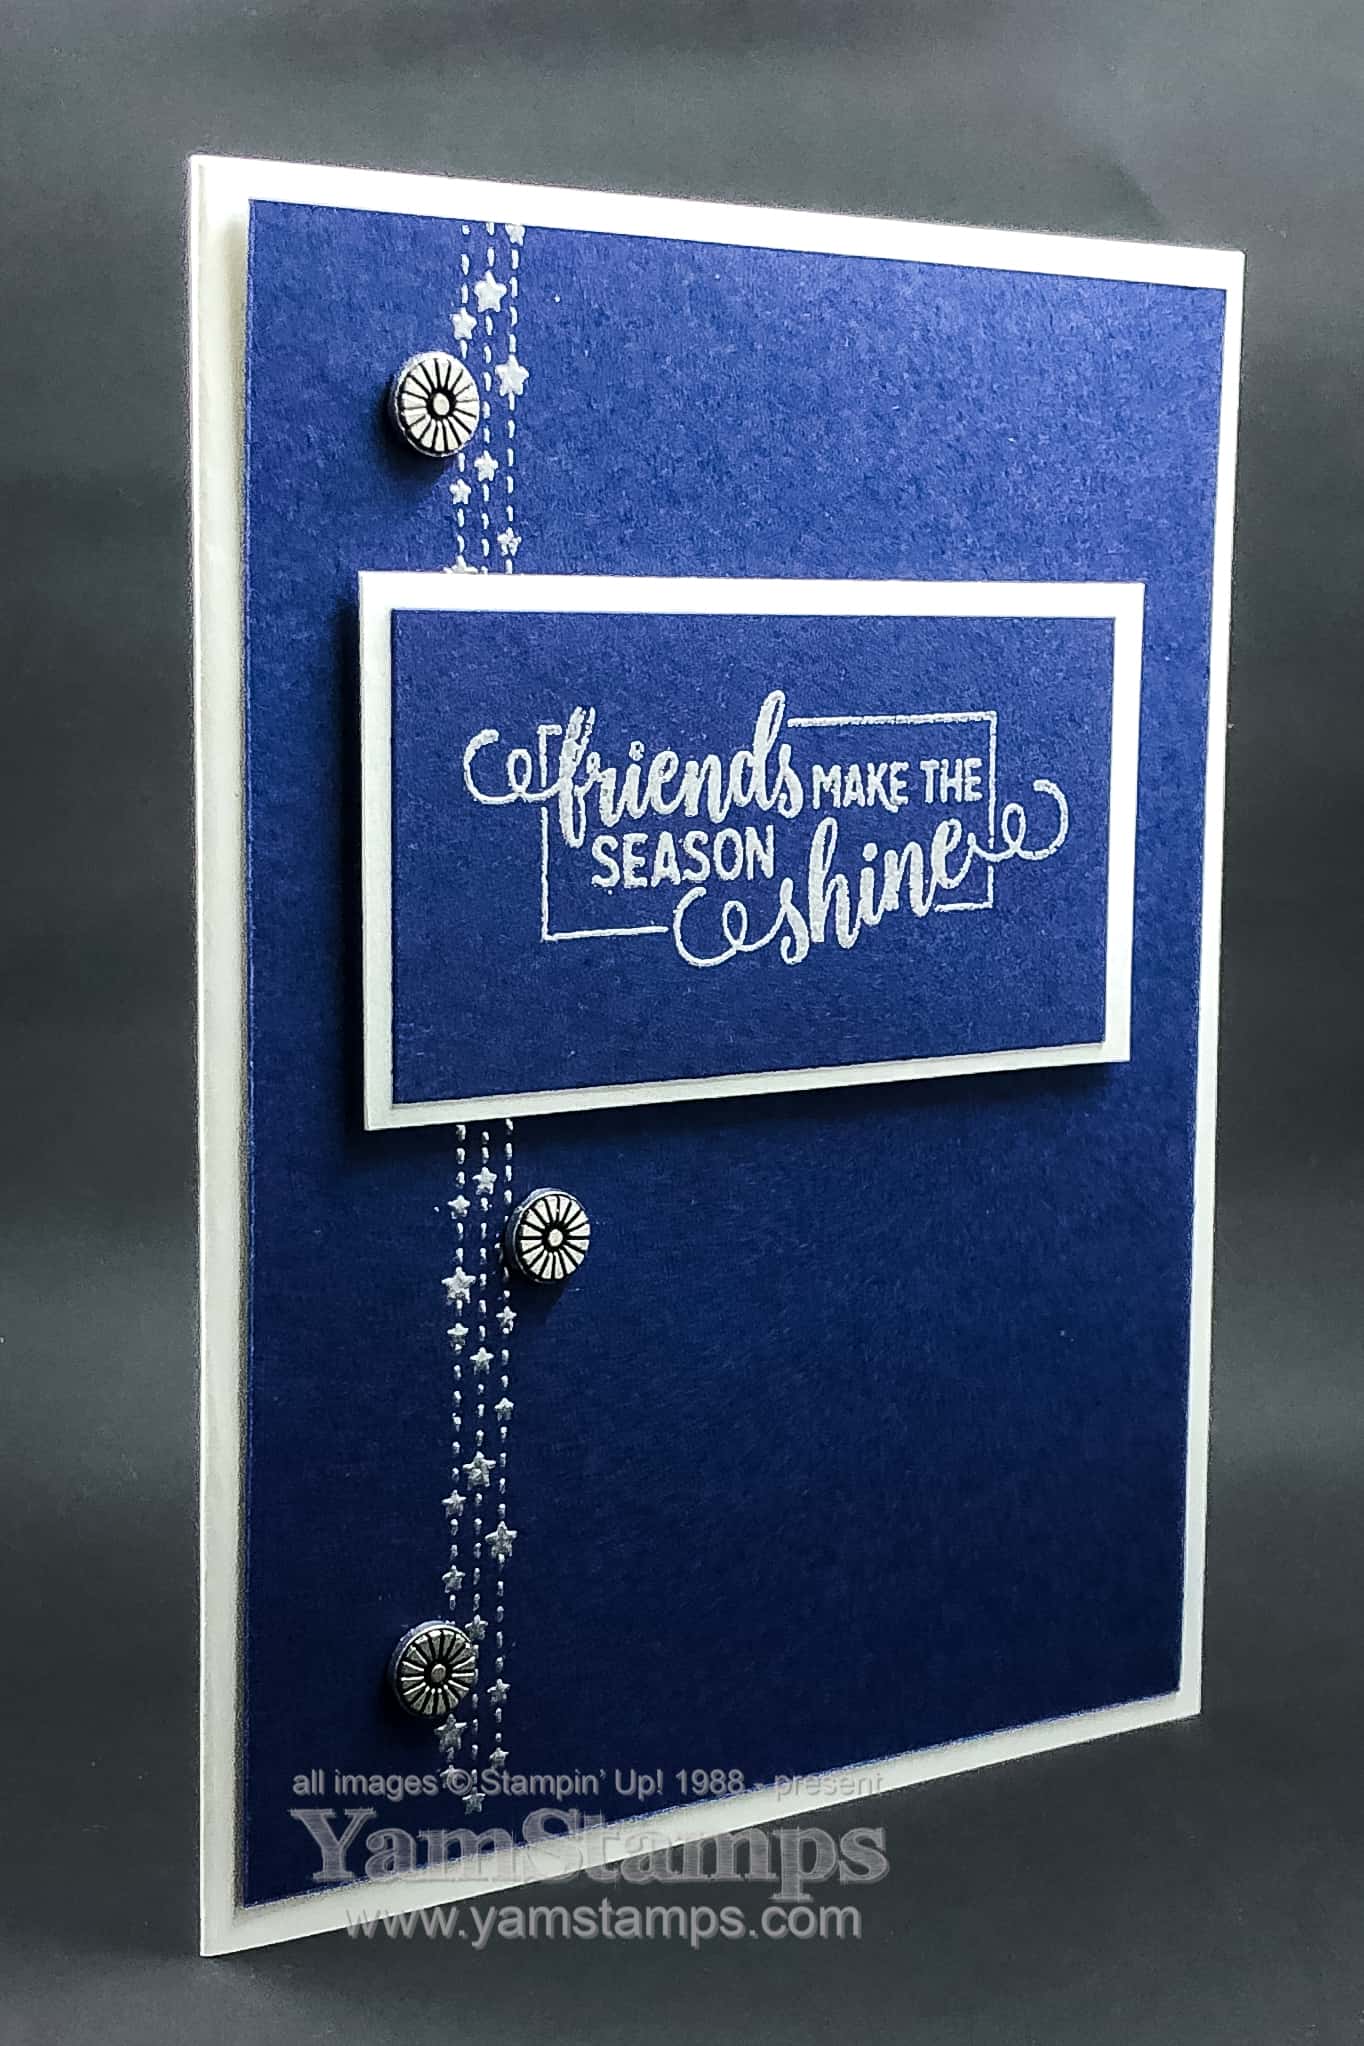
I used my favourite colour combination for this blue and silver holiday card! Plus it has some teeny stars on it – so an all around favourite for me I think. This is from the August Christmas Card Class – and I liked it so much, I included a variation of it for my regular September class too!
My Christmas Card Classes include product – and it’s typically a package of embellishments that we use on our cards and then class members take the remainder of their packages home to use for other projects. In August, I was only working out of the Annual Catalogue, since the Holiday Catalogue wasn’t available for customer orders yet! We used the Designer Elements in that class, and then used Clear Faceted Gems this month.
By the way – If you like bling, you’ll want to register for the October Christmas Card Class – we’ll be using the Holiday Rhinestone Basic Jewels!
This blue and silver holiday card could be used for Christmas, Hanukkah or New Years, don’t you think? The sentiment and dangling stars are from the Making Christmas Bright stamp set (the one with the Christmas bulbs!). The variety of stamps in the set means you can come up with a variety of “looks” from one stamp set. To extend the dangling stars, we used the Stamparatus to make sure the images were perfectly in line, and then stamped them twice – the sentiment hides the gap. I didn’t mind the lines running off the top of the card, but I wanted the finished effect at the bottom. (which I now realize you can’t really see well for the watermaking on the photo. Sorry!).
he image and sentiment were stamped in Versamark and then heat embossed with the Silver Embossing Powder. Heat embossing is always a winner for holiday cards in my opinion! The card is Smoky Slate, which I find really compliments any silver accents, without drawing attention away from them.
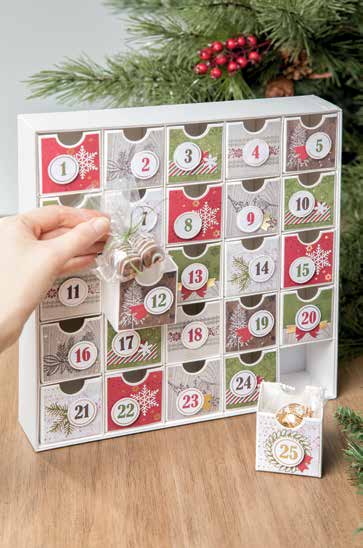
Hard to believe, but I’ve only got two more scheduled Christmas Card Classes this year! You have two more chances to make some beautiful handmade cards to give to the special people on your card list. Plus there’s an Advent Calendar Class too! Wednesday, November 13th – 1pm or 7pm – you can come to class, pick up your Christmas Countdown kit and use my stamps and ink to complete the project!
The class fee of $55 covers the kit (plus shipping/taxes) and the use of my adhesives/ink/stamps to complete the kit as per the instructions. You can contact me to register, or use the PayPal link on the YamStamps Events page. Registration & payment required by October 30th, or additional fees may apply in order to ensure that your kit will arrive in time for class.
Check out an alternative use for the kit that I shared here on the YamStamps Facebook Page! BONUS – you don’t have to use the kit for one or the other! The boxes have notches on two sides, so I’m thinking that after the Christmas season is over, I’ll flip the boxes around and use them for something else! What would you use them for?
Oh – and for my next Christmas Card share, I promise to try to show something OTHER than a blue and silver holiday card. No promises about the card AFTER that one though. hahaha!
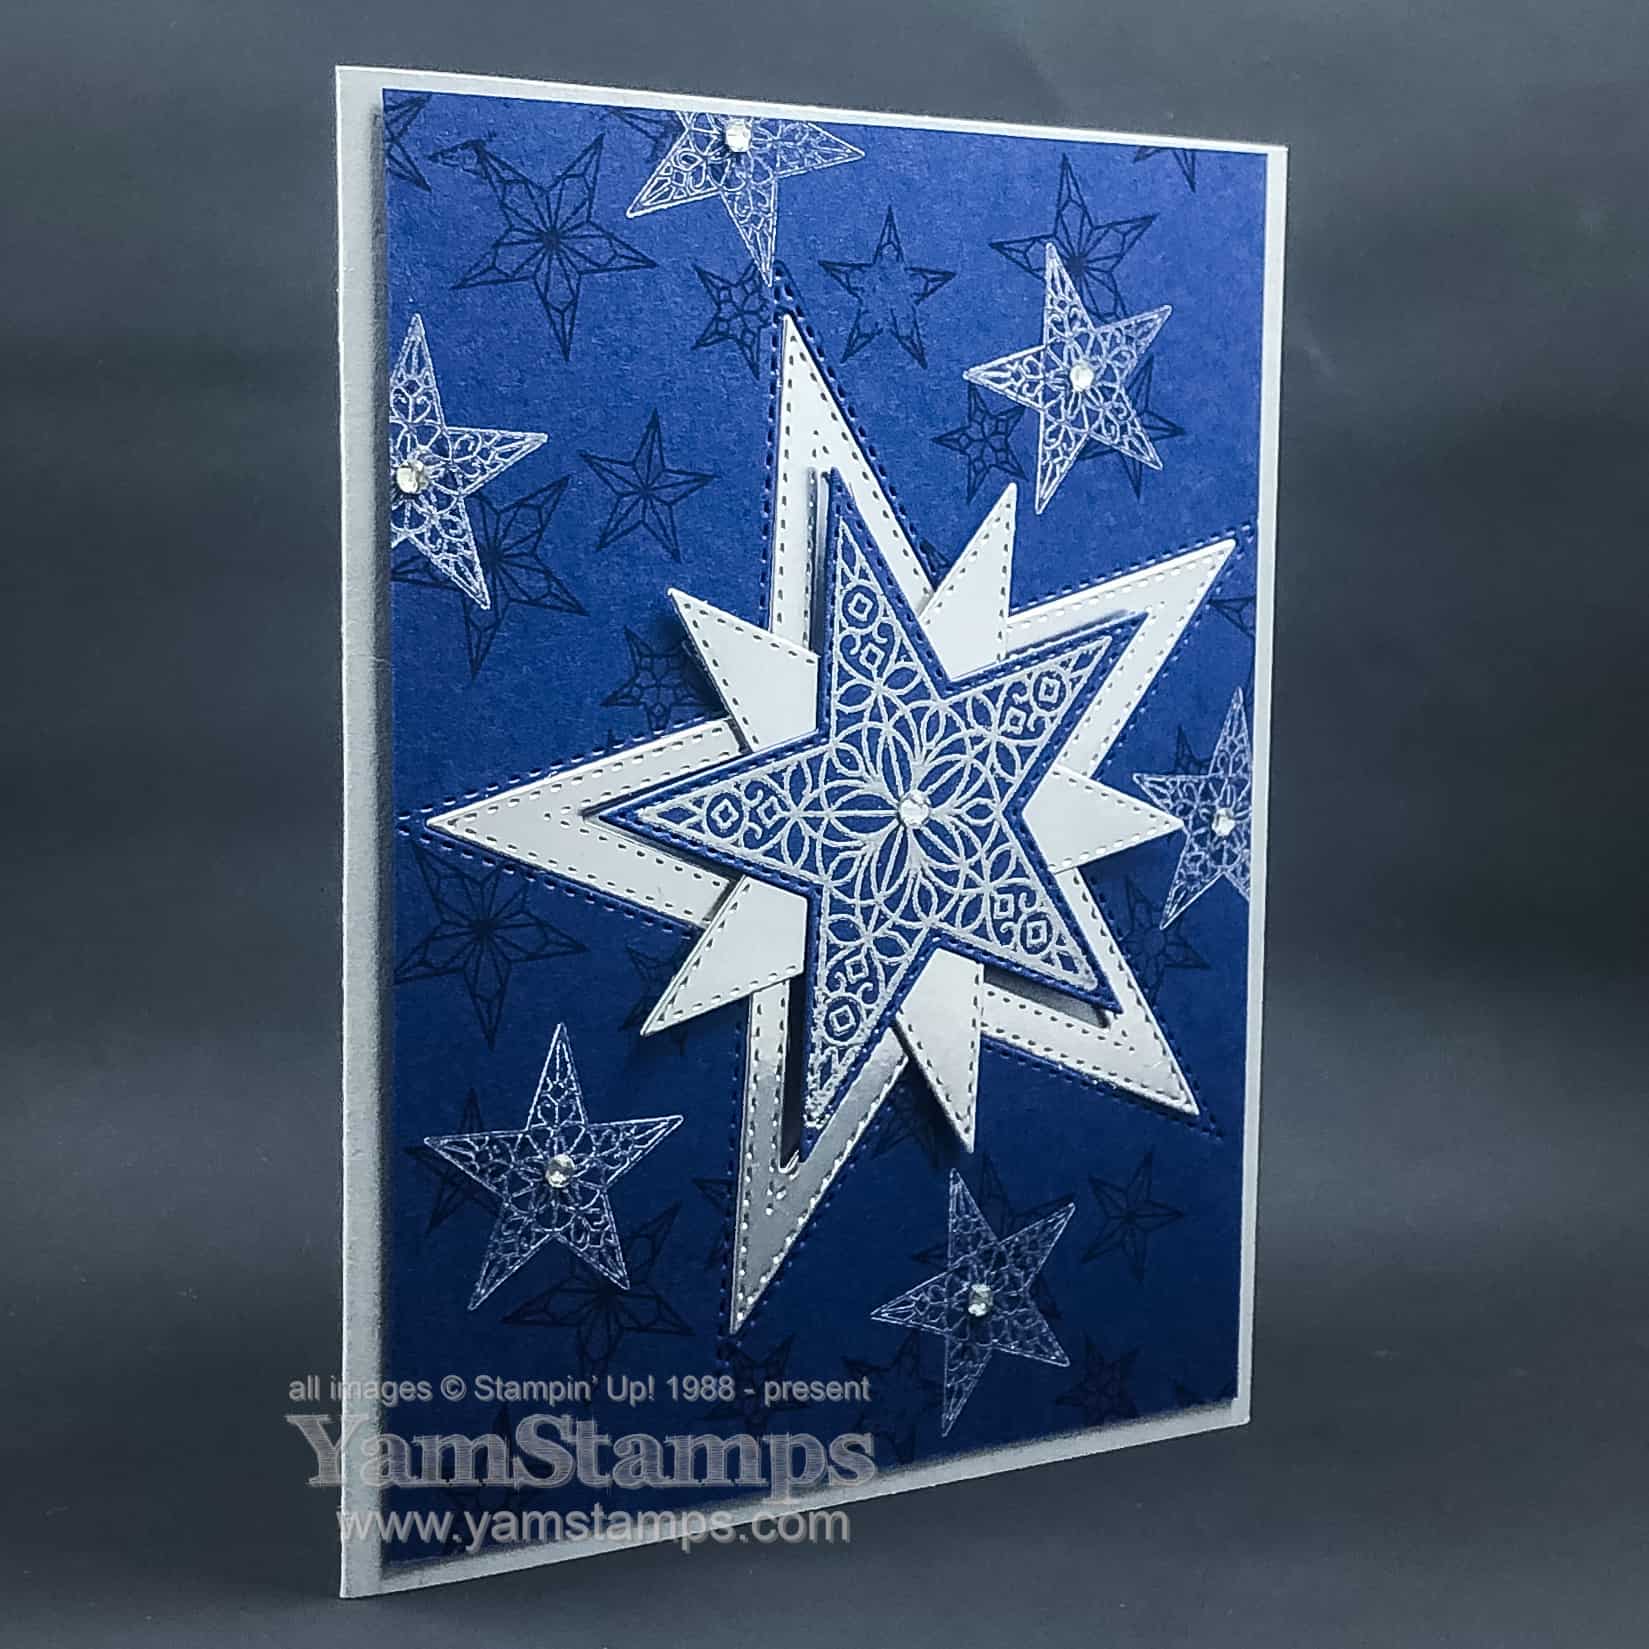
One of the perks of being a Stampin’ Up! Demonstrator is early access to catalogue product. This die cut star card was made using products from the Holiday Catalogue. I created this for a swap with fellow demonstrators while the summer heat was still in full effect!
I love the combination of navy and silver, so chose to use it for these starry cards. On this card, I did silver heat embossing, but you could also use the new Silvery Shimmer Delicata Metallic Ink Pad. The Night of Navy star is die cut from the background, and layering stars were cut from Silver Foil Sheets. The largest silver star is fitted into the opening in the Night of Navy cardstock, and the the other stars are turned and layered in place. A little bling from rhinestones also helps to make thisdie cut star cardeven shinier.
While there was a fair bit of die cutting involved in this card, it was actually not to bad to do assembly-line style. I did all the die cutting at one time, then I did the stamping and assembling. Last was the bling. I found the Take Your Pick Tool “spatula” helpful in picking up and placing the rhinestones. I usually just use my finger nails if I’m only doing one or two, but doing a whole bunch of rhinestones on a whole bunch of cards was a different story.
While the Stitched Stars are great for the holidays, they can also be used for other card giving occasions! This month’s card classes feature a fun birthday card created with these dies. I want to keep some of the surprise for class and Stampers Club members, so I’ll share that version a little later this month.
There are a few spots still available for September’s Christmas Card Class – Wednesday September 18th at 1pm or 7pm. Cost is $30 and includes a package of the Brightly Gleaming Foil Elements. We’ll use some for our in class projects and you’ll take the rest home! Contact me to reserve your spot. You can see the other upcoming Christmas Card Class Dates on the YamStamps Events Page.
If you need a copy of the Holiday Catalogue, live in Canada and don’t have a demonstrator that you work with already, please contact me to arrange to get a copy! In the meantime, if you prefer, you can download the digital version here, or see the items in the online store here, including the So Many Stars Bundle used to create today’s Die Cut Star Card. Happy Shopping!